In the hoop is what most embroiderers want to do for fun, so today’s post is all about making an in the hoop project quickly and easily. Have you heard about prairie points?
Make prairie points traditionally or use embroidery software program.
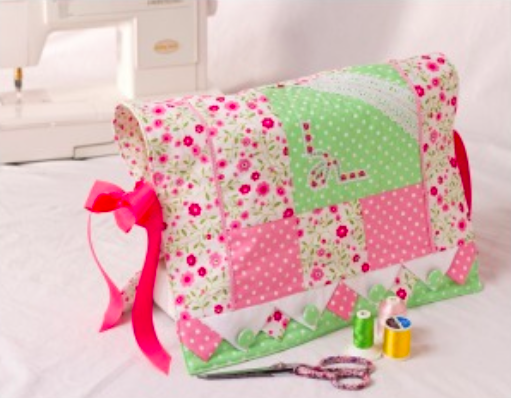
Traditional prairie points
Materials
To make prairie points, begin with a square of fabric. Charm packs (5” squares) are a great way of involving an array of interesting patterns and prints into your project without breaking your budget. You can find charm packs by clicking on this link, or visiting your local quilt store.
Let’s begin
Step 1:
First fold your square in half, wrong sides together and press the large triangle with an iron. Use steam and a wooden clapper to get a sharp crease at the fold line.
Step 2:
Fold the wide triangle in half again, matching up all raw edges, to make a small triangle and press with an iron. Use a clapper again to get and nice flap crease.
Step 3:
Make several prairie points and lay them on a table with all the open edges and folded edges going the same direction.
There are several different ways to stack and arrange prairie points!
For this sample we are adding the prairie points to the band on the sewing machine cover picture from above. This application is similar to creating a piping, in that we will be inserting a finished embellishment between two seams.
Step 1:
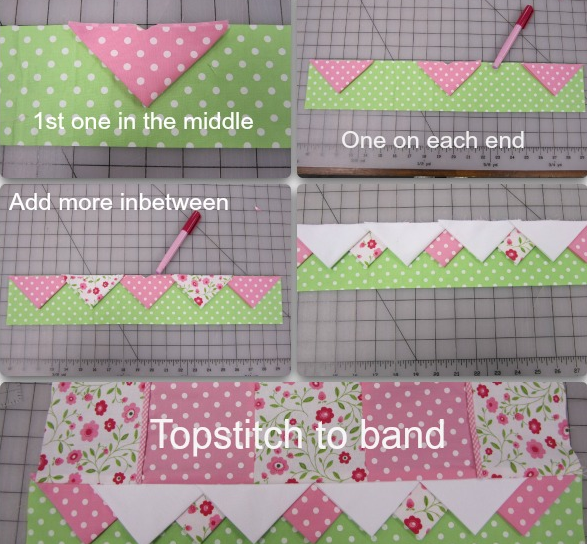
First, find the middle of the band and mark it with a pin or notch. Find the center of one prairie point and mark it. Match up the two marks and pin in place.
Step 2:
Next lay a prairie point with the edge of one point to the left and right edge of the band and pin in place. Rather than pinning, I like to use a fabric glue stick that is water soluble. It makes life a whole lot easier.
Step 3:
Then lay prairie points in between the openings, making sure you evenly space them. Continue to add more prairie points until you are happy with the look. Make sure all the folds of the prairie points are going the same direction and all the raw edges are even.
Step 4:
Topstitch all the points to the band before inserting into your project.
Step 5:
Add a little more embellishment by sewing on some matching covered buttons.
Embroidered prairie points ITH
Take the same steps above to a new level by creating your own in the hoop version of prairie points. It’s so easy to make them using an embroidery software program, you don’t even have to know how to digitize! Another great option is to add a small design such as an embroidered flower, placing it so that it will show up in the point of the finished project. Once you embroider the prairie point design, you will fold and stack it just as illustrated above.
Let me show you how easy it is to digitize your own ITH prairie points.
Tip: I am using Total Control Professional software, but you can use any program to make the squares.
Step 1:
Open a new page and select the artwork tool/rectangle.
Step 2:
Go the Properties Window/Transform and change the size to square 3” or larger, then click Apply.
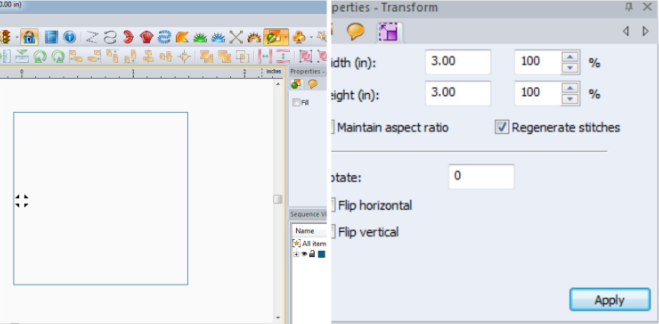
Step 3:
Right click on the square inside the design window.
Step 4:
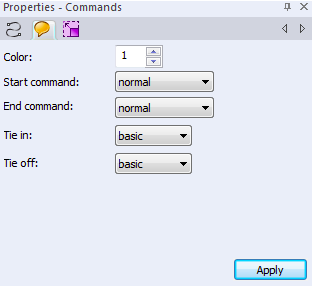
Select Convert To/Run and change the stitch length to 2.0. In the Properties Window/Command/Tie in: Basic; Tie off: Basic. This adds tie off stitches at the beginning and end of the design.
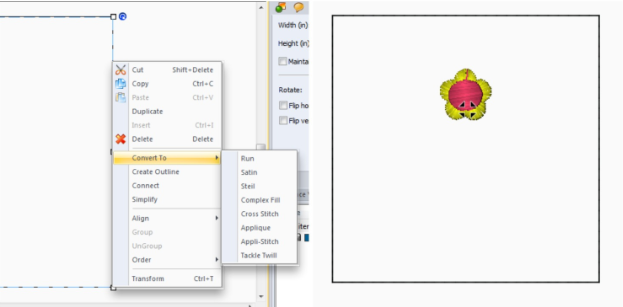
Step 5:
Add a small flower like the one picture here, which is a free download. Once you download the file, use the smallest flower for the prairie point.
Step 6:
Once you have created your ITH design, save it to your hard drive and transfer it to you embroidery machine. Lightly starch several colors of cotton fabrics so they are slightly crisp. Iron them completely dry. Use lightweight tearaway stabilizer such as Tear Easy. You want the lightest weight stabilizer so it won’t rip the stitches which is why an easy tear is the best choice and preferred above a medium weight stabilizer.
Step 7:
Hoop Tear Easy stabilizer and embroider as follows. Embroider each prairie points on starched fabric squares. Color 1 is flower petals, Color 2 is flower center, Color 3 is the prairie point cutting line which can be used with any color as it will be cut away later.
Step 8:
When the embroidery is complete, remove it from the hoop and gently tear away the stabilizer with your fingers over the stitching line so the threads won’t pull out.
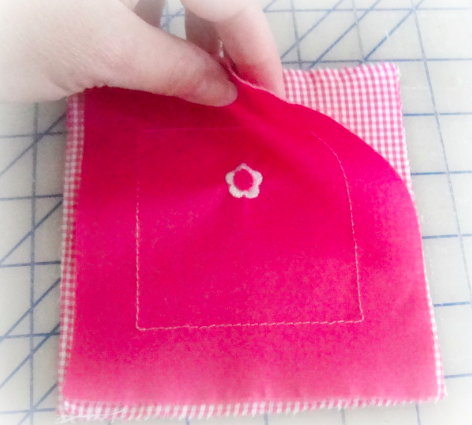
Tip: Notice the square stitching line, this is your cut line which is much easier than trying to trace a template while keeping the embroidered flower in just the right place.
Step 9:
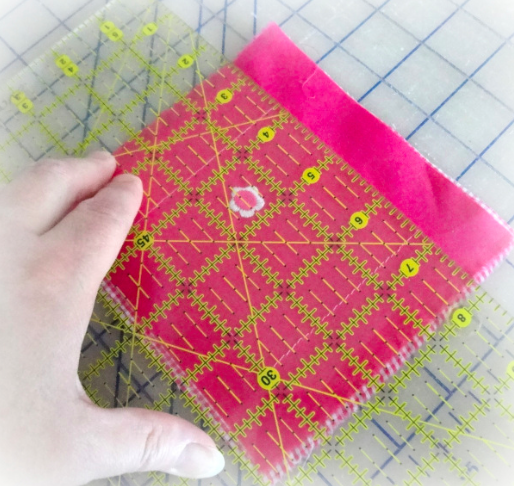
Use a quilting ruler, rotary cutter and mat to cut out each prairie point so that the ruler is lined up on each of the four stitching lines.
Step 10:
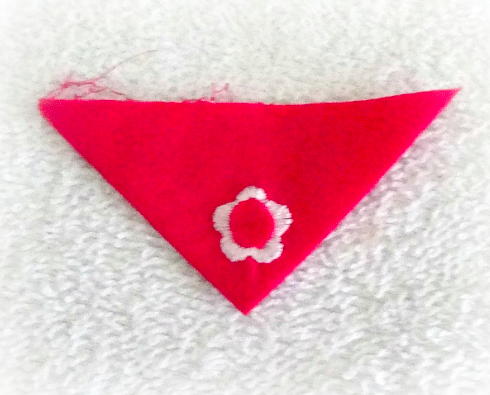
Fold the squares in half diagonally and then in half again so that all the raw edges are together. Make sure that the flower shows on the pink prairie points.
Step 11:
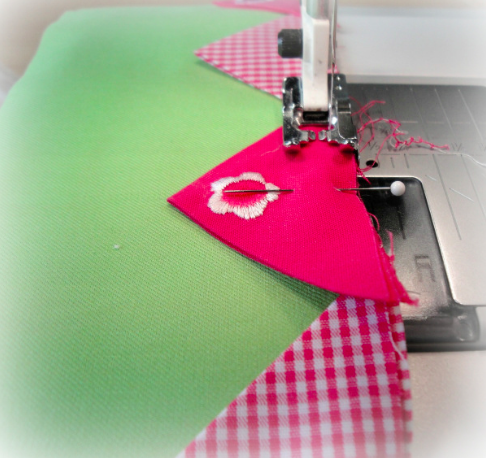
Lay the prairie points along one long edge of the band, starting with a pink prairie point with a flower in the center of the strip, and add a pink gingham on each side of the solid pink overlapping about ½”. To this, add the solid pink with the flowers to each side of the pink gingham, overlapping ½” and again with the pink gingham.

Step 12:
Baste prairie points at 1/8” seam. Attach to the bottom of the appliqué block. Press seam toward the block.
It can be hard to find tiny little machine embroidery designs that would fit on the end of a prairie point. Here is an option if you are making children’s garments. Or if you’re looking for something beach-themed, you’ll love these little Nautical designs.
Find more ideas for creating your own ITH project in this previous blog post on making trapunto quilt blocks. You might also enjoy learning how to duplicate a wide variety of hand-embroidery stitches with your machine.

Share tips, start a discussion or ask one of our experts or other students a question.
No Responses to “Machine Embroidered Prairie Points”