
Eager to try colorwork, but not sure where to start? We highly recommend the lice stitch!
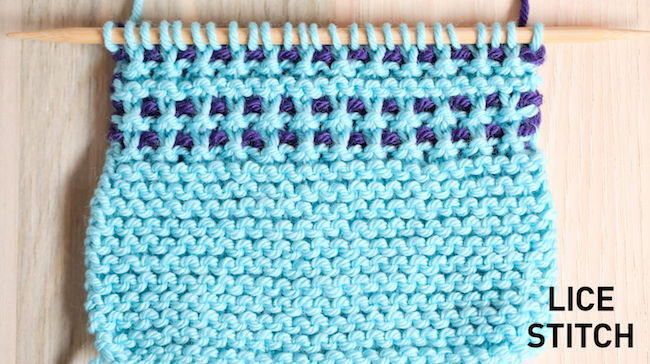
This easy stitch adds a pop of color to your work without needing to maneuver multiple strands of yarn — you’ll only work with one yarn at a time. The pattern uses a simple slip stitch technique to work a row in two colors.
How to knit the lice stitch
You can dive right into the lice stitch on the project you’re working on, or if you’d like to practice, work up a small garter stitch swatch. You’ll work the next row in a contrasting color.
On the right side
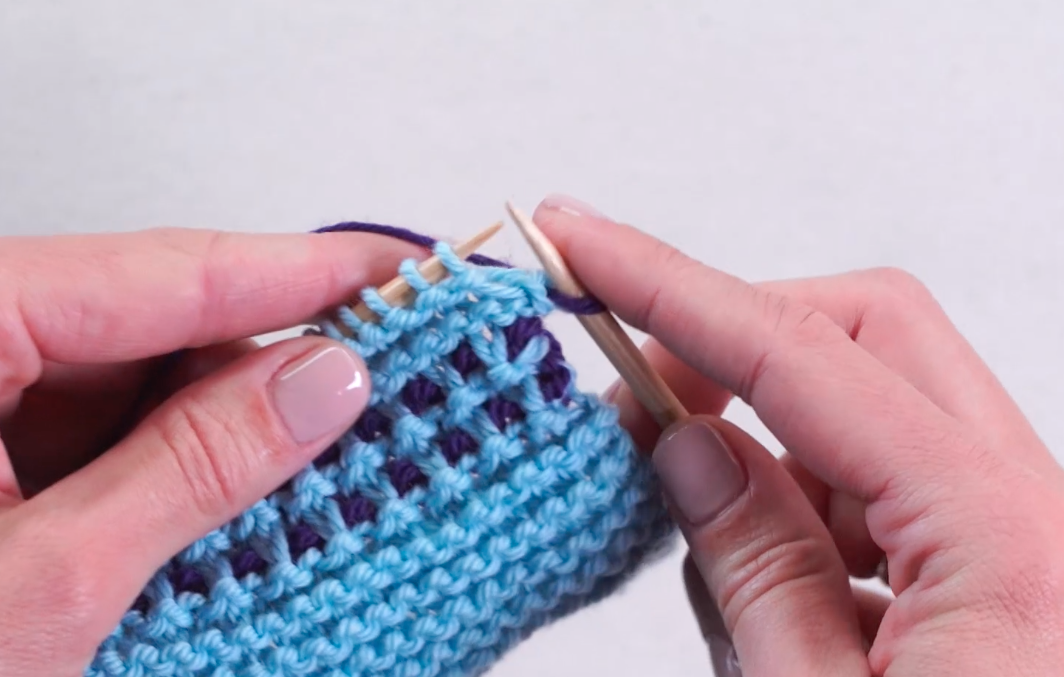
With your contrast color, knit one with your contrast color.
Slip the next stitch purl-wise with the yarn in back.
Repeat these two steps — knit one, slip one with the yarn in back — until the end of the row. Make sure to end with a knit stitch.
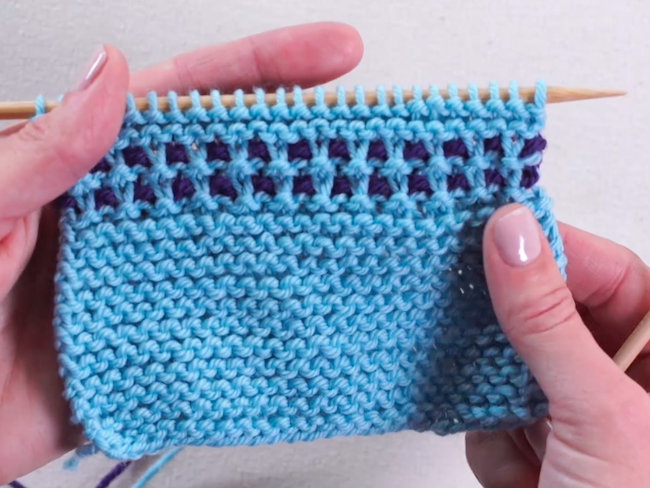
You should have alternating contrast-color stitches and slipped main-color stitches all the way across the work.
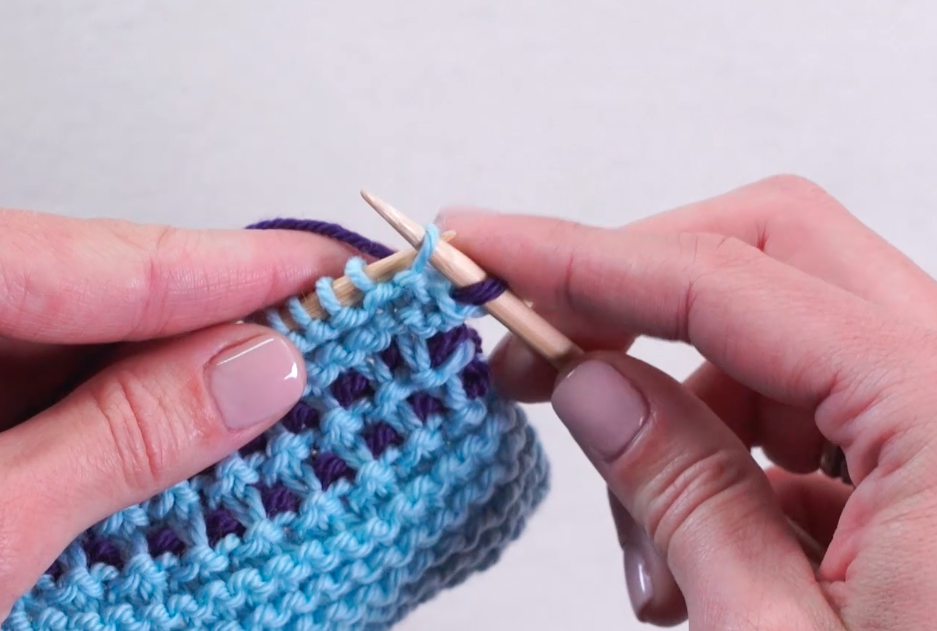
On the wrong side
Turn your work and, still with your contrast color, knit one.
Slip the next stitch purl-wise with the yarn in front.
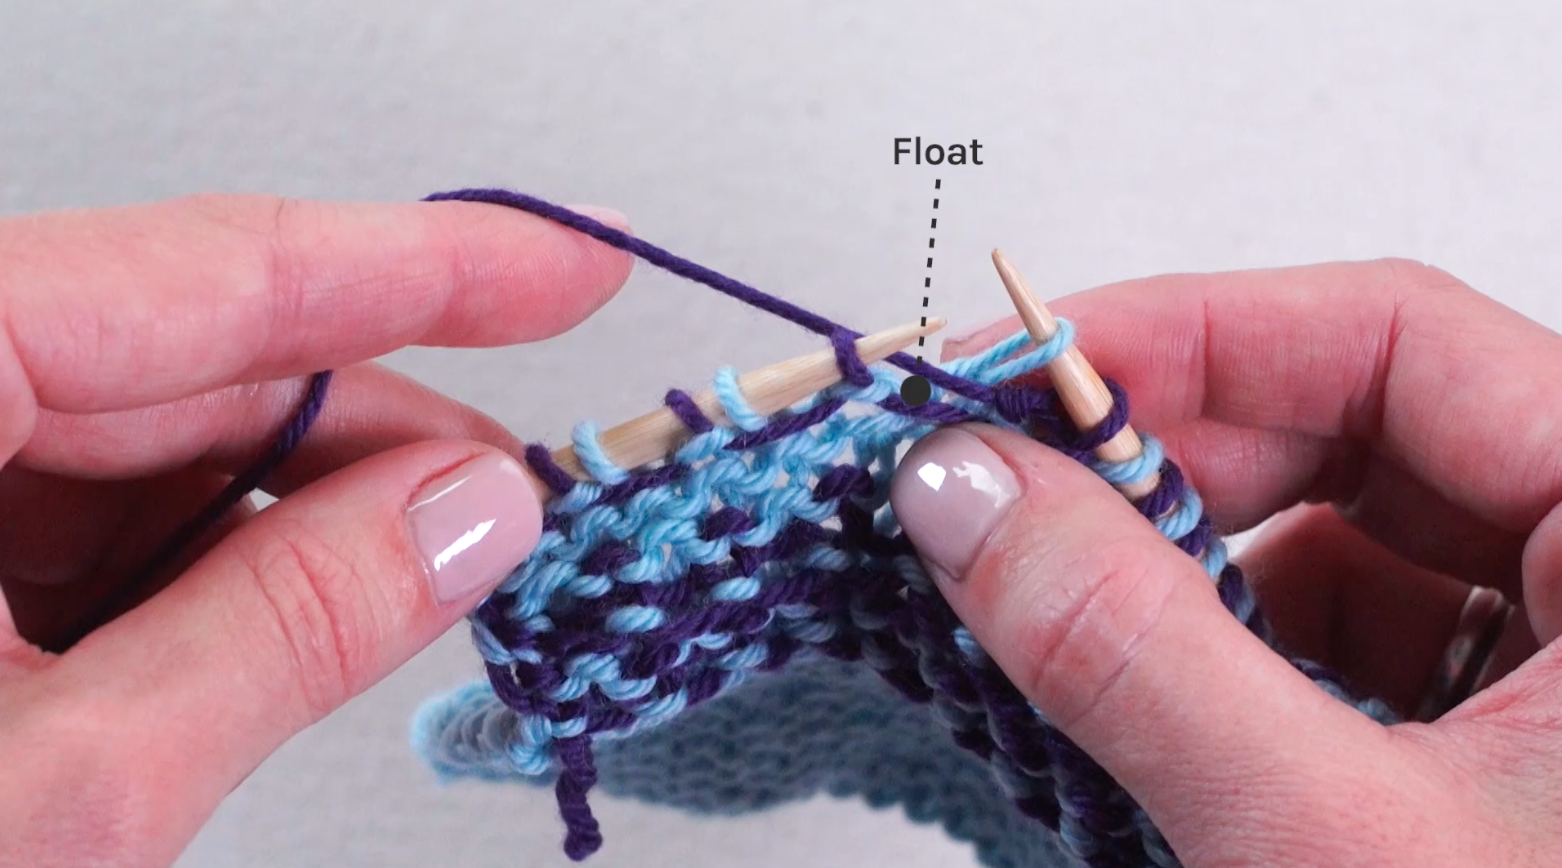
Each time you slip a stitch, a little strand of the contrasting yarn runs past the slipped stitch — it’s called a float. By holding the yarn in front while working the back side, we make sure that the floats are on the same side.
Continue these steps — knit one, slip one with the yarn in front — all the way across. When in doubt, slip the main-color stitches and knit the contrast-color stitches. Finish with a knit stitch.
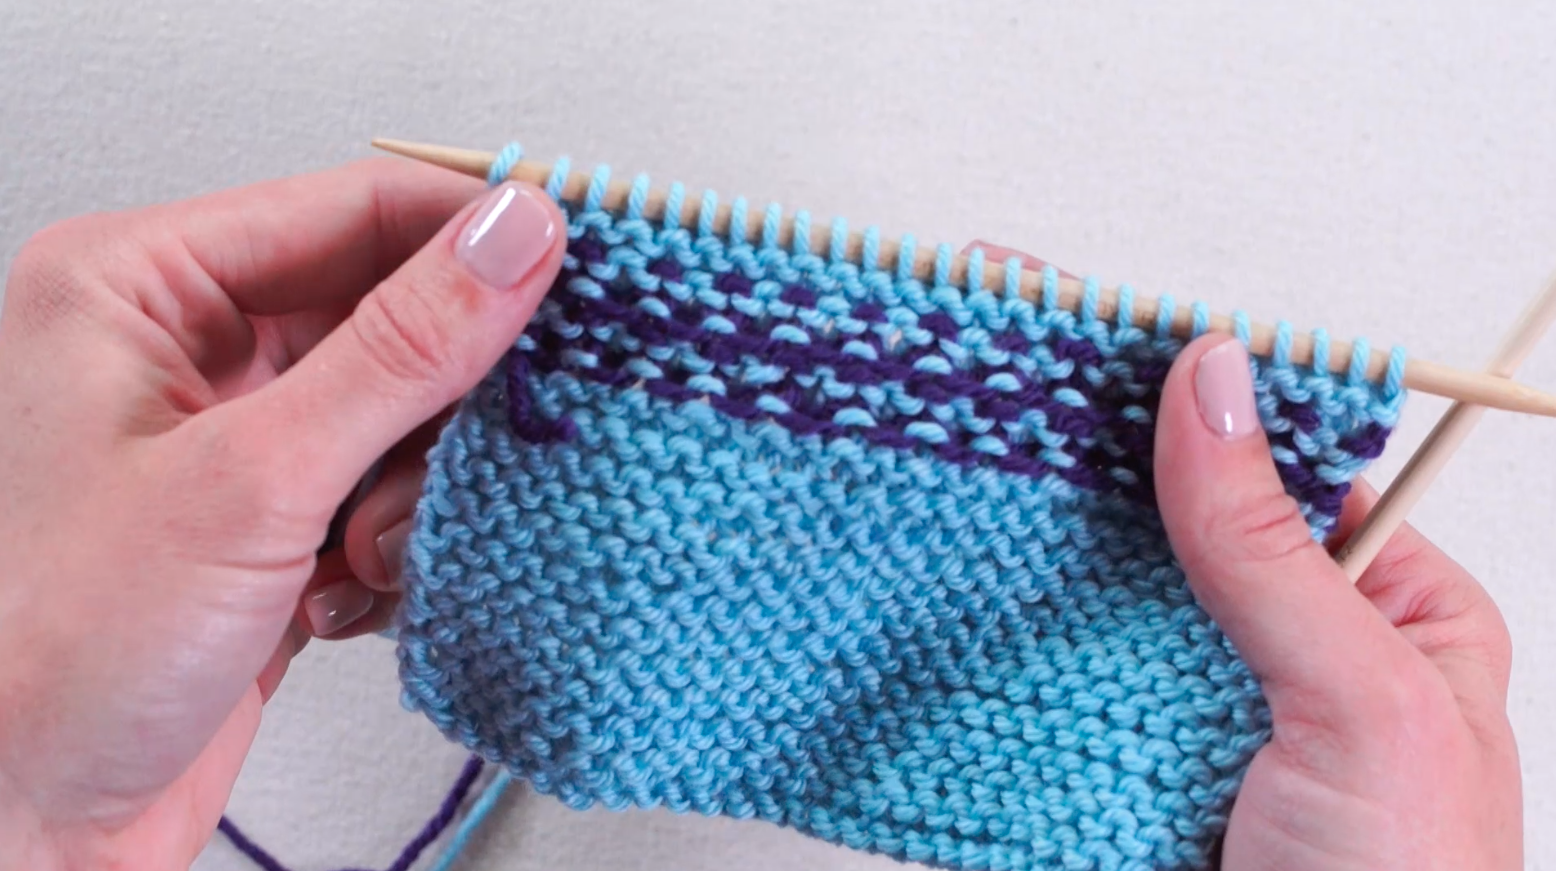
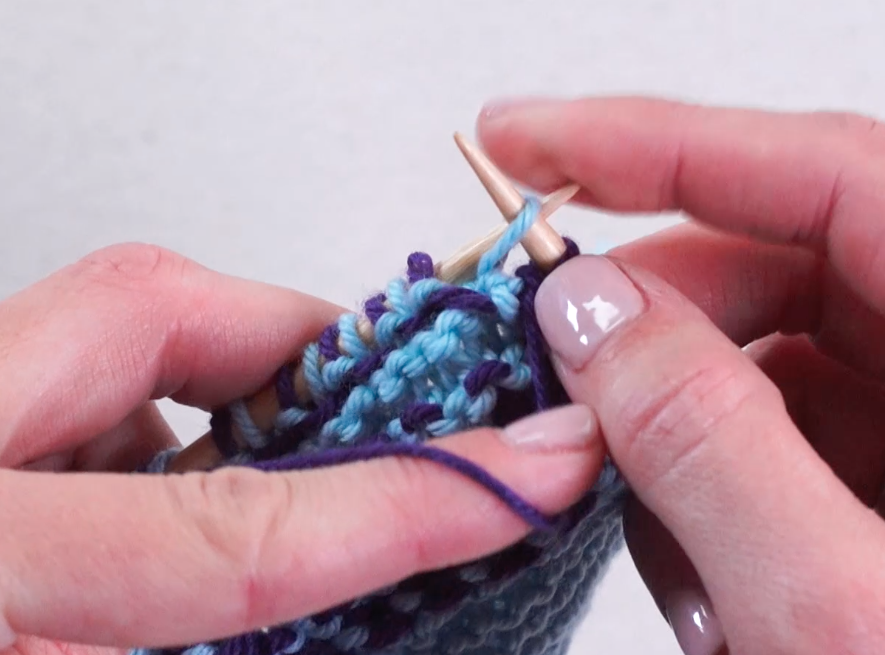
The back of your work may look a little messy, like in the photo above. Don’t worry, the right side will look right!
On the next row
Knit all the way across with the main color.
Capture that color!
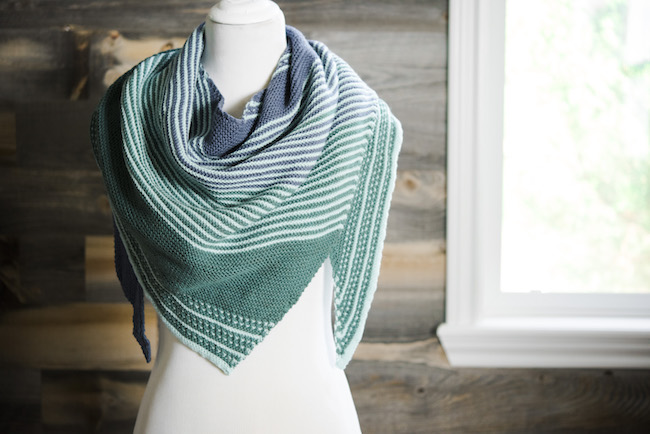
Give the lice stitch a try in the oh-so popular Drachefels Shawl kit. Rows of lice stitch are set off with solid stripes, creating a striking shawl you’ll want to wear again and again.
I would like to make another Drachenfels shawl. What is required to make an another?