
Have you noticed the larksfoot stitch all popping up in patterns lately? This crochet stitch is hugely popular at the moment, and I think you’ll see why.

Learn how to stitch the larksfoot stitch with this free step-by-step tutorial!
The larksfoot stitch is a very versatile stitch, useful for making blankets and afghans, hats, mittens and other wearables. The stitch likely got its name it looks very much like a bird’s foot, with its long central toe.
This stitch is most effective when you use bright, contrasting colors in a yarn that is a DK-weight or heavier. Once you get the hang of it, it’s really easy to do. Grab some spare yarn and a hook and work up this small swatch. But be warned — it’s addictive!
The larksfoot stitch tutorial
This tutorial for the larksfoot stitch uses a small swatch with four colors. A color change is necessary every two rows to achieve the correct pattern.
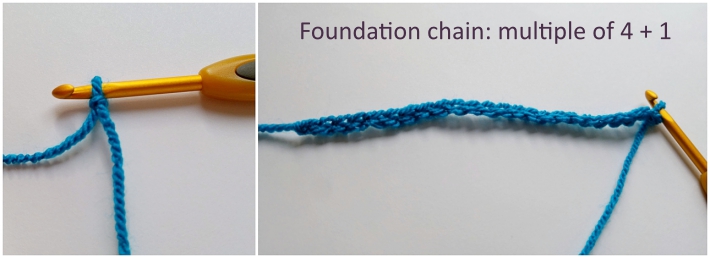
To make a bigger sample or adapt it into a pillow cover or blanket, make a foundation chain that’s a multiple of 4 + 1.
Step 1: The starting chain
For this practice swatch, make 25 (24 + 1) chains.
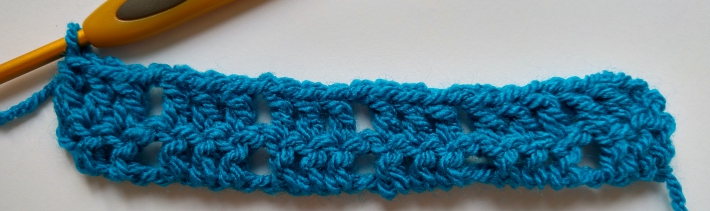
Step 2: Your first two rows
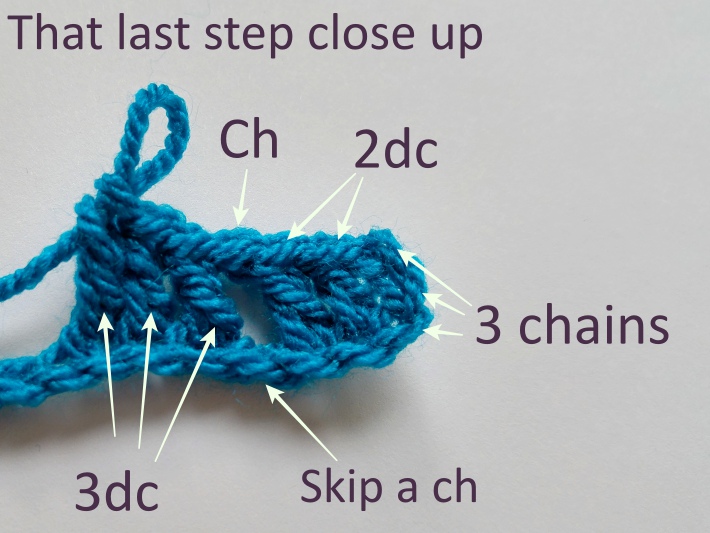
Row 1: The last 3 chains of your foundation count as your first dc. Work 2 dc, one into each of the next two chains along the foundation. Then chain 1 and skip the next foundation chain. Then make three dc stitches, one into each of the next three chains. This creates two sets of 3 dc with a space in between.
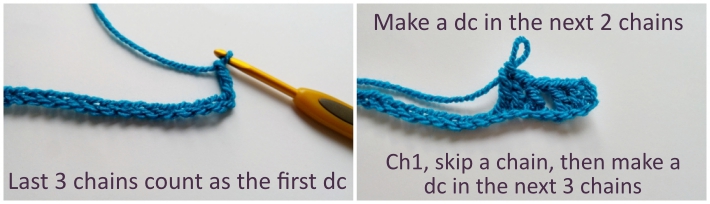
Continue in the same way until you reach the end of the foundation chain. I made six sets of 3 dc, each separated by a chain space.
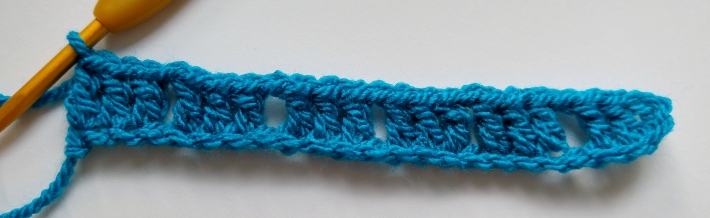
Row 2: Don’t change color yet, but turn your work so that you are working on the wrong side. Ch 3, then dc into the next 2 stitches. *Ch1 and skip a stitch. Work 1 dc into each of the next 3 stitches.* Repeat from * to * until the end of the row. Break your yarn and fasten off.
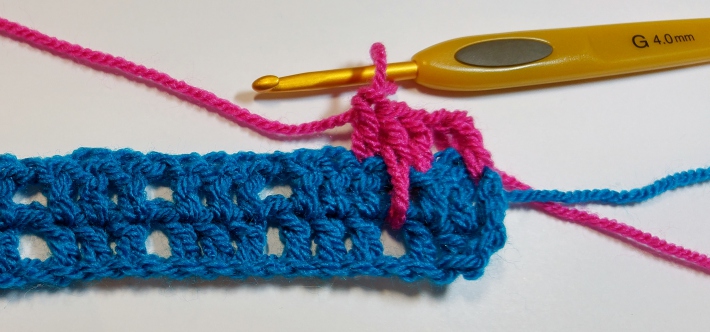
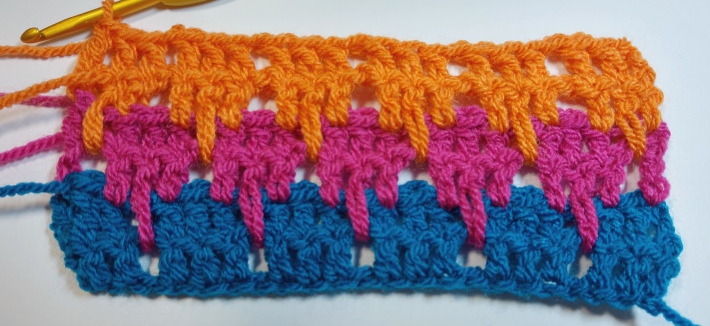
Step 3: Making the larksfoot stitch
Row 3: Turn and join in a new color. Make 4 chains (this counts as a dc and a chain space) then skip the next dc stitch from the previous row. Work 1 dc stitch into the next dc stitch.
Now comes the interesting part: work a long dc stitch into the chain space that is below in Row 1. Don’t pull the leg of the stitch too tight. Once you finish the dc, it should be at the same level as the previous one you just made. Then make a normal dc stitch into the next stitch.
Continue as follows: *Ch 1 and skip the next dc stitch. Dc into the next stitch, make a long dc stitch into the chain space below in row 1. Dc into the next stitch.* Repeat from * to * until you have reached the end of the row.
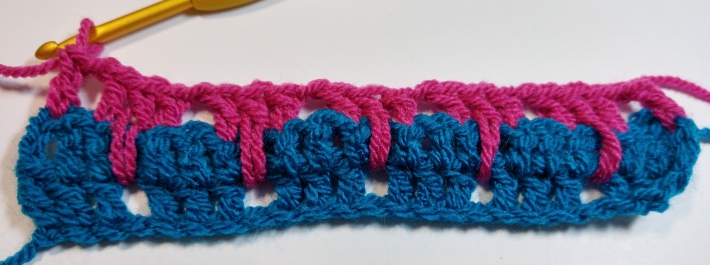
Row 4: Carrying on with the same color, turn your work. Ch 4 (this counts as the first dc and a chain space. *Skip a stitch, then work a dc stitch into each of the next three stitches.* Repeat from * to * until you reach the end of Row 4.
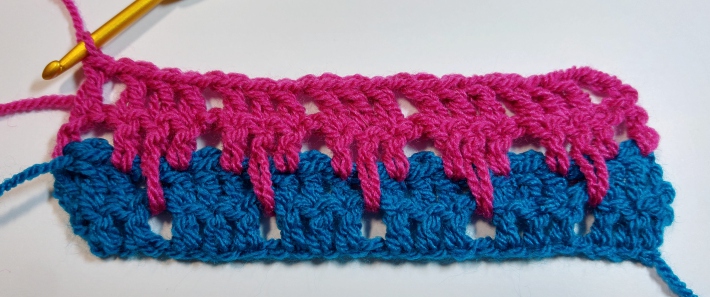
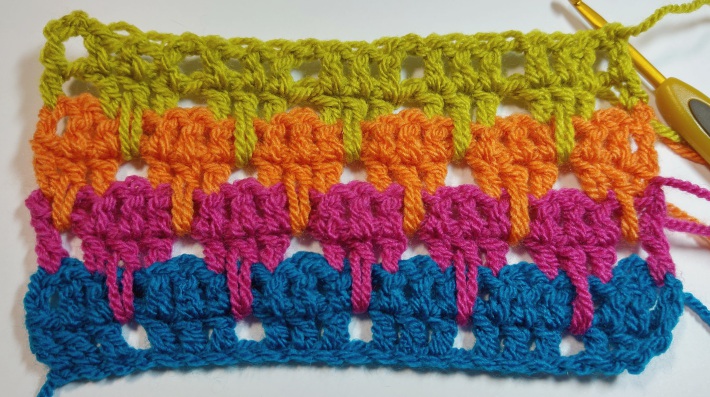
Step 4: Continue adding stripes of the larksfoot stitch
Row 5: Join in a third color of yarn and chain 3. Work a long dc stitch into the chain space down below in Row 3. Dc into the next dc. Chain 1 and skip a stitch. *Cc into the next stitch. Work a long dc into the chain space below in row 3, then dc into the next dc. Chain 1 and skip a stitch.* Repeat from * to * to the end of the row.
Row 6: Turn your work and carry on in the same color. Chain 3; then make one dc into each of the next two stitches (including the long dc). Chain 1 and skip a stitch. *Work one dc into each of the next three stitches, ch1 and skip a stitch.* Repeat from * to * until you reach the end of the row. Break yarn and fasten off.
Step 5: Adding more larksfoot stitch rows
Join the next color and repeat rows 2 and 3. For the next color, repeat Rows 4 and 5, and so on as long as you like.
Share tips, start a discussion or ask one of our experts or other students a question.
No Responses to “Advanced Stitches: Learn to Crochet the Larksfoot Stitch!”