
Are your landscape photos not coming out the way you’d hoped? Your pictures don’t look anything like the ones you’ve seen online? Sounds like it’s time to rush out and buy a new camera or lens, or both, just like the ones the pros use, right?
Wrong!
Here are 8 tips guaranteed to improve your landscape photography.
Let’s assume you have the basics: a DSLR with at least the kit lens that came with it OR an advanced point and shoot style camera purchased in the last 5 years, and a decent tripod (which in my opinion no self respecting landscape photographer should be without). Then, you have everything you need to improve your landscape photography without buying a single item of gear.
1. Get up early.
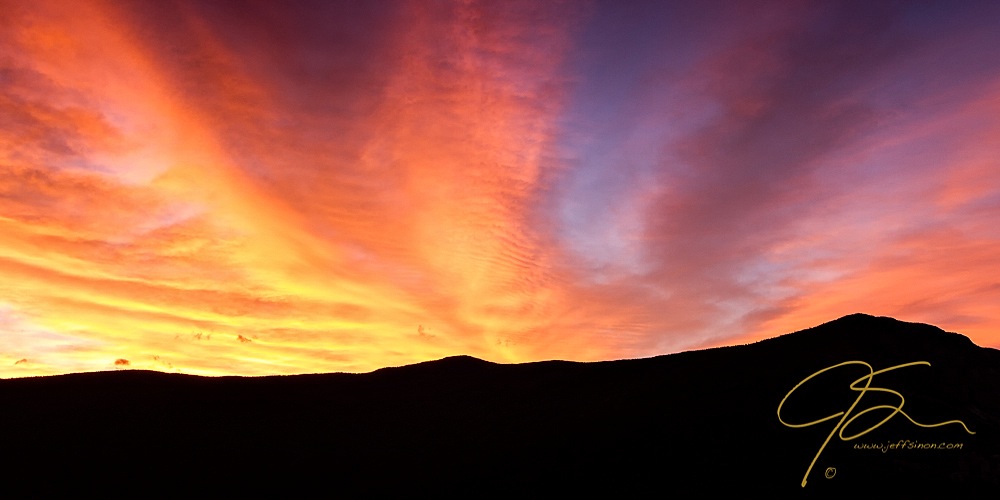
The sun rises early, you need to rise earlier. If you think you can stroll up to that picturesque mountain view at the crack of 10 a.m. and make a great photograph, more often than not you will be sadly disappointed. The most dramatic light of sunrise often occurs long before not just at sunrise. You need to be there early to capture it. The photo above was taken 25 minutes before the sun officially peeked above the horizon. Had I slept in I would most definitely have missed this flaming sky.
I do everything in my power to be set up and ready 30 minutes, give or take, before sunrise. It’s not uncommon for me to be out of the house by 2 a.m. to do so.
When people comment on my sunrise photography I often tell them my biggest “talent” as a landscape photographer is my willingness to forego sleep in order to be there when Mother Nature is showing off.
2. Stay out late.
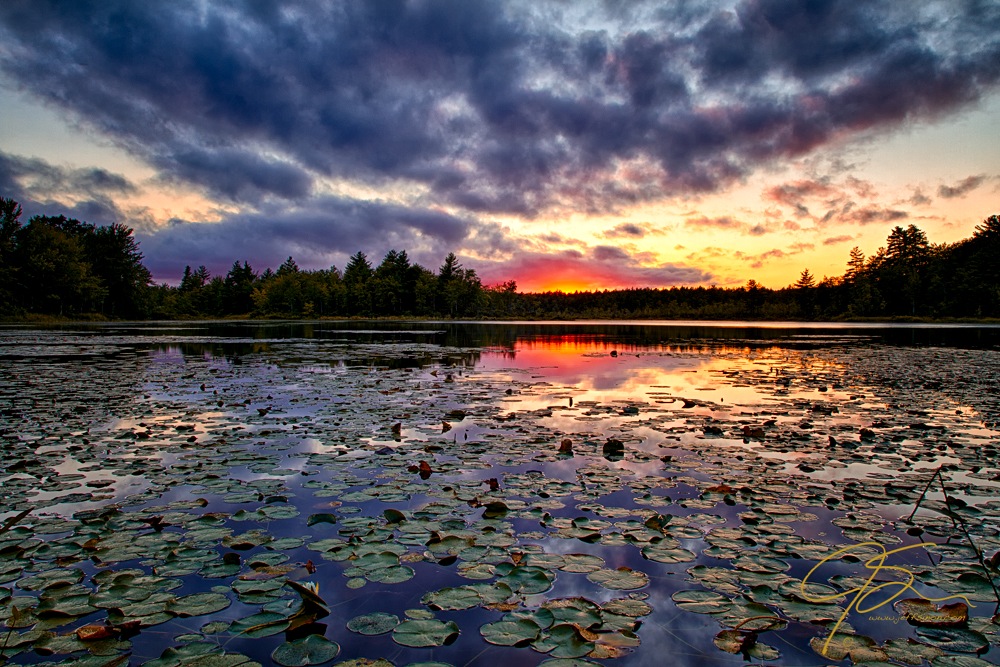
Just because the sun has set doesn’t mean the show is over. As with sunrise, the most dramatic light may come after the sun has gone down. If there are clouds in the sky, the sun can cast a wonderful glow on their undersides long after it has dipped below the horizon. Give it at least 15-30 minutes before you put your camera away.
3. Get a little wet.
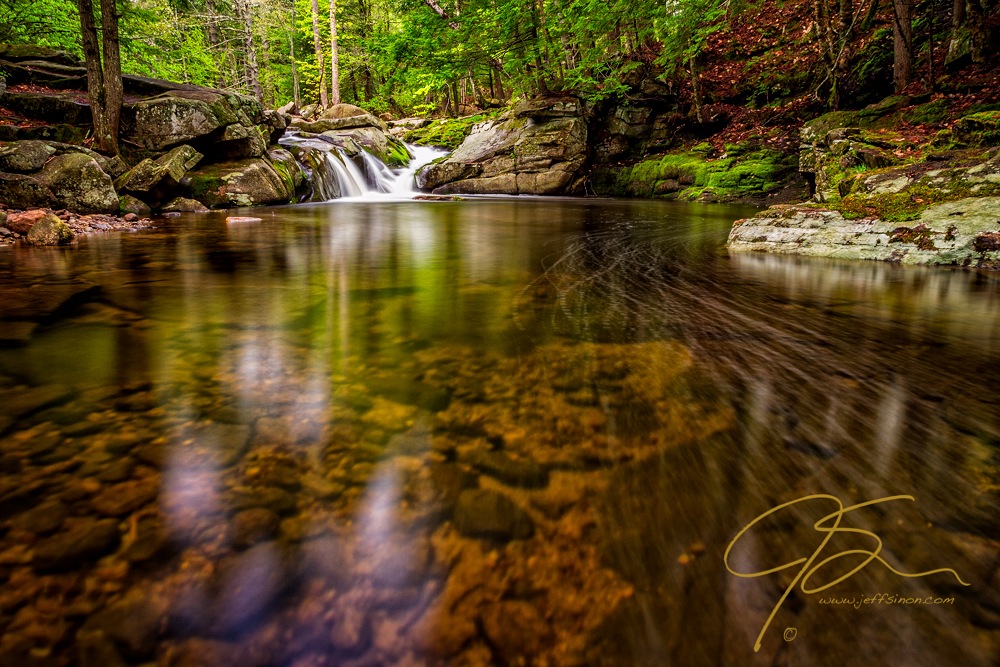
Say there’s a waterfall near you, one that you really want to photograph, yet it has been photographed by every person within a 50 mile radius who owns a camera. One thing most of their pictures will have in common is that they were all taken from the nice dry riverbank. A sure-fire way to make your photo stand out, assuming you can do so safely, is to get you and your tripod right out in the middle of the stream.
Just remember, be safe. No photo is ever worth risking your safety.
4. Get down low.
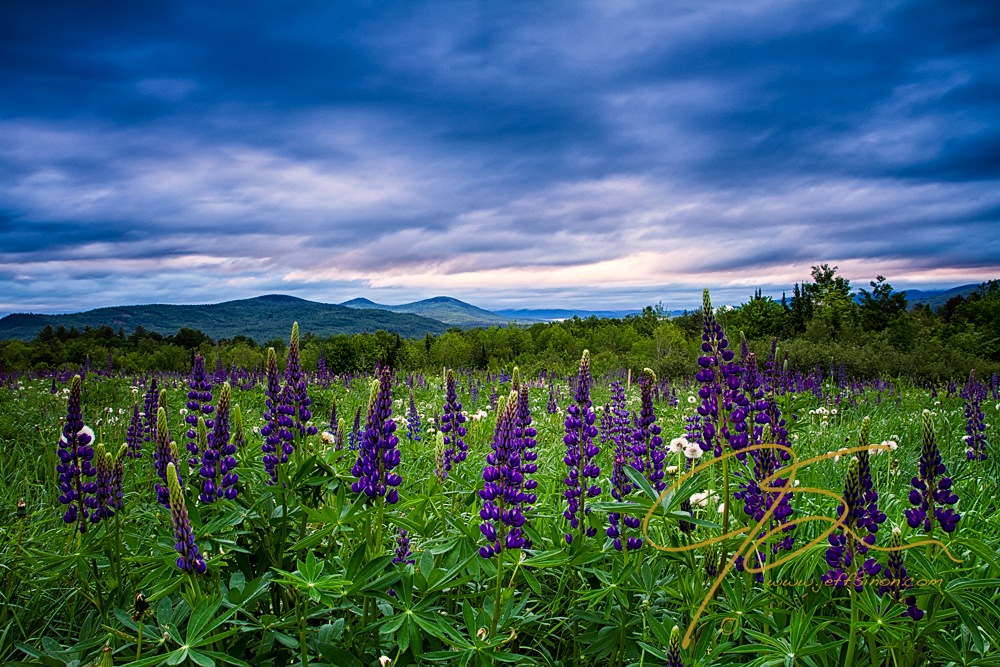
We see the world at eye level every day, avoid always photographing landscapes the same way. One way to add an interesting perspective to your landscape photos is to set your camera low to the ground placing a strong emphasis on your foreground element. Rather than looking down on this field of lupine, I set my camera up to look through it.
Learn more about how to see beauty on a small scale in your landscape photography in the Craftsy class Shooting Intimate Landscapes.
5. Make a portrait.
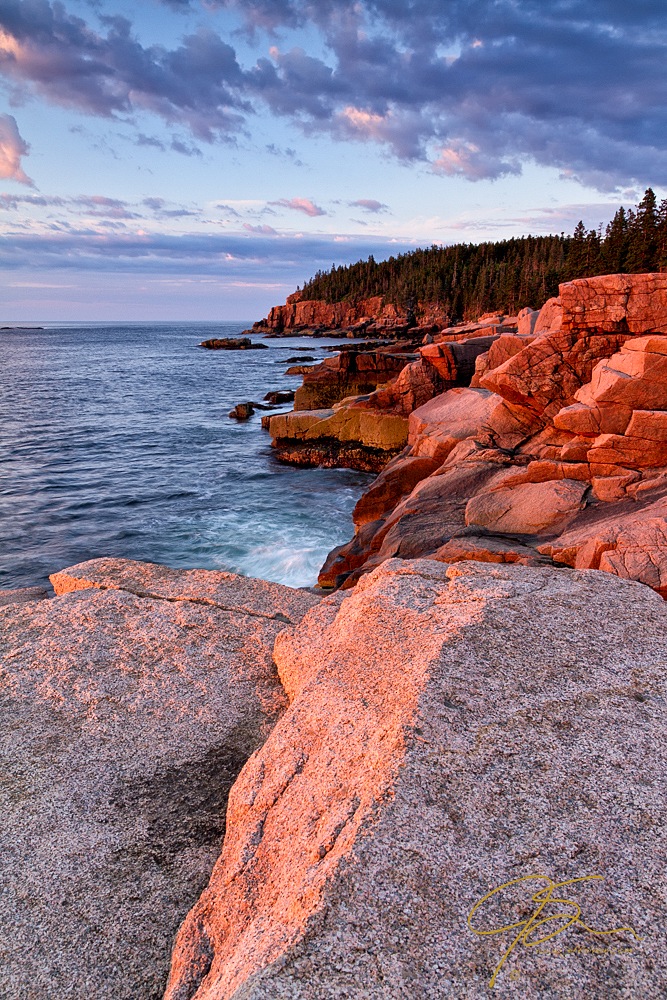
The horizontal position of the camera isn’t referred to as the “landscape” position for nothing. It is, after all, the most common way landscapes are seen and photographed. By simply placing your camera in the vertical, or “portrait” position, you can make a photograph of an often photographed location, like this image of the Otter Cliffs in Acadia National Park, that isn’t like most other photos of this often captured section of the Maine coastline.
6. Try a telephoto.
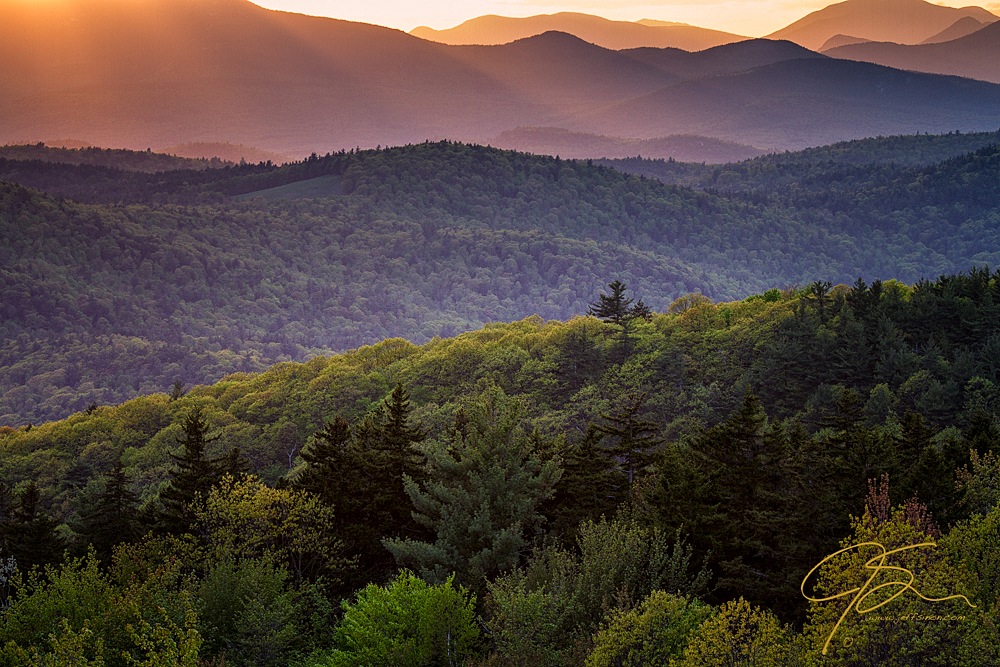
Just as with the most common format for landscape photography is the horizontal “landscape” orientation, the most common lens choice is usually the wide angle. The next time you’re photographing landscapes try using a telephoto lens, if you have one, to isolate elements within the scene.
In the photo above, I wanted to focus not on the wide scenic view, but instead on the layers and way the light from the setting sun was playing across the ridge lines. For this photo I use my Canon 70-200 f4 L IS lens zoomed to 93 mm. Definitely not your normal wide landscape focal length.
7. Bad weather = good photos.
Put simply, dramatic weather leads to dramatic photographs.
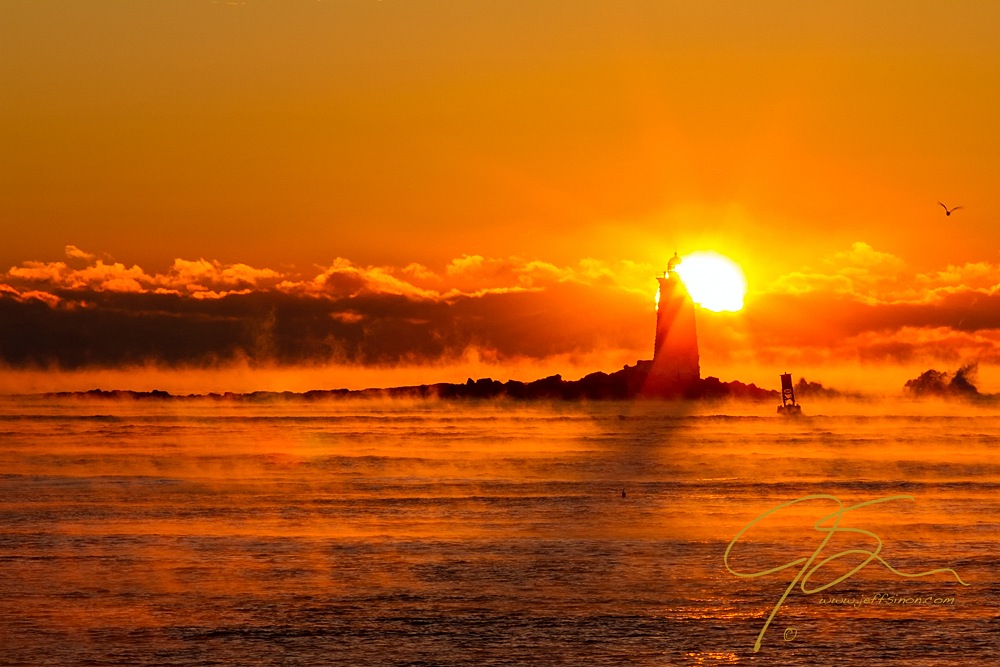
Of course I’m not advocating you head out in a hurricane to take pictures, but an approaching or departing storm clouds, or extremely cold temperatures, can do wonders for your landscape photography. Based on the weather forecast, I made sure I was on the New Hampshire seacoast well before sunrise to set up for the above photograph. The catch: It was -10° F the morning I made this photo. I knew the forecast of extremely cold temps and little to no wind meant there was a good chance for sea smoke to form out over the Atlantic. So I layered up in my warmest winter clothing and headed for the beach.
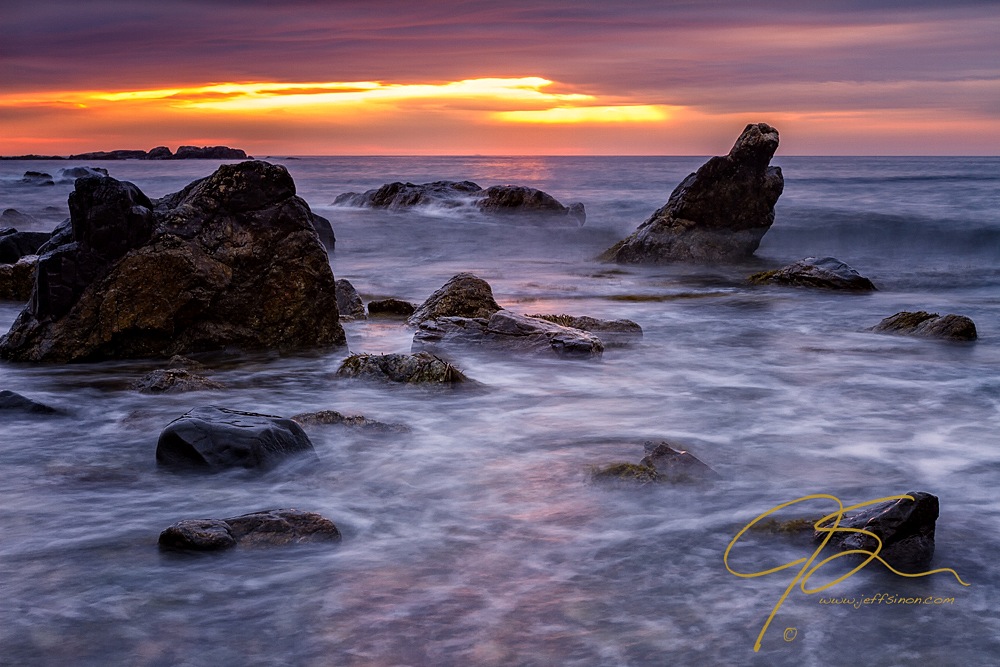
Again on the New Hampshire coast, on this particular morning there was a weather front moving out to sea. After checking the weather the night before, I gambled on the sun rising before the storm clouds reached the horizon and blocked it out. I wasn’t as successful as I’d hoped, but the sun did find a few breaks in the clouds. Had either of these photos been taken on a “picture perfect” cloudless morning, neither would have been as dramatic.
All of which leads me to the final step to improving your landscape photography, again, without buying any new gear.
8. Do it all over again, and again.
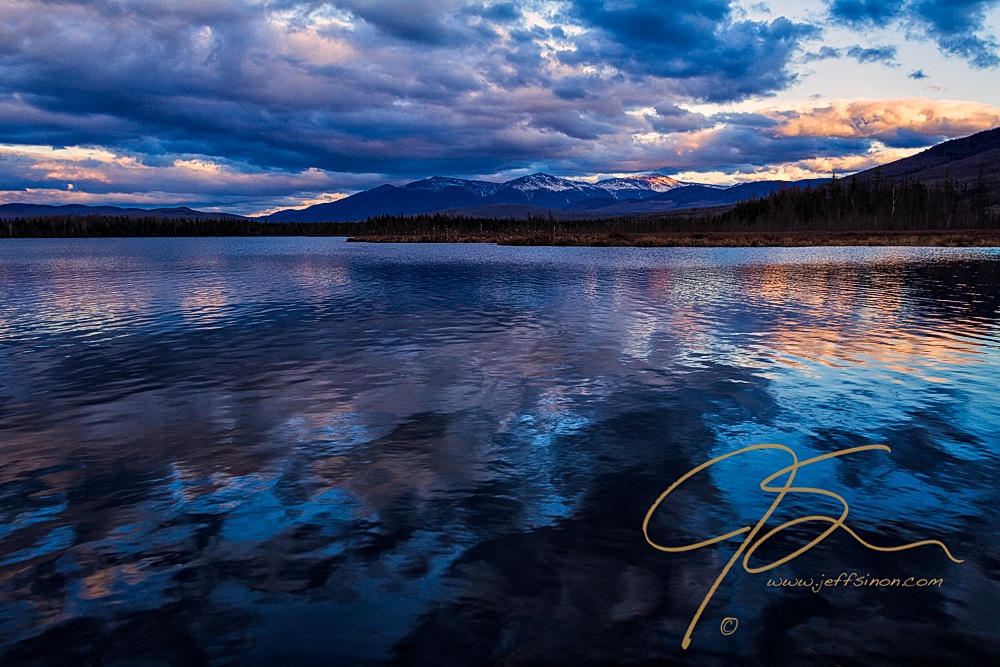
No matter how early you get up or how late you stay out. No matter how wet, dirty or frozen you get, the conditions or the light aren’t always going to work. The photo below is from the Pondicherry National Wildlife Refuge in northern New Hampshire. This is probably my favorite view in the entire state, and I’ve been here close to a dozen times with one photo in mind. Though I come away with photos I’m happy with every time I go, I still haven’t come away with THE photo I’m hoping for.
So I continue to go back.
Sure a new camera is nice (and that expensive new pro-level lens you’ve been lusting after would be too). And if you want to buy them go right ahead. But, it’s so often the photographer, not the camera, and I’d like to bet that buying new gear isn’t likely to improve your landscape photography as much as any of these eight tips can!
Share tips, start a discussion or ask one of our experts or other students a question.
No Responses to “Improve Your Landscape Photography Without Buying Any New Gear”