
The simple, but classic pearl necklace is a timeless piece sure to be treasured. Today we’re sharing an easy knotted pearl necklace tutorial that doesn’t even require a clasp, which means it’s a perfect project for beginning beaders to tackle.
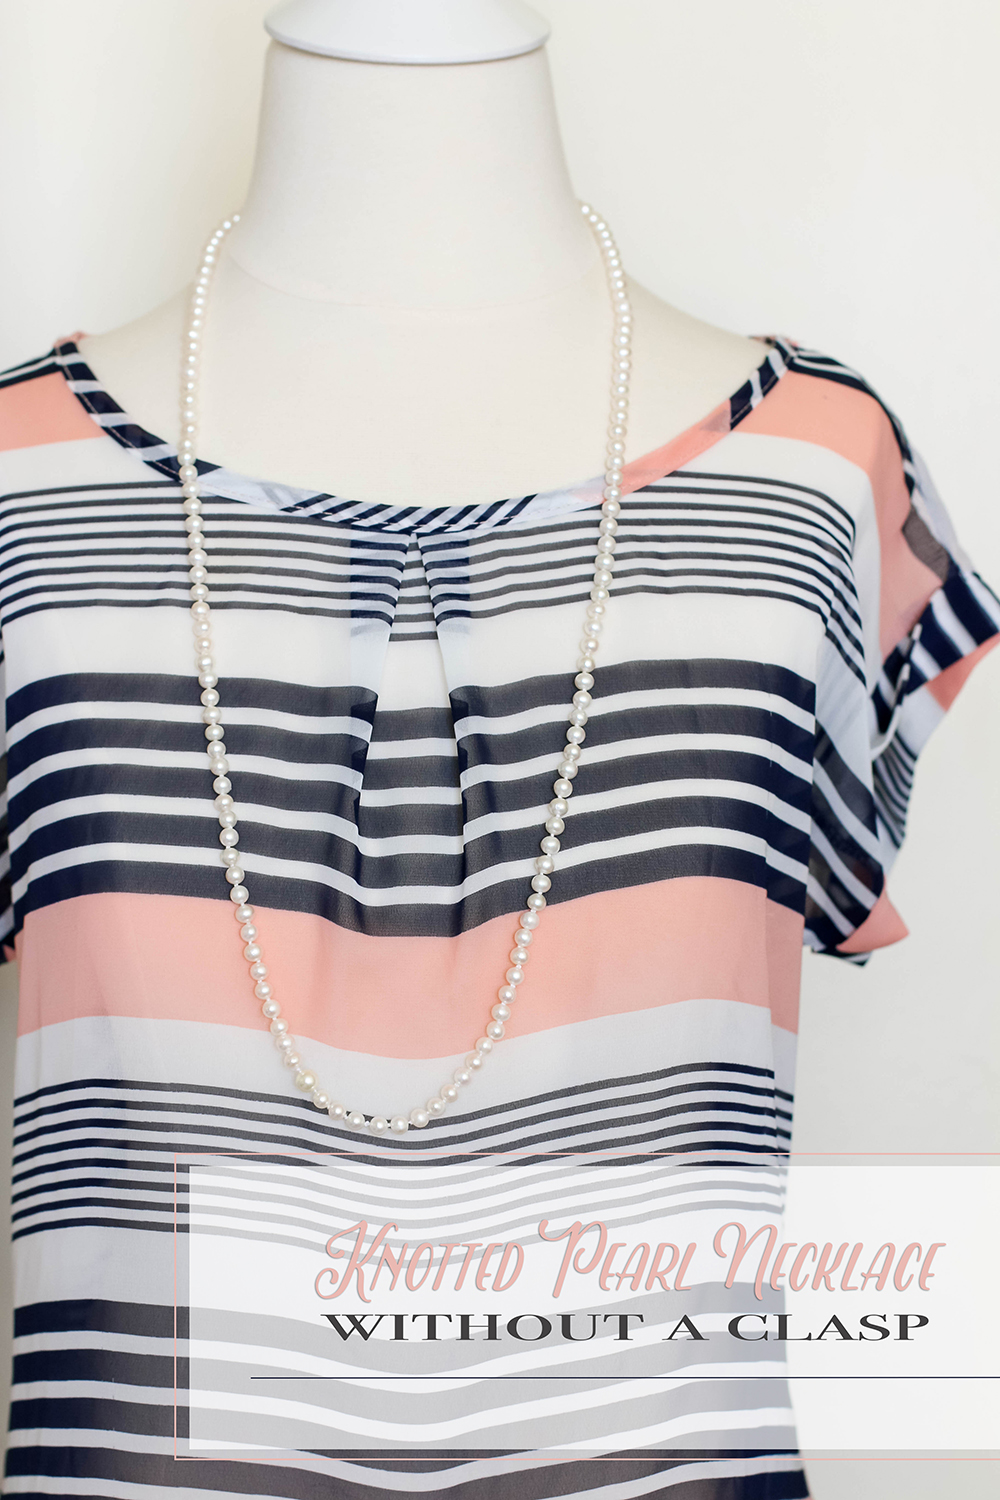
Knotted pearl necklace tutorial
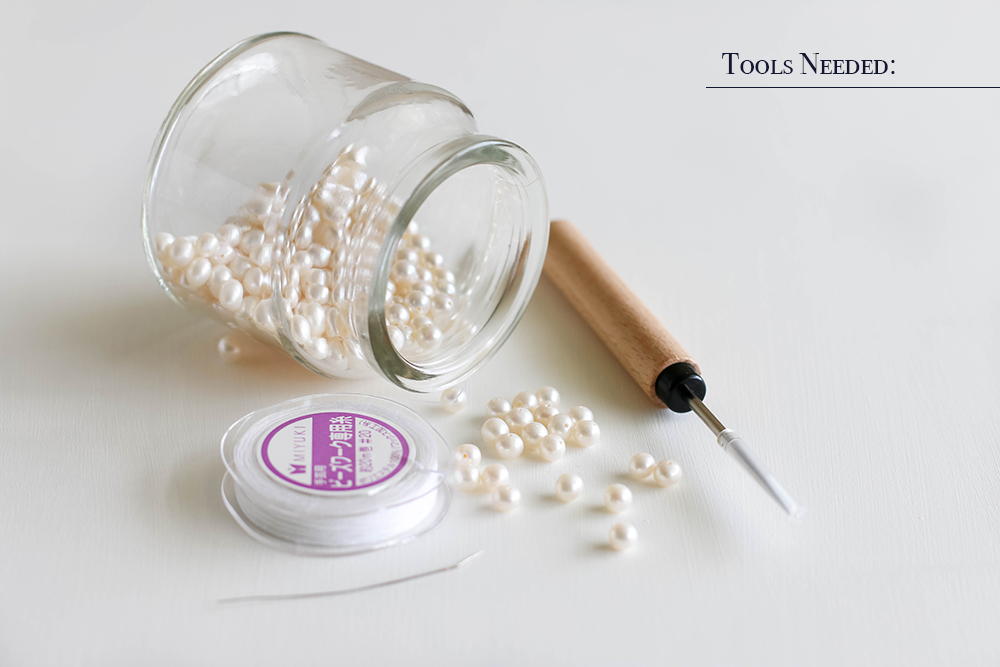
You’ll need:
- Griffin silk beading cord and needle (I used size 4 in silver gray)
- Round potato freshwater pearls 5mm (like these)
- Bead and pearl knotting fine point steel awl (like this)
- Sharp scissors
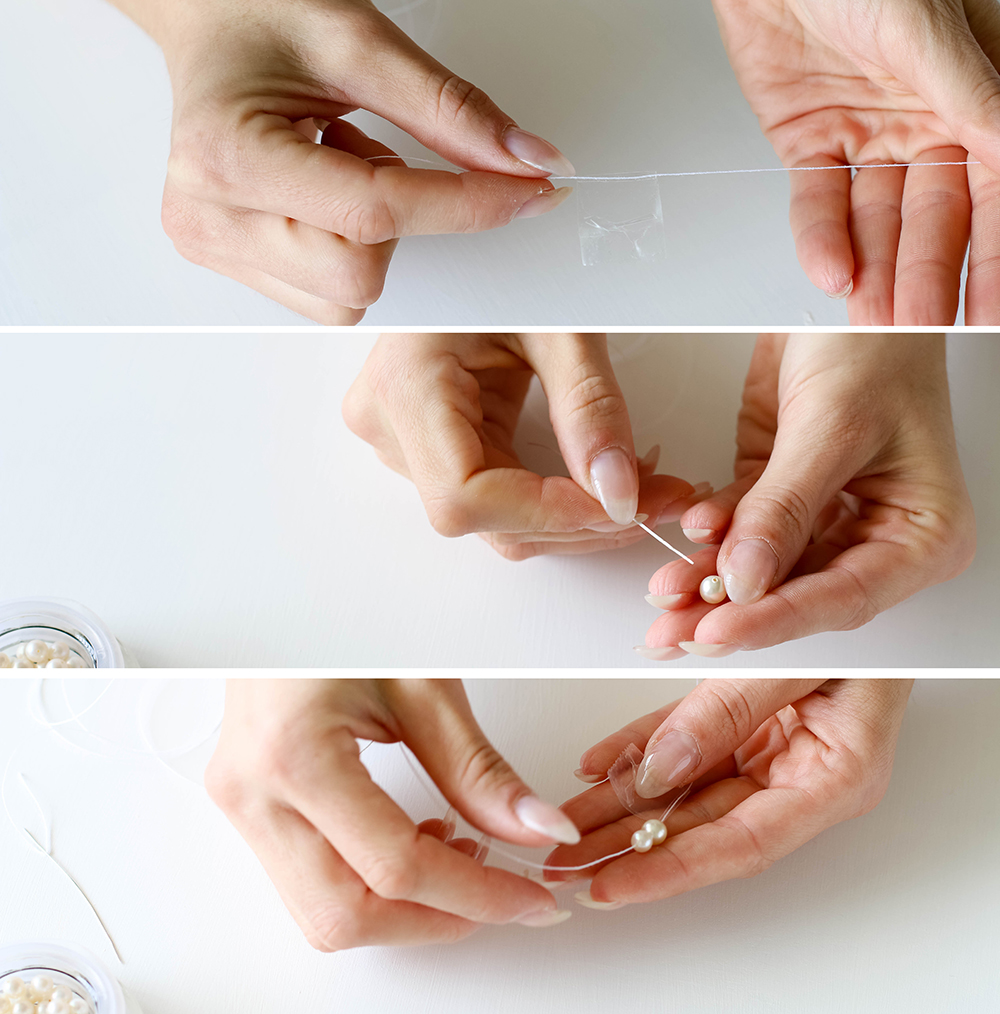
Step 1:
Cut your cord. Depending on the length of your finished necklace, I recommend at least 27″ so you can slide it over your head. Add at least 12″ to the finished length, so if you are planning on making a 27″ necklace add 12 extra inches to your string.
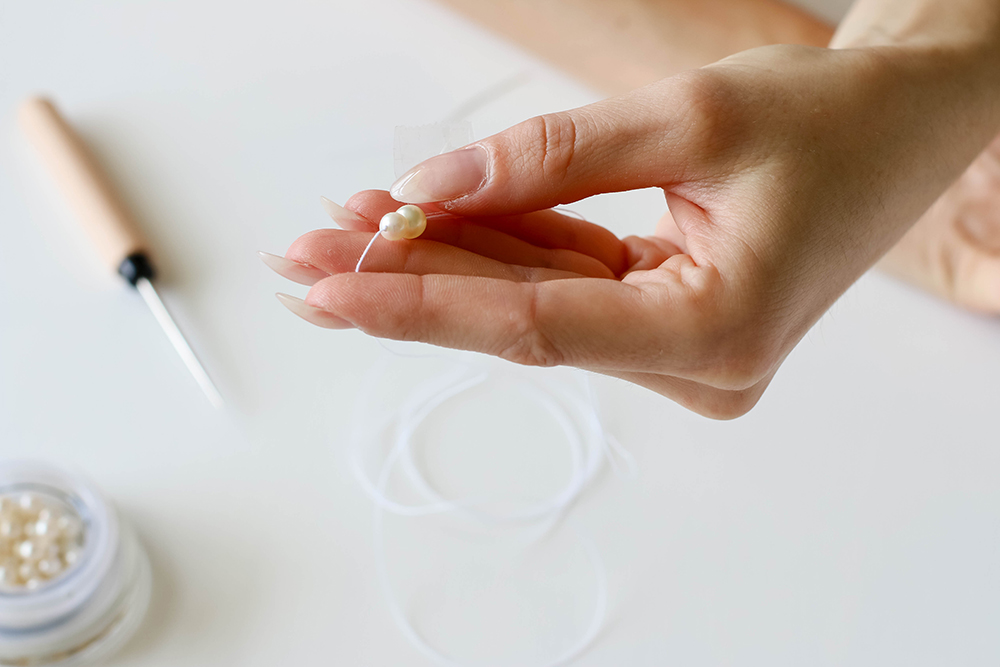
Use a piece of tape 4-6″ from the end of your string, this is to hold the first and second pearl in place.
Note: The first pearl needs to have a slightly larger hole, because we need to slide through it two times. First time, at the beginning of making this necklace, and the second time when we finish the necklace.
The hole can be enlarged with a diamond bead reamer, or you can use a larger pearl.
Slide on the first pearl with the larger hole, skip this knot and slide on one of the regular pearls. You should have two pearls on the beading cord.
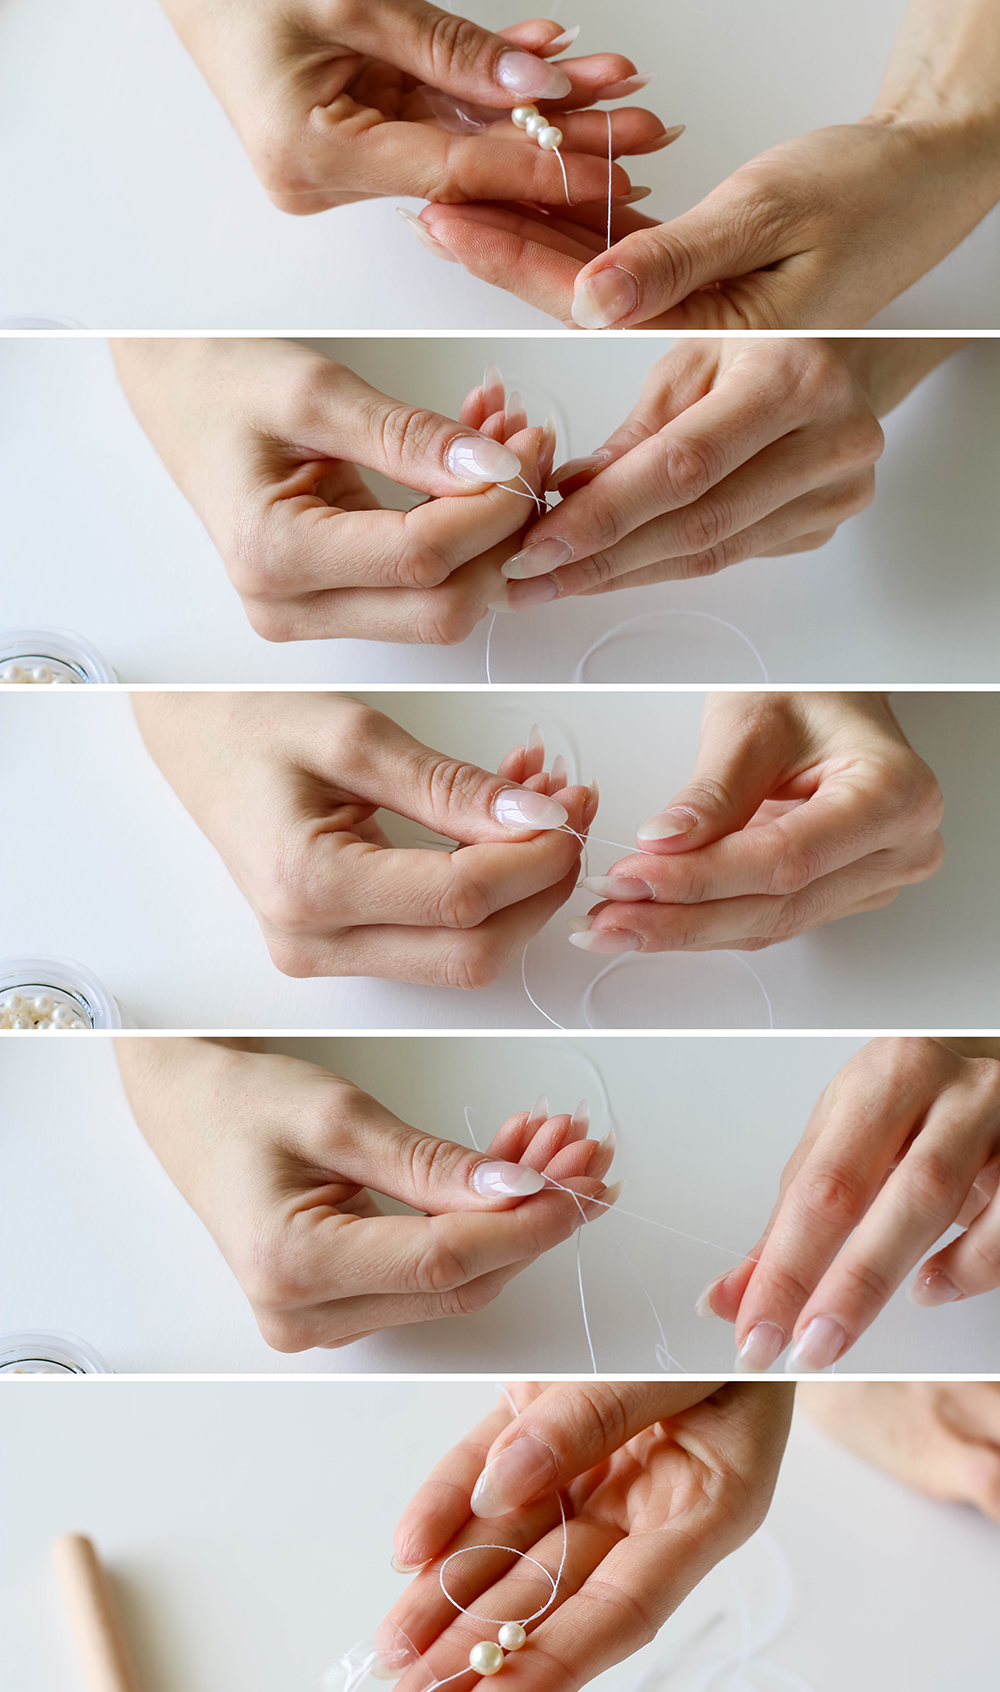
Step 2:
Create a slip for the the knot after the second pearl. We skip a knot because it will be placed there when the necklace is being closed.
Note: The image above shows the knot being made after the third pearl, this was done only for demonstrating purposes – stick to the knot after the second pearl.
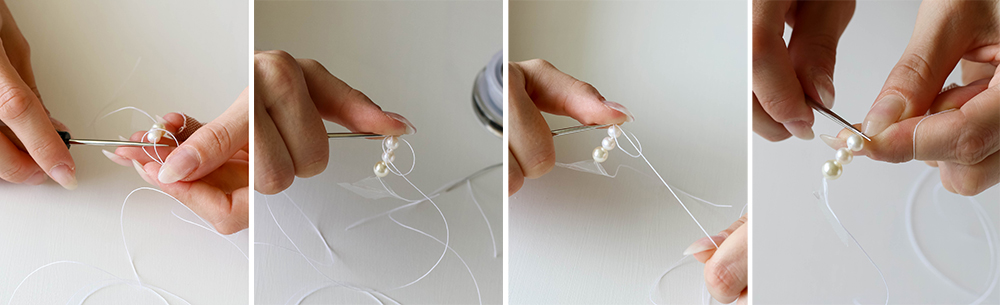
Step 3:
Once the a slip is made, use the awl to hold the cord in place. This method allows to place the knot right next to the pearl.
The necklace can be closed when the stand measures the desired length. I used two strands instead of one, but the closing method is the same.

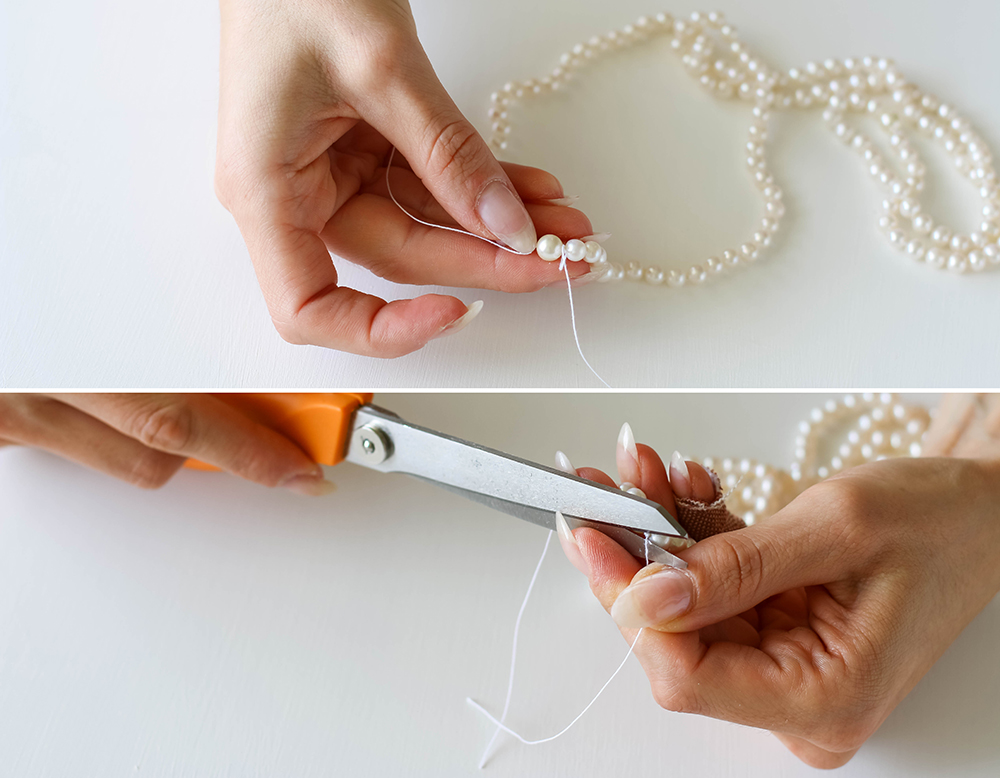
Step 4:
Take each end and guide the needle through the last pearl (which we started with). Pull the ends tight, wrap one of the ends around the finger to create a slip knot in between the last pearl and the second, while holding the other end tightly.
Make a second knot over the first one for better strength. Repeat with the other cord end!
To keep the necklace from un-knotting, place a dab of cement glue next to the second and last knot made.
Share tips, start a discussion or ask one of our experts or other students a question.
No Responses to “Make A Simple Knotted Pearl Necklace With This FREE Tutorial”