In knitting, we always try to avoid making knots in our yarn. We join yarns by knitting with both the old and new yarns for several stitches. We weave in the ends of our yarn rather than tying knots. Knitting and knots don’t mix – except at the very beginning. The very first step in any knitting project is to make a slip knot.
A slip knot is created by looping yarn around itself.
At the beginning of your cast-on row, the slip knot visually fits in with the other stitches, as all knitting is looping yarn around itself to bind it into a fabric.
There are a couple of ways to hold the yarn as you make a slip knot, but they all function the same.
First, here’s the way I do it:
This slip-knot method has become so automatic to me, I don’t have to think about it.
Step 1: I use my left hand to set up the slip knot, draping the tail of my yarn up and over the palm of the hand.
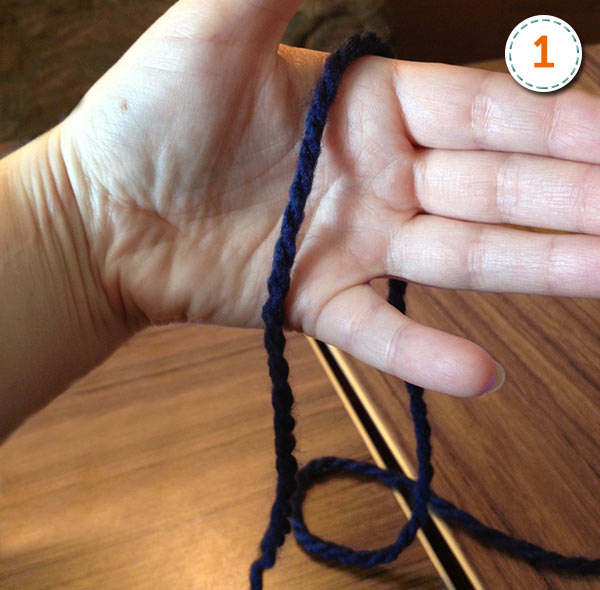
Step 2: Continue by bringing the yarn down behind your hand and then up in front of your fingers.
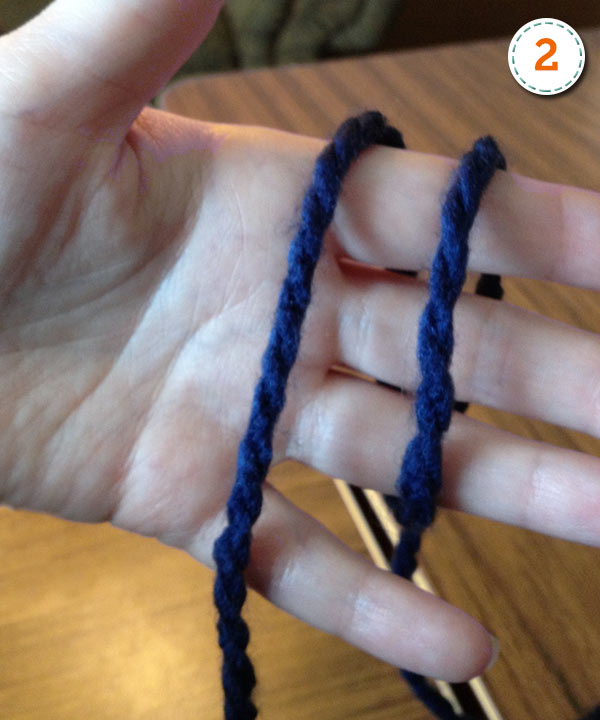
Step 3: Now cross the yarn over the first strand, from right to left.
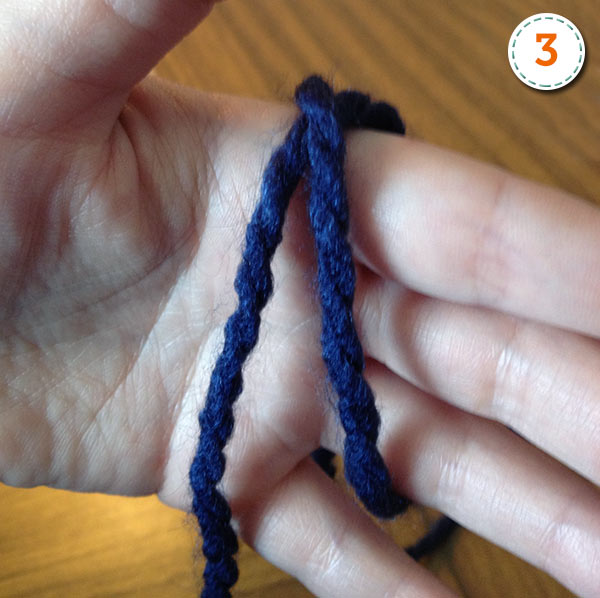
Step 4: Then, on the backside of your hand, cross the yarn over again and pull a loop through.
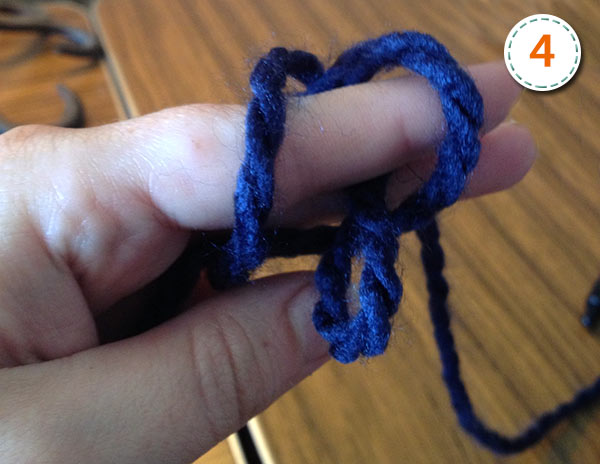
That loop you have just pulled through is what will go on your needle as your first stitch.
You can also make the same knot on a flat surface.
Step 1: With a good length tail, make a loop in your yarn.
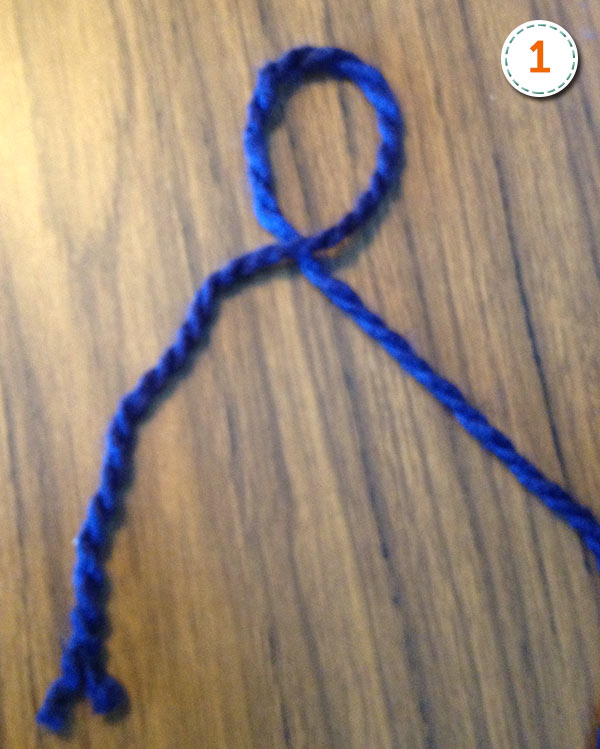
Step 2: Pick up your loop and place it over your yarn.
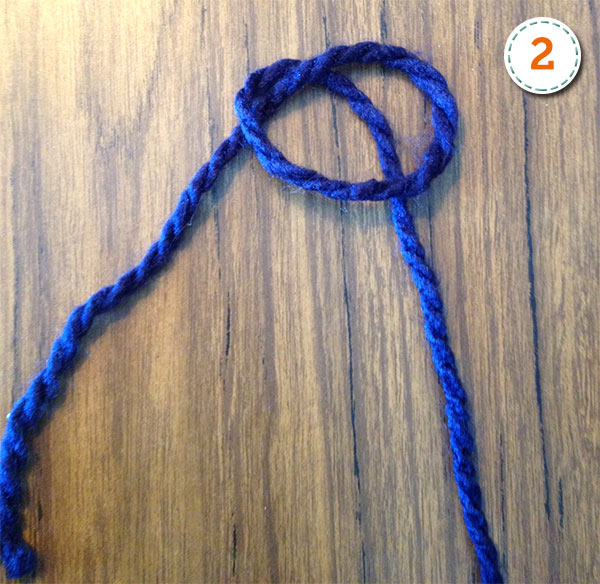
Step 3: Pull up that bar of yarn that is in the middle of your loop.
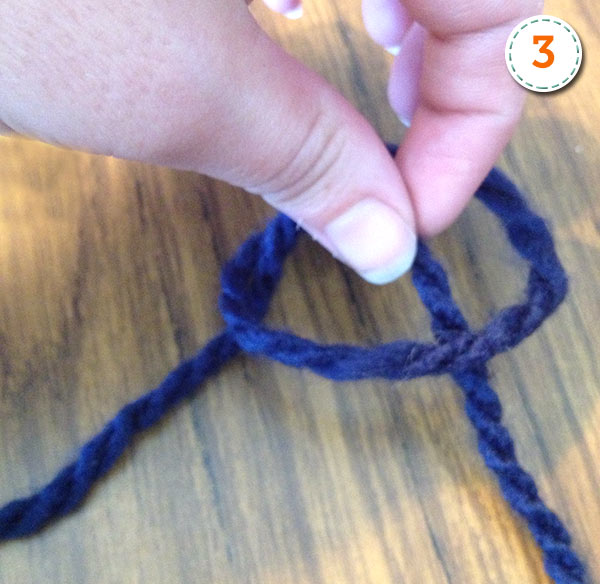
Step 4: Place it on the needle and pull the working end of the yarn to tighten it, making sure you leave yourself a good length tail. (I like my tail to be about 6 inches long.)
Other knitters might teach the slip knot yet another way, but no matter how you hold the yarn, you’re always doing the same thing: creating a loop at the beginning end of your yarn and then pulling another loop through that. As soon as you put your needle through the loop of the slip knot, a tug on the working end of the yarn should pull it snug.
One thing to remember when you are done with your knitting project and weaving in ends: be sure you don’t start weaving in the tail by taking it back through the slip knot!
For more videos and graphics of knitting basics, don’t forget to check out our post on knitting fundamentals. And to learn more knitting essentials, enroll in Knit Lab: Projects, Patterns & Techniques with Stefanie Japel.

Share tips, start a discussion or ask one of our experts or other students a question.
No Responses to “The First Step to Knitting: The Slip Knot”