
If you’re craving a homemade bread that works perfectly for sandwiches, then this easy kaiser roll recipe is just what you’ve been looking for.

Kaiser rolls are a unique, crusty roll with a signature crown-shaped top. The special form can be made either by folding in the edges of the dough or by using a specific tool called a kaiser stamp, which imprints a wavy criss-cross pattern on top of the rolls before baking.
These sizable rolls have the perfect ratio of crispy crustiness and soft, pillowy interior. They are perfect for sandwiches or burgers, and they pair well with soup. They’re a must in any bread-baker’s repertoire!
Kaiser rolls recipe
Adapted from King Arthur Flour
Makes 6 large rolls
For the dough:
- ¾ cup lukewarm water
- 1½ teaspoons instant yeast
- 1 teaspoon honey
- 1¼ teaspoons salt
- 1 large egg, at room temperature
- 2 tablespoons unsalted butter, softened
- 3 cups all-purpose flour
For the topping:
- 2 tablespoons milk
- Seeds, such as sesame or poppy, if desired (optional)
Step 1:
In a large bowl, combine the water, yeast and honey. Wait for a few minutes until the yeast looks foamy, then add all of the remaining dough ingredients (excluding the topping ingredients).
Step 2:
Mix together. Once the ingredients have come together into a loose, sticky dough, knead either by hand or in a stand mixer fitted with the dough hook attachment until the dough is smooth and elastic. This can take five minutes in your mixer, longer by hand.
Step 3:
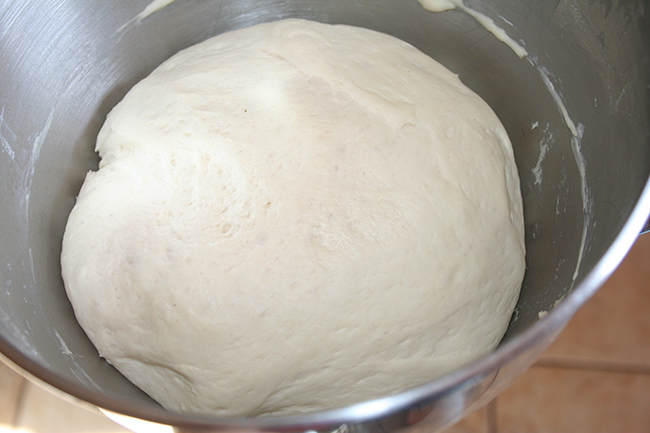
Once the dough seems to be thoroughly worked, place it in a large, oiled bowl and cover. Let the dough rise until puffy and doubled in size, about an hour.
Step 4:

Punch the dough (a gentle pressing of your fist into the dough; not a knockout punch) and let it sit for about 10 minutes. Transfer the dough to a greased work surface and divide it into six equal portions.
Step 5:
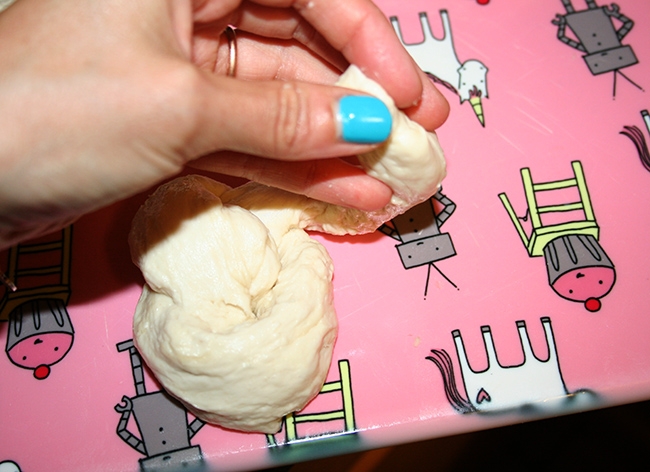
Shape the dough into circles, and place the dough rounds on a parchment-lined baking sheet. Either score the tops of the rolls with a wavy cross shape (see recipe notes), or shape the rolls by making a loose knot with two long ends, and then folding in the ends two times each (for more on this method, check out this tutorial).
Step 6:
Cover the rolls and let them proof for about 45 minutes to an hour. Near the end of this rising time, preheat the oven to 425 F.
Step 7:
Uncover the rolls. Brush the tops of the rolls with milk and sprinkle with seeds, if using.
Step 8:
Bake the rolls for 14-16 minutes, or until golden on top and puffy in shape. Remove from the oven, and let them cool on a rack. Serve warm or at room temperature.
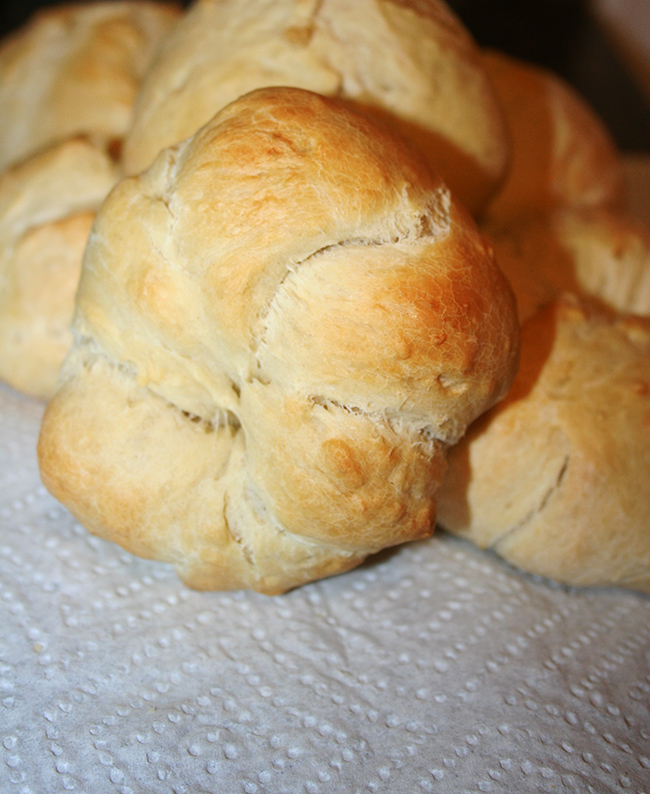
Note: I like my rolls a little softer, so I removed them when just golden, at the 15-minute mark. You can bake a few minutes longer if you like a darker golden crust.
Recipe notes
These homemade kaiser rolls can be stored, well wrapped, at room temperature for a few days, or you can freeze them for up to one month.
There is a tool called a “kaiser roll stamp” that can be imprinted into your rolls before baking for the signature top of a kaiser roll. If you don’t have a kaiser roll stamp on hand, using a sharp knife or the blade edge of a pair of kitchen shears to score the top of the bread with a wavy crisscross shape will do the trick. Alternatively, you can shape the dough as specified in Step 5.
Your best sandwich breads yet!
Make your everyday sandwiches a little more delicious and learn to make tasty loaves and rolls you’ll love.
Share tips, start a discussion or ask one of our experts or other students a question.
No Responses to “Upgrade Your Lunch With a Homemade Kaiser Roll”