
These tips will give you a general idea of how to work with ink wash.
Preparing to work
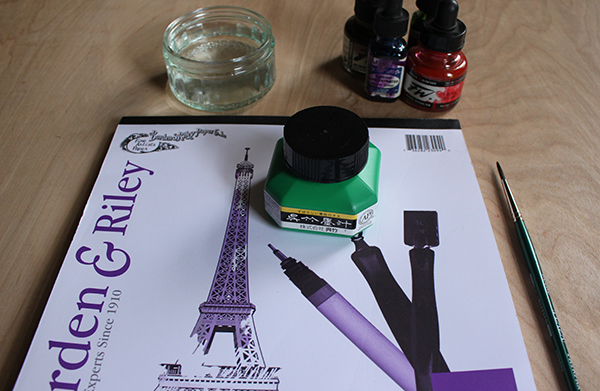
Before you start, you’ll need to gather tools. Luckily, ink doesn’t require that much to get painting.- Paper: Here, I’ve used a smooth sheet of paper specially made for pen and ink. You’ll want to experiment with what you like and how it looks. For instance, with hot press watercolor paper, you won’t see any of the paper’s texture. Cold press paper has a “tooth” to it, meaning that you’ll see grooves through what you’ve painted.
- Brushes: There are paintbrushes made specifically for watercolor and ink, and I’d recommend going with those. The bristles are designed to hold that type of media. Beyond that, feel free to choose the size and shape of your brush. If you’re going to cover a lot of large areas, then a bigger brush is for you. For finer details, try a small and rounded brush.
- Water: Water is your friend! It will help give you control over your pigment and tone. Some people like to have two separate water containers. One stays completely clean and the other is allowed to get dirty as to not alter your wash in a negative way.
- Palette: This is vital for mixing and creating clean washes. You can use anything as your palette as long as it keeps colors separated.
- Ink: There are a lot of brands and options for types of ink. Some have an acrylic base while others resemble a dye. I’m using Sumi Ink because I love how rich the black is. But, I’ve also included some other inks I have. See all of the different colors to chose from?
Creating a wash
I’m going to paint something simple using ink, but it’s the same process I’d use for something more complex.
 The general idea is to work light to dark, and large to small. Don’t start with the darkest shade. It will be hard to do anything with that, like add variation in tone, detail or even other colors. Instead, work in layers.
Start with the lightest shade you see. Wait for everything to dry before proceeding to the next layer, which is going to be slightly darker than the last. Mix the wash and apply it to the necessary areas. Again, wait for it to dry and mix again. Repeat the process until you’ve added all of the tones so you have a nice balance of contrast.
The general idea is to work light to dark, and large to small. Don’t start with the darkest shade. It will be hard to do anything with that, like add variation in tone, detail or even other colors. Instead, work in layers.
Start with the lightest shade you see. Wait for everything to dry before proceeding to the next layer, which is going to be slightly darker than the last. Mix the wash and apply it to the necessary areas. Again, wait for it to dry and mix again. Repeat the process until you’ve added all of the tones so you have a nice balance of contrast.

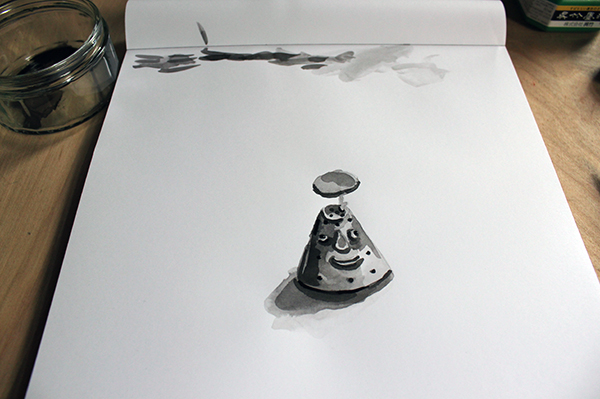 If you have any fine details, like the edge of an object, you can use a tiny brush or even a nib to accentuate them.
Another option for creating a wash
Maybe you want to get a little crazier with your ink washes. You want to create a some interesting, experimental washes that aren’t concerned with form. And why not? Those are fun, too! One way to do this is a “wet-on-wet” technique.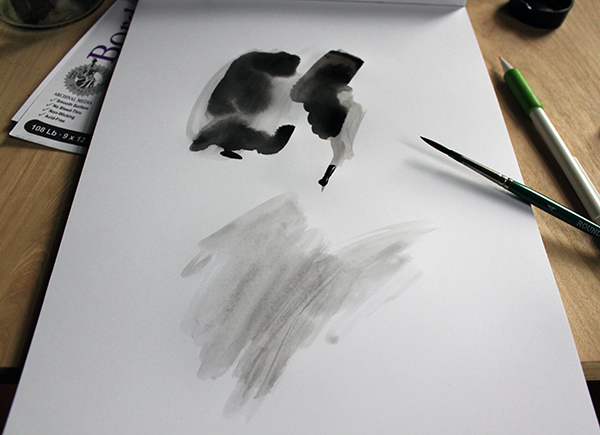
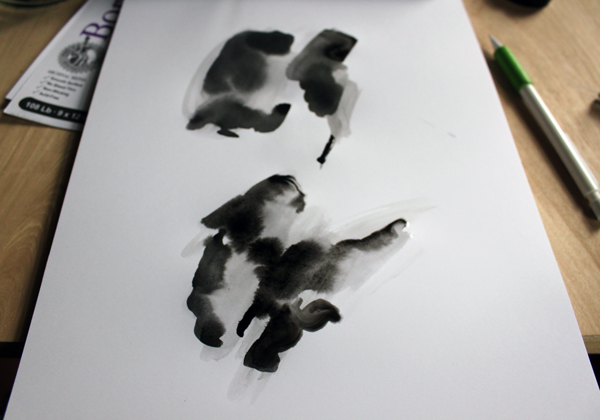 Wet the area of paper that will receive the ink. Make it as big or as small as you want. Then, using your brush, drop ink onto the watered spot. It will have a mind of its own and pigment will feather in multiple directions. That’s okay, though – it’s what we want! Alternatively, you can pick up the paper and guide the ink around the page.
So, there you have it! These tips will get you started on creating your masterpiece.
Wet the area of paper that will receive the ink. Make it as big or as small as you want. Then, using your brush, drop ink onto the watered spot. It will have a mind of its own and pigment will feather in multiple directions. That’s okay, though – it’s what we want! Alternatively, you can pick up the paper and guide the ink around the page.
So, there you have it! These tips will get you started on creating your masterpiece.
Share tips, start a discussion or ask one of our experts or other students a question.
No Responses to “Having Fun With Ink Wash: Tips & Techniques to Try”