
Let’s face it: Cowls are where it’s at. They’re stylish, convenient, and warm–and there are no ends flapping around, getting in the way. If you’ve had enough of plain old scarves, follow this simple tutorial on how to weave a cowl scarf that’s both fashionable and practical.

Let’s face it: Cowls are where it’s at. They’re stylish, convenient, and warm–and there are no ends flapping around, getting in the way. If you’ve had enough of plain old scarves, follow this simple tutorial on how to weave a cowl scarf that’s both fashionable and practical.
How to weave a cowl scarf
What you’ll need:
- A loom
- Yarn (sample used crochet cotton for the warp and acrylic boucle for the weft)
- A sewing machine or needle for hand sewing
- Matching thread
Step 1: Warp your loom
The first step to weaving a cowl scarf is do the first step of any weaving: warping your loom. Angela Tong’s Craftsy class Rigid Heddle Weaving includes an excellent worksheet for calculating exactly how much warp you’ll need. I’ve found that a finished length of about 5 feet makes for a cowl that can be wrapped around the neck twice and not be too tight. The width it totally up to you (mine is about 8.5″ across).
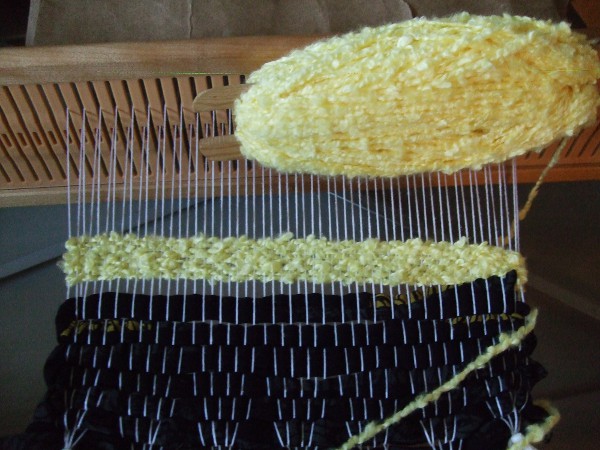
Step 2: Weave!
I think this cowl is an excellent use for all those multicolored boucle skeins that pool oddly and are a pain to knit. If you go with a boucle or other textured yarn, you’ll want a simple plain weave. But if you choose to use a smoother yarn, feel free to get creative! Houndstooth, log cabin, pick-up patterns or lace would all make for excellent cowls.
Step 3: Take the weaving off of the loom
Cut your finished weaving off of the loom and knot the free warp ends. Don’t worry about making them super neat because we’re going to sew over them. You just want to secure the weft so it doesn’t slip out and come undone. If you’re using natural fibers (wool, alpaca, cotton, etc.), you’ll want to wash and block your piece now. It’s less necessary for acrylic fibers because they won’t change all that much.
Step 4 (optional): Zigzag stitch the ends
I usually skip this step (I leave the warp separator in the hold the beginning weft threads and the knots at the end secure the end weft threads), but for extra security, run a line of zigzag stitching over the ends.
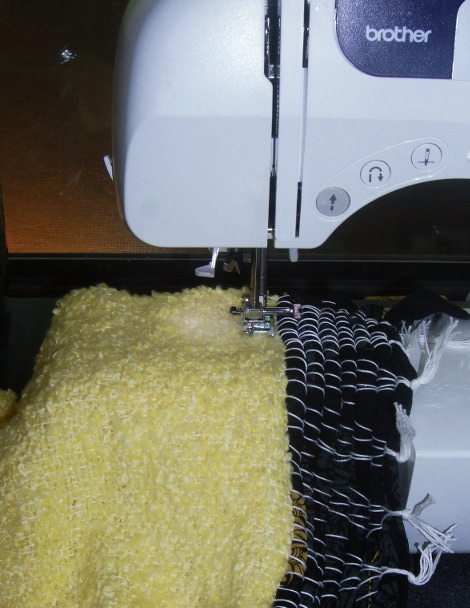
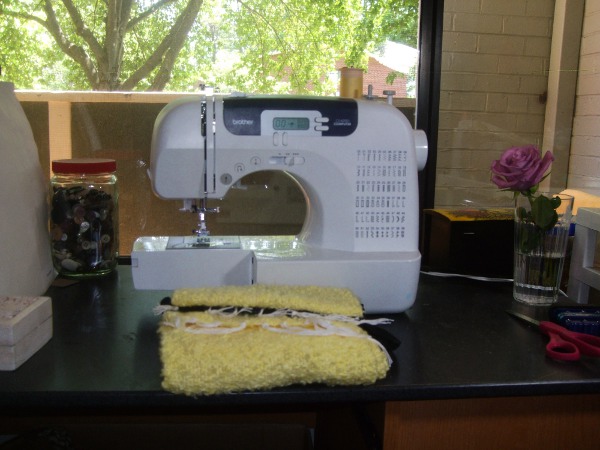
Step 5: Sew the ends together
Holding the right sides together, fold your piece in half and sew a seam using a straight stitch. I used a 5/8″ seam allowance. You probably don’t want to go too much shorter than that because you want to have enough room to fold the seam allowance down in the next step.

Step 6: Fold down the seam allowance and sew down
Do each side of the seam allowance separately on either side of the seam. This will cut down on the bulk and also reduce raw ends. Only sew through one side of the cowl. Make sure you open up the cowl so you are not sewing through both layers. You should have two layers of fabric under your needle–one layer of cowl and one layer of seam allowance. Use a zigzag stitch to capture all the threads.
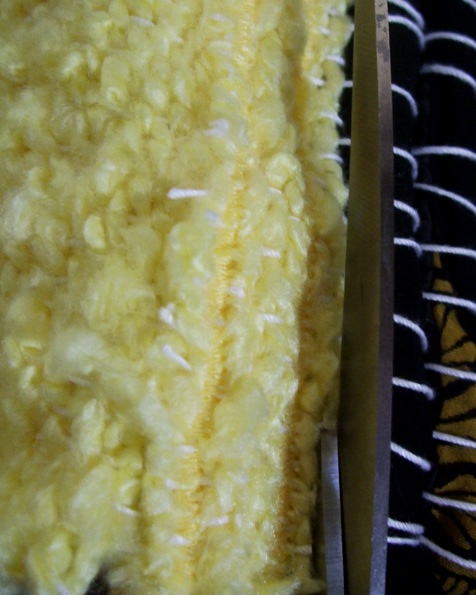
Step 7: Trim the excess seam allowance
Because we used a zigzag stitch, you can trim right up next to the stitching. If you used a boucle yarn, your line of stitching should pretty much disappear into the fuzz of the yarn.
And that’s it! If you trimmed the seam allowance right up next to the stitching, the seams will look pretty much the same on both sides. If you want to wear the cowl long, like in the first picture above, put the seam at the back of your neck, where it will be hidden by long hair or coat collars. If you want to wear it doubled, put the seam in the front, and it will be covered by the second wrap.
Using this simple tutorial, you can make a variety of cowls to coordinate with your whole wardrobe.
Share tips, start a discussion or ask one of our experts or other students a question.
No Responses to “How to Weave a Cowl Scarf: Free Tutorial”