
In the world of charcoal drawing, there’s one unsung hero, and that’s the kneaded eraser. What is that, you ask? Oh, it’s only a super-helpful tool for drawing and erasing charcoal pigment. Think of it like Silly Putty — you can bend and stretch it into whatever shape you like. Doing this also cleans the charcoal eraser, meaning no more obnoxious eraser bits to brush away!
Learn how to use a kneaded eraser is and how it’s helpful in charcoal drawing.
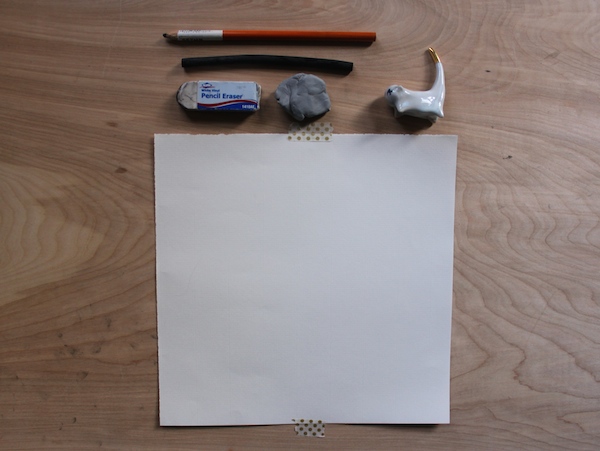
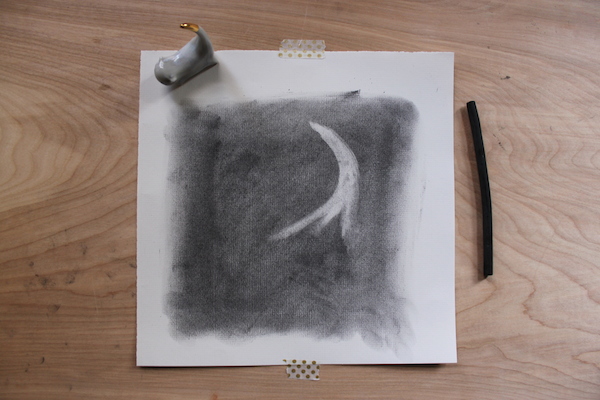
I use my charcoal eraser a lot. If you’ve followed any of my other charcoal tutorials, you’ll see that I constantly have it in hand. Today the spotlight will shine on it. Before we get started, here are the tools that I’m using: a kneaded eraser (the gray amorphous shape), vine charcoal, compressed charcoal and a conventional eraser to clean up smudges at the very end. Since I love a good ceramic object, I’m going to draw this tiny cat.
1. How does a kneaded eraser work?

The kneaded eraser, while it erases, isn’t as strong as your regular eraser. It’s not going to take up all the charcoal off your page. This is a good thing, because it means we can work in a subtractive drawing style. You’ll notice that this malleable tool will allow you to shade subtly. And, since you can fashion it into different shapes like a point, you can carve fine details with it.
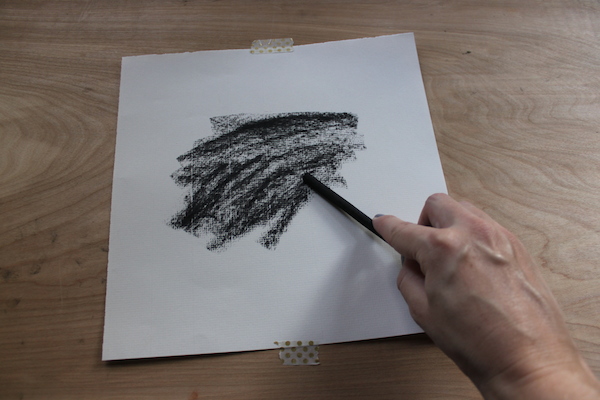
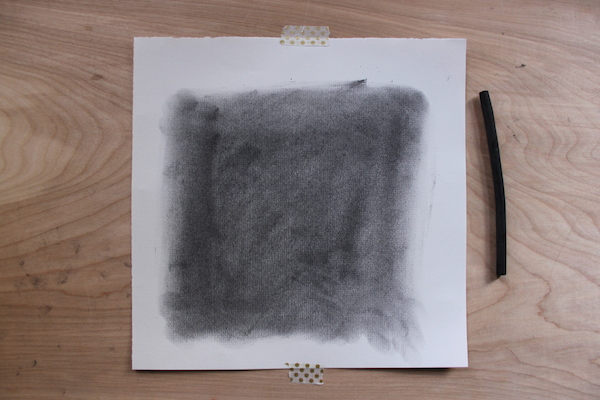
So, we’re going to begin by covering a large area with vine charcoal. Make it as big as what you’re planning to draw. Now, we’re going to get a little messy! Blend it in with your fingers for a charcoal base.
2. Start drawing with your eraser
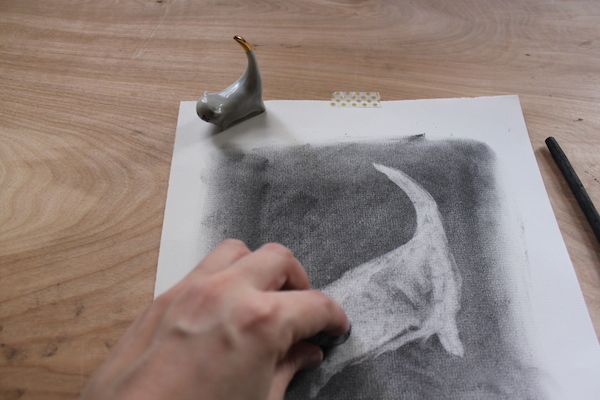
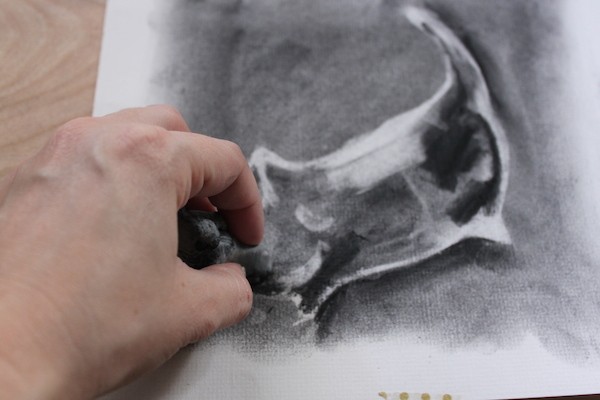
Here’s where the fun begins. Using your kneaded eraser, start to block out the shapes you see. I’ve fashioned my eraser into a flat edge and am erasing charcoal where the cat’s head, body, feet and tail are. You can see that there’s a blocky form emerging. I’m going to erase a little more to give the implication of form and bring out the lighter areas of the object.
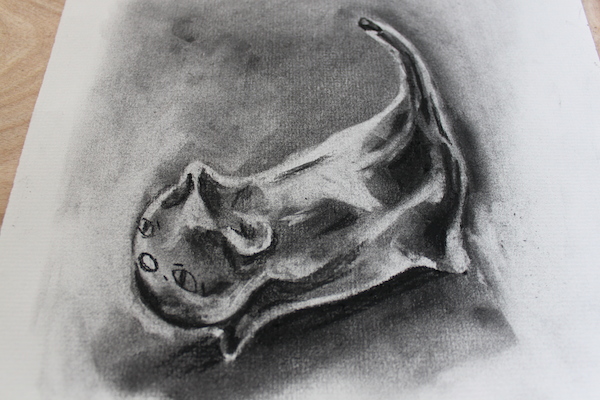
Now that I’ve erased this form, you can see that even the lighter areas aren’t completely paper-white. That’s what I wanted, and it’s the beauty of this technique.
Remember, you’ll need to clean your eraser periodically as it collects a lot of charcoal. To do this, simply pull it apart. The dust in it will disappear!
3. Layer, erase and repeat
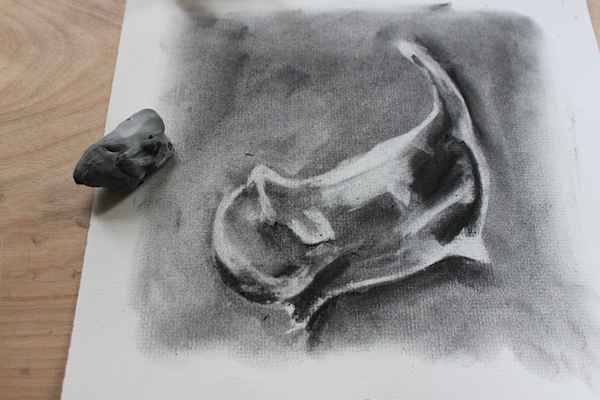
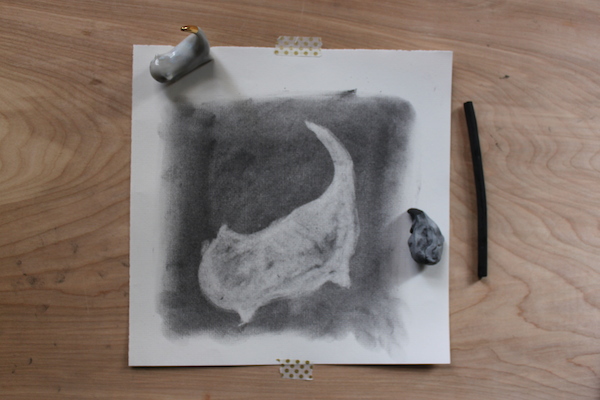
Now we’re going to get a little repetitive. Looking back on my little cat, there are obviously darker areas than what I’ve drawn/erased here. For those particular spots, I’m going to work in the same method that I was just using — layer with charcoal, blend it into the paper, erase areas to build form. I’ll repeat this over and over until I have a good amount of detail and the shading is complete.
As the shaded areas become more delicate, I’ll bend and form my eraser accordingly. Remember to use it like you would a pencil, except instead of adding pigment, you’re taking it away. This is different than how we’re normally taught. Instead of using an eraser to correct mistakes, it’s helping us give this drawing life!
4. Finish with your compressed charcoal pencil

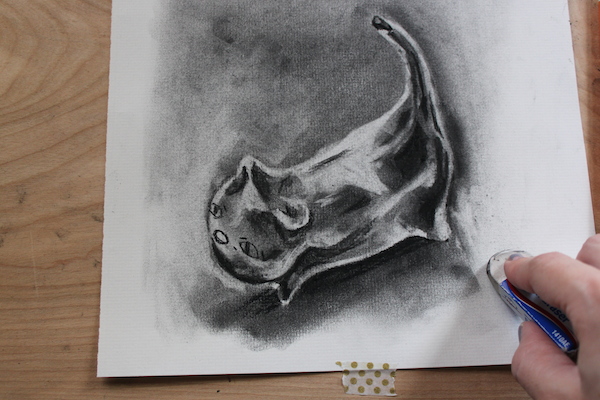

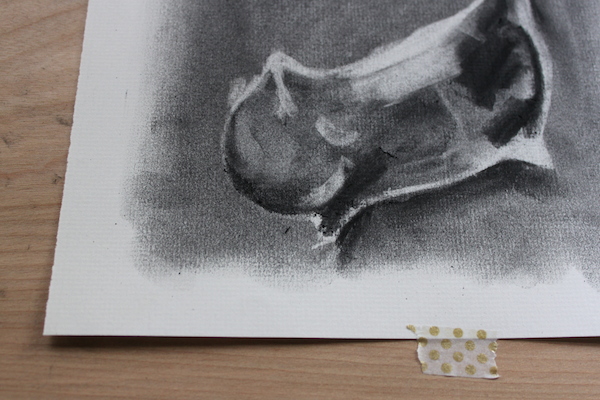
Once you’ve layered, erased and repeated the process, you should have a defined form. Now it’s time to add the finishing touches. I’m going to use a compressed charcoal pencil to add in some super dark lines with areas. Be mindful in your use because this is a type of charcoal that’s not easily erasable. After you’re done and feel confident about your drawing, clean up any smudges using the conventional eraser. Volia!
[box type=”shadow”]
Create a beautiful charcoal portrait while learning valuable techniques to add to your artistic repertoire in Bluprint’s Drawing Children: Charcoal Portraits class!
Share tips, start a discussion or ask one of our experts or other students a question.
No Responses to “Lighten Up! How to Use a Kneaded Eraser for Charcoal Drawings”