
Whether you are working on your first, tenth or hundredth quilt, it’s important to know how to square a quilt block if you want to get accurate piecing.
I especially learned how important it is to square quilt blocks when sewing with other quilters in a number of online and in-person quilting bees. When quilting with blocks from multiple makers, seam allowances may vary, which can cause you to have slightly smaller or larger blocks than called for in the pattern.
Today we are going to focus on squaring up quilt blocks that are slightly larger than the required size.
Follow along to learn how to square a quilt block!
You’ll need:
- Quilt block
- Square, acrylic ruler with a 45-degree mark (preferably the size of your finished block or larger)
- Rotary cutter and cutting mat
- Iron
Step 1
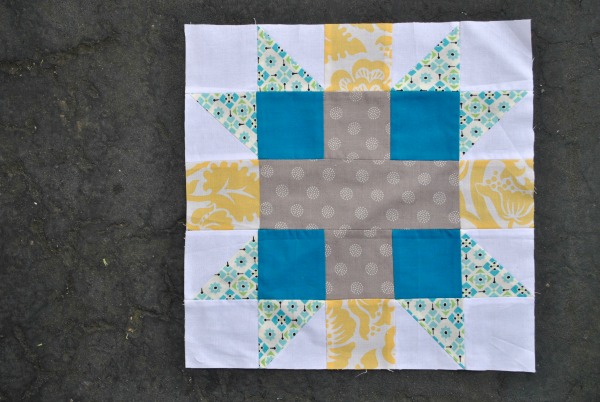
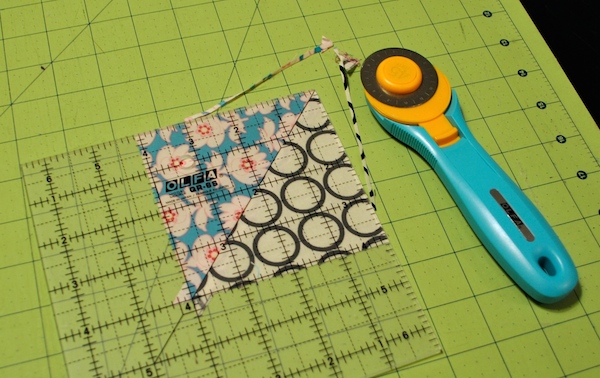
The quilt block pictured here is slightly larger than the requested 12 1/2″ unfinished size. To square up this block, I’m using a 12 1/2″ OLFA acrylic ruler that allows me to see through to the block below.
Step 2
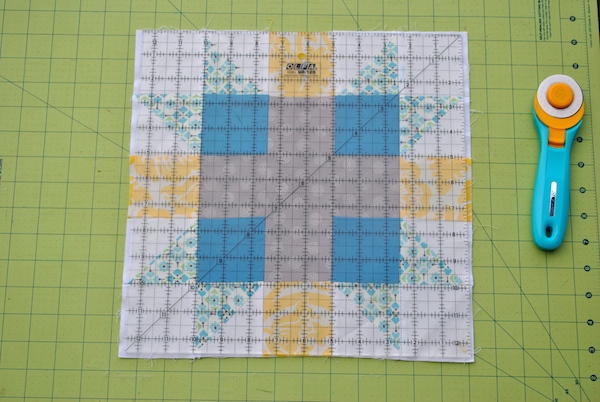
Find the center of your block and line it up with the center of your ruler. Because this block has a strong central element (the grey cross), I’m going to use this to center my block behind the ruler.
Counting to the left and right of the cross, I’ve made sure the fabric to each side is equal. In this case, I can see 5″ of fabric to the right of the grey cross, and 5″ of fabric to the left of the grey cross (plus a little bit extra on each side, which I’ll trim off). If you prefer not to eyeball it, you can also fold the block in half to find the center, and then align this fold mark with the center of the ruler, which is 6 1/4″.
Step 3
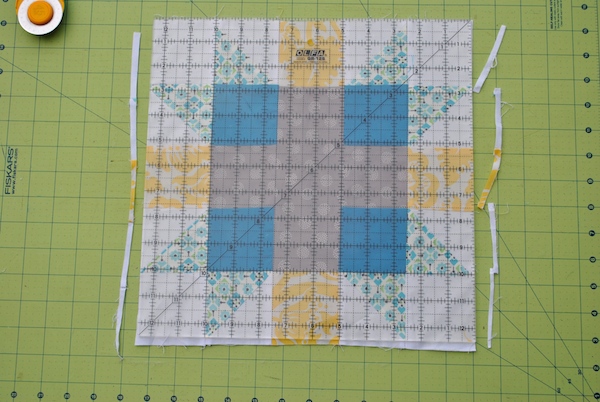
Holding the ruler firmly in place, I’ll trim off the left and right sides of the block.
Step 4
With the right and left sides of the block trimmed off, I’ll make sure the ruler is still in place so I can trim the top and bottom of the block. This time, I’ll align the 6 1/4″ mark with the center of my block.
Step 5
I also want to make sure that the 45-degree angle (the black diagonal line going from bottom left to top right corner) is aligned with what will be the corners of my block, when trimmed. This is especially important when squaring up blocks with a triangular element, but is helpful to check in any case.
Step 6
Once you’ve checked the center and diagonal alignment (steps 4 and 5), trim the top and bottom of your block. You’ll notice that the half-square triangles around the block’s border are not all equal. This happens sometimes when squaring up a block. However, because they are low-value blocks, it shouldn’t affect the overall appearance of the quilt. It’s most important that the central element of the block ends up centered in the final, trimmed block.
Additional tips for squaring up a quilt block
1. Press the block
Always press the block before squaring it up. The half-square triangle block above is easiest to trim when the center seam is pressed open. Do not move your iron from side to side, but lift and press it up and down only to avoid stretching the fabric in an unnatural way.
2. Make your ruler work
If you don’t have a ruler the size of the block you are trimming, that’s OK! Just use two adjacent corners of the ruler and the 45-degree diagonal mark to trim the block. This 4″ half-square triangle block can be trimmed two sides at a time with a 6 1/2″ acrylic ruler.
3. Square wonky blocks
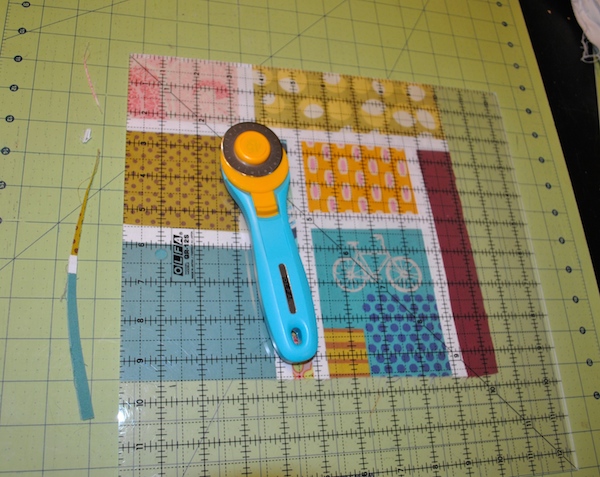
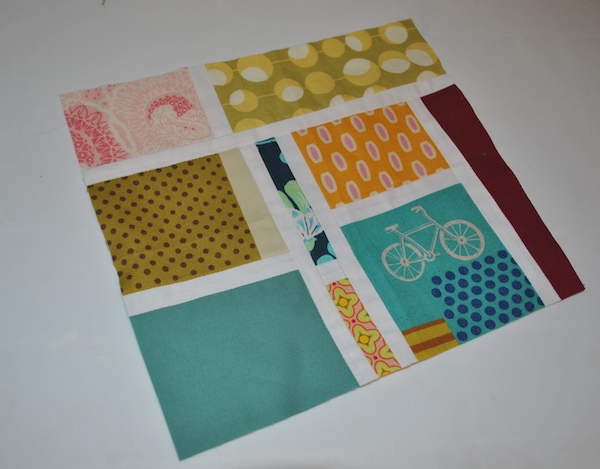
To square up a wonky or improvisational quilt block, use your acrylic ruler and trim one edge at a time, focusing on making a 90-degree angle at each of the four corners. This block is wider than it is tall, so it will be trimmed to 9 1/2″ x 10″.
4. Find the central element
In this block, the strong central element is actually the white sashing that runs across the top of the block, so I aligned that with one of the horizontal ruler marks while trimming each side.
5. Work toward the edges
Finally, if you only have a rectangular ruler, start trimming your block from the center and work your way toward the edges, moving the ruler as you go along. If you trim one edge at a time and take your time, you can still get an accurate finished block.
What is your favorite trick or tool for squaring up quilt blocks?
FREE Guide: How to Finish Your Quilts in Style

Frame your quilts like the masterpieces they are! Learn how to add beautiful borders and binding today.
Share tips, start a discussion or ask one of our experts or other students a question.
No Responses to “How to Square a Quilt Block in 6 Simple Steps”