
Sharpening is a handy tool in your photography post-processing arsenal and usually the last one you use before sending the image to print or posting to the web. A sharp image is easily set apart as more professional than an unsharp one and is a small step, but an important one as you put the finishing touches on your edits.
You have a few options for sharpening in Photoshop. I will deconstruct how to sharpen photos and simplify the process.
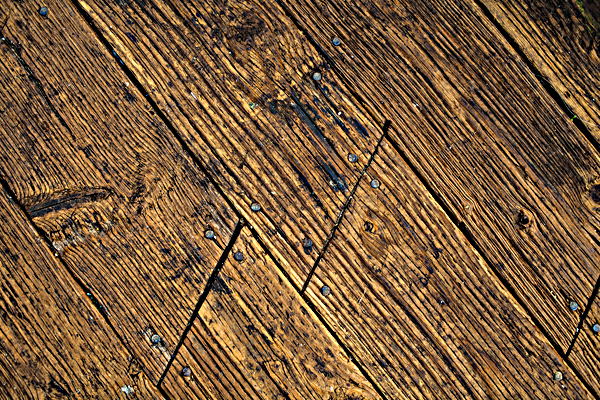
A “Smart-Sharpened” image
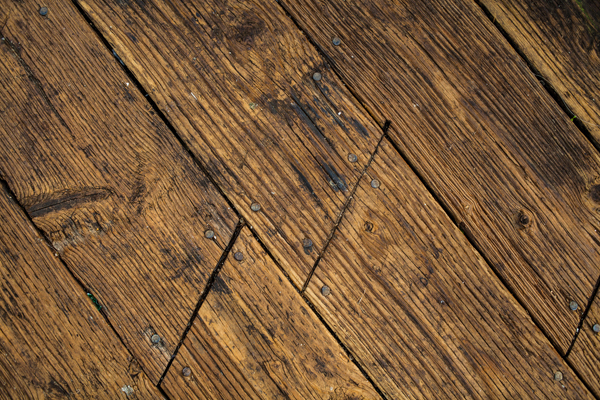
The original file
What does sharpening do?
First, it is important to start with an image that is sharp in the sense that it is focused correctly. You can use sharpening to bring a fuzzy image back to life to a small degree, but it doesn’t always work well.
Sharpening functions look for areas of contrast — where light areas of pixels meet dark areas — and then increase this contrast to make the edges even more defined. So, the light areas get lighter and the dark areas get darker, but only in areas where contrast is already occurring. If you were to oversharpen an image, the contrast would be too much, causing halos around objects and artifacting.
Photoshop’s Sharpen and Unsharp Mask Filter
In Photoshop, if you navigate to Filter -> Sharpening -> Sharpen, the application will automatically apply sharpening across the image as it sees fit. This is based on the image size and resolution.
The Unsharp Mask filter does a similar thing, but gives you the control over the Amount, Radius, and Threshold of the sharpening. Like it’s name implies, an unsharp (or Gaussian blurred) version of the image is created and then used to mask out and subtract similar unsharp portions of the image. This helps the sharpening to really affect the areas where it counts. The Amount option is listed as a percentage and controls how much darker or lighter the edges of contrast areas become. The Radius controls how many pixels wide the contrast areas are allowed to be before being affected. The Threshold determines how far apart the light areas and dark areas need to be before the sharpening affects them. Lower values mean more areas of the image will be sharpened (even when contrast areas are not that far apart) and higher values mean only the high contrast areas are affected.

Original file, no sharpening
Overly sharpened file, using Unsharp Mask at 150% and a 5 pixel radius
Photoshop’s Smart Sharpen Filter
Smart Sharpen is a top choice for photographers because it specifically lets you remove blur that is common to us: lens blur. In the dialog box you are given the choice to remove Gaussian blur (just like Unsharp Mask), Lens Blur, or Motion Blur. The Lens Blur setting does a better job of sharpening details and avoiding halos than Unsharp Mask. The Motion Blur setting can be helpful to the photographer whose image is not sharp because the camera was moving. You can even set the angle of the movement you want to compensate for. You might notice that Smart Sharpen does not have a Threshold slider like Unsharp Mask. This is the smart part of the filter: it determines the threshold automatically.
Photoshop Selective Sharpening
One of the cool things about using Photoshop and its layer based system is that you can sharpen different parts of the image at different rates and mask out the parts you don’t want. For example, I prefer to sharpen hair and eyes a lot more than I would skin. I want hair and eyes to have nice texture and crispness but skin to look silky smooth. I would create one layer for just hair and eyes with a high level of sharpening and one layer for skin with minimal sharpening.
High Pass Filter
Another method for sharpening is to use the high-pass filter. This does a similar thing as the sharpening filters, but gives you more control. The basic idea is to duplicate your photo on a new layer, then to choose Filter -> Other -> High Pass. The Radius slider allows you to see what parts will be sharpened (in darker gray). Then change the blend mode of your top layer to overlay. You will see sharpening applied and you can them mask out areas that you do not want sharpened.
These are the most common ways to apply sharpening to your images.
FREE Guide: Explore Essential Photoshop® Functions

Transform your photos with valuable Photoshop tips and techniques!
Share tips, start a discussion or ask one of our experts or other students a question.
No Responses to “5 Ways to Sharpen Photos in Photoshop”