
There are certain items in the closet that it seems like we never even consider making — bras, underwear, workout clothing, and swimsuits — but I’m thrilled that it seems as though many of us are breaking out of that mold and jumping into projects from all of those categories. No longer is sewing garments restricted to dresses, pants, skirts, and tops! More and more sewers are branching out into all of those unmentionables, including me. I’ve been sewing for over 30 years, and never once did I consider making my own swimsuit, until now.
Sewing Swimsuits: The Supportive One-Piece

Sew swimwear that fits better than ready-to-wear! Learn techniques for working with swimwear fabric, adding supportive cups, shaping seams and more. Get The Class
Read to learn how to sew a swimsuit that fits and flatters your body!
When I saw the Bombshell Swimsuit by designer ClosetCaseFiles, I knew that it was the one for me, as it is very similar to a ready-to-wear suit I have worn and loved for many years. It’s a classic retro-style with three view options, all equally saucy, all incredibly flattering, especially to ladies with curves. This suit isn’t terribly hard to make, but there are a lot of steps — seeing them in clear photographs is helpful. It’s also really important to have the correct tools and materials on hand, or else the suit will not perform properly.
Get the Bombshell Swimsuit pattern here!
Because of the scope of this project, I have broken it down into two posts. In this, the first post, we will go from the very beginning to the halfway point where the front and back pieces are assembled. In the second post, we will spend our time putting the two halves together and finishing the suit.
Don’t get overwhelmed, simply take your time and do it in stages and before you know it, you’ll have a suit of your own! Please note that I am only making view A, though much of what is covered is applicable for views B and C as well.

Step 1: Gather your tools.
With this project having the correct type of fabric, thread, pins, and notions is hugely important. Read below to learn about each element and how to identify the correct item for the task.
- Bombshell Swimsuit pattern
- Fabric and lining*
- Elastic: This must be rubber elastic, not cotton or polyester, as it needs to hold up to saltwater and chlorine
- Thread: Much like the elastic, this must be polyester thread, not cotton or any other fiber
- Swimwear bra cups (Optional)
- Scissors
- Rotary cutter (Optional)
- Water soluble pen
- Clear ruler
- Tape
- Sewing machine needles: Stretch needles in size 90/14
- Pins: Ball point pins for stretch fabrics
- Pattern weights (Optional)
*Note: Both the fabric and lining must be swimsuit material, so if you are unsure, ask for help where you are shopping to make sure they are both swimsuit fabric and swimsuit lining
Step 2: Print and prepare the pattern.
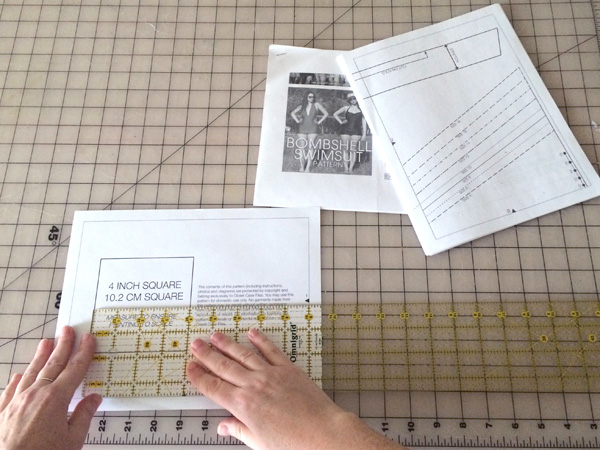
PDF patterns are great because you can use them over and over again, but the printing must be sized correctly, or else the entire project will be scaled too big or too small. The first page of the pattern has a test square on it. Print this page using a PDF reading software like Adobe Acrobat, making sure to print at 100% and not “scaled to the page” so it prints at the correct size. Measure the test page to make sure it’s correct. Once it is, print the remaining pages.
Need help with PDFs? Check out this post on how to print, assemble and trace PDF sewing patterns.
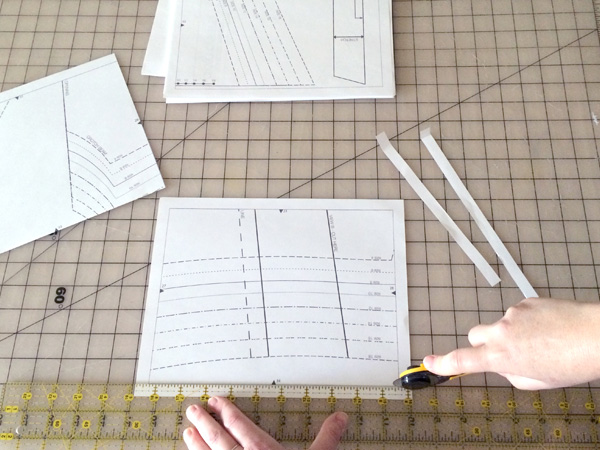
Step 3: Trim the pages.
Each PDF page will have a mess of lines and marks on it, all locked in by an outer rectangle. Trim up to this rectangle so you can match the lines on the pages to form the full pattern.
Tip: I like to only trim the right and bottom edges, so I can overlap the left and top edges with the pages next to it. I find this is easier than trying to line up two trimmed edges. You can use your paper scissors for this step or a rotary cutter as I have here.
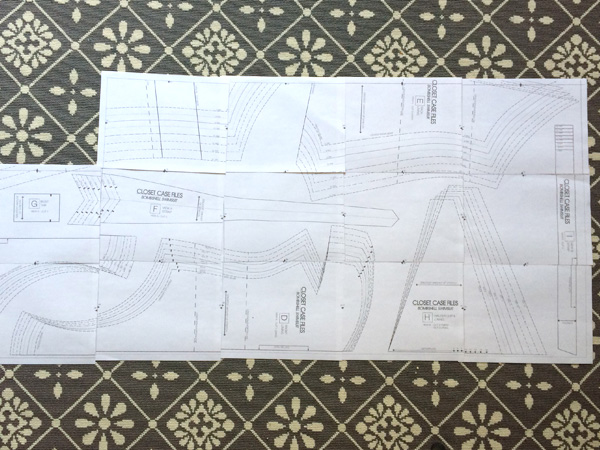
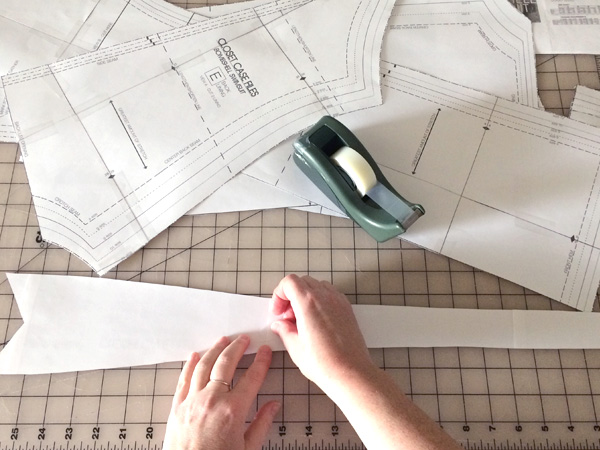
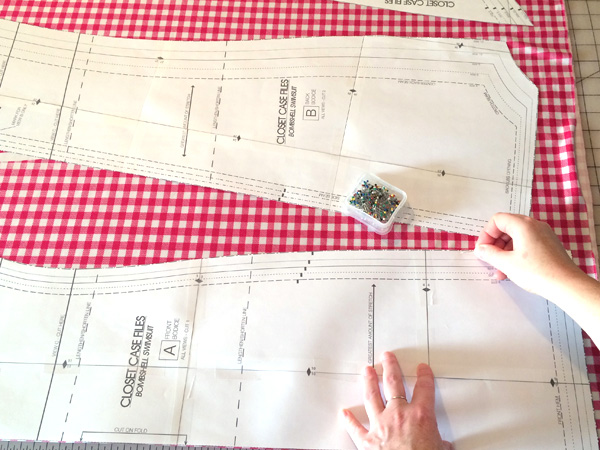
Step 4: Assemble the pattern.
Each page has a point to match up to the page on either side of it. Match up the corresponding pages and lay them out into a large sheet. I use my floor for this step and make sure I have all my pages before taping anything together. Once you have them all in place, tape them all together to form the pattern.
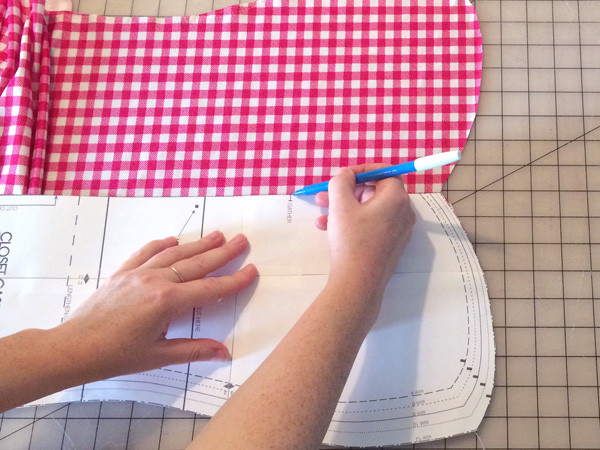
Step 5: Cut the pattern.
Take a tape measure and measure your bust, hip, and waist and check them against the body measurements on the pattern. Remember, this is a bathing suit with negative ease, so that means that the finished size will be smaller than your body’s measurements, so make sure to look at the body size not the garment size on the chart, or else you will have a suit far too big for you. Once you’ve picked a size, cut out all of the pieces for the view you are making.
I don’t tape the entirety of every edge of every page, rather I place the tape at intervals along the way. After the pieces are cut, check to see that all the edges are taped down properly and tape along the back at any key spots as well.
Step 6: Cut the fabric.
When working with swimsuit fabric, it’s key to take your time. It is incredibly stretchy and slippery, so go slow and pin the pattern down a lot to keep it in place. Only use ball point pins to make sure the pins don’t puncture a hole through the fabric.
Keep in mind that while most patterns have a grainline on the pattern that is to be parallel with the selvage and lengthwise grain, this pattern has a line indicating the “greatest amount of stretch”. Be sure to place that line parallel to the crosswise or lengthwise grain, which ever stretches the most.
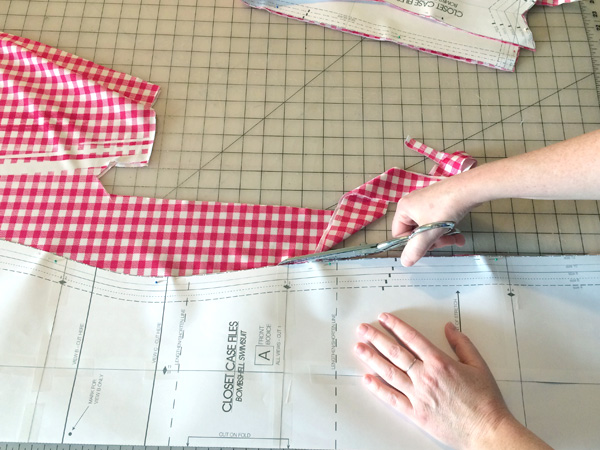
Cut the fabric once you have all the pieces pinned in place. If you are an experienced sewer, you could choose to use pattern weights and a rotary cutter for this step. Make your notch markings on your fabric, but do so with a water soluble marking tool instead of scissors as the project only has a 1/4″ seam allowance.
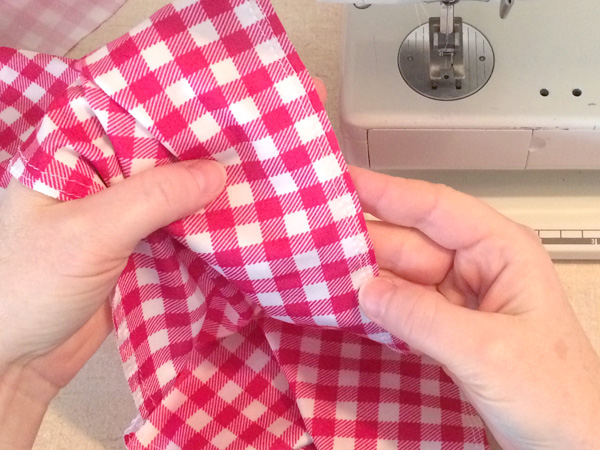
Step 7: Sew gather baste stitches.
Now it’s time to get to the sewing! But before we do, we need to talk a moment about machines. This fabric is stretch fabric and while many machines have “stretch” stitches, here we are not using those. You want to use a regular sewing machine straight stitch or zigzag stitch for many of these steps, and for some, a serger (overlock) machine is best. I will say which you should use at each step, so just read along and you’ll be fine. Also, make sure to change to polyester thread and 90/14 stretch needles for any machine to be used for the project. Before doing any sewing, be sure to test your stitches on your machine to make sure the feed and settings are working well with the fabric.
The first step to sew are two rows of baste stitches along each of the long sides of the two back pieces. The suit has a 1/4″ seam allowance unless otherwise noted, so make sure that both rows of baste stitches are within the 1/4″ seam allowance. Repeat by sewing two rows of baste stitches along the sides of the suit front piece.
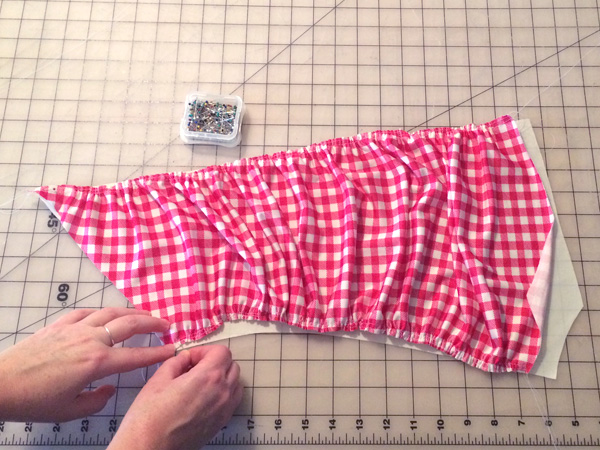
Step 8: Gather the back.
Lay one back piece on top of a back lining. The lining piece is the size the back will be once the suit is gathered. Pull the baste stitches to gather the two back pieces until they match the size of the two back lining pieces. Pin in place at the top and bottom, even out the gathers, then pin along the gathered sides with the wrong side of the suit fabric facing the wrong side of the lining fabric.
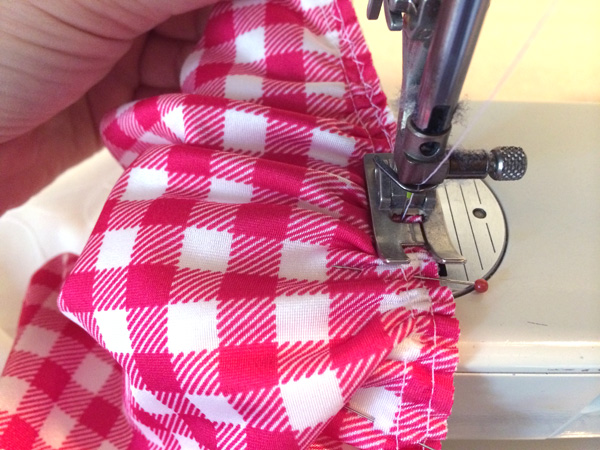
Step 9: Sew back to lining.
For this step, use a regular machine with a long and narrow zigzag stitch. For reference, I used a width of 2.0 and a length of 3.0 for my stitch. Sew along the two long sides of each back piece that was pinned in place in step 8. Use a 1/8″ seam allowance for this stitch.
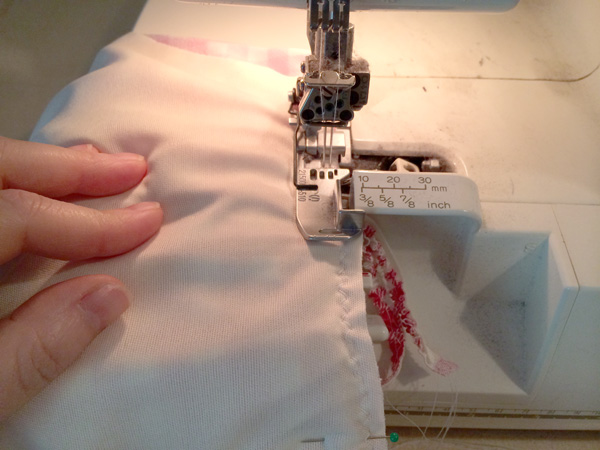
Step 10: Sew the legs.
At the bottom of each back piece, pin together the longest edge, which is part of the leg opening. The smaller part to the right of it in this photo is part of the crotch opening. If you have a serger machine, serge the leg seam. If not, use a regular sewing machine with a long and narrow zigzag stitch like used in step 9.
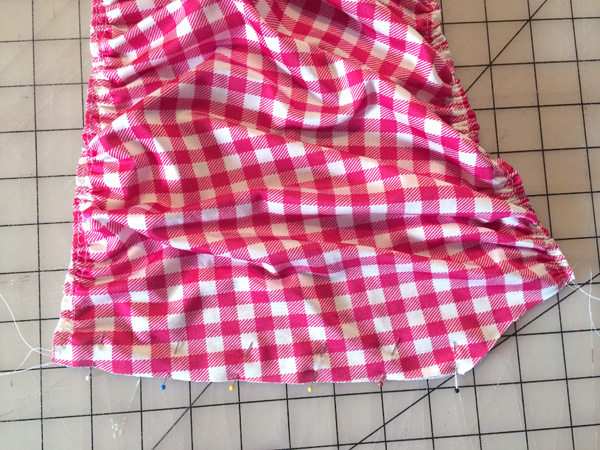
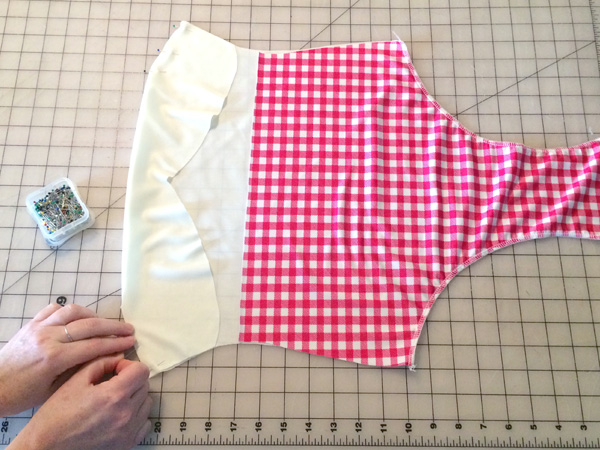
Step 11: Sew the center back.
Place the two back pieces on top of each other, right sides facing. Line up all the edges and pin them together along the center back, which is the shorter of the two sides.
Before you sew the center back seam, test your stitches. This seam has two layers of swimsuit fabric and two layers of swimsuit lining, so it is rather thick. If using a regular machine, run the same layers through the machine using a long and narrow zigzag stitch. If using a serger, which I highly recommend for the key construction seams like this one since they need to stretch and will be much more sturdy, test the tension and looper threads with the four layers.
Once you are confident in your stitch, sew the center back seam on the machine of your choice. Again, remember that this is sewn with a 1/4″ seam allowance.
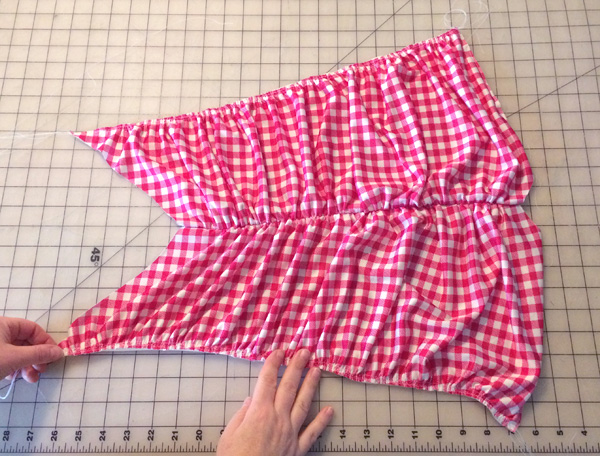
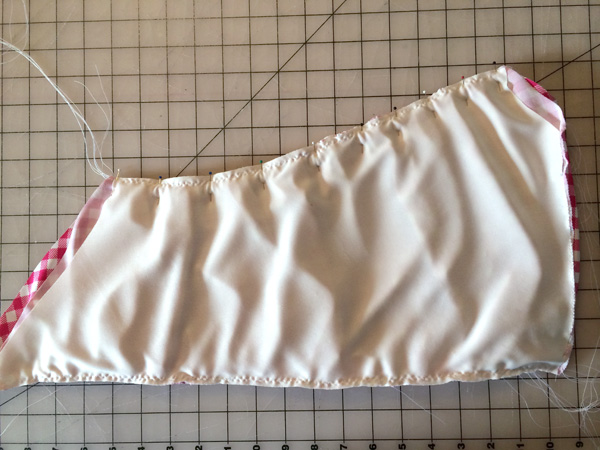
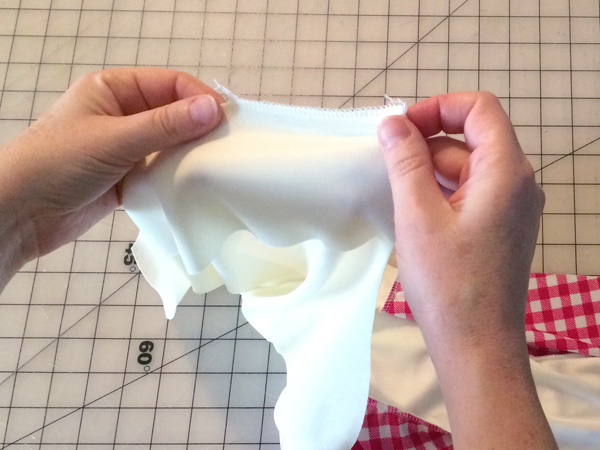
Here is the back all assembled and ready to go! To the right is what goes around your bum, the V-shape to the left is the top of the center back, and the top and bottom sides in the image are the side seams.
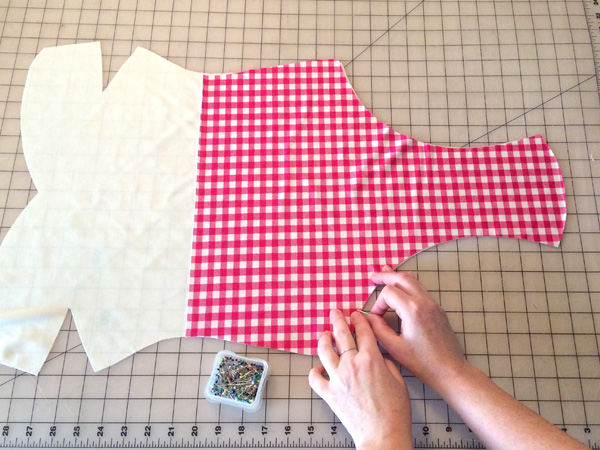
Step 12: Assemble the front lining.
Lay the lower front piece on the front lining piece, wrong sides together. Pin along the curved front leg edges.
Sew along these two edges using a 1/4″ seam allowance on a serger machine if you have one. If not, use a long and narrow zigzag stitch on a regular machine.
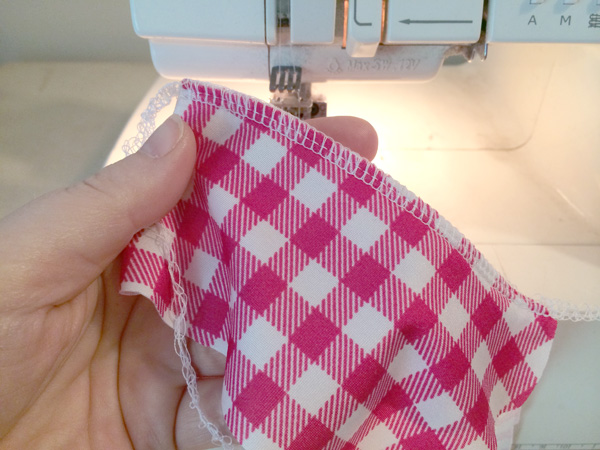
Step 13: Sew the bust darts.
I trimmed my bust darts into the fabric so the extra flap of fabric was cut away. This is almost never done on regular garments, but with the swimsuit I wanted to reduce the bulk that the flap will create. You can choose to do either. Fold the fabric to line up the dart legs (or if you cut the fabric, line up the raw edges) and pin the dart in place.
I chose to sew the bust dart with my serger so it will stretch around my bust, but you can use a regular machine for this step if you like. Use a long and narrow zigzag stitch so it will stretch.

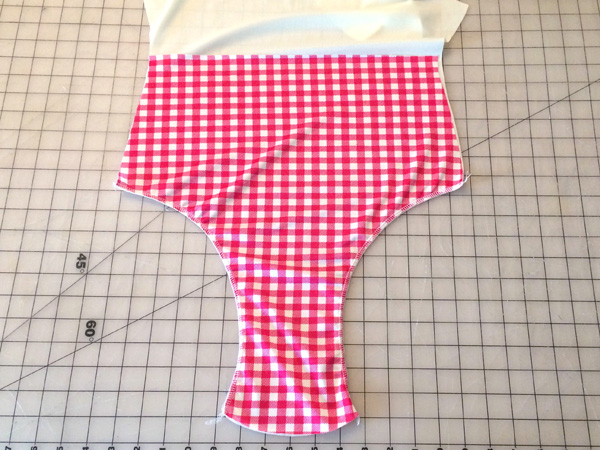
Step 14: Sew the lining to the bottom front.
Using a regular machine with a zigzag stitch, sew around the rest of the lower front along the top of the fabric, the side seams, and the crotch to tack the fabric to the lining. Stay within your 1/4″ seam allowance.
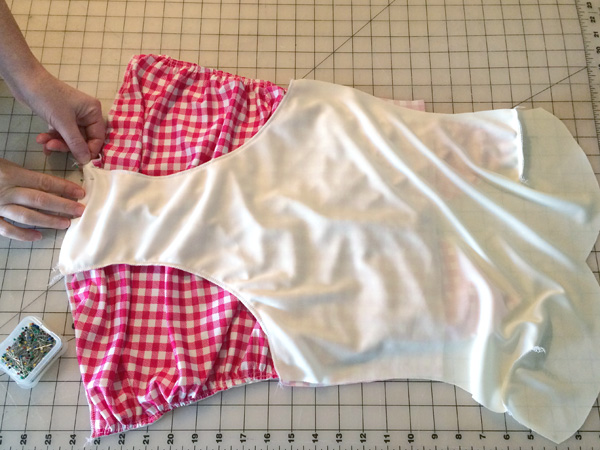
Step 15: Sew the crotch seam.
Place the front lining on top of the back piece, right sides facing. Pin along the crotch seam with the back fabric, the back lining, the front lining, and the lower front fabric all trapped in the seam.
Stitch the crotch seam in place. If you have a serger, use it for this step. If not, use a zigzag stitch on a regular machine.
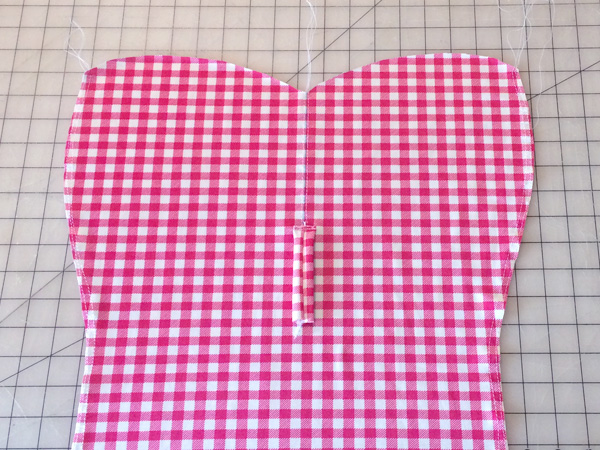
Step 16: The bust line.
Use your pattern piece for the front of the suit and draw a line from the center of the sweetheart bust to the mark on the pattern that says “gather”. Be sure to use a water soluble marking tool that you have tested out on a scrap of the exact same fabric. Synthetics can behave unpredictably so it is always good to test first before marking on the center front of your project.

Using a regular sewing machine set to a long baste stitch, stitch down the left side of the line, 1/8″ away. At the bottom, pivot and sew to 1/8″ on the right side of the line. Continue sewing up the right side, 1/8″ away from the line so it is a continuous stitch from top to bottom and back up to the top again. Leave long thread tails to be pulled and knotted later.
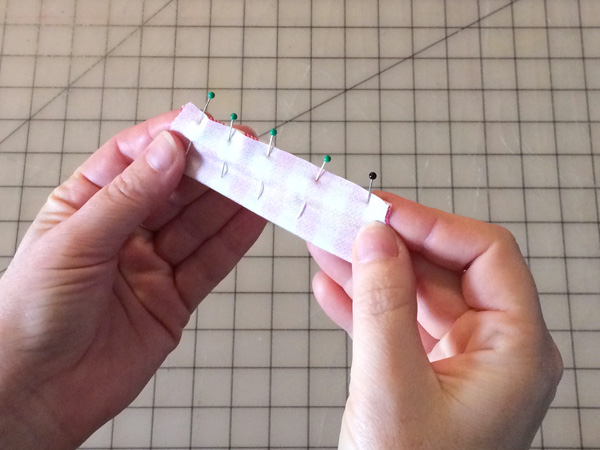
Step 17: Sew the front tab.
Match up the notch marks on the tab piece and fold right sides together. Pin along the notched edge and sew it with the 1/4″ seam allowance. Use a serger if you have one for this step.
Just below the bottom of the line you drew in step 16, pin the tab in place with the right side down and the seam in the tab along the center of the side facing up. Stitch the tab in place along the short edge closest to the drawn line. I sewed this with a regular straight stitch on my regular machine, sewing back and forth a few times to secure it in place.
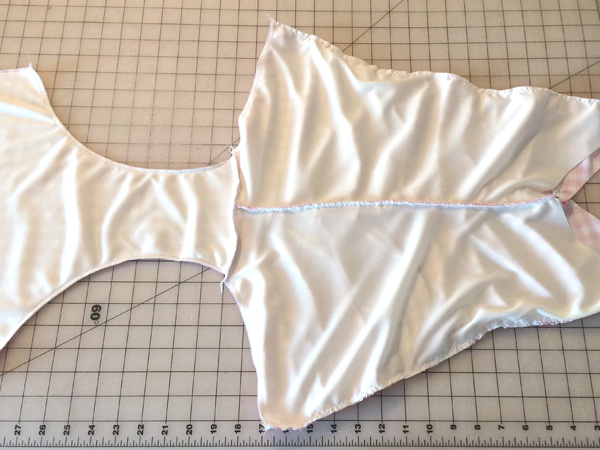
At this point, you have most of the front in place, the lining sewn to the back, and the back nearly completed! This is an excellent place to pause and take a breather!
Check out part two of sewing the bombshell swimsuit, where we will finish up the entire suit! Get ready to look like a bombshell bathing beauty!
What new sewing project have you tried lately that’s outside your “sewing comfort zone”?
Sewing Swimsuits: The Supportive One-Piece
Sew swimwear that fits better than ready-to-wear! Learn techniques for working with swimwear fabric, adding supportive cups, shaping seams and more. Get The Class
So apparently the link to part two is broken. It just loops and takes me back to craftsy.com. I am logged in and a premium user so not sure what else to do.