
Looking for a simple summer top to sew? Look no further! The Kimono Top Pattern by Salme is an excellent project for all kinds of sewers. It’s great for experienced sewers because it’s quick to make and works well with more challenging fabrics like silk or chiffon, but the pattern is equally great for a beginner because the construction is so simple!
The print at home PDF is easy to to assemble, but I found the original sewing instructions to be geared more towards intermediate skill levels with the language and lack of illustrations. If you appreciate more visual instruction, we can work through this pattern together with my simple summer shirt tutorial.

Photo via Salme Patterns
Sew a simple summer top with this step-by-step tutorial!
Pattern notes
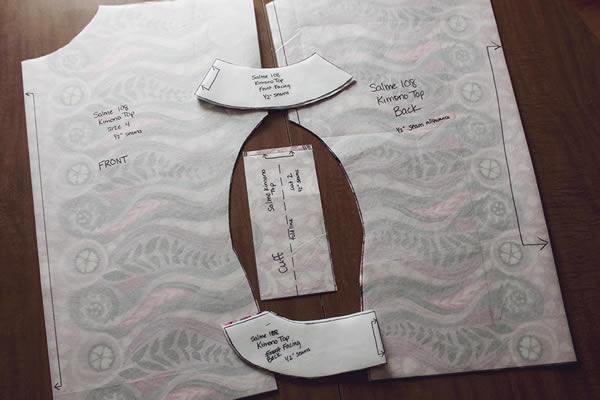
Before we begin, remember to print your 1” test square (page 2 of the PDF) to make sure your pattern pieces are to scale. Also remember to add a ½” seam allowance to all your pattern pieces! I traced my pattern pieces with Pellon 830 tracing cloth and added my seam allowance before cutting it out. I left the original printed pattern intact as a master copy in case I needed to make adjustments.
Also note, pattern errata: Both facings have been labeled as “Front” when one should have been labeled as the back. But don’t worry, it’s easy to spot the difference and doesn’t effect the garment construction.
I am using a cotton voile fabric, which I found surprisingly easy to sew with, and a serger to finish my seams.
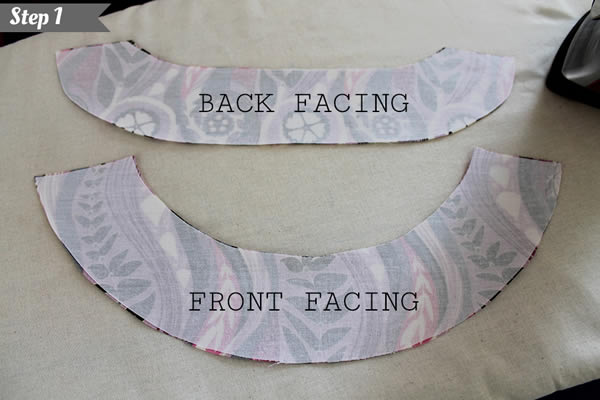
Step 1:
Apply interfacing to the wrong side of the facing pieces according the manufacturer’s directions. Finish the bottom edge of both facing pieces. With right sides together, sew the front facing to the back facing at the shoulder seams. Press seams flat and set the facing aside.
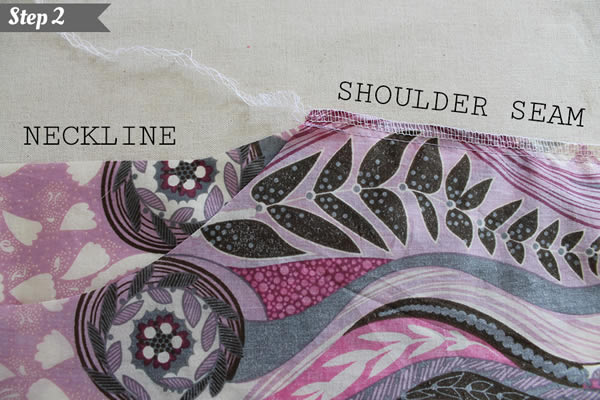
Step 2:
With right sides together, sew the front and back shirt pieces together at the shoulder seams. Finish raw edges.
Sewing tip: Press shoulder seams to the back, then serge the raw edge of the arm openings before sewing the side seams together.
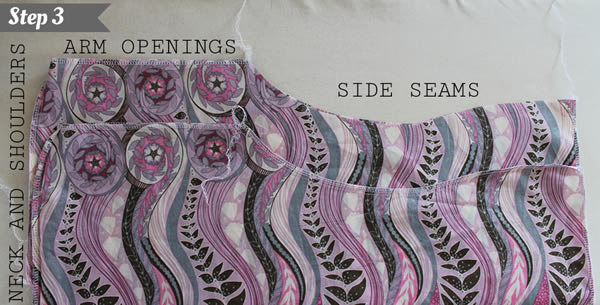
Step 3:
With right sides together, sew the side seams. Finish edges and press seams.
Sewing tip: Sew one side seam together and serge. Then sew the entire bottom hem before sewing the second side seam. This step will come in handy when sewing your narrow hem at the end.
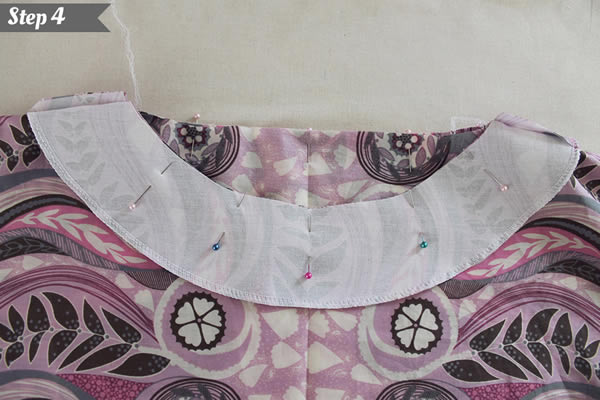
Step 4:
Turn your shirt right-side out so the correct side of your fabric is facing you. Lay the right side of your facing on the right side of your fabric matching shoulder seams, and secure with pins. Sew the facings to the neck opening.
Step 5:
Clip the seam allowance at the shoulder seam to ensure your facings will turn and press flat. Turn the neck facing to the inside of the shirt and press well.
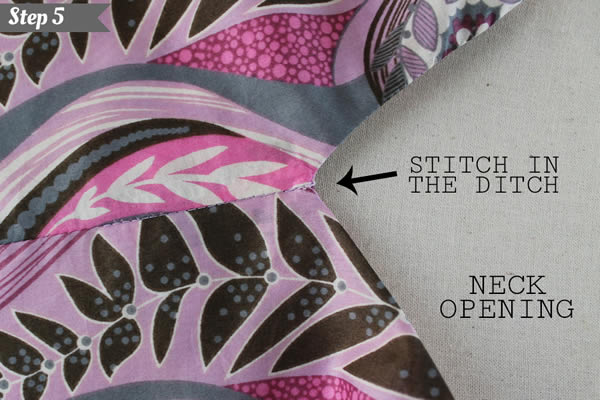
Sewing tip: Tack your facing down with a few invisible stitches, or stitch in the ditch along to the shoulder seams to attach the facing to the shirt. This will prevent the facing from flipping to the outside as you wear it.
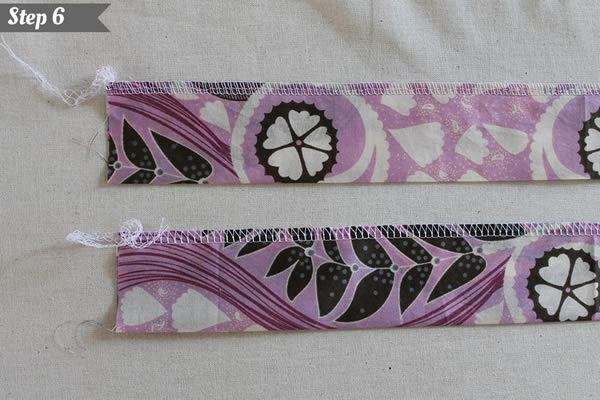
Step 6:
Fold the sleeve cuffs in half lengthwise, so the right sides are out. Serge the raw edge. Fold the cuffs again to stitch the side seams. You should now have two cuff loops with a folded edge and a finished edge.

Step 7:
Turn your shirt inside out so the wrong side is facing you. Match the right side of your cuff to the wrong side of your shirt, matching underarm seams and serged edges, pin in place. Stitch the cuff to the arm opening. The raw edges of the arm opening will turn to the right side and will be concealed in the fold of the cuff, leaving a smooth seamless finish on the inside.
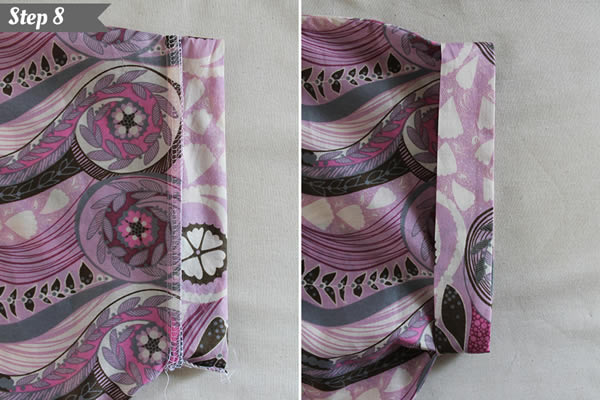
Step 8:
Turn your shirt and cuff right-side out and press. Turn the cuff in towards the center of the shirt. The raw/serged edge of the cuff becomes concealed, leaving a smooth clean finish on the inside of your sleeve.
Sewing tip: Tack the cuff to the shirt with a few invisible stitches, or stitch in the ditch at the underarm seam, to prevent the cuff from unfolding.
Step 9:
Hem the bottom of your shirt (for a little extra length I opted for a narrow hem).
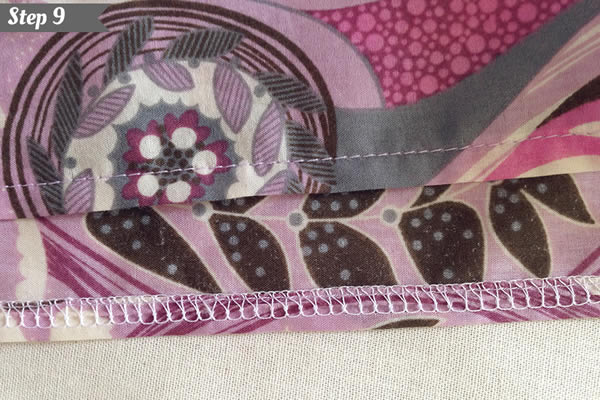
Sewing tip: Simply press the serged edge to the inside of your shirt and stitch down for a really easy narrow hem.
Step 10:
Give your shirt one more thorough press, and you’re finished!

Photos via Lucky Lucille
I love this pattern because it’s the perfect blend of vintage shaping mixed with modern appeal. The kimono sleeves and boat neckline are as classic and feminine as they are easy to wear. The best part is, your choice of fabric will determine whether this top becomes a dressy nighttime blouse or a fun summer beach staple!
My favorite summer sewing projects are the quick ones that I can start in the morning and enjoy wearing by the end of the day! I’ve made two of these Kimono Tops already, and have plans for a few more before the hot weather starts to really set in.
Did I miss something? Where do I print the pattern?