
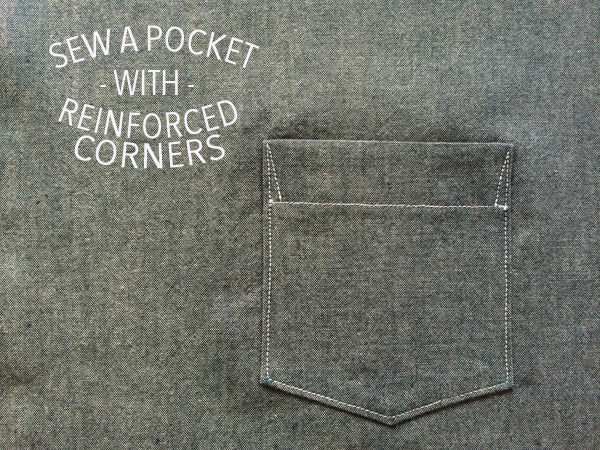
Patch pockets are a lovely touch to any garment, as they are both decorative and practical at the same time. While they are easy to sew, they can be made significantly stronger by reinforcing the upper corners with additional stitching. This might seem like a simple task, but knowing the order in which the sewing should go can be really helpful.
Below I go through step-by-step how to mark and sew the pocket in place, guiding you through all the twists and turns you will have to make as you sew up and down and pivot over and over. Give this a try on some scrap fabric and you will see how easy it can be! Let’s get started!
Directions for sewing a patch pocket:
Step 1:
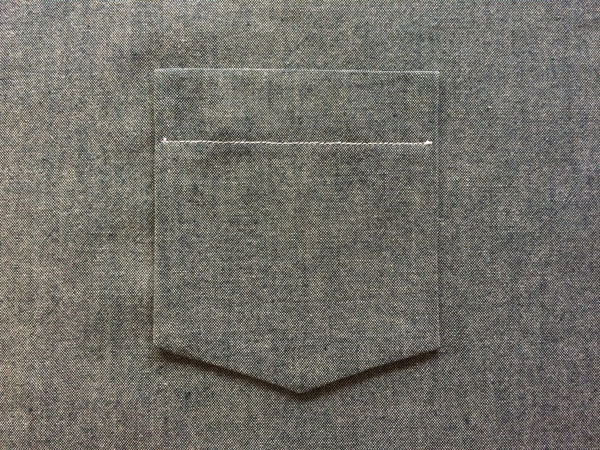
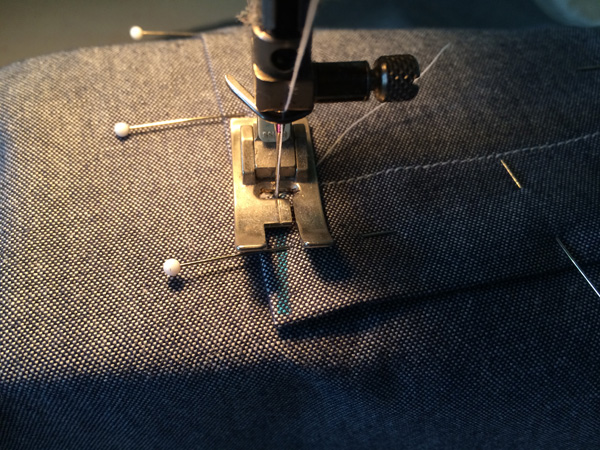
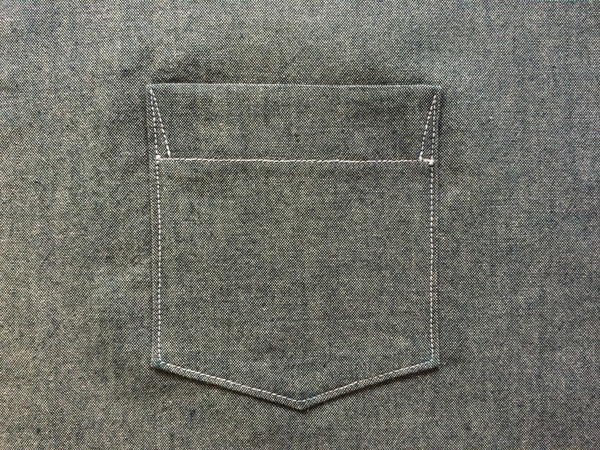
Begin with your pocket ready to be applied to the garment. For this pocket, I made a simple patch pocket with a pointed bottom. The interior flap is topstitched down in preparation for being sewn in place.
Step 2:
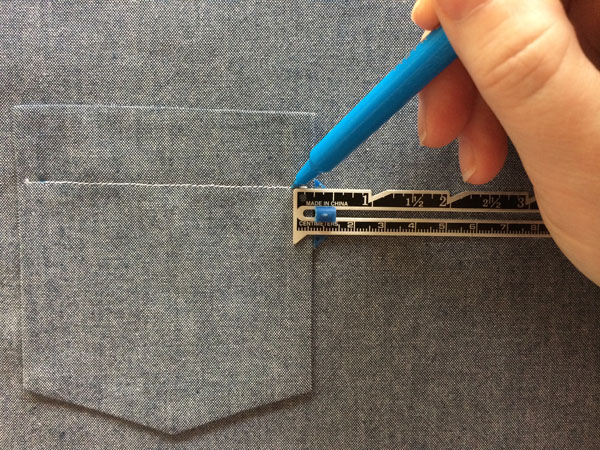
To stitch the reinforcement at the top corners, mark where you would like your stitch lines to go. For this pocket example, I sewed a 1/4″ in from the sides at the topstitched line, reducing to a point at the top corner. The opposite order is the commonly used as well, with the wider end of the triangle at the top, as seen in the image below.

Step 3:
Draw the line from the 1/4″ mark to the corner to follow when sewing. Be sure to only use water soluble marking tools that you have tested previously on a scrap to ensure it will remove after sewing.

Step 4:
Mark all other pivots around the corners of the pockets.

Step 5:
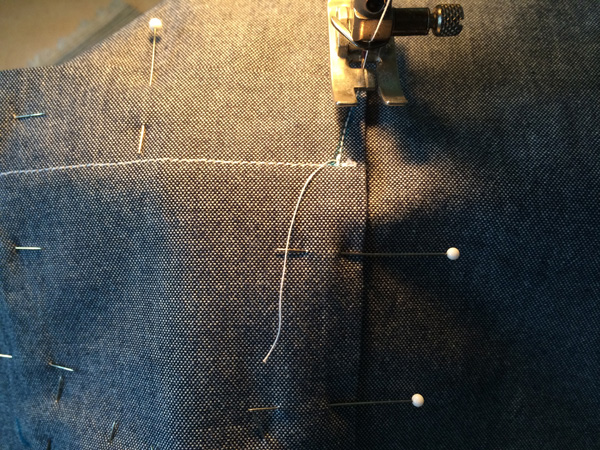
Pin the pocket in position on the garment. I like to pin all the sides plus the top to keep the pocket from gaping at the top. This way it will be sewn flat.
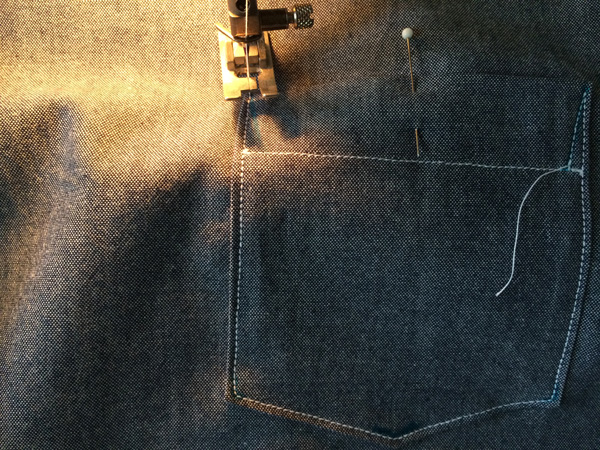
Step 6:
To sew the reinforced conner, start by sewing up toward the opening. Follow your stitch line and stitch to the corner. Be sure to sew a discreet backstitch at the start.
Step 7:
Pivot at the top corner, turning the entire pocket around so you are now sewing down the pocket.

Step 8:
Sew down to the corner, pivoting by following your marks, turning the fabric to sew along the bottom.

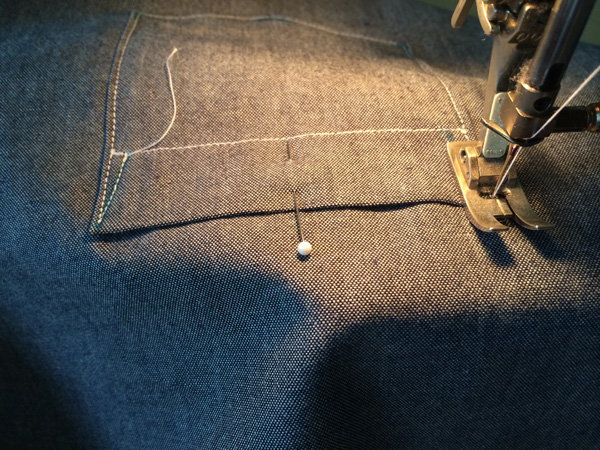
Step 9:
Sew to the pivot at the center bottom. Again, follow your marks and pivot to sew the other half of the bottom.
Step 10:
Pivot at the next corner, turning the fabric again so you can now sew up towards the top of the pocket.
Step 11:
When you reach the other top edge of the pocket, follow your marks and pivot so you can sew down the pocket.
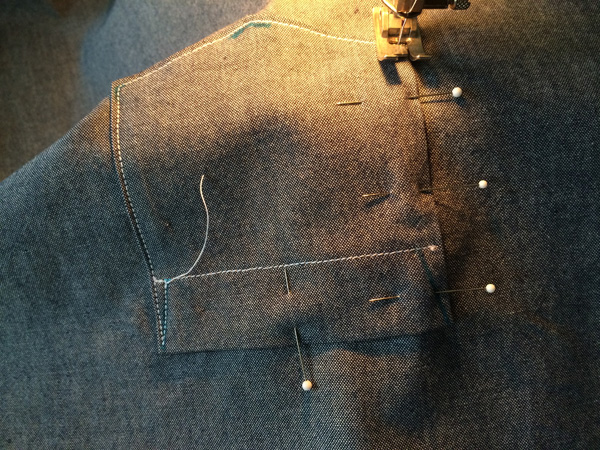
Step 12:
Turn the fabric and follow the markings to sew down to the original topstitching line. As you did at the start, be sure to backstitch.
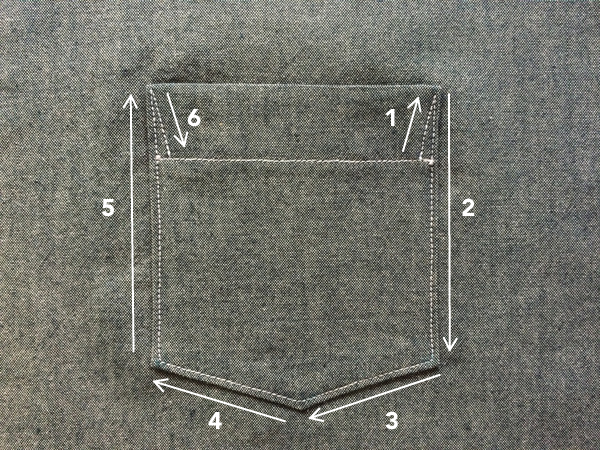
Step 13:
Trim off all the threads, give the pocket a press, and it’s all done! As a point of reference, below is the order in a handy image that might help clearly understand what we just did.
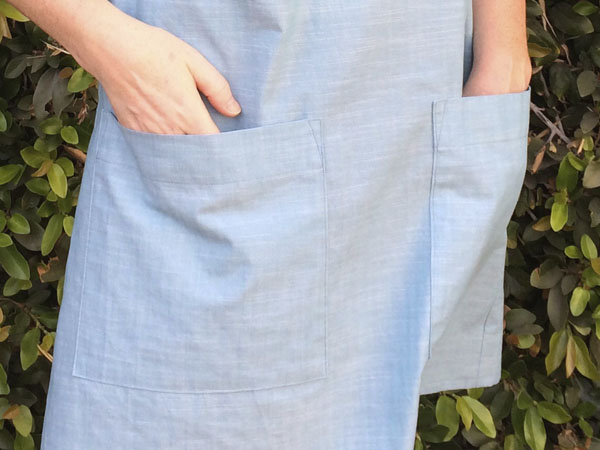
And that’s it! I hope this helps you when you embellish your next outfit with some super cute patch pockets!

Share tips, start a discussion or ask one of our experts or other students a question.
No Responses to “Pretty + Practical: How to Sew a Patch Pocket With Reinforced Corners”