
Learning how to remove the background from an image on Adobe is an extremely valuable skill for those who love to draw or illustrate.
If you intend on using an image on greeting cards, t-shirts or even on a Web site with a colored background, removing the paper background from a scanned image is a vital skill. The background is scanned as part of the image — that means if you try to put the image on a colored background, it would look like this:


Illustrations via CakeSpy
As opposed to this free-floating image which can be superimposed on any color or surface with no weird white block around it.
Luckily, removing a paper background isn’t rocket science, and is accessible even to the Photoshop newbie. Here are easy steps to making it happen.
Before you scan
If you know that you will want to remove the background from an image, take the following steps before you even hit the scanner to make your job easier.
Close your lines

It’s easiest to remove the background from artwork with “closed” lines. See how on the above images, the top word has closed, block shapes, whereas the bottom image has slight gaps? As you can see, once colored in, the un-closed lines bleed. However, the closed lines of the word on top would make it easy to remove the yellow background while maintaining the color inside of the letters.
Don’t color the background

It’s easier to remove a solid white background than a multicolored If you know in advance you’re using the key image, leave the background bare.
After you scan
Crop the image
Cropping the image closely means you have less background to remove. Whew!
Color correct
Make adjustments such as contrast and color correcting before you remove the background.
How to remove a paper background from artwork digitally
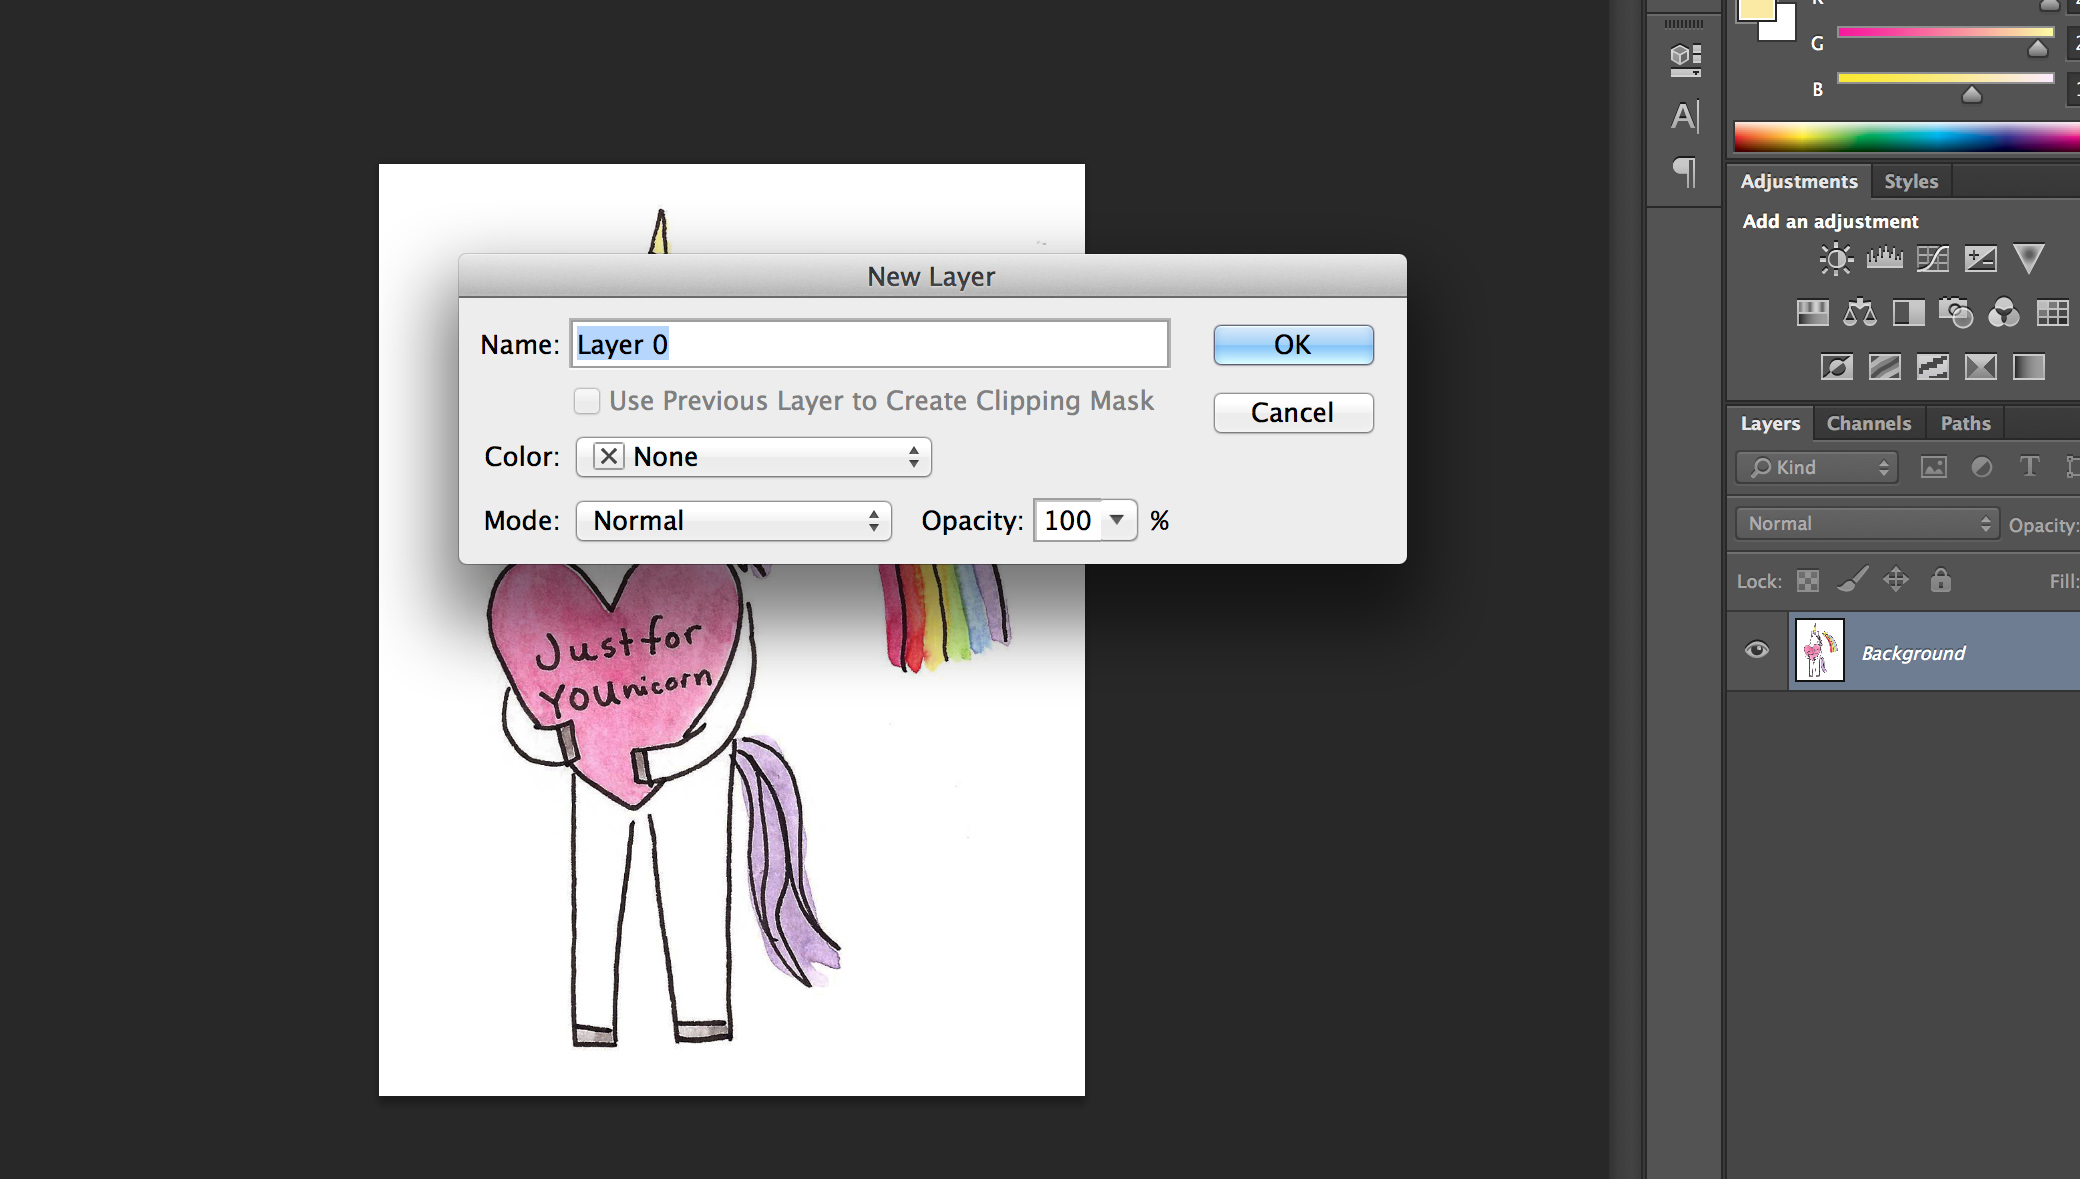
Step 1:
Create a new layer. If you are removing the background from a single layer it will just turn white once you erase it unless the image is a layer, not a background. Creating a new layer will ensure that the image is free-floating.
Step 2:
If the lines on your image are not closed, take a moment to select the eraser tool. Using a fairly small point, “close” the open spots in your lines by erasing a portion of the white background. This will form an invisible barrier when you select the background, so that you won’t unintentionally erase a portion of the image.
Step 3:
Select the “magic wand” tool. You’ll see a setting called “tolerance” at the top of the screen; set this to 20 (typically I will set it between 15 and 30). This allows enough tolerance in the tool that it will select the area of the background with leeway to pick up minute textures and colorations from the background.
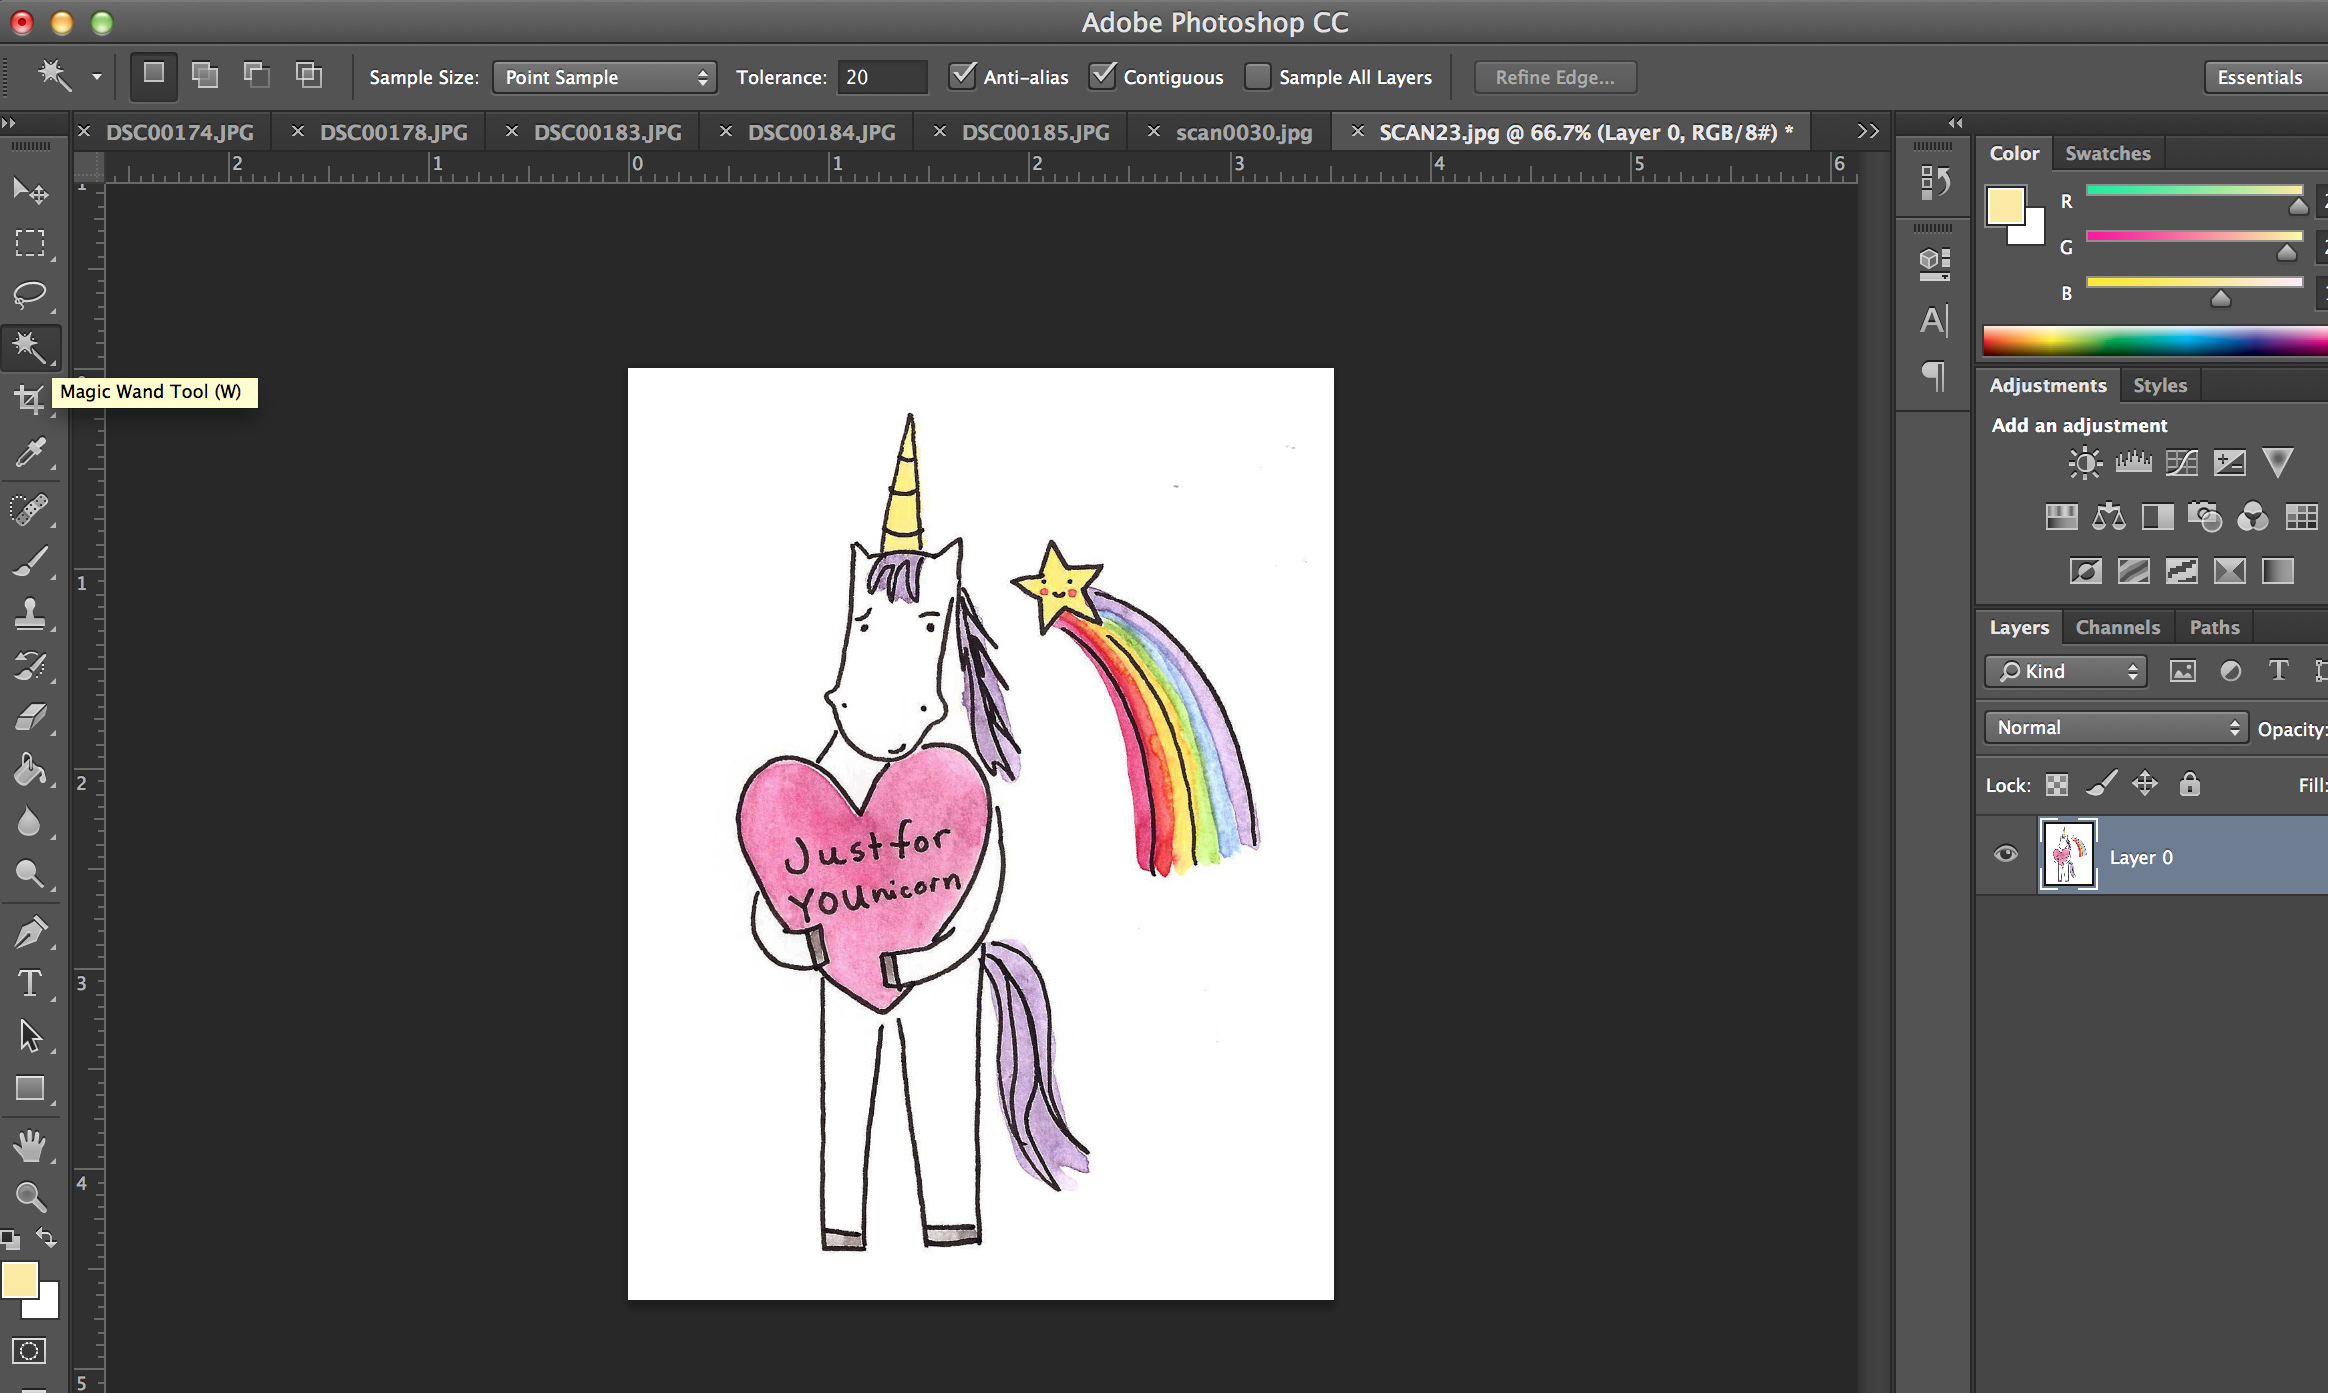
Select the background. Double check that none of the important parts of the image are selected. If they are, you may need to adjust the “tolerance” to a lower number, or you need to make sure that you fully closed all of the lines using the eraser tool in step 2.
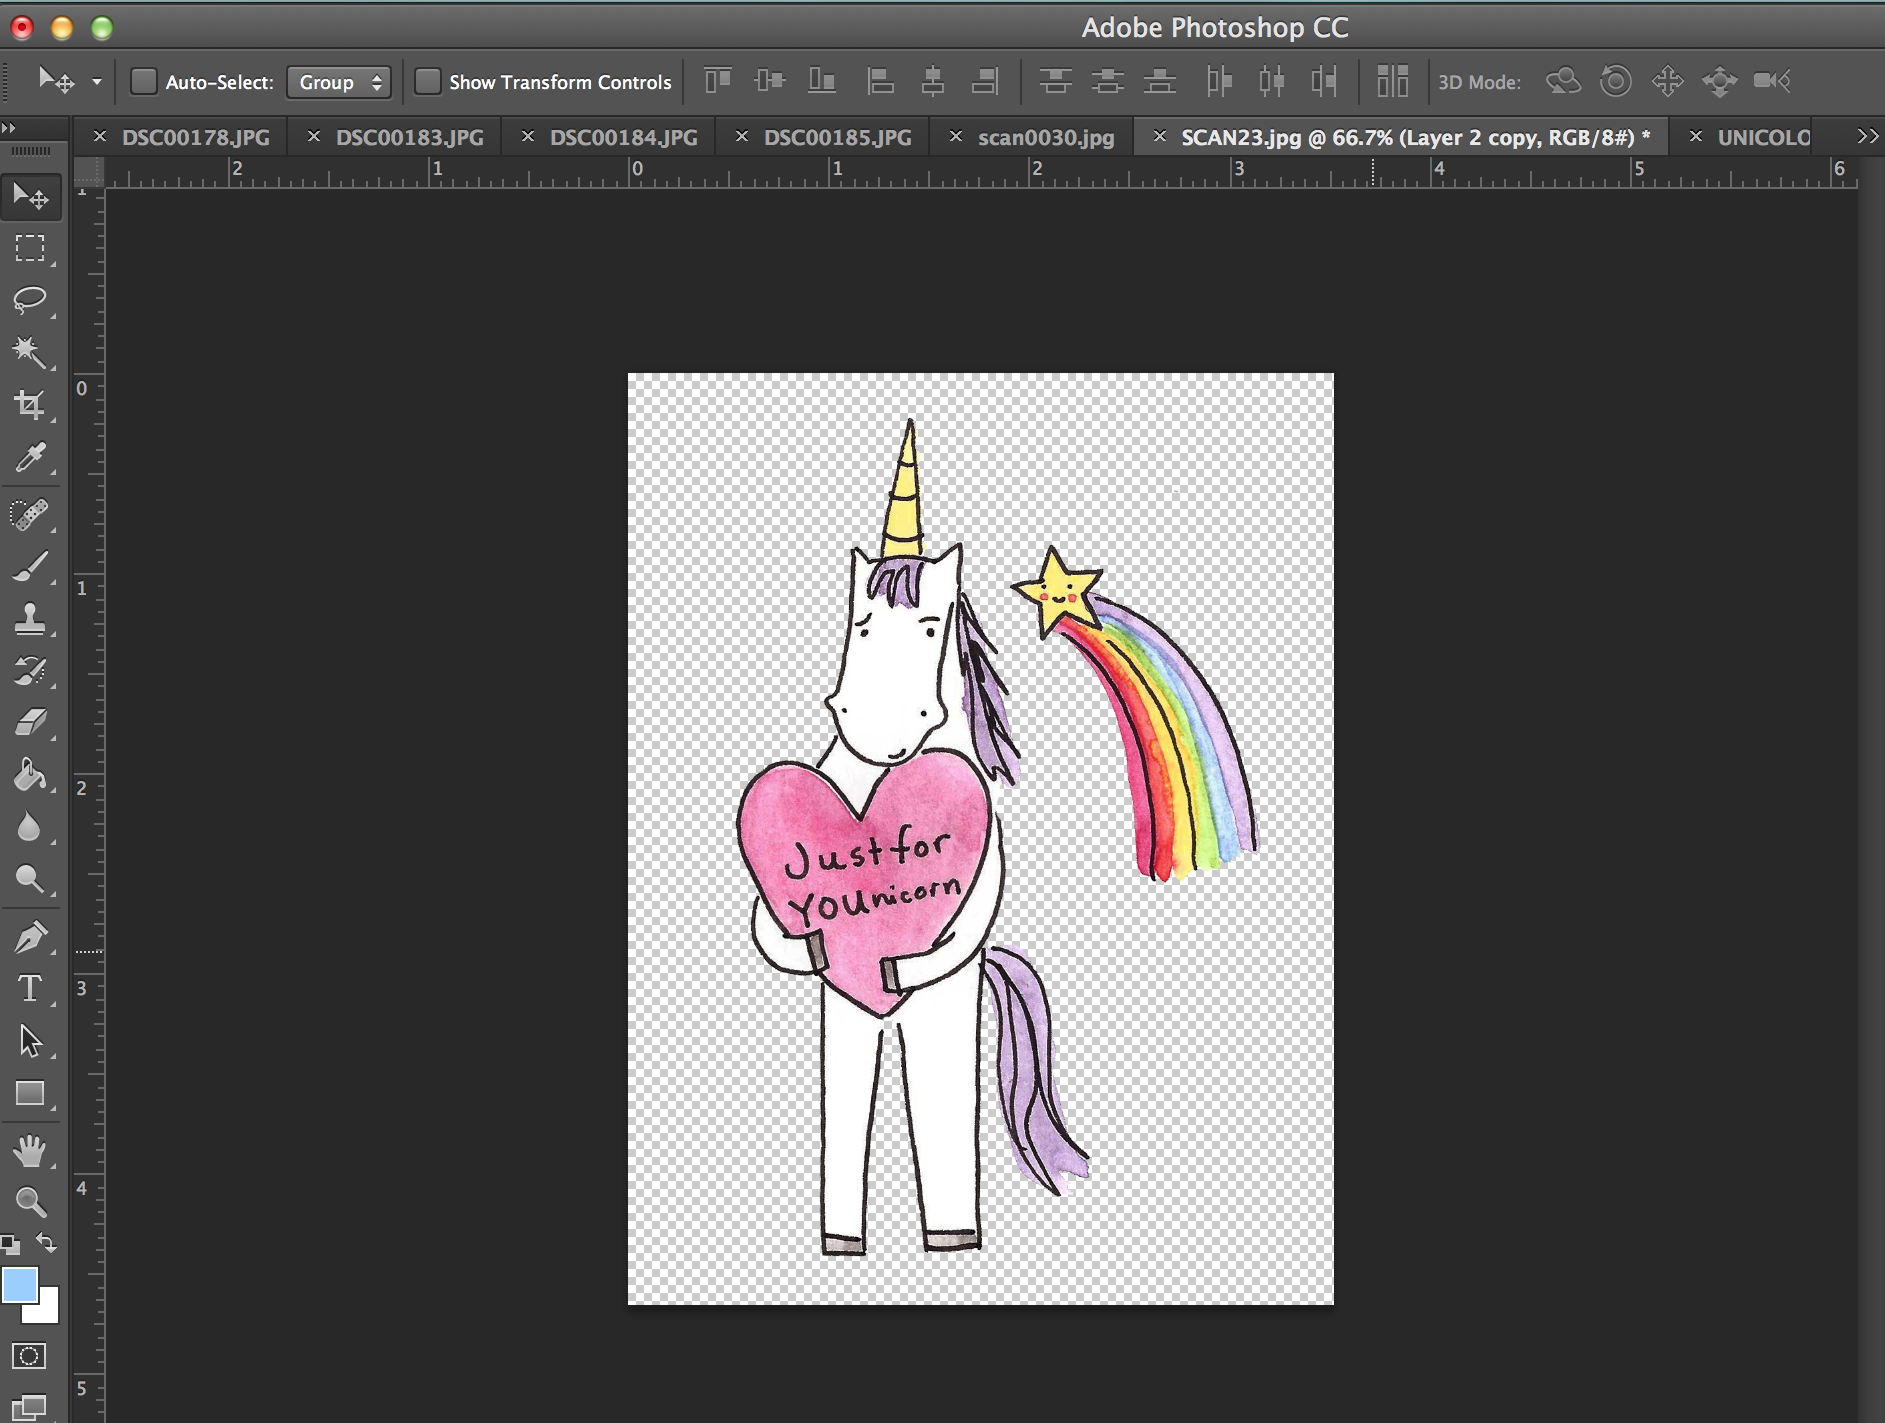
Step 4:
Press delete to remove the background. It should be a clean removal. If you notice too much or too little has been removed, undo the action and make any necessary adjustments to try again (higher or lower tolerance of the tool, etc). There will be a grey checked background — that is ok, it is the default “no background” background in Photoshop.
Step 5:
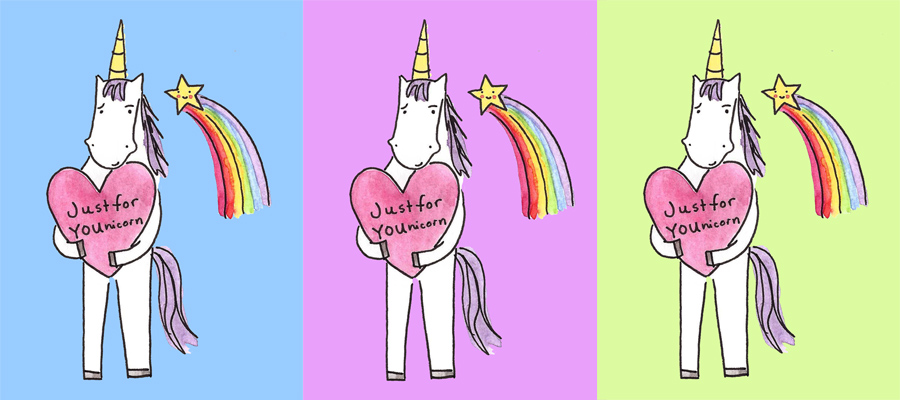
To double check your work and ensure that there is no background “debris” left is to add a solid color below the image in a separate layer. You can erase any bits of background if you spy them. If not, you can use this new layer to play around with background colors for your image, which is now free-floating.
Step 6:
Save it as a .pdf, .tiff, or .psd file (formats which will allow for layers to be saved). Don’t flatten the image to save — this will add a background back on.
This image can now be used in a number of different ways. You can put it on a T-shirt, greeting card, or use it as a Web site image that can hover over color.
Learn to draw compelling characters and intriguing environments with instant access to lessons from renowned concept artist Donald Yatomi with the online drawing class Sketching for Concept Art.
Share tips, start a discussion or ask one of our experts or other students a question.
No Responses to “Change of Scenery: How to Digitally Remove Paper Backgrounds in Photoshop”