
Digital noise can be a byproduct of shooting at higher ISO values. The first article in this series provided tips for reducing digital noise while shooting, and this article go the next step and explore what you can do in post-processing to reduce noise in your photographs even after you have taken them. The impacts of noise reduction may seem subtle, but can have a big impact, especially if you plan to print larger photographs.
Read on to learn how to reduce noise in photos during post-processing.

Photos via Boost Your Photography
Shooting and using dark frames
An alternative to using long exposure noise reduction in-camera is to shoot dark frames while you are out in the field. A dark frame is a photograph that has the same settings as the original photograph but is taken with the lens cap on. A dark frame, therefore, records only black, plus the digital noise. The dark frame below was cropped from a shot at ISO 12,800 to show the dramatic prevalence of digital noise.
StarStaX is one free program, of many, that allows you to use a dark frame to remove digital noise from a photograph in post-processing. It can use the digital noise visible in the dark frame to selectively remove those same pixels from your photograph, significantly reducing visible noise in the final image.
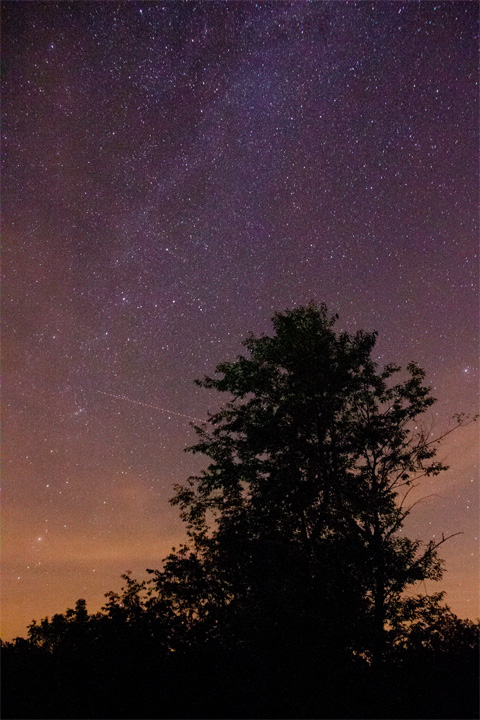
Milky Way photograph with dark frame removed
The downside is that you need to shoot new dark frames each time you are photographing. Because digital noise is the result of random fluctuations, it depends on many factors, including the ambient temperature while shooting, in addition to the specific camera settings you were using.
Use noise reduction software
There are many different types of software that can be used to reduce digital noise in photographs without the need for a dark frame. Adobe Photoshop contains two different ways of dealing with noise reduction, depending on whether you are shooting in RAW or JPEG formats. With any noise reduction software, be sure that you are viewing your photograph at 100 percent when manipulating, so that you can really see the effects.
Adobe Camera Raw
If you shoot in RAW, Adobe Camera Raw has a powerful noise reduction option, available under the Detail tab. The Luminance slider will reduce luminance (grayscale) noise. Adjusting the luminance slider will then allow you to control the effect further with the luminance detail and luminance contrast sliders.
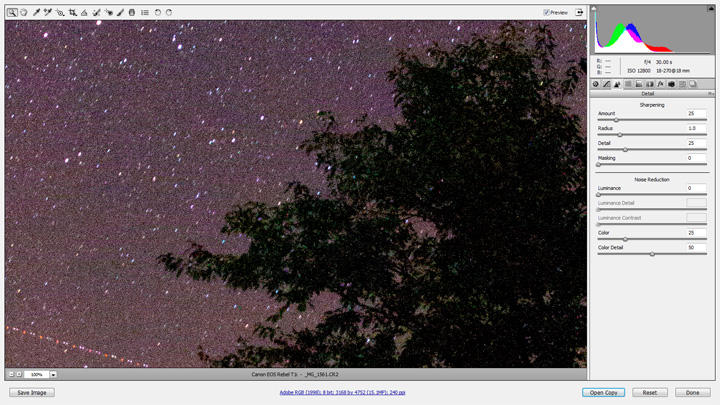
Default noise reduction settings in Adobe Camera Raw
The luminance detail slider controls the threshold for eliminating luminance noise. A higher value will reduce less noise but retain more details. A lower value will reduce more noise but may start also reducing detail in the image.
The luminance contrast slider controls the contrast of the luminance affected. A higher value can produce blotches or mottling but will preserve contrast. A lower value can create smoother results but can reduce contrast.
The color slider reduces color noise, and the color detail slider controls the threshold for eliminating color noise. Higher values can result in color speckling but will preserve color edges, while lower values can remove color speckling but can cause colors to bleed into each other.
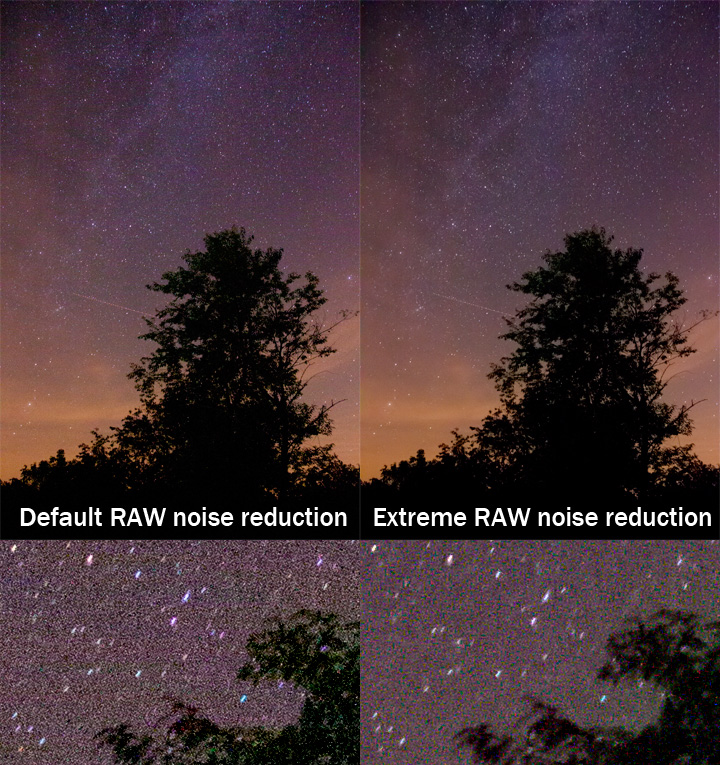
How best to adjust these sliders is very much a personal preference, and depends on your image. Always adjust sliders while viewing at 100 percent zoom, but remember to zoom back out to your preferred print or display size as well to check the overall effect.
Adobe Photoshop filters
If you do not shoot RAW, Adobe Photoshop also has a noise reduction filter that can be accessed from the menu Filter -> Noise -> Reduce Noise. The strength value will control the luminance noise reduction. The preserve details percentage is similar to the luminance detail slider: a higher value will reduce less noise but preserve the most image detail, while a lower value will reduce more noise but also reduce detail.
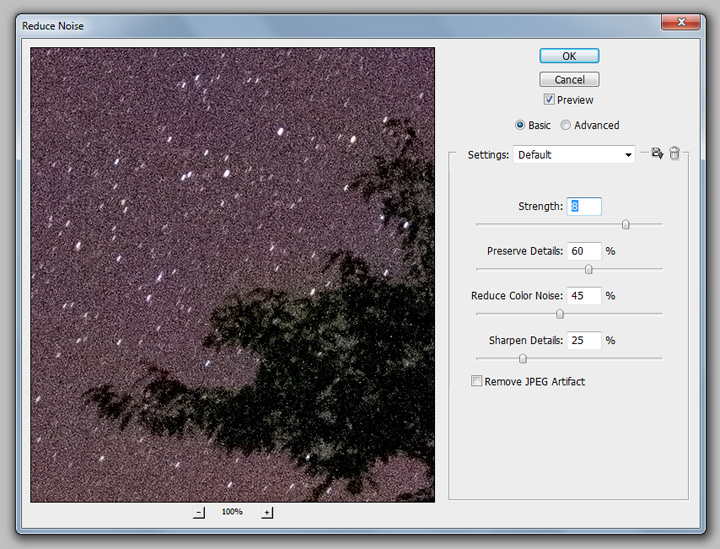
Default noise reduction settings for Adobe Photoshop’s Noise Reduction Filter
The reduce color noise percentage will help remove random brightly colored pixels. The sharpen details percentage helps compensate for the reduction in detail that occurs when applying noise reduction. Use this feature to restore sharpness. Check the remove JPEG artifacts box if you are trying to reduce halos caused by saving a low quality JPEG.
You can also click the advanced button and individually manipulate the strength and preserve details slider for each RGB channel. This is useful if your image has luminance noise across two or three channels that were not adequately addressed using the basic options.
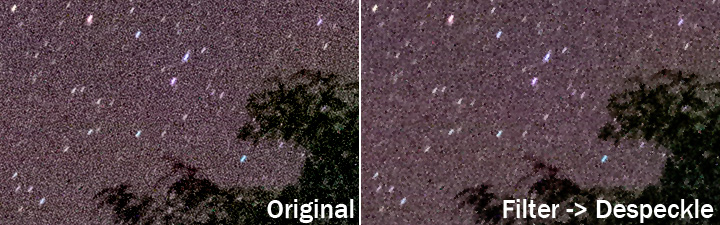
For a faster option, you can also try the despeckle filter, found at Filter -> Noise -> Despeckle. This one-shot deal detects edges in your image and blurs all non-edge portions in an attempt to reduce noise while preserving detail. If you want to fine-tune the effect, use the reduce noise filter instead.
Noise reduction in post-processing is always going to be more work and effort than reducing the potential for digital noise while you are shooting. But, if a situation arises where you must use a high ISO value, these different post-processing techniques can help reduce noise in your final image.
Online Photography Class

Transform your images and videos with the creative power of Photoshop!Enroll Now »
Share tips, start a discussion or ask one of our experts or other students a question.
No Responses to “How to Reduce Noise in Photos During Post-Processing”