
Hairstyles are one thing about our appearance that we can easily alter, and for some people, it’s a large part of their self-expression. So, when we’re painting a portrait, it’s important to get the hair just right.
Learn how to paint hair that looks real with this simple tutorial!
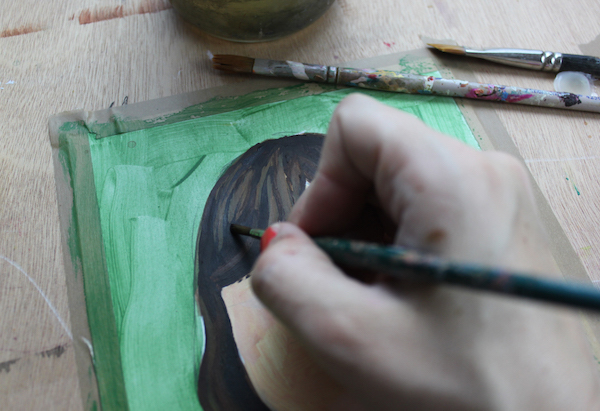
Tools for this tutorial

For this painting, I’m going to use acrylic paint. It’s really versatile, dries quickly and has a ton of colors to choose from. I’m painting brown hair, so I initially grabbed four tubes: burnt umber, burnt sienna, yellow, and white. Later, I grabbed my ultramarine blue to mix with the burnt umber and create a brilliant, almost black pigment.
Tip for using white paint: Use it sparingly. Adding too much white to a color can make it appear gray. If your subject doesn’t have gray hair, it will age them — and who wants that?
Feel free to paint on whatever surface you like. Personally, I prepared a piece of paper using an acrylic matte medium.
Most importantly, you’ll want a reference photo. Choose an image that has good lighting, preferably one where you can see the texture of the hair clearly. That’ll make it easier to draw and paint.
Paint better portraits!
Join this online video course to mix, blend and paint true-to-life skin tones for more realistic portraits.
Step 1: Create a pencil sketch
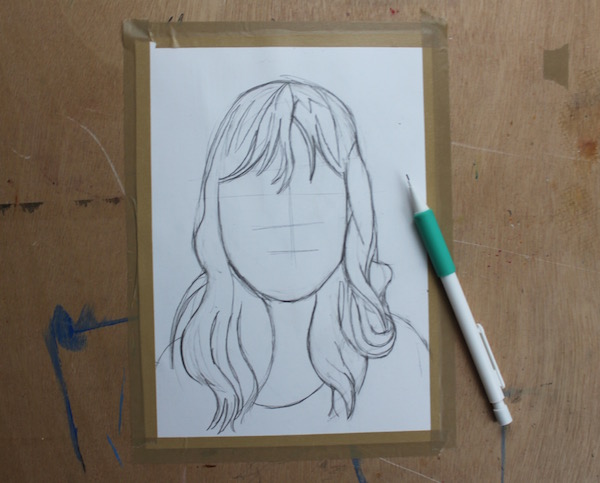
Before putting paint to paper, I always work out a detailed pencil sketch. That way, I’m able to get the proportions and sizing correct. Don’t worry about painting over it — the acrylic pigment should cover the pencil marks without a problem.
I used my sketch as a map to identify the “shapes” or sections I saw in my reference photo, which were made thanks to the highlights and shadows.
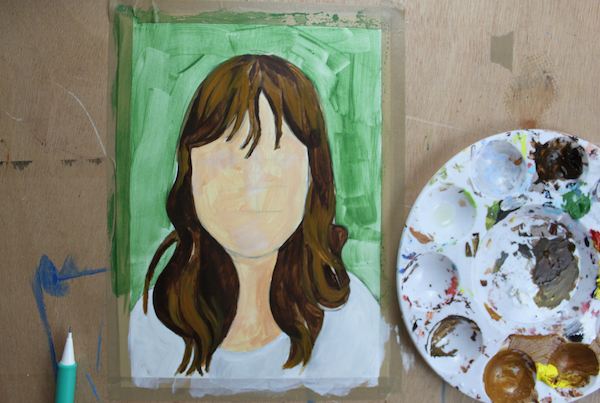
Step 2: Paint your first layer of color
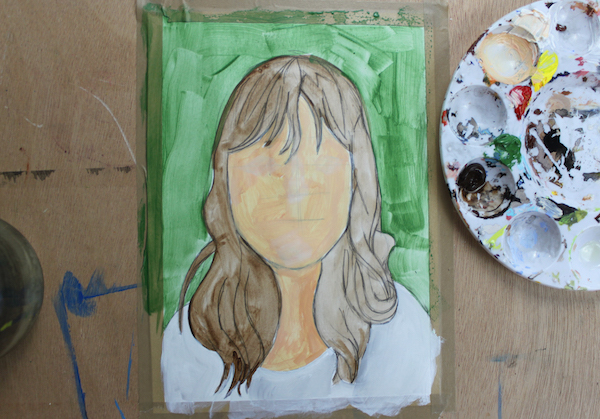
I like painting in layers. Not only does it help you get a richer color base, but it’s more forgiving if you paint the wrong color or need to adjust something.
I began by thinning my burnt umber pigment and applying it to the entire head of hair. Then, I painted the background, clothing and skin for context.
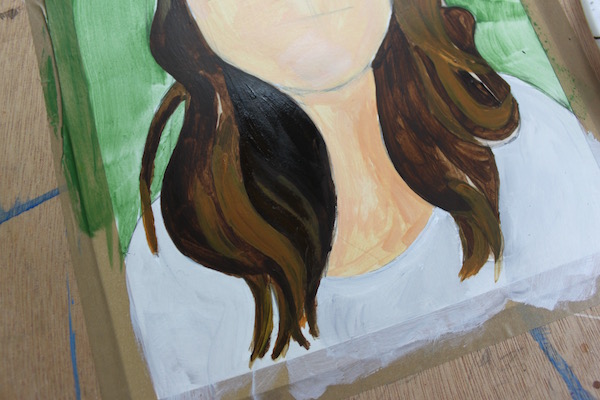
Step 3: Begin shading
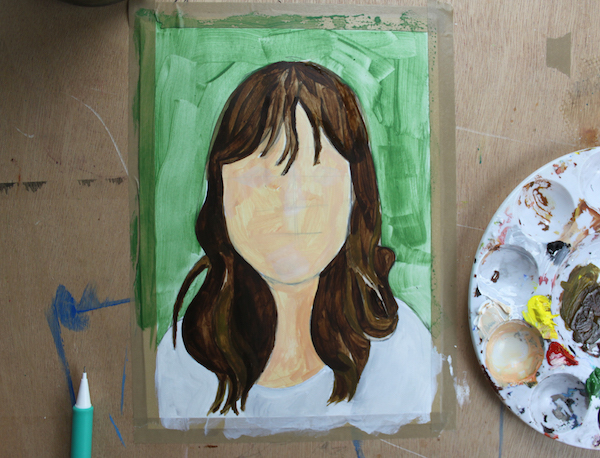
Take a look at your reference photo and find the dark and light areas. Then, use a medium-shade pigment to layer the color into areas where the hair appears darker, like around the neck, ears and top of the head. If you made a detailed sketch, these sections should already be on your canvas. Just fill them in with more color!
Use this to start building form and give the hair structure. My particular hairstyle is wavy in parts, so adding these shaded portions imply their volume.
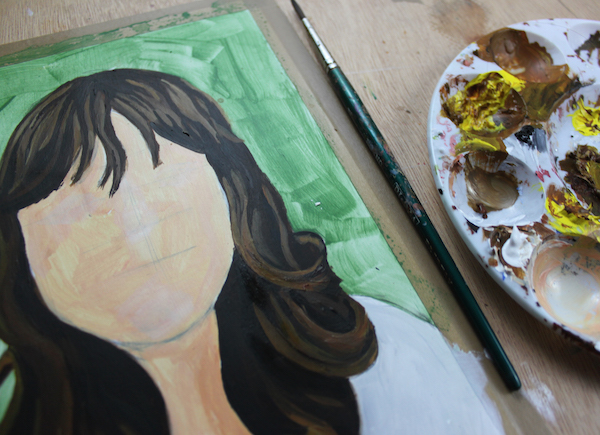
Step 4: Add highlights
Once you have shaded the right areas, add lighter colors and highlights. Be sure to look at your reference photo to find these. In my painting, it’s the bangs and tips of the hair. By including these pigments — mostly made of yellow and burnt sienna — you continue building form.
The highlights will be the first thing to catch a viewer’s eye, and they’ll demonstrate the texture of the hair — so make sure you paint the highlights accordingly. If you have a curl or wave, have the pigment mimic the direction and shape of the curl itself.
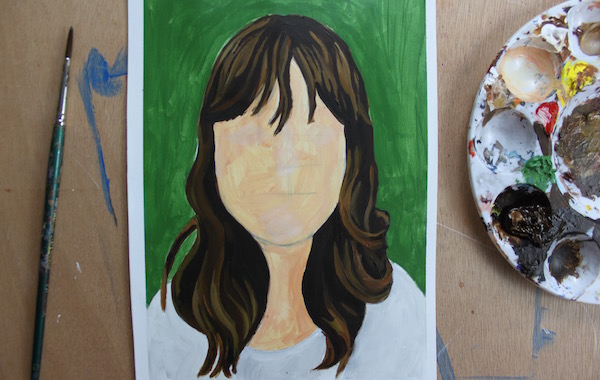
Step 5: Refine shadows and highlights
After you’ve painted your shadows and highlights, they will probably need some refinement so that the various hues look like one cohesive head of hair. Do this by adding medium-toned colors to bridge the hues between light and dark, painting small lines.
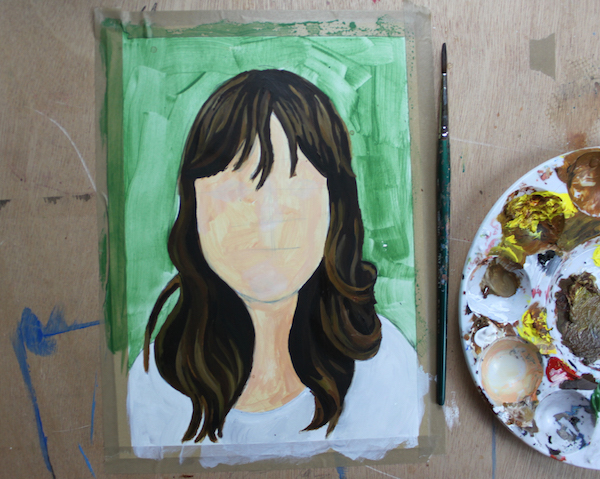
Tip: When we look at someone’s hair, we very rarely see individual strands. Instead, we see sections of hair. Use a liner brush to draw a few delicate lines indicating these groups.
Paint better portraits!
Join this online video course to mix, blend and paint true-to-life skin tones for more realistic portraits.
Share tips, start a discussion or ask one of our experts or other students a question.
No Responses to “Unlock Luscious Locks: Learn How to Paint Hair Step by Step”