
Painting eyes can look deceptively difficult. After all, there are a number of fine details in the iris and pupil such as fractured light and speckles of brilliant color. But, worry not. This easy process will help you to realistically paint eyes.
Follow these tips on how to paint eyes using acrylic paint!
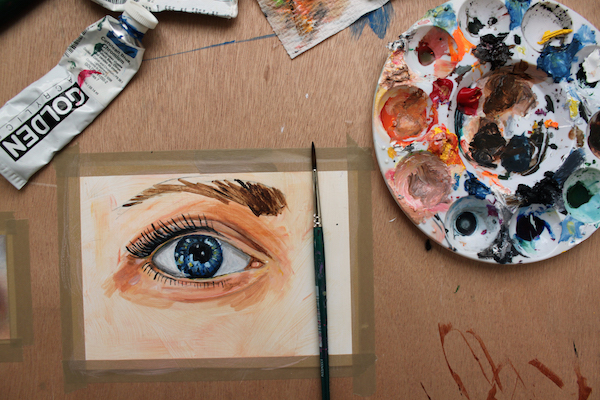
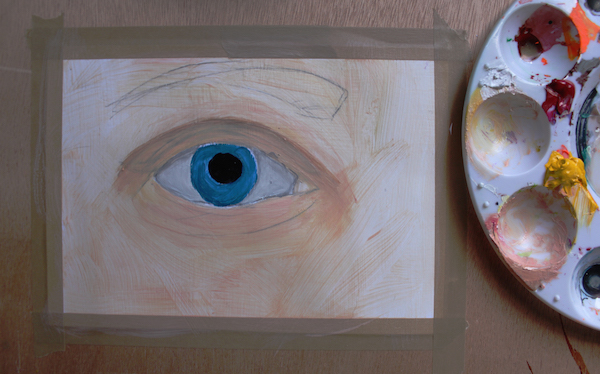
Before you begin, round up some of your favorite painting supplies. I gessoed a sheet of paper and grabbed several paintbrushes as well as tubes of red, yellow, white, blue, burnt sienna and black paint. And, of course, the all-important paint palette.
1. Draw the eye
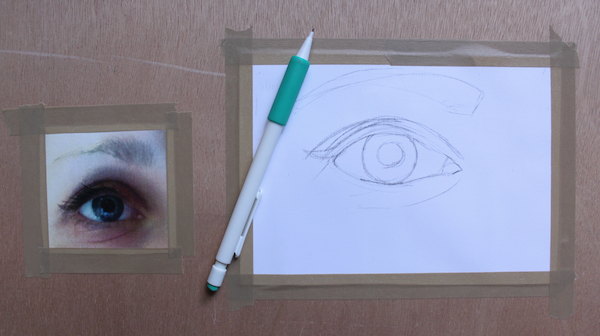
I decided that it was easiest to draw my own eye for this exercise, but if you want to gaze into someone else’s, feel free. I snapped a photo of my eye from up close and printed it out for reference. If you want a challenge, though, skip the photo and just look straight into the mirror!
Using a pencil, I drew the outline of my eyeball, the pupil and iris, plus my eyebrow and lines under and above my eyes. Don’t forget to include those details — they’re defining features!
2. Paint around the eye
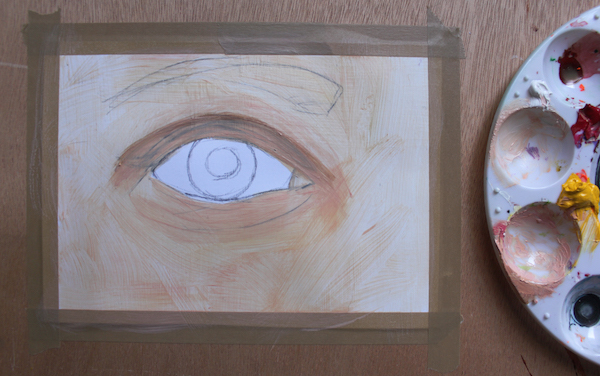
Before you begin painting inside of the eye, paint around it. Mix the appropriate skin tone (keep it a medium shade — not too light or dark), and brush it across your surface. Then, mix a shade and apply it to the crease in above the eye. Afterwards, add highlights to the lid below the crease and blend it with the shadow.
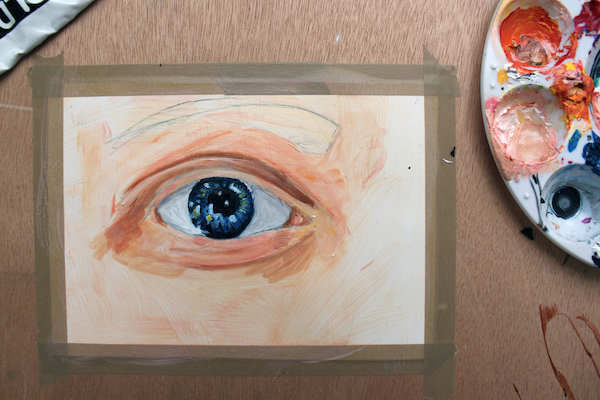
3. The gray of the eye
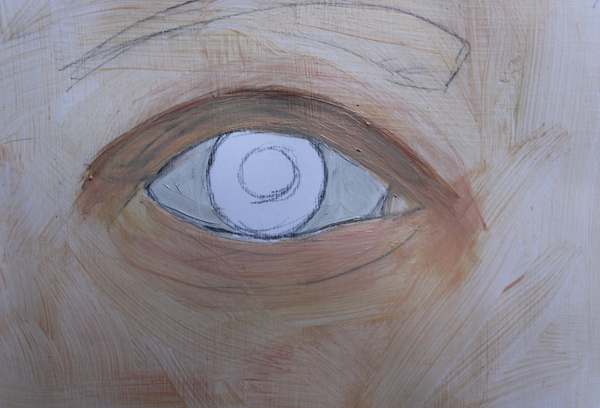
You might have the inclination that the eyeball is white, but it actually appears gray to us. It’s in a shadow thanks to the lid, our forehead and eye cavity. So, it only makes sense that we paint the eyeballs a light gray! The centers will be the lightest (think of a sphere shape) while the tops and bottoms will be slightly in shadows.
4. Paint the iris and pupil
This is the part that most people think of “the eye.” The iris can be a visually striking color, and depending on lighting, pupils can be big or small.
Block in the color of the iris and pupil with a flat, medium-toned color.
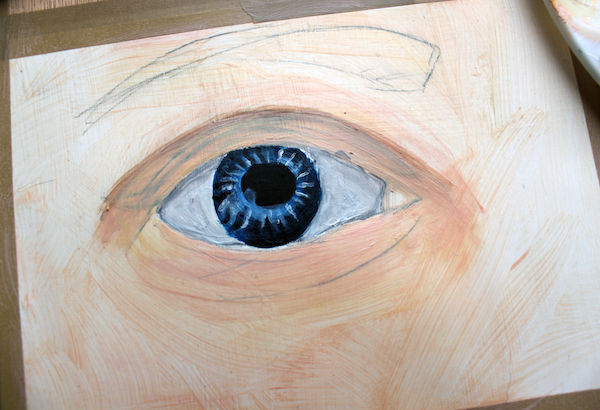
Now, darken the edges of the iris and right around the pupil. Notice how it already feels more realistic?
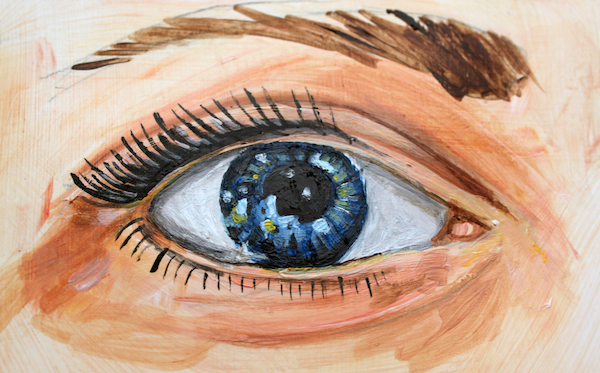
If you look closely at your eye, I bet you’ll find a lot of beautiful details and multifaceted color. You might see tiny, radiating lines around your iris, and that’s what we’re going to mimic here. I used a darker blue pigment and made squiggle marks all around. Afterward, I added lighter-colored squiggle marks. Remember, when you paint these, don’t make straight lines. Since we’re trying to express a spherical shape, it makes sense to have lines that follow the form.

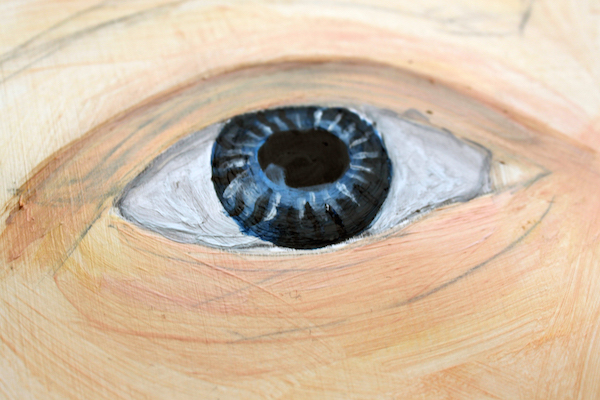
Here’s where you’ll really want to look to your reference so to accurately capture the light. Depending on your surroundings, your eyes might have different flecks of color reflected into them. And, like in my painting, you can see that edges of the pupil and iris were distorted thanks to highlights. Add the highlights and marks wherever you see them. This is what will help make your painting look the most realistic. Don’t be afraid to add hints of yellow and red!
5. Creating graceful eyelashes
Everyone has different lengths and amount of eyelashes. Some people (like me) might be wearing eyeliner and mascara. Either way, you’ll want to use a liner brush (if you have one) to paint the eyelashes. Look closely at how the top lashes arc. Starting with the edge of the eye, mimic swoop and length of the lash in one fluid motion. Move from the outside and towards the inside of the eye when they look shorter and less pronounced.
The bottom eyelashes will be shorter and thinner. Remember, there’s a small area of skin between the eyeball and those lashes, so there will be space between the bottom of the eye and its lashes.
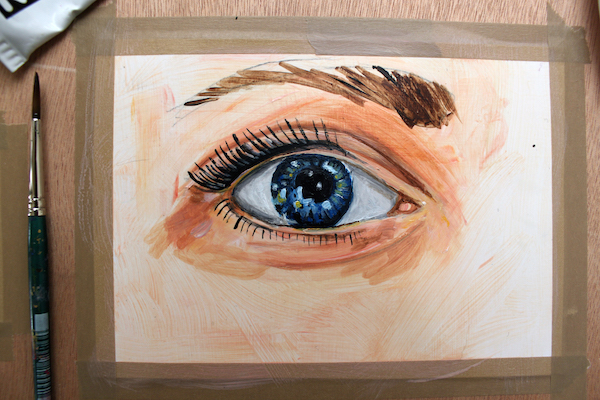
Add highlights (thin, light-colored) lines in-between the lashes so that they don’t look like one uncomfortable mass.
6. Finishing touches
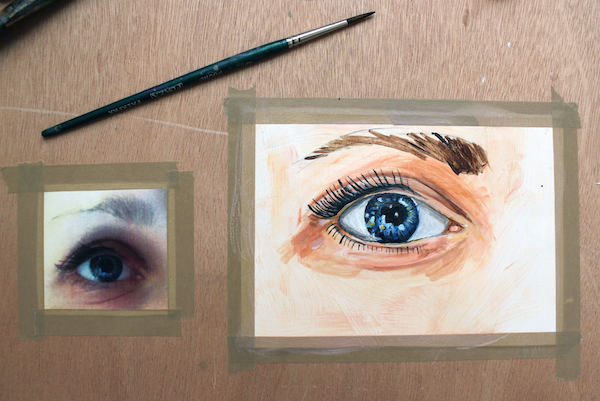
Once you’ve finished painting the eyelashes, the hard part is over. Now, it’s just going back and refining your painting. Glance at your reference. What areas need to be darkened? Often, it’s the top and bottom of the eyeballs and the creases around the eyes. If you’ve included eyebrows in the painting, now is the time to paint those, too.
Good content.
<strong> Nice job
Thanks for the tips. However I want to know how to paint the eye of a person with a darker skin tone