
Summertime is synonymous with a day at the beach but don’t forget your sketchbook — there are great life sketching opportunities there while getting your fill of sea breezes and sunshine!
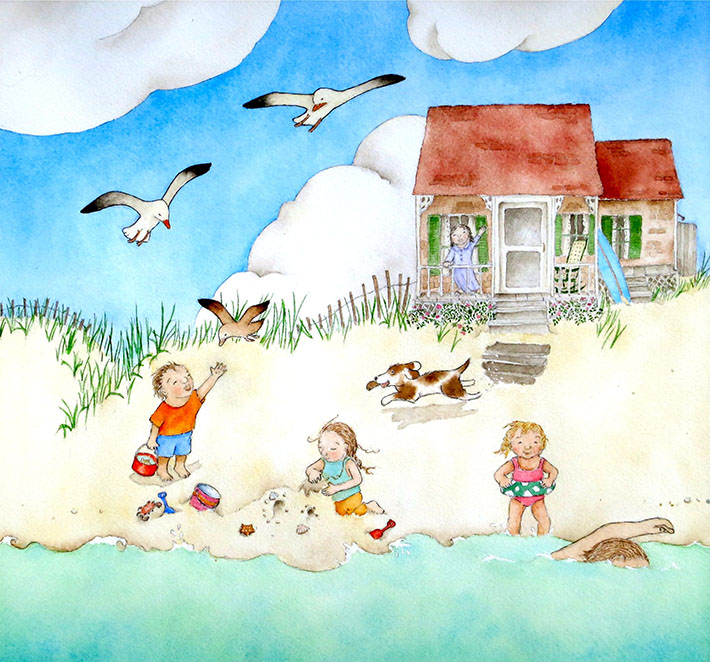
If you always wanted learn how to paint a beach scene, here are some pointers to help you with creating small details that will make your artwork come to life.
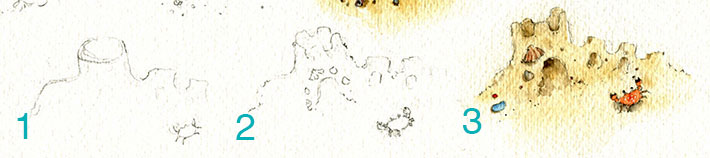
Sandcastle
Step 1:
Draw a simple outline of the sandcastle you are going to use.
Step 2:
Now detail your sandcastle by adding a doorway, windows and some other castle like features. Try to make some of the edges rough so it looks like sand.
Seashells, pebbles other treasures you can hunt for along the shoreline make great ornaments for your sandcastle.
Step 3:
Make a nice “sand” shade with your watercolors (my mix is cadmium yellow, yellow ochre and a tiny bit of vandyke brown, very watered down.
Give your castle a nice wash of this mix and while still wet, dab in a little more saturation here and there to make it uneven.
Next deepen the shaded areas like windows, doors and anywhere else shade may fall around your castle. My mix for the darker shading is sepia with vandyke brown.
Paint your shells/ornaments and shade around them too.
A nice last touch is to add some tiny dots with a sharp pencil randomly — this enhances the sandy effect.
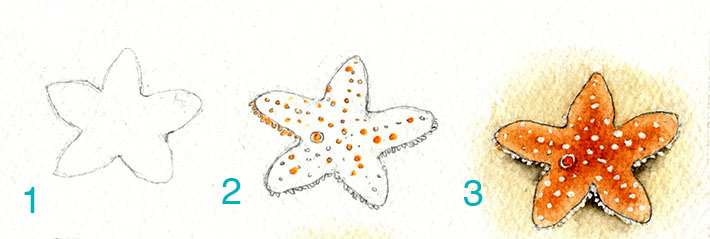
Starfish
Don’t you find it hard to not stop to look when you see a starfish? They are the ocean’s living stars and are simple to make a piece of art from as well.
Step 1:
Draw a puffy and rounded five-point star.
Step 2:
Pencil in the placement for the starfish’s little white spots. Draw a larger circle with a circle within for his eye.
Draw rice-shaped tentacles where they would be visible given the perspective of your sketch.
I have used masking fluid to cover the dots, eye and tentacles to keep these details free of paint color. It is not necessary because you can paint in any of these details after painting with gouache. However, the masking fluid will make this faster.
Step 3:
Paint the starfish one shade (burnt sienna with some cadmium orange) and while still wet, deepen the shade in the center area.
Paint the center circle of the eye red.
When dry, remove the masking medium and shade under the starfish.
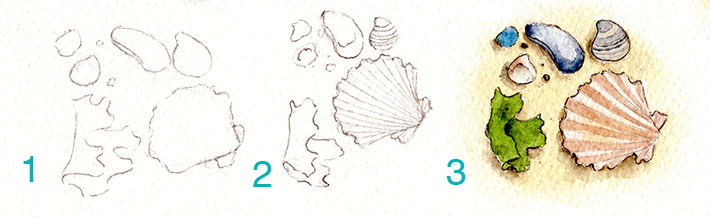
Seashells
Step 1:
Draw the outline first. Each variety of shell comes with its own specific shaping and is good practice for artists.
Step 2:
Add the details of the shell(s) and start to think of how to paint each shell.
Step 3:
Paint each shell one at a time, paying attention to it’s colors and details. (I have added a piece of seaweed here just to add some color.)
When each shell is painted, take a little shading mix, dampen the area right to one side of each shell and dab in the mix. This creates some nice depth.
Pencil in a few sandy dots and you are finished.
Wave whitecap

This can be done very simply by just edging the top of a wave with white. But here is how to go a step further:
Step 1:
Draw a curvy line (mine unintentionally looks like looks like a seagull — but it works)!
Draw a hilly top to this and a few right-side-up tear drop shapes above this.
Step 2:
Add some masking medium to protect the splashes when you paint the sky and wave. You can opt to be careful with the paint and use white gouache and paint the whitecap after.
Step 3:
Paint the sky and the wave different hues. Deepen the color of the wave under the whitecap where it would be shadowed.
Remove the masking medium when the paper is completely dry. If you think you need more splashes, use some white gouache.
Pail and shovel
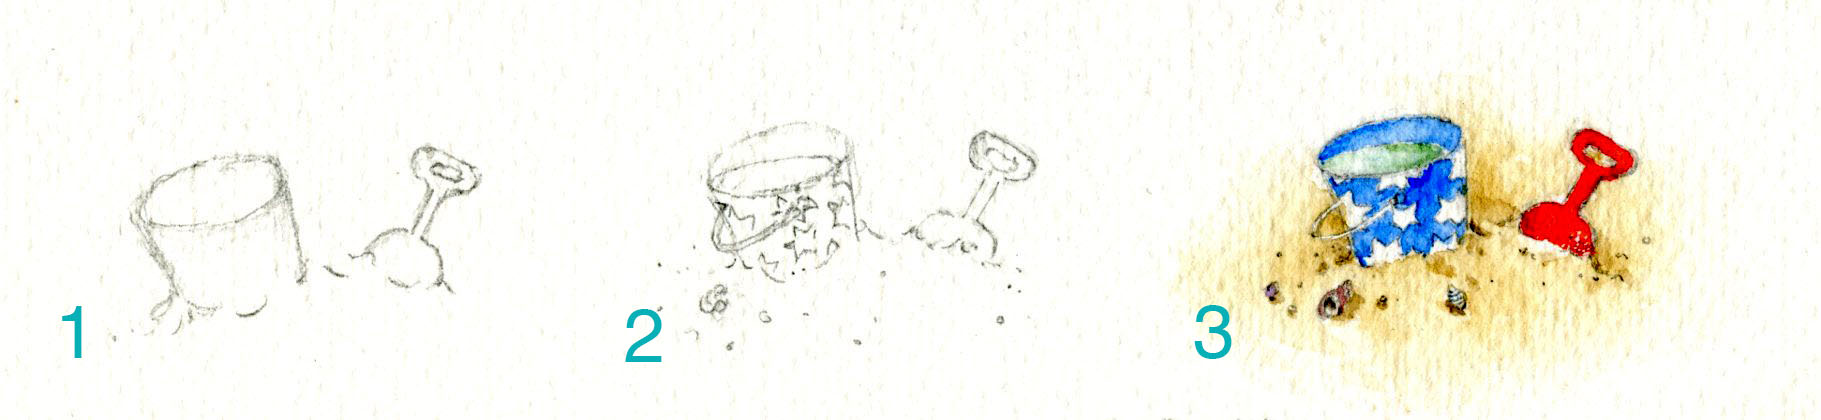
A beach classic! Who can resist a pail and shovel? This is probably one of the sweetest and easiest mini paintings to accomplish.
Step 1:
Draw the pail and shovel in the position you like best. For the bottom of each, just draw curvy lines that hug the objects. This is the effect of them being partially in the sand.
Step 2:
Add any details and tidy your sketch up for painting.
Step 3:
Paint the sand first, then the pail and shovel. Add some shading around all the objects. For the water in the pail, I wet all the water and then dabbed in a little blue-green on one side and let the color flow out.
What is your idea of the perfect beach scene painting?
Creating Realistic Waterscapes in Mixed Media

Gain the skills to create lifelike waterscapes in mixed media.Get My FREE Guide »
Share tips, start a discussion or ask one of our experts or other students a question.
No Responses to “A Day at the Shore: How to Paint a Beach Scene”