
Before we get started, let’s talk about a few tips for taking measurements.
- Always keep your tape measure level across your body.
- Make sure you’re not pulling the tape measure too tight, but also, be sure not to leave slack room between the tape measure and your body. You want to take your actual size — not leave extra room or squeeze your body for a smaller number.
- Wear minimal undergarments during the measuring process.
- You’ll get more accurate measurements if you’re standing naturally, with your arms down, and looking straight ahead in a normal body position. That’s why measuring is best done with friend to help.

Measure Yourself!
No friend around to help? Don’t worry — you can measure your own body with easy strategies from Linda Lee.
10 key measurements to take for fitting pants
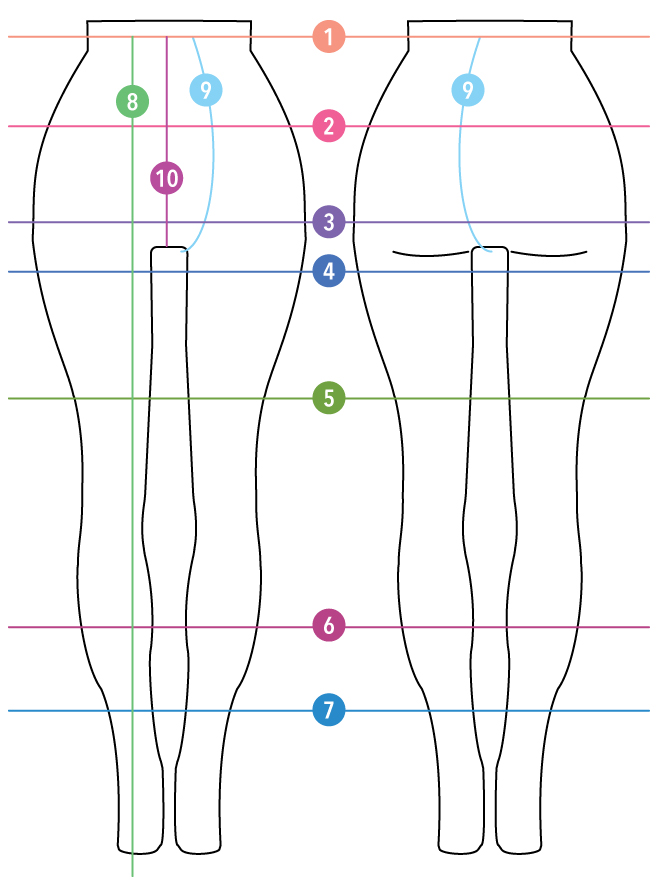
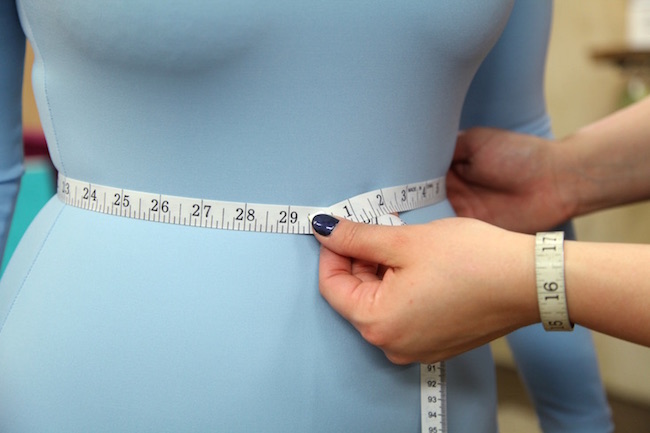
1. Waist
To find your waist measurement at the smallest point around your middle, bend to the side and see where you crease. If you have trouble finding that point, wrap a piece of elastic around your waist, and place it at the spot that feels comfortable. Wear it for a bit to ensure that it feels natural and use that point for your measurement.
Keep in mind that this is your “natural waist” measurement, but not necessarily where you intend to wear your pants. All pants sit at a different place along the waist, and you might want to also take a measurement at the spot that you intend to wear the pants to compare to the pattern later.
For the rest of this article, the waist refers to the point at which you intend to wear your pants.
2. High hip
The high hip is the point around your upper butt and across the fullest point of your lower belly. This is likely across the belly button on your body. After taking down that measurement, measure the distance from the waist to the high hip to compare to the pants later.
3. Full hip
The full hip is just above your crotch and below your belly button. Like with the high hip, also measure from the waist to this point for later reference.
4. Upper thigh
Immediately below the crotch, measure the circumference around your thigh. This will help you size the pants to your thighs for your desired fit.
5. Thigh
In the middle of the distance between your crotch and your knee, measure your thigh. Along with the upper thigh, you can use these numbers to blend between sizes if necessary.
6. Calf
Take your calf measurement around its fullest point. No matter what the rest of your body size, the calf can vary dramatically from body to body. Do not underestimate measuring this point to compare to your pants pattern. Much like the thighs, you can use this information to blend between bigger or smaller sizes if necessary.
7. Ankle
The ankle might seem like a weird place to measure, but if you’re making pants that are intended to be tightly fitted at the ankle, this is an important measurement to write down. Simply measure at the point where you want the pants to hit at the ankle.
8. Length
Measuring the length should be done from a couple of places on the body, and while wearing a few different kinds of footwear. First, measure the distance down the side of your body from the waist to the spot that you want the pants to end when hemmed. Second, measure from the crotch to the hem. Then, try on the intended shoes for the pants and see how they will fit with the length you’ve selected and adjust accordingly.
9. Crotch length.
The crotch length is the distance from your waist, under the crotch, up around the curve of your butt, and back up to the waist. It is hugely important to include any curves of the belly and butt into this measurement; otherwise, your pants will not fit.
10. Crotch depth
And lastly, measure the crotch depth, which is the distance from the waist to the crotch. Again, be sure to include any body fullness.
So now that you have all of this information, what are you supposed to do with it?
From here, go ahead and measure your pants pattern and compare the numbers. Then, you can decide if you need to adjust.
Waist & hip
For spots that go around the body, like the waist and hip, you can measure across the pattern to compare your body to the pattern. Be sure to subtract any seam allowances!
Legs
For the legs, including the thigh, calf and ankle, measure the pants at those same points, subtract seam allowance, and decide if you need to blend between sizes. On basic pants, this is an easy blending alteration, simply smoothing out from one pattern size to the next. Ideally you do not want to blend more than 2-3 sizes.
Crotch
To measure the crotch, turn the tape measure on its side and lay it on the crotch curve of the pattern to compare to your measurement. Again, take out seam allowances to see if you need to raise or lower the crotch curve or waist to fit your body.
Length
And lastly, measure all the length points you took down and shorten or lengthen the pattern as needed. Then of course, sew up a muslin to check the fit!
Measure Yourself!
No friend around to help? Don’t worry — you can measure your own body with easy strategies from Linda Lee.
Share tips, start a discussion or ask one of our experts or other students a question.
No Responses to “How to Measure Your Body for Pants That Fit Perfectly”