
Paper flowers are timeless, beautiful and available in a variety of colors, sizes and styles, but they can also be quite expensive to purchase. With the use of dies, punches, patterns and/or ink, you can easily make your own paper flowers.
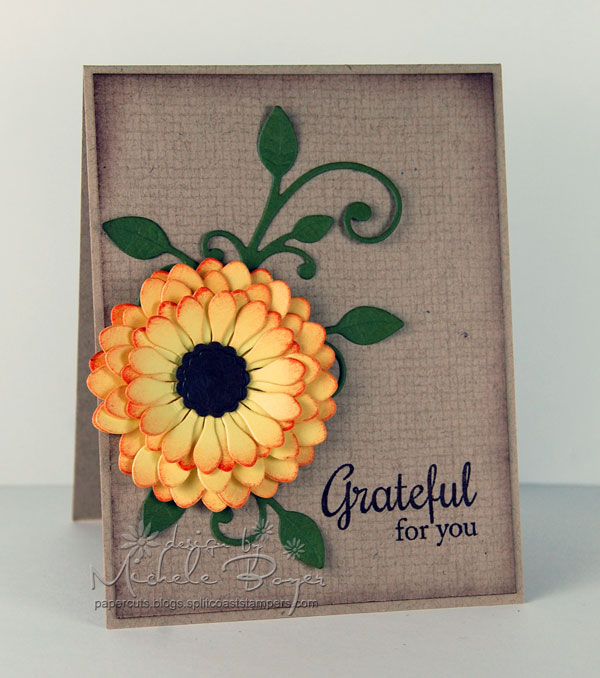
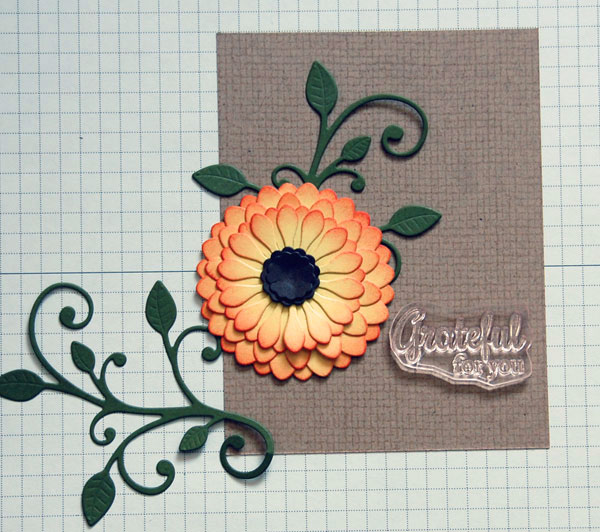
With the season of thanks upon us, I have created a Thank You card embellished with warm golden petals and graceful leaves. Below I’ll show you, step-by-step, how to make paper flowers and re-create this look yourself.
How to make paper flowers
Supplies you’ll need:

- Yellow, green and brown card stock
- Orange dye ink
- Inking tool
- Flower and leaf dies
- Die-cutting machine
- Quilling tool
- Small foam mat
- Scrap Paper
- Adhesive
Step 1:
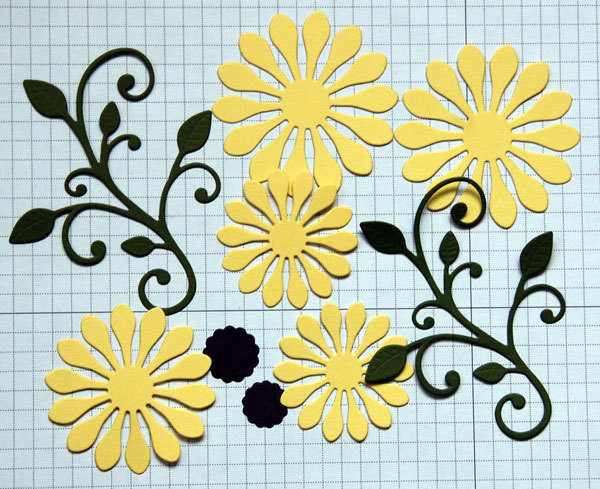
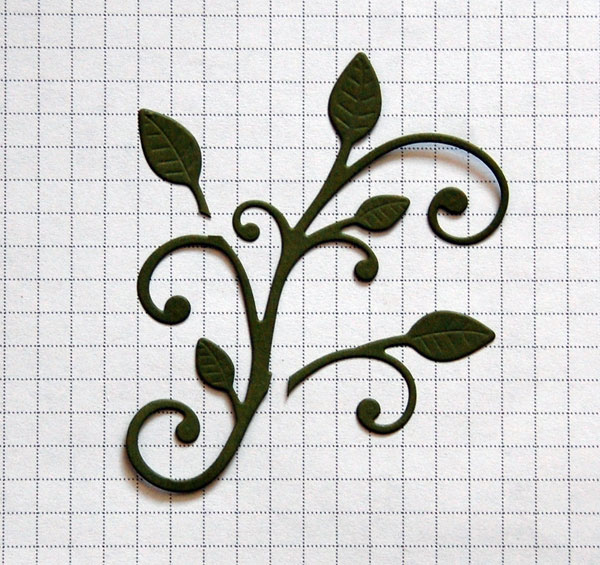
From yellow card stock, die-cut three large flowers, one medium and two small. Cut two leaf flourishes from green card stock and a medium and small flower center from brown card stock. When removing pieces from the dies, take care not to bend the flowers or stems.
If you don’t have dies, hand-cut or punched flower shapes and leaves will work just as well.
Step 2:
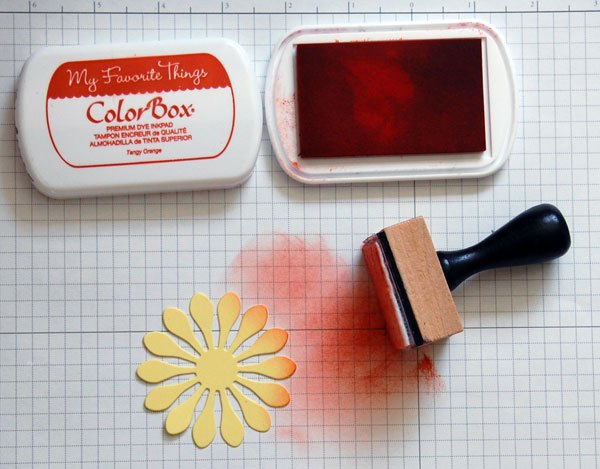
Inking the edges of each petal creates a more realistic appearance and adds definition between the petal layers. To ink the petal edges, begin by applying ink to an inking tool. Move inking tool in small, circular motions, beginning on scrap paper and slowly moving toward the flower. By using this method, you can better control the amount of ink that is applied and you will create a softer blend of color toward the flower center. Once desired amount of ink is applied, turn flower and repeat to ink all outer edges.
Step 3:
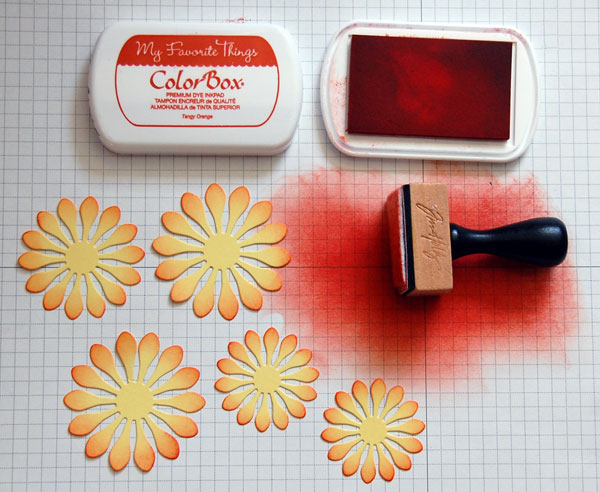
Repeat inking process until all flower petals are inked.
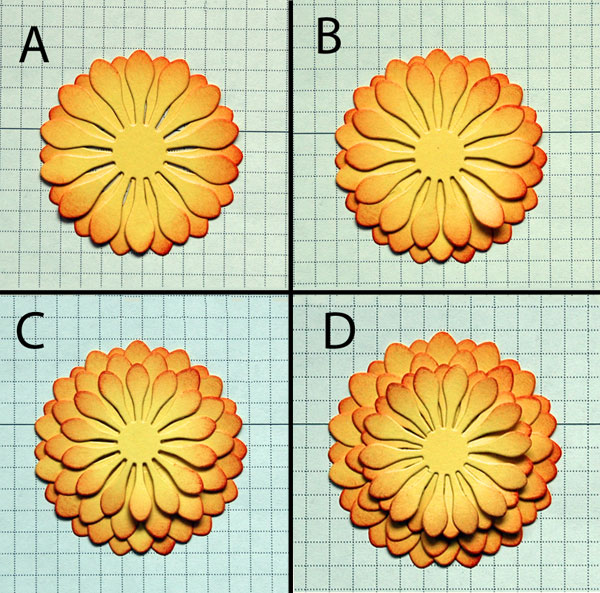
Step 4:
To build the flower, layer and adhere second large piece over the first (A), staggering the petals to cover any open space. Continuing to stagger petals, layer medium-sized flower over large flowers (B). Continue to build by layering the remaining two smaller flowers over the larger ones (C and D).
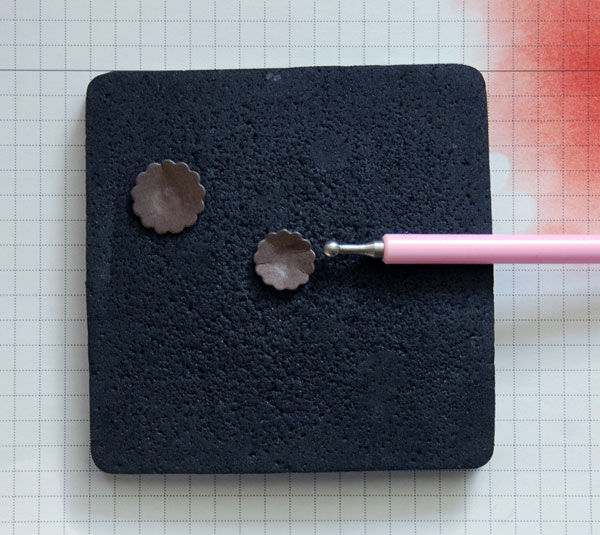
Step 5:
Using a foam mat and the ball end of a quilling tool, place ball into the middle of a brown flower center piece. Apply pressure while moving the tool in a circular motion until the piece begins to form a cup shape. Repeat for remaining piece.
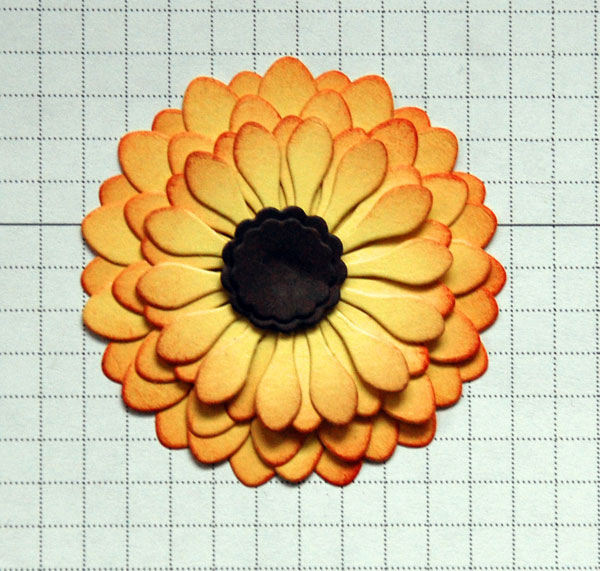
Step 6:
Adhere brown pieces to the center of the flower, layering the small piece on top of the larger piece.
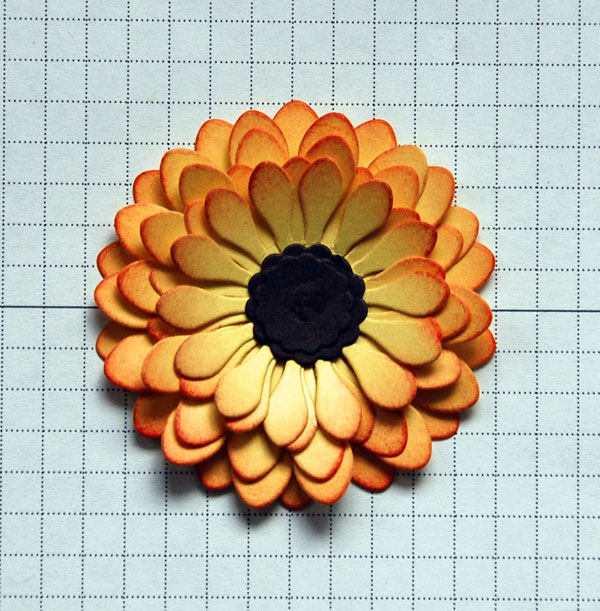
Step 7:
Holding the flower center firmly onto surface with one hand, use fingers on other hand to “fluff” the petals. I place my fingers beneath all petals in one area and repeatedly “fan” upward until I have the desired amount of dimension. Continue around flower until all petals are “fluffed.” If desired, small pieces of adhesive could be placed between petals to help retain dimension.
Step 8:
Lay the flower and leaves on card stock to determine placement of pieces. Don’t forget to include your sentiment in the layout to ensure there is enough room after adhering your pieces.
Step 9:
Snip away stems of the second flourish to place below the flower. The remaining pieces can be saved for another use, if desired.
I finished my card by stamping a burlap background onto kraft card stock and lightly inking the edges to create definition between the embellished layer and card base.
This is a lovely card anyone could use. Thanks!