
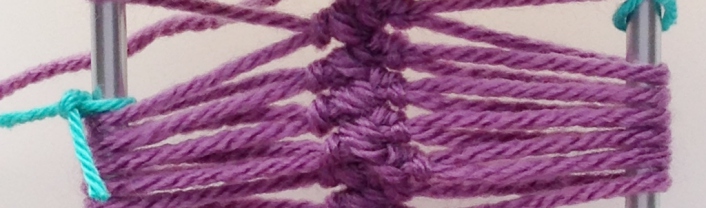
Hairpin lace is a crochet technique similar to broomstick lace, but it’s done between two metal prongs rather than over a broomstick handle. It was originally made on large U-shaped hairpins with thin cotton to create delicate, intricate crochet lace. Today, we use commercial hairpin lace looms and different weights of yarn for garments, headbands, belts, purse handles and more.
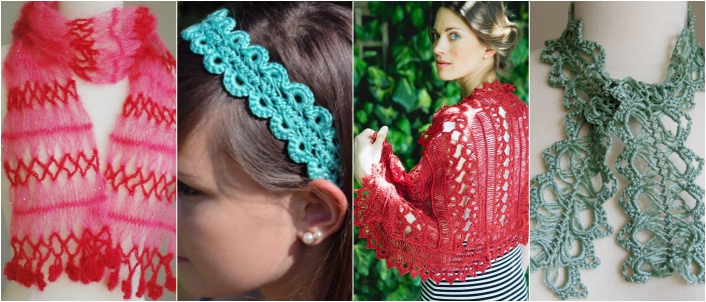
You can make beautiful items with hairpin lace. Photos via Birgit Tüchsen of By Number 19
These gorgeous hairpin lace projects are by Birgit Tüchsen of the lovely and popular blog By Number 19. The headband and the scarf on the right were created using just one strand of hairpin lace, while the more complex scarf on the left and the beautiful stole were made by joining several strips of hairpin lace together.
I have only just started my adventures with hairpin lace, but it really is true that it looks a lot more complicated than it actually is. I learned very quickly, and getting comfortable with the technique has given me heaps of design ideas.
This tutorial is just a starting point to show you how to create a strip of hairpin lace. It’s almost the crochet equivalent to learning how to make a granny square! Once you know the basics, you can go on to explore different yarns, stitches and ways of joining your strips.
What you’ll need
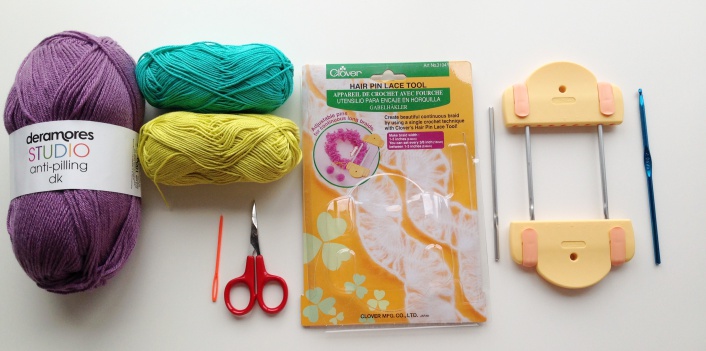
- A hairpin lace loom. The one I used is a two-clip hairpin loom by Clover and retails for about $25 to $30. It’s compact, sturdy and has an genius system for making long lengths of lace. You can also buy a cheaper loom that just has two prongs and two simple longer bars. Or you can make your own loom using knitting needles and cardboard tubes!
- Yarn. I used a quality light worsted weight acrylic yarn. You will also need two contrasting colors of a 4-ply cotton for your extender threads.
- Crochet hook. The size depends on the yarn weight, but generally I would use a half size or even a full size larger than you would normally use. I used a size G (4mm) hook.
- Scissors and a darning needle
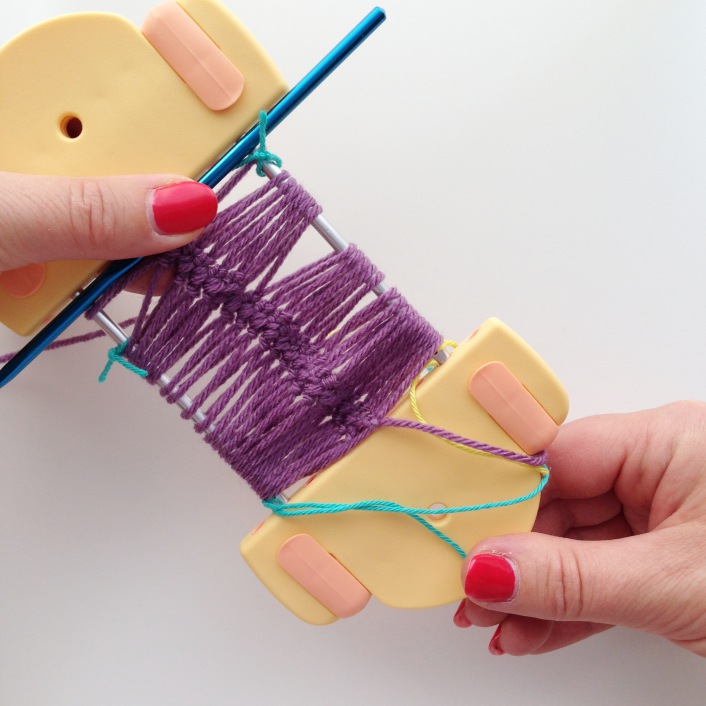
Preparing your hairpin lace loom
The easiest loom to use has clips at the top and bottom, but you’ll mostly work without the top clip. Squeeze the clips to open and insert the prongs in the small circular sockets. When you release the clip, the prongs will be secure.
The clips have numbered marks so that you can set the prongs evenly. The prongs’ eyelets should be at the bottom.
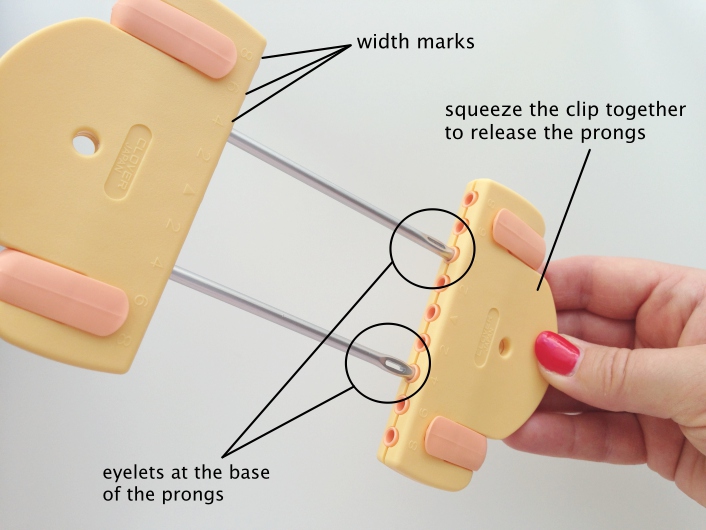
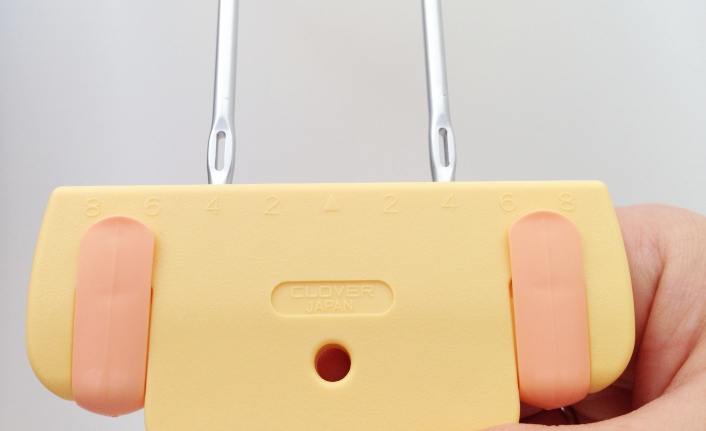
Put the prongs in at an even distance — the loom here is set with the prongs 4 cm apart, at the No. 4 marker. To make your hairpin lace slightly wider, move the prongs out to a higher numbered marker.
The eyelets in the prongs are a great design feature of this loom because they allow you to extend your work onto thread. You need to attach this before you start making lace.
Attaching extender thread to your loom
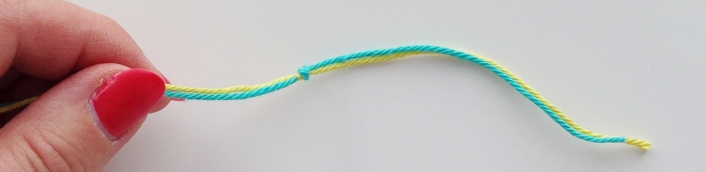
Cut two lengths of cotton thread about 36″ long. You will see later why they should be different colors! Tie each one through an eyelet using a double knot.
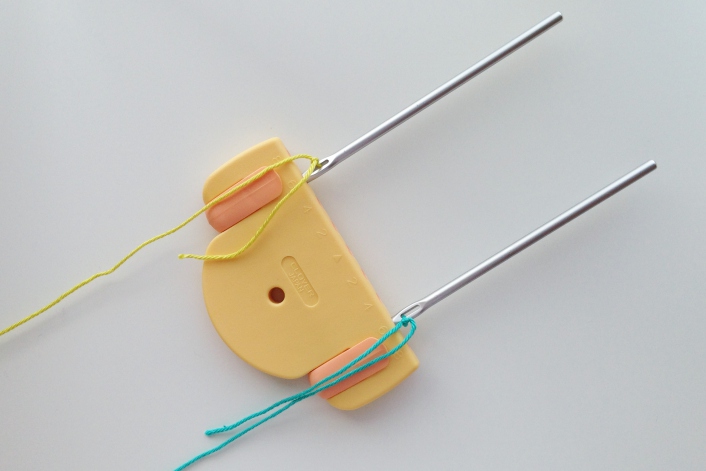
Tie the other ends of the extender threads together using a simple knot. This will prevent your long length of hairpin lace falling off the ends.
Making hairpin lace
Step 1:
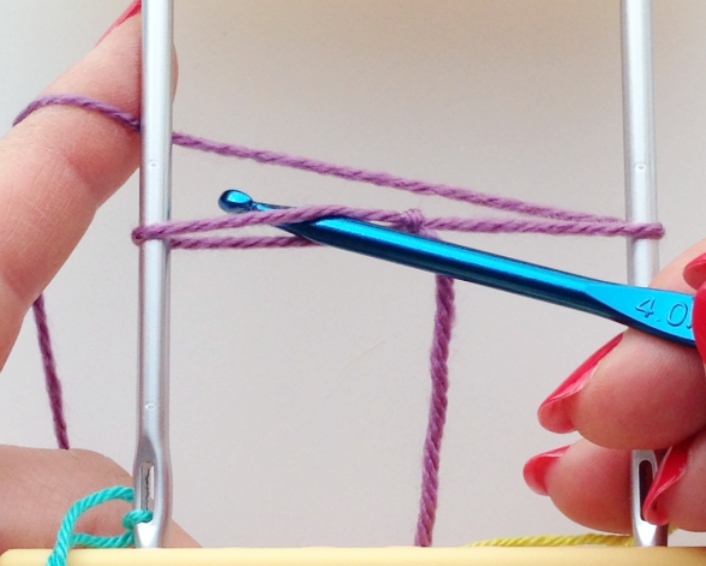
Make a slip knot in your yarn, as you would to begin crocheting. Loop it over the right-hand prong of the loom. The tail end should hang loosely in front, and your working yarn should be behind the left-hand prong. Hold the working yarn as if you were crocheting normally so that it has an even tension.
The knot of the slip knot should lie in the center of the prongs at all times. As you work, your crochet stitches should all be made on this midline.

Step 2:
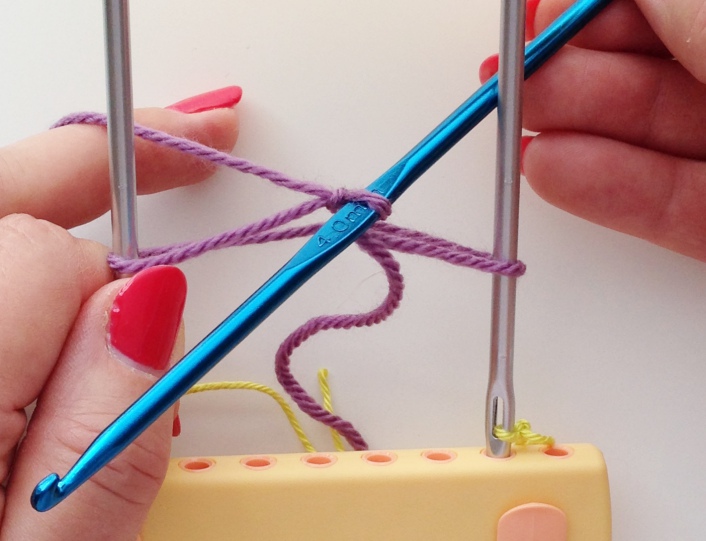
Turn the entire loom counter-clockwise 180 degrees so that it is facing the other way.
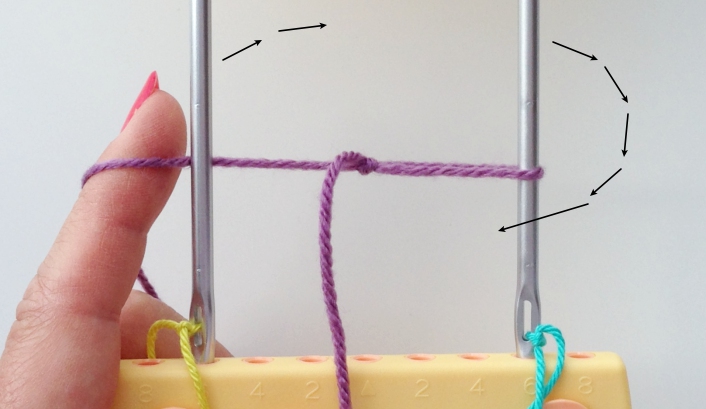
The working yarn on the back left in the photo above will come around the prong so that it will again be on the left, behind the prong with your slip knot. The slip knot should still be between the prongs, and the working yarn should be above the loop of the slip knot.
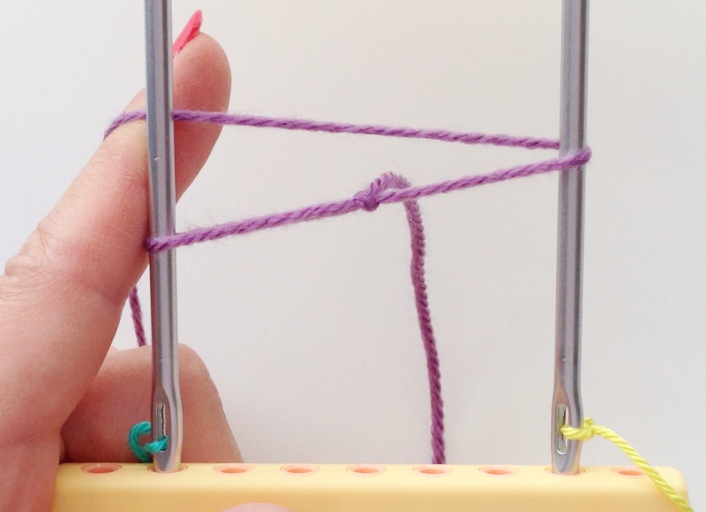
Step 3:
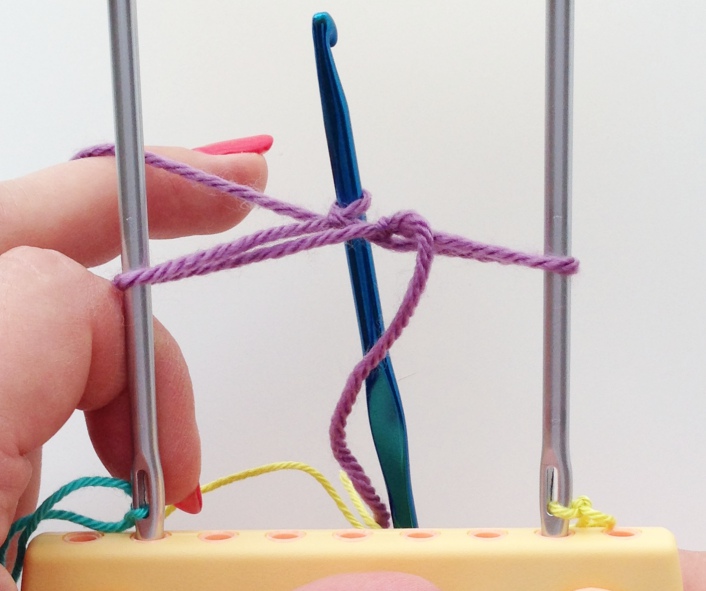
Insert your crochet hook through the loop on the left. The hook should pass under the front loop and up in front of the back loop.
The next few steps are a basic single crochet stitch:
- Put the working yarn around your hook (yarn over).
- Pull up a loop through the loop on the loom.
- Yarn over again.
- Pull yarn through so you have one loop on your hook.
You might need to hold the tail end or even the slip knot at this point. It is fiddly, but the later stitches get easier. The stitch you have made should be in the center of the prongs.

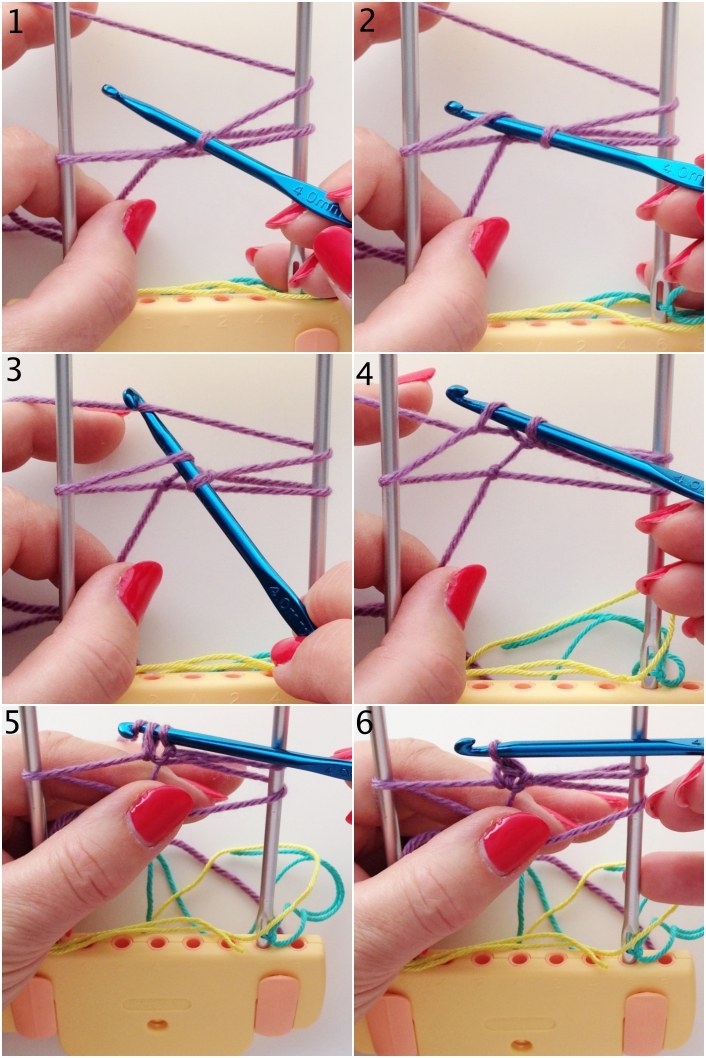
Step 4:
Now, you’ll need to move your hook to the opposite side of the loom. Point your crochet hook downward. Slide the loop on the hook along the shaft so that you can flip the hook behind the prong on the right. Just pass the end of the hook over the prong.
Then, keeping hold of the shaft and sliding the working loop toward the hook, allow the hook to lie vertically at the back of the loom.
Step 5:
Rotate the loom again, moving it clockwise 180 degrees so that your hook is in the front. Make sure you are working in the center of the prongs. You’ll make another single crochet stitch.
- Insert the hook through the loop on the left of the loom, going up through between the front loop and the back.
- Yarn over.
- Pull the yarn through. You will have two loops on your hook.
- Yarn over.
- Pull the yarn through both loops on your hook. Your SC is complete!
Starting out and getting the hang of holding the loom is tricky at first, but that is all there is to it! To make more hairpin lace, simply repeat Steps 4 and 5 as many times as you like.
If you have a larger, simpler loom, make your lace with the top bar in place to keep the prongs stable. Just pass the hook through between the prongs each time.
Counting your loops.
When following a pattern, the instructions will probably tell you to make a definite number of loops. If the pattern says 200 loops, for example, that means you should have 200 loops on both the right and left prongs — not 100 on each.
To keep count, use a spare piece of contrasting yarn as a stitch marker. Just tie a small piece around the prong after you have completed 20, 30, 40 loops — whatever number suits you or the pattern.
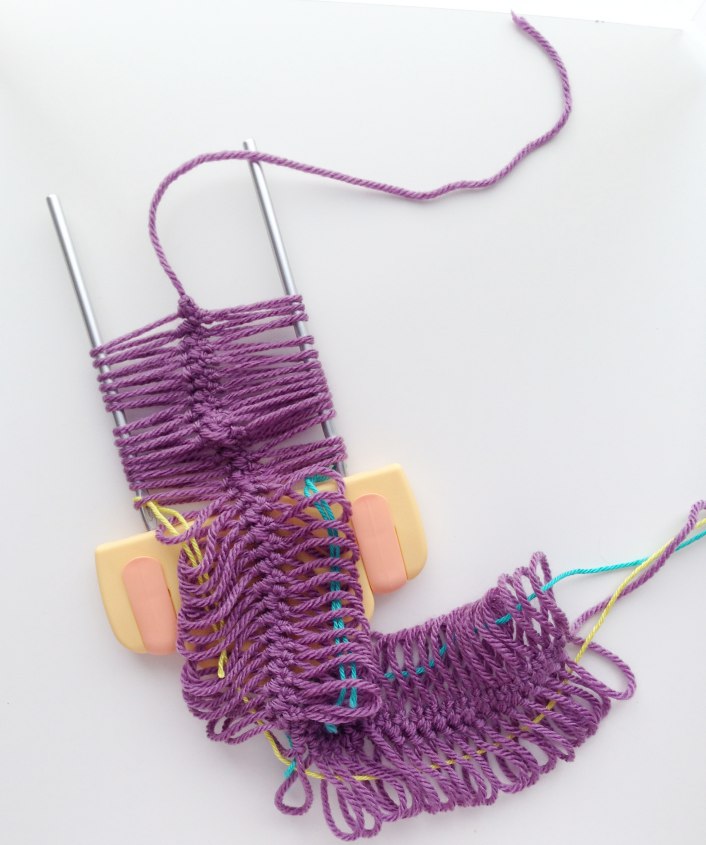
What happens when the hairpin lace loom is full?
Even though hairpin lace looms often look small, eyelets on the prongs let you extend your hairpin lace an unlimited amount. With a few simple steps, you can let your hairpin lace onto your extender threads, giving you more room to continue creating the hairpin lace.
Step 1:
Put the top clip in place on the prongs. If you skip this part, your work could fall out when you take off the bottom clip.
Keep your working loop on the crochet hook, but move the yarn to the center of the hook and hold the hook horizontally and securely next to the top clip. Remove the bottom clip.
Step 2:
Gently ease the lower part of the hairpin lace over the eyelets and off the prongs. The extender threads will hold your lace and prevent tangling as you continue with your lace.
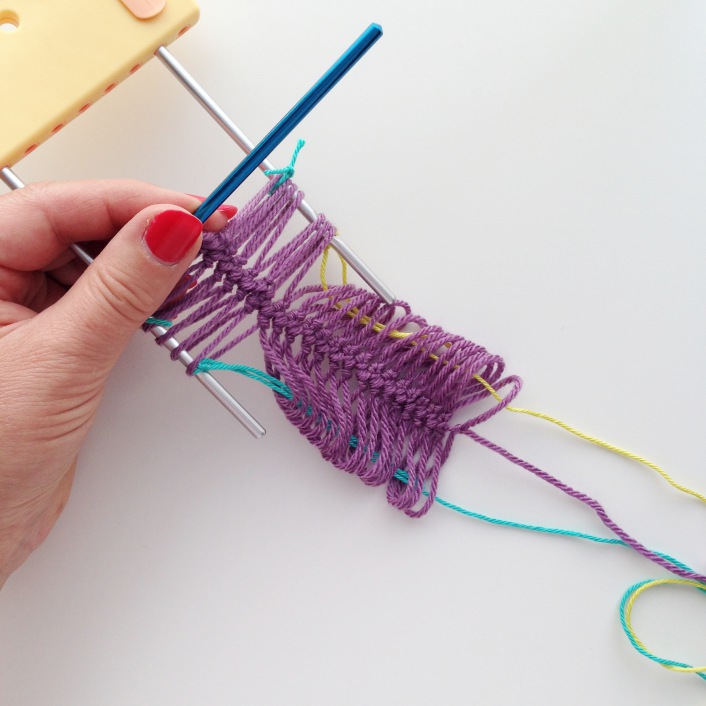
Step 3:
This feels scary the first time, but everything will be OK! Allow the lace on the extender threads to drop loosely onto a table or surface. Replace the bottom clip, taking care not to trap any lace. Leave about six loops on each side of the loom before replacing the bottom clip.
You can now remove the top clip and make more hairpin lace.
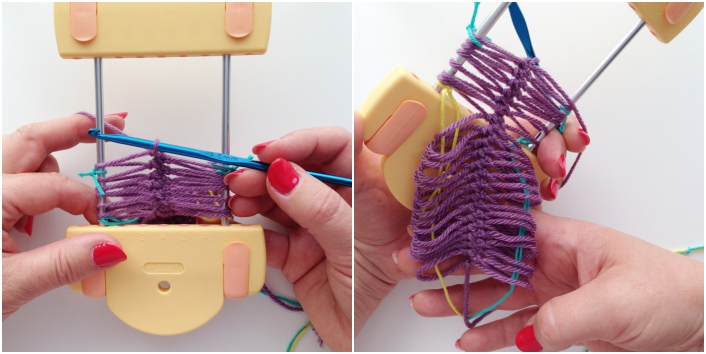
Taking your finished hairpin lace off the loom
When you’ve completed all the loops you need, you can do a simple bind- off by making a chain after your last sc, cutting the yarn and pulling it through the chain stitch. You’ll weave it in eventually, but you can just leave it for now.
Remove the finished hairpin lace the same way you did when the loom filled up: clip on the top and remove the bottom clip. Ease the hairpin lace completely onto the extender threads.
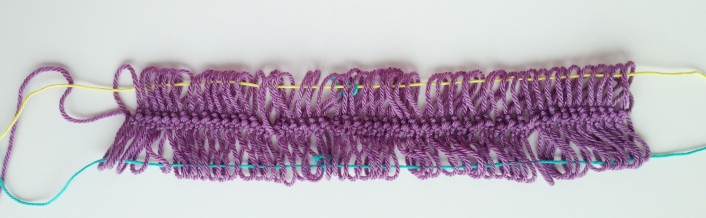
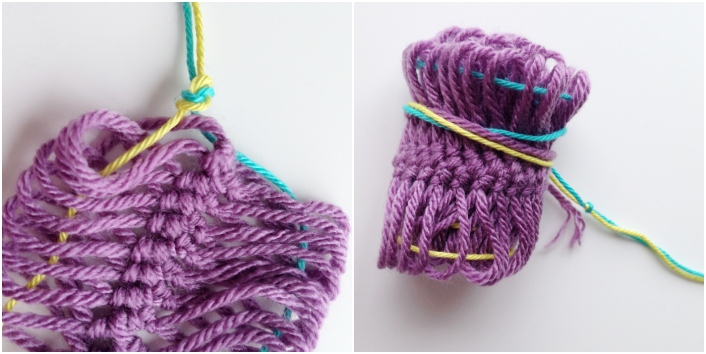
To save your hairpin lace for later — like if you plan to combine several pieces — cut the extender threads from the loom, tie them in a knot and then roll up the lace. Storing them rolled and tied makes knots much less likely.
This is where the different color of extender thread is very helpful. You can easily see the contrasting color and pull them out when you’re ready.
More than just lengths of lace
The very talented blogger Heidi Hengel from Hello Speckless has used short strips of hairpin lace joined together to form a circle as the basis of her beautiful lace motifs. Don’t they look fantastic in this blanket?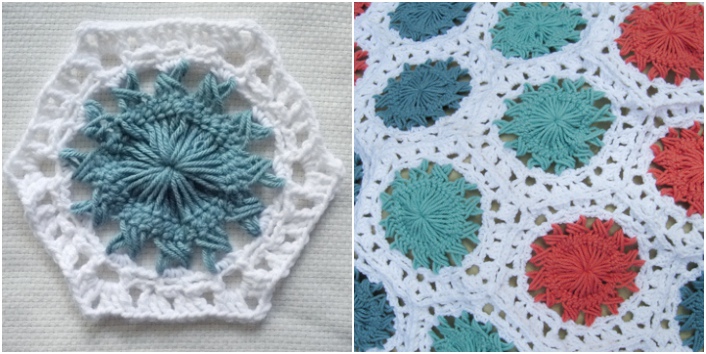
Hairpin lace hexagon motif and hexagon blanket by Heidi Hengel of Hello Speckless.
Share tips, start a discussion or ask one of our experts or other students a question.
No Responses to “Have You Heard of This Unusual Crochet Technique?”