
Digestive biscuits might sound more like medicine than a tasty treat. But stay with us because these lightly sweet cookies really are quite nice. Plus, making digestive biscuits at home is extremely easy and is a fun little baking adventure.
Photos via CakeSpy
Recipe Notes
What are digestive biscuits?
Before you learn how to make digestive biscuits, perhaps we should discuss what they are, exactly. Digestive biscuits are traditionally a store-bought sweet — a lightly sweet and crunchy cookie, or “biscuit,” as they would be called in their native United Kingdom.
When originally debuted, they were said to have antacid qualities owing to the sodium bicarbonate in the recipe, and, accordingly, they were dubbed “digestive.” Since then, the name has stuck.
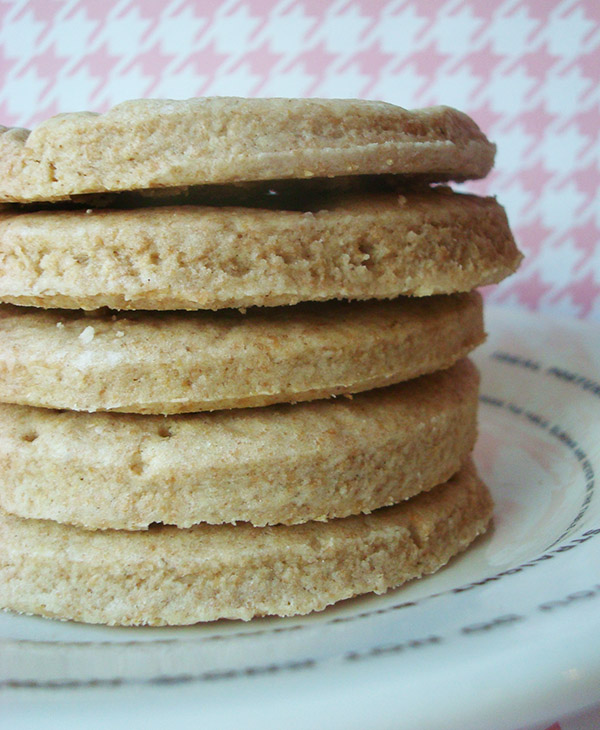
Digestive biscuits could be described as the British cousin to the American graham cracker. These digestive biscuits can be enjoyed by themselves, crushed for a cookie crumb pie crust or used to replace crushed graham crackers in various food and cooking projects, such as Nanaimo bars. You could even try them with marshmallows and melted chocolate for an international take on a s’more.
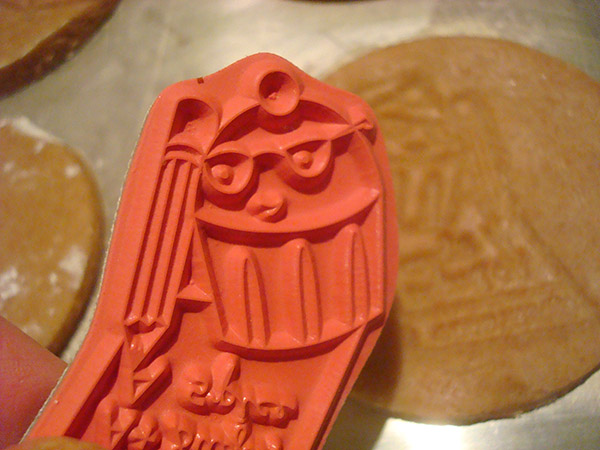
Decorating: Put your own stamp on it!
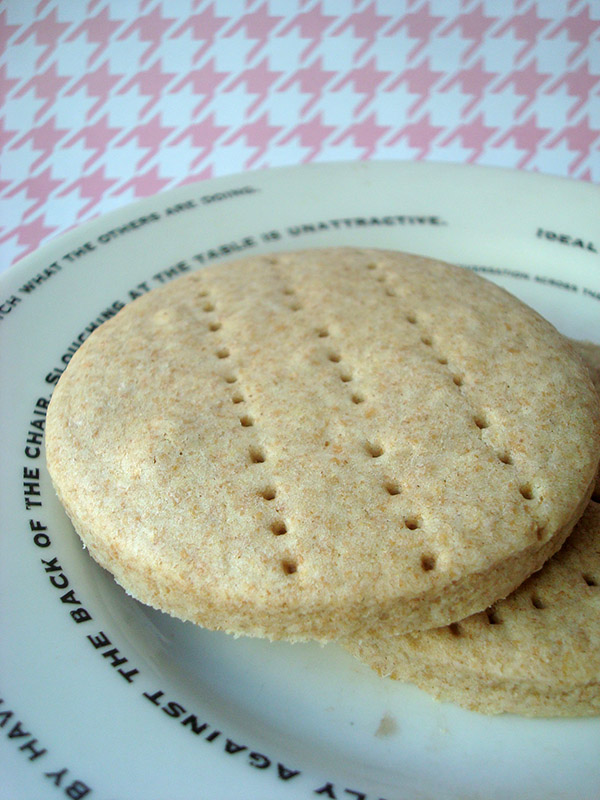
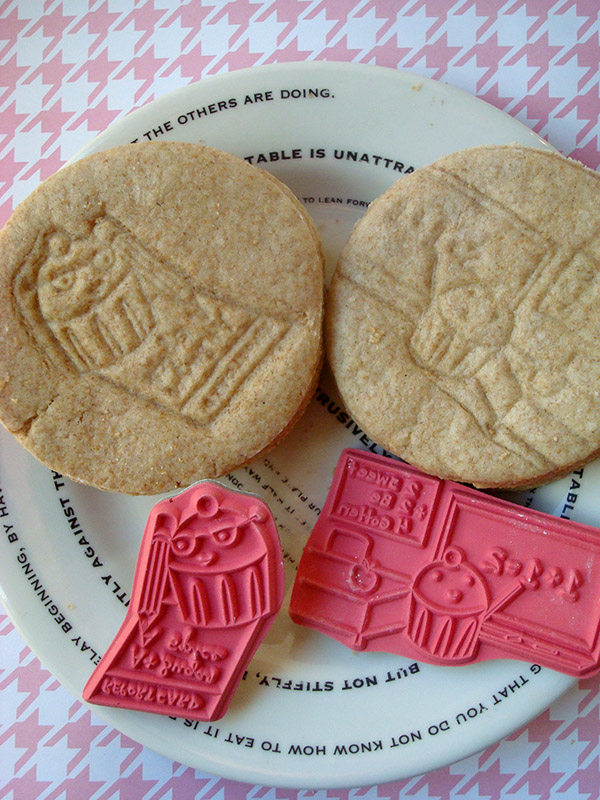
In terms of decoration, these cookies will retain imprints once baked. You can take a classic approach and prick the tops with the tines of a fork before putting the cookies in the oven, you could also make your own creative mark by using rubber stamps to imprint the cookies.
Make sure the rubber stamps are impeccably clean, and don’t use them if you’ve used any ink that might not be safe for human consumption. For the cookies pictured, we used new, never-before-used stamps.
Recipe for homemade digestive biscuits
Adapted from King Arthur Flour
Makes about 24 cookies (more or less depending on the size)
- 1/4 cup all-purpose flour
- 1 3/4 cups whole wheat flour
- 1 teaspoon baking powder
- 1/2 cup (1 stick) unsalted butter at cool room temperature, cut into pieces
- ½ teaspoon salt
- ½ teaspoon vanilla extract
- 3/4 cup confectioners’ sugar, sifted
- 1/4 cup milk or cream
Step 1:
Preheat the oven to 350 degrees F. Line two baking sheets with parchment paper, or grease them generously.
Step 2:
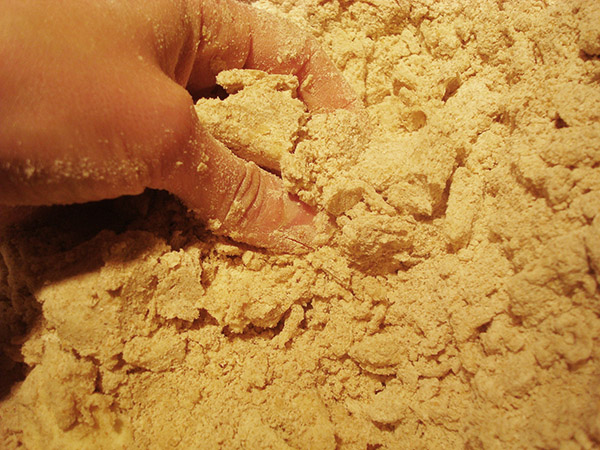
Sift the flour, butter and baking powder into a mixing bowl. Now, using a pastry blender, two forks or your impeccably clean fingertips, add the butter into the flour mixture. Mix until it has formed a slightly shaggy dough.
Step 3:
Add the sugar, milk and vanilla, and mix until it comes together to form a stiff dough. Switch to a wooden spoon at this point. You may need to add a few more teaspoons of milk to get a workable consistency, but wait until everything is mixed to judge that.
Step 4:
Transfer the mixture on to a surface dusted with confectioners’ sugar. Knead until it has become smooth and cohesive.
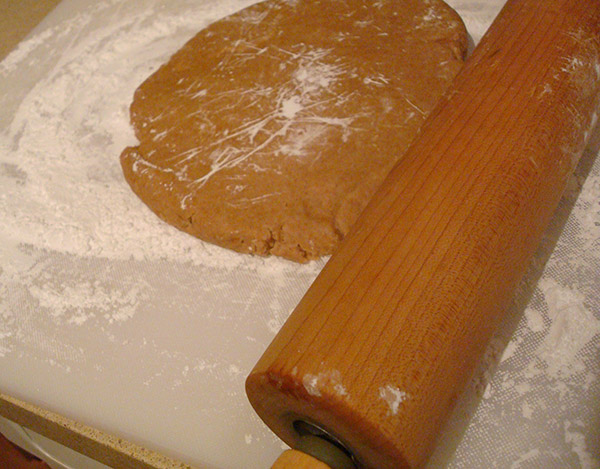
Step 5:
Once it’s a firm dough, roll it using a rolling pin until it’s somewhere between 1/8- and 1/4-inch thick (about the thickness of a graham cracker).
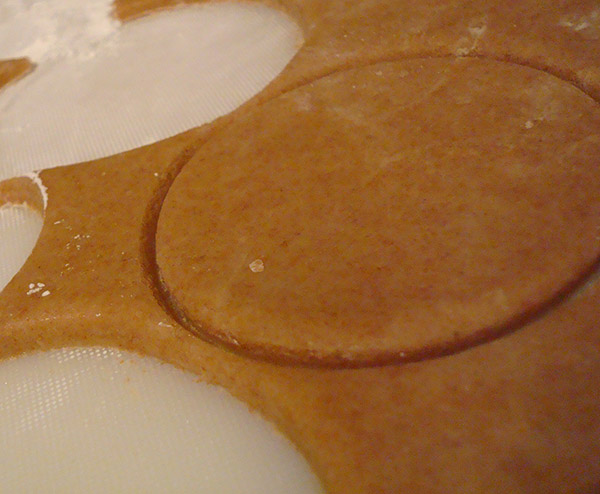
Step 6:
Once rolled out, cut out your cookies using a lightly floured cookie cutter. For a traditional look, use a round cookie cutter (between 2 and 3 inches in diameter), but you can really do any shape you like!
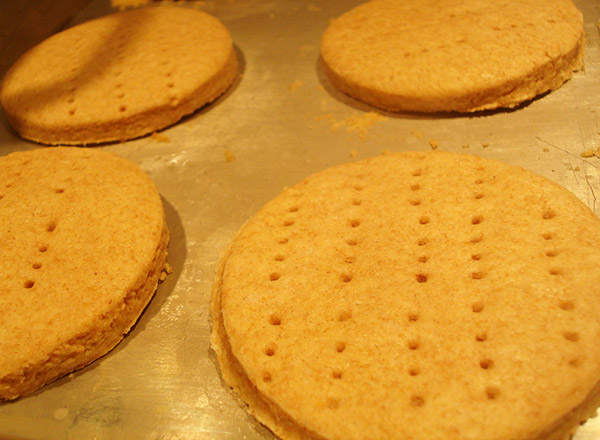
Step 7:
Place the cookies on your prepared baking sheet, and prick with a fork.
Or, you can imprint them using impeccably clean rubber stamps.
Step 8:
Bake until set on the sides and with a dull finish on top, about 15 to 20 minutes.
Step 9:
Remove, and let sit for 5 minutes before transferring to wire racks to cool completely. The cookies will firm and become crisp as they cool.
Share tips, start a discussion or ask one of our experts or other students a question.
No Responses to “A Spoon Full of Sugar: Making Digestive Biscuits At Home”