
Wooden spoons have been around as long as human beings have been preparing food. They can be made with just a few simple tools, and the possibilities for designs and styles are endless. They also present a great opportunity to learn about wood grain and how it behaves. Join me on my first foray into spoonmaking!
Start with good tools
For my first spoon, I used a gouge, a mallet, a spokeshave, a straight knife and a hook knife, with assistance from my bandsaw.
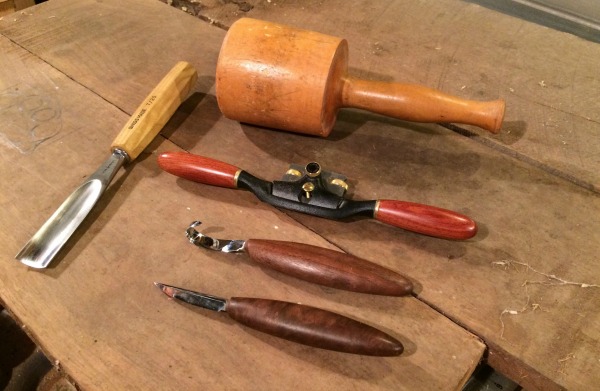
All the tools you need to carve a wooden spoon.
I already had the gouge, spokeshave and mallet, but I bought the carving knives specifically to make spoons. After looking around online at several great examples of carving knives, I arrived at the knives made by Del Stubbs at Pine Wood Forge in Leonard, Minnesota. Del has made thousands of knives and maybe tens of thousands of spoons. He makes the blade from raw steel and the handle with beautiful hardwoods. Mine are made with Claro walnut and feel silky to the touch. Del’s knives are impeccably made and come razor sharp. Actually, they seem sharper than a razor.
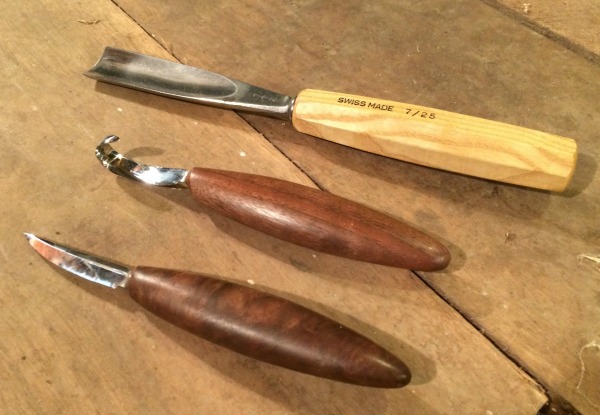
These three tools do most of the shaping.

The blade is sharp along the entire curve of the hook, making it perfect for shaping spoons.
Find good carving wood
Soft woods like pine, basswood, poplar and others are great for carving. Hardwoods such as cherry, walnut, maple and ash can be carved as well, though they are more difficult to cut. Fresh-cut wood with a high moisture content is particularly good for carving. I am starting out with poplar for my first spoons because I have some on hand. I plan to experiment with fresh cut hardwoods soon, so I’ll report on those in a future post.
Be aware of grain direction
In all these steps, the general rule is that cutting with the grain (i.e., following the upslope of the grain) will produce a smooth surface. Cutting against the grain (i.e., cutting against the upslope) will cause tear-out. Most cuts are going to be a little of both. There are a few places on a spoon that can be particularly challenging: the outside curve of the bowl, the transition from the bottom of the inside of the bowl to the sides, and the transitions from the bowl to the stem. Take your time and take note of what happens when you make different cuts. The wood will teach you what NOT to do.
With my new knives, a few other tools and a piece of poplar, I’m ready to get started making a spoon!
Tutorial on how to make a wooden spoon
Step 1: Draw the spoon
Draw the rough shape of a spoon on top of the poplar, including the outside and inside shape of the bowl of the spoon. Make a pattern if you want, but don’t belabor it too much. Also draw a center line. On the side of the spoon, draw the profile, showing the underside curve of the bowl and the shape of the stem.
Here’s a tip: Leave the wood longer than the length of the spoon so you have more area to clamp.
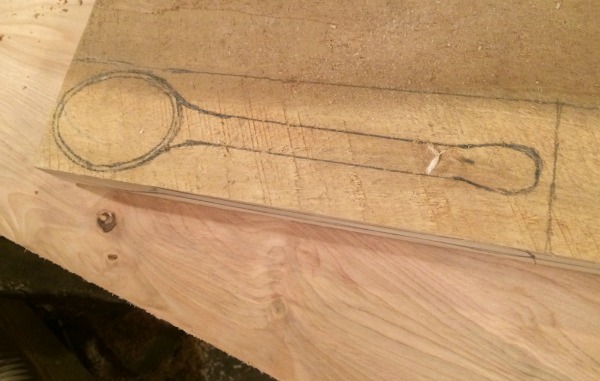
Draw the rough shape of the spoon, including the thickness of the walls of the bowl.
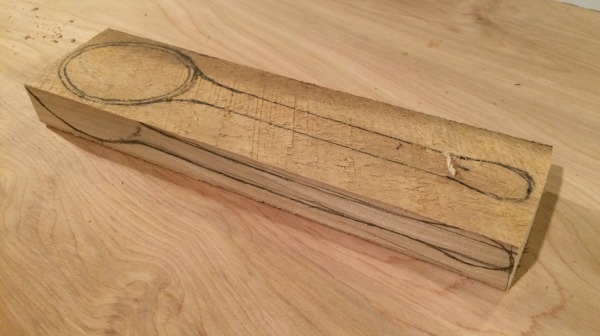
Also draw the profile of the spoon to be cut on the bandsaw.
Step 2: Carve out the bowl of the spoon
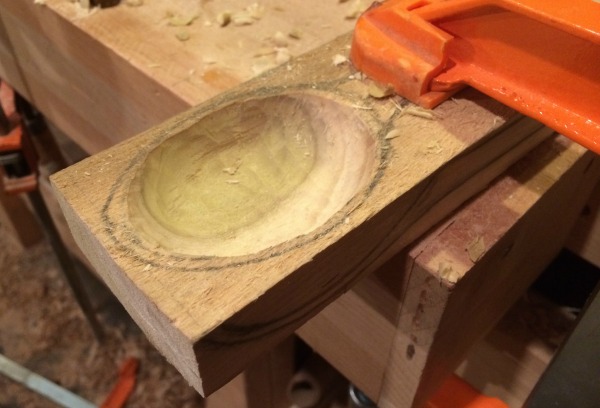
Use the gouge and a mallet for the rough shaping of the bowl. With the poplar secured, make a couple cuts with the gouge perpendicular to the center line. Turn the gouge 180 degrees and make a couple cuts from the opposite side. You will start to have curls of wood facing in both directions. Working in from the sides, remove this material with the gouge. Expand gradually away from the center along the line until you start to reach the depth you want to achieve. At this point, only make cuts perpendicularly along the center line. Start to expand your cuts laterally as well to shape the bowl from side to side. Stop a little short of your line for the inside of the bowl.
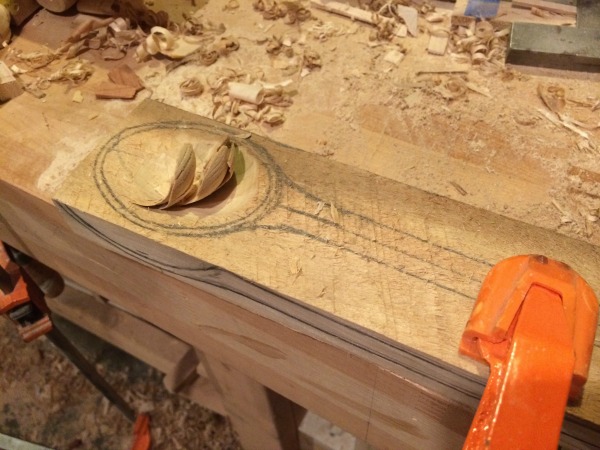
A gouge is great for removing most of the material for the bowl.
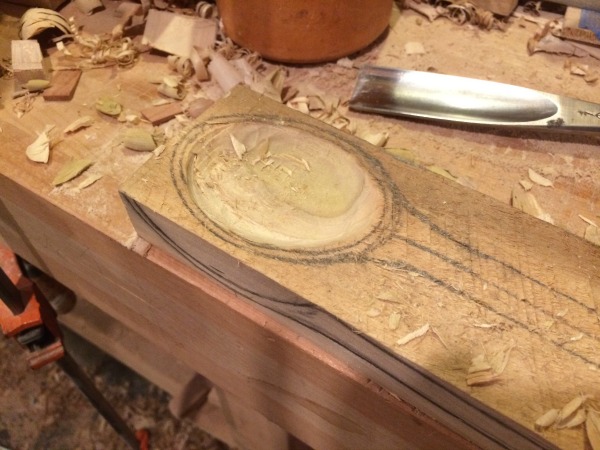
The bowl is starting to take shape.
It’s critical to clamp the work piece for safe chopping.
Step 3: Bandsaw the outside shape of the spoon
The reason I kept the blank in a rough rectangular shape in the beginning was to help keep it stable while chopping out the bowl. But now it’s time to work on the underside of the bowl and the stem. Use a bandsaw to cut the spoon close to the line of its final shape. With the piece still a rough rectangle, I chose to cut the bottom profile first, then cut the left side of the spoon and then the right side.
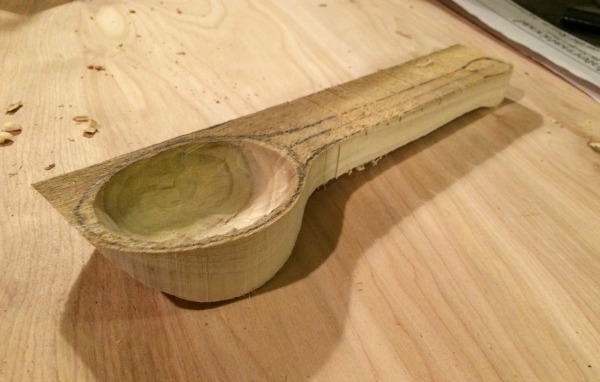
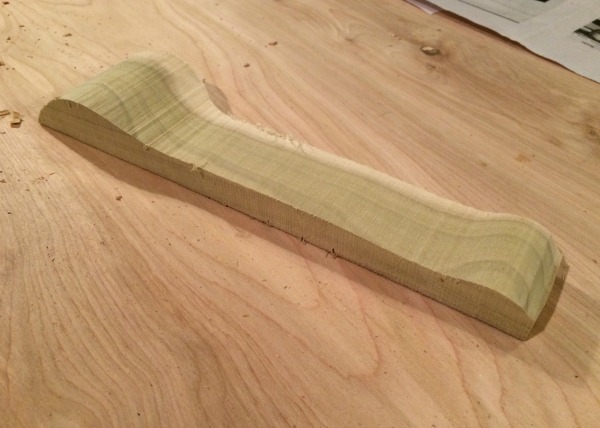
After shaping the inside of the bowl, use a bandsaw to cut the rough shape of the spoon.
Step 4: Shape the underside of the bowl
With the stem gently clamped in a vise, use a spokeshave to shape the underside of the bowl. Part of the fun of making spoons is that they don’t have to be perfect. If you’re wondering how to achieve a perfect shape, there really isn’t one. Just go by eye, taking a little off on one side then the other until you like the shape. Use the straight knife to handle smaller, tricky cuts.
A spokeshave is a perfect tool for shaping the back of the bowl.
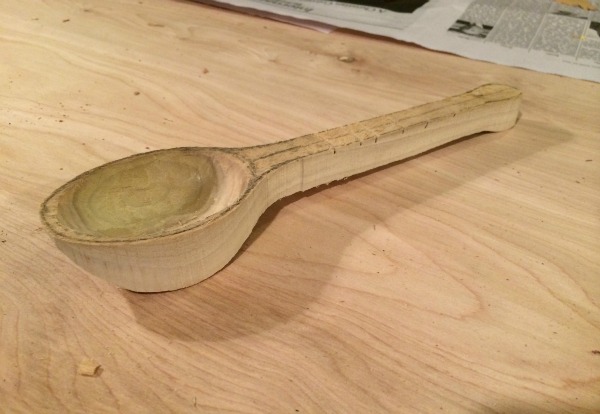
Step 5: Finalize the shape and surface
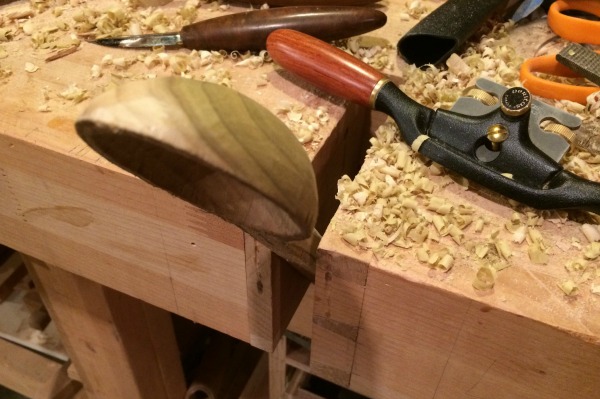
Remember, this is just the rough shaping. Using your hook knife, work across the grain, making light, shallow cuts to smooth out the shape. This part takes a lot of practice, so be prepared to gradually increase your skill level. When you are satisfied with the shape and texture of the bowl, having expanded outward to the inside line, it’s time to move on to the rest of the shaping.
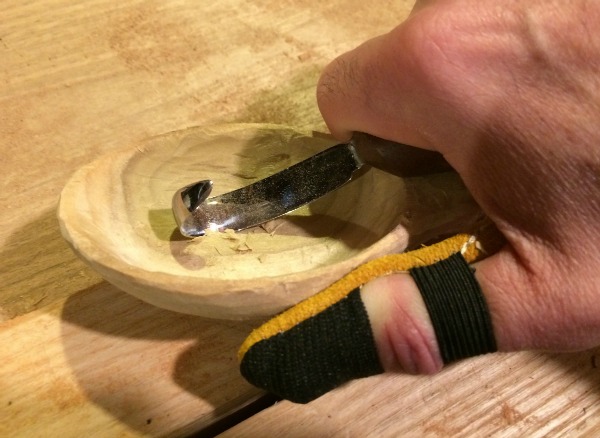
Using hook knife (with a thumb guard) to carve the final shape of the bowl.
Step 6: Shape the handle
The handle of the spoon lends itself to both the spokeshave and the straight knife. Clamp the bowl gently in a vise and work with the grain. Keep an eye out for tricky grain and change cutting directions when necessary. The spokeshave is great for taking long shavings that eventually turn a squared edge into a round one.
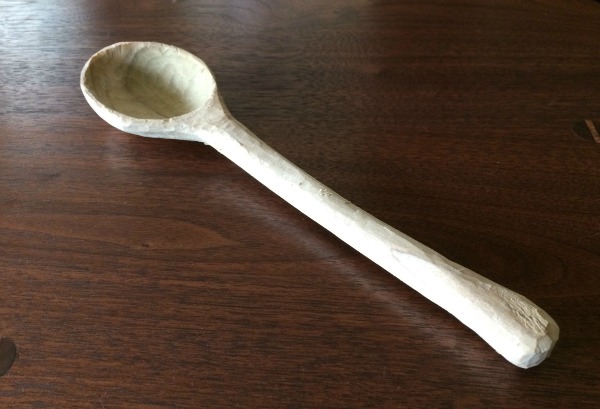
Step 7: Enjoy the spoon!
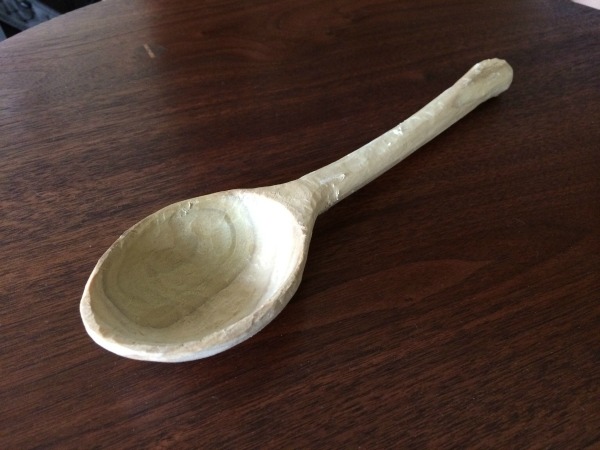
When you like the shape and texture of the spoon, you’re done! You can use sandpaper if you want the surface to be smooth or stick with the knife cuts if you like the faceted look. I’ll bet you anything that when you finish, you’ll immediately start to think of the next spoon you want to make. Experient with stirring spoons, eating spoons, ladles, scoops, big spoons, small spoons or totally weird, non-functional spoons. Each spoon you make is one-of-a-kind. I have a long way to go but I’m enjoying the challenge.
Special offer!
Learn all about the art of woodturning with our FREE PDF eGuide Woodturning Basics for Beginners.
HI Just set up my new bandsaw and want to learn spoon carving. Please send me your free pdf template to get started. Thanks Randy
Please send me the free pdf. I am just starting on wood turning using a JET Lathe. Need to understand better on how to use the NOVA chuck and the drilling chuck. Thank you