
What is always in style, can work a trend and yet be a timeless wardrobe staple? The tunic top!
This simple season-spanning garment can be worn as anything from a casual beach cover-up to an elegant blouse. It is one of the few garments that can be made in almost any fabric: comfy knit, sophisticated silk, lightweight voile, colorful batik, luscious velvet and even quilting cotton.
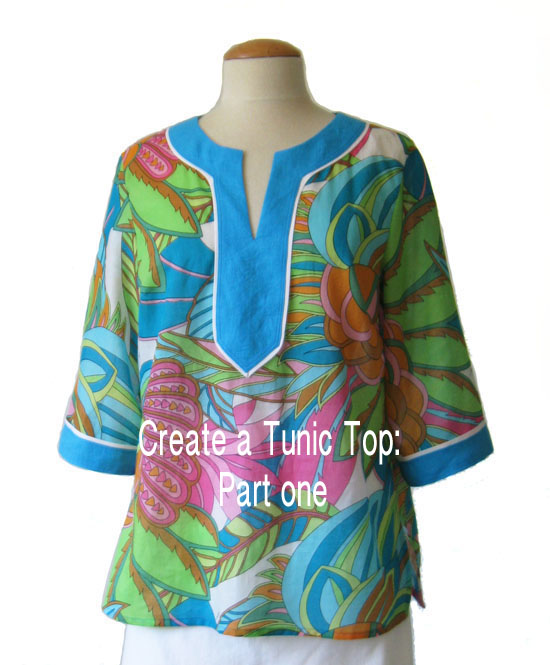
Tunic tops allow you to use interesting fabrics and smaller remnants to create a top that is quick and easy to sew. In part one of this series, you will see how to adapt a current shirt pattern to a tunic top shape, and then in the second post you will see how to create a crisp edge and sew a clean finish on the neckline placket.
Learn to sew a tunic top that can translated to any season or occasion!
Start with a simple shirt or dress pattern that is slightly loose fitting, and has horizontal bust darts to give your top some shaping. The most important thing about a tunic top with no closure is that you have to be able to pull it on over your head without straining the front neckline.
A minimum of 8 inches circumference over your actual bust measurement gives a nice look. If you have sewn up the pattern you’re using before, try putting it on with the buttons done up, this will tell you if you need to add some additional width or ease to the pattern.
1. Create your pattern.
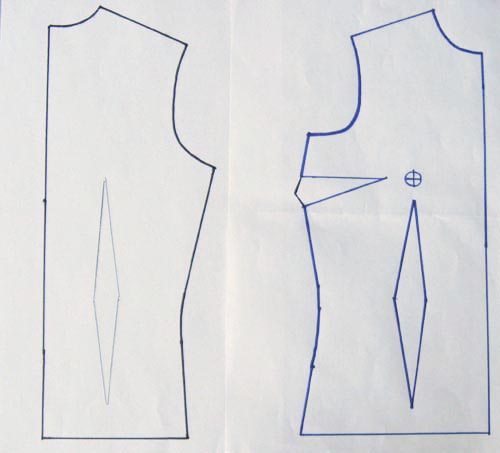
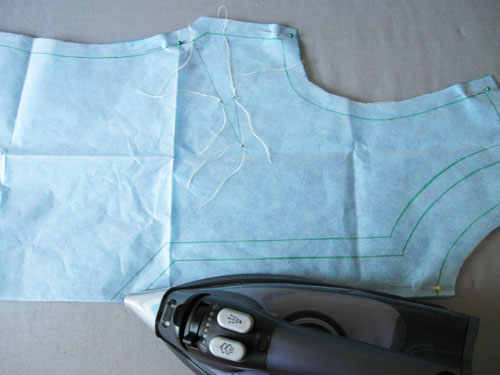
Trace the front and back pieces of your blouse pattern. If the pattern you are using is designed for front buttons or a back zipper, be sure to use the lines of the center front and center back, where you will cut on the fold of the fabric. For this example there are no seam allowances pictured, they are added after all the pattern pieces are completed.
Don’t let your style be sealed by what’s in the envelope! Learn to modify any blouse pattern to create all the custom looks you’ve been longing for with the online sewing class One Pattern, Many Looks: Blouses.
2. Add some ease.
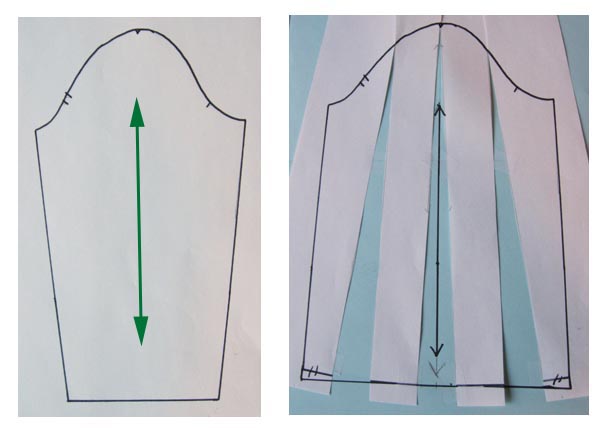
Once you have your front and back pattern pieces, you can eliminate the waist darts on both. Next I add some width to the pattern pieces, which gives more ease in circumference and gives a more relaxed, slightly drop shoulder look.
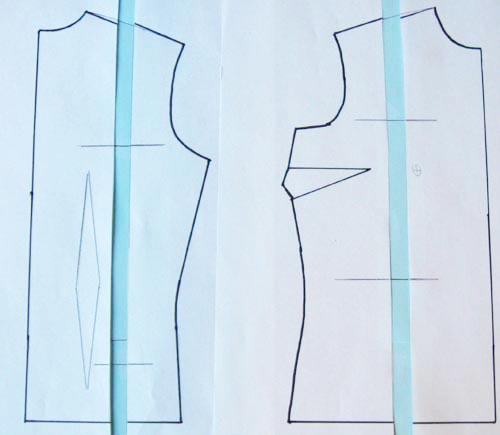
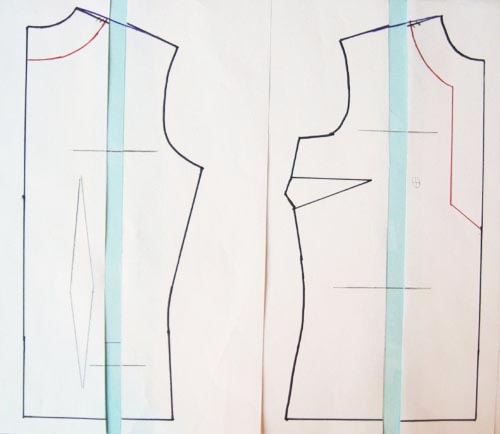
By using a long vertical slash to add some width you are not changing the armhole so your sleeve will still fit properly there. To add the width, draw vertical lines from shoulder to hem, and add some horizontal lines which serve to keep your pattern portions on grain after they are separated. Insert 1 inch strips and tape back together.
Adjust the shoulder seams on the front and back. At this point I also add length if needed and make sure the waist and hip circumference are at least 8 inches greater than the measurements of the wearer. If more space is needed, add at the side seam of both front and back, making sure to walk your seams so they match correctly. If you add at the side seam make sure to adjust your sleeve as well.
3. Create the neckline placket.
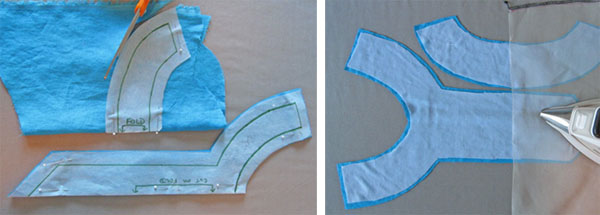
Draw the neckline placket on the front and back pattern pieces. The placket can be any length you want, but remember the opening has to accommodate your head. Designing a placket that ends just below the bust darts gives a pleasing proportion. For width, 1.5 – 2″ wide gives a nice shape and contrast. Trace the placket pieces and add seam allowances.
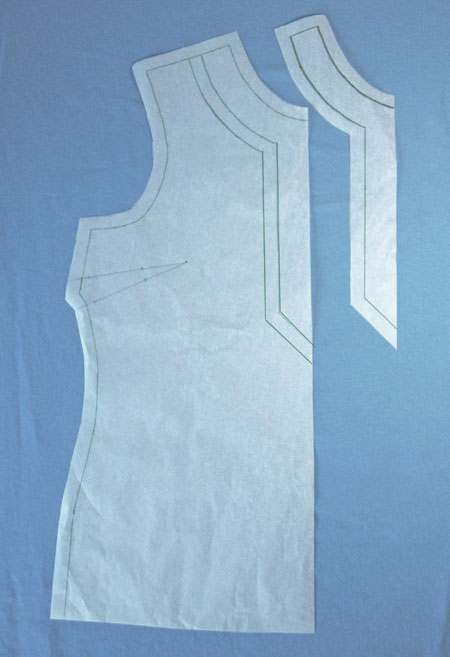
Here are the finished pattern pieces for the top and the front placket. The seam allowances are added and it is ready to be cut out.
4. Adjust the sleeve.
For this type of top a slightly wider sleeve gives a classic tunic top look, so adjust the sleeve at the wrist, adding width and taper to zero at the sleeve cap. By doing this adjustment you have not changed the sleeve cap so it will fit into the original armhole on your pattern.
5. Create a pressing template.
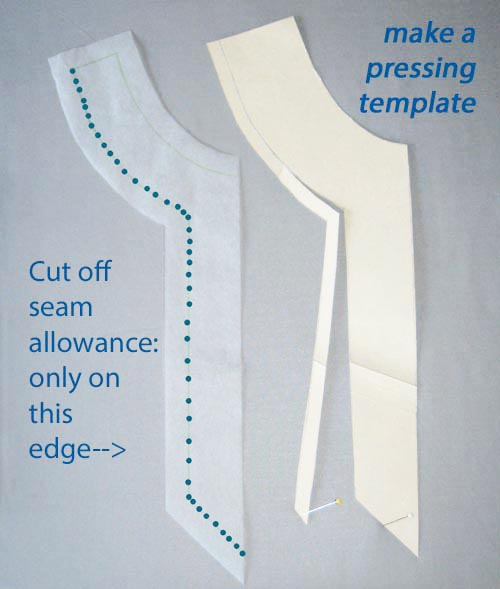
Here is a way to recycle old office supplies, I use manila file folders to make pressing templates when I want to get a very sharp pressed edge. Cut out a copy of the neckline placket piece from the the manila folder and mark the seam allowance only on the outside edge. Then cut off this seam allowance and you have a template that is the exact size of your finished placket pieces.
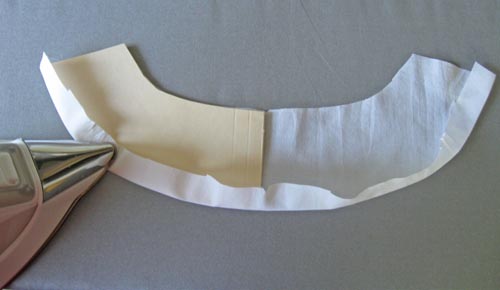
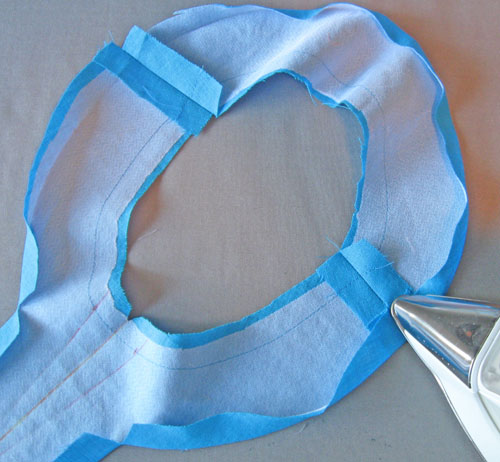
Here is an example of how to use the pressing template. Only the outside edge seam allowance is cut off, which allows you to place the template on the pattern piece and get an exact and very crisp press of the seam allowance edge on the placket.
Be sure to use only the natural color file folders for your template as the colored folders may mark your garment fabric when pressed. You can use steam and a hot iron over the paper template, the results are fantastic and it makes the job of turning and pressing that edge come out perfectly.
6. Cut out and mark your pattern pieces.
Once you have created your pattern pieces it’s time to cut out your tunic top. Remember to cut the front and back pieces on the fold for both the tunic front and back. Mark the bust darts and if you want to make sure about placement you can add some marks for the edges of the placket.
However, I have a shortcut: Use the iron to press a sharp crease on the center front of the tunic body from the neckline only to the bottom of the placket. This will give you mark to place your placket on the center front.
7. Cut out and interface your placket pieces.
Cut the neckline front and back placket pieces on the fold also. Interface these pieces with some lightweight interfacing which helps them to have a nice weight and create a smooth crisp neckline edge.
8. Staystitch and mark the front placket piece.
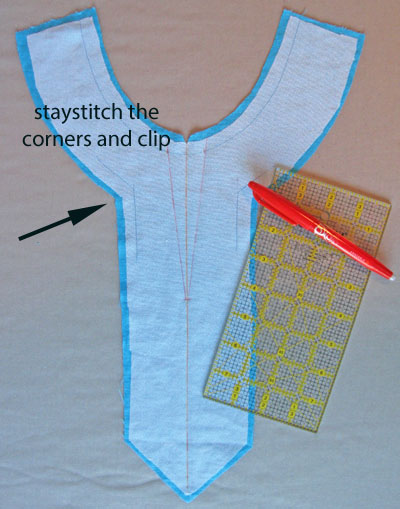
Staystitch the neckline edge of the front and back neckline placket pieces, and staystitch the corner as indicated by the arrow above. Mark a line at the center from the neckline edge down to the point.
Draw on the V-neckline as well. Marking the V-neckline makes it much easier to sew, you can get an exactly even neckline opening. You can mark with chalk, disappearing pens or even a lead pencil, as these marks will be enclosed when we finish the neckline.
8. Press with the template.
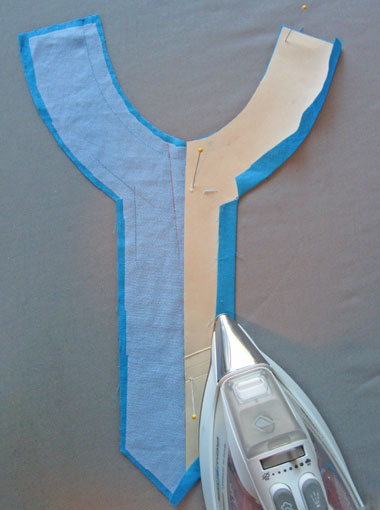
Now is the time to use our magic pressing template. I find it easier to work with the front and back neckline pieces separately so press the edge of the front and back pieces by folding over the seam allowance of the outside edge over the pressing template.
You can use the steam settings if your fabric needs it, the manila folder template works perfectly. It helps to pin the template in position along the center so you can use one hand to fold up the fabric and the other to move your iron.
9. Sew the front and back neckline placket pieces.
Final step for today, sew the front and back neckline placket pieces at their shoulder seams. There is no need to finish or serge these seams as they will be enclosed when we finish the tunic top. That section might need another quick iron to blend the seam allowance where we pressed it with the template at that outside edge.
Share tips, start a discussion or ask one of our experts or other students a question.
No Responses to “How to Adapt a Shirt Pattern to Make an Adorable Tunic Top: Part One”