
As I said in the first installment of this blog series on building a Tage Frid-style three-legged stool, this project is a miniature course in woodworking, complete with angled dovetails, a mortise-and-tenon joint and lots of shaping. Follow along as I describe how to get started making this challenging piece of furniture.
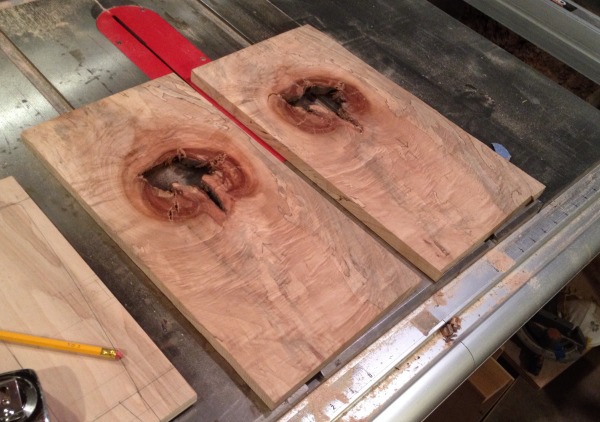
Two pieces of Ambrosia maple from a tree that fell during a tornado in 1998
I’ve wanted to build a Tage Frid-style three-legged stool for years, but it wasn’t until I came across a couple of unique pieces of wood I rescued from the burn pile of another woodworker that I decided to give it a go. The wood, pictured above, is from a maple tree that fell in a tornado in Nashville, TN, in 1998. This kind of maple, known as ambrosia maple, has streaks of color from a reaction in the tree to the ambrosia beetle (For more information, read this explanation from Rick Hearne, of Hearne Hardwoods, in Wood Magazine.)
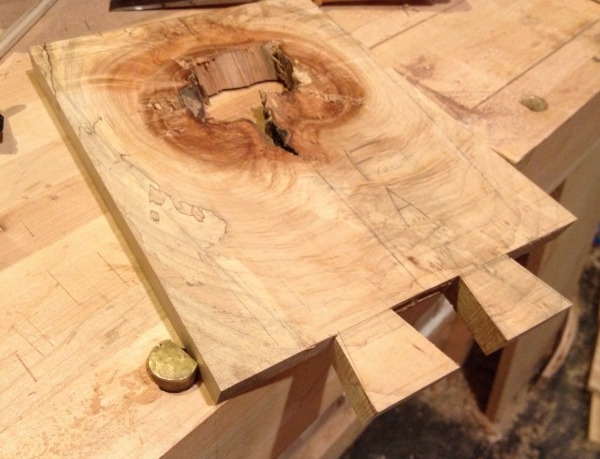
The wood had been laying around in my shop for years when it hit me that the natural holes could mimic the handle on the back of Tage Frid’s stool. I saw an opportunity to not only re-imagine an important piece of furniture, but also commemorate, in a small way, an important event in the history of my city. Let’s get started.
Making the seat
As Tage Frid recommends in his book Tage Frid Teaches Woodworking (1985, The Taunton Press), it’s a great idea to start with the seat, which is made of three parts – the seat itself, a seat extension and the back. Mill the wood for all of these pieces at the same time.
Step 1: Cut a mortise
The seat extension is connected to the seat with a mortise and tenon joint.
While the seat is still square, cut a mortise about 5/8” up from the bottom of the seat blank. (I’ll mention a few dimensions here and there, but it would be best to look at the diagram in Frid’s book to be exact.) The reason the mortise seems low is that the top part of the seat will be cut away when it is shaped. Frid used a mortise 2 ¼” deep. In my version, the mortise was 1 ¾” to accommodate the size of the wood I milled for the extension. I think a tenon anywhere near that measurement is going to be fine.
After marking out the mortise, I drilled a series of holes with my drill press, then cleaned out the waste with a mortise chisel.

Cleaning out the waste is easy with a mortise chisel
Step 2: Cut a four-shouldered tenon
Now, cut a tenon on the seat extension to fit the mortise in the seat. I used a dado stack on my table saw with a crosscut sled. A dado stack is two saw blades with chippers between them. They make a wide cut with a flat bottom, so they are perfect for cutting grooves or the cheeks and shoulders of tenons. It’s important to fit this tenon well, so I used a piece of scrap milled to the same thickness as the extension to fine-tune the cut. Of course, the tenon could also be cut by hand, with a tenoning jig on a table saw or even on a router table.
Step 3: Join the back to the seat extension
The seat extension is really the workhorse of this stool. It bridges the back to the seat and has a hole for the back leg.
The back of Frid’s original is tapered from the bottom to the top. The wood for the back and extension start as the same thickness and are tapered after the dovetails are cut. The pieces I used for the back were already planed to about ¾” thick, so I used them as their existing thickness.
I used my table saw with the blade tilted to 75 degrees to crosscut the seat extension with a sled. The seat back should be the exact same angle, so go ahead and cut it with this same setup of the table saw. Save the off-cuts, as you can use those later.

Use a crosscut sled on the table saw to cut the back at 75 degrees.
Step 4: Cut the angled dovetails
Don’t let the angled dovetails intimidate you. All dovetails are angled, most just happen to be at 90 degrees. If you’ve never cut angled dovetails before, I suggest doing a practice run on some scrap pieces to gain confidence. On the two stools I made, one set of dovetails came out well. The other had some gaps, so I repaired them before moving on.
Step 5: Mark the baselines
Start by marking the baselines on both the seat back and the seat extension. Frid suggests using a standard marking gauge to establish the baseline for the angled dovetails, but that didn’t work for me. On the acute side of the angle, the marking gauge works fine. But on the obtuse side, the fence of the gauge doesn’t touch the wood.
Starting with the tail piece, I used the marking gauge on the acute sign. Then, with a bevel gauge set at 75 degrees, I transferred that measurement to the obtuse side of the wood, marking the other baseline with a knife. I also marked the sides at 75 degrees. Use this same concept of the marking gauge and bevel gauge to mark the baselines for the pins on the seat extension.
Cut the tails first, remembering to keep the saw at an angle to meet the baseline.
Step 6: Cut the tails first
In a typical way of cutting dovetails, draw the tails with a bevel gauge and cut them by hand with a carcass or dovetail saw, remembering to keep the saw angled to meet the baseline. After removing most of the waste with a coping saw, clean up the base with a chisel. I used the angled off-cut I set aside earlier as a guide for my chisel to clean up the area between the tails. Transfer the tails to the seat extension and cut the pins, using the off-cut again to clean between them.

Use the shape of the tails to define the pins.
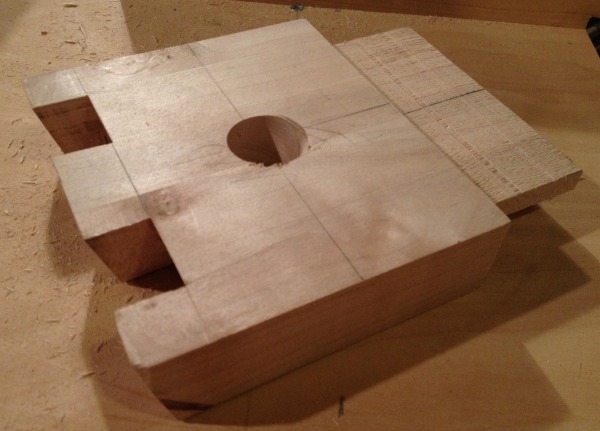
The seat extension is the workhorse of this three-legged stool.
Step 7: Shaping the seat back
After you’ve finished the dovetails for the seat back, you can cut the back to final shape.
The back of Frid’s original is tapered from the bottom to the top. Cutting this taper would be straightforward on the bandsaw. To cut the oval handles, I suggest making a template out of plywood and using a flush trim bit on a router table. The next step is to shape the back, which has gentle curves. If you are only making one stool, it makes sense to simply draw the shape, cut it out on the bandsaw and fair it with sandpaper. If you are making a batch of stools, it would be worth it to make a template for the seat back to be shaped on the router table.
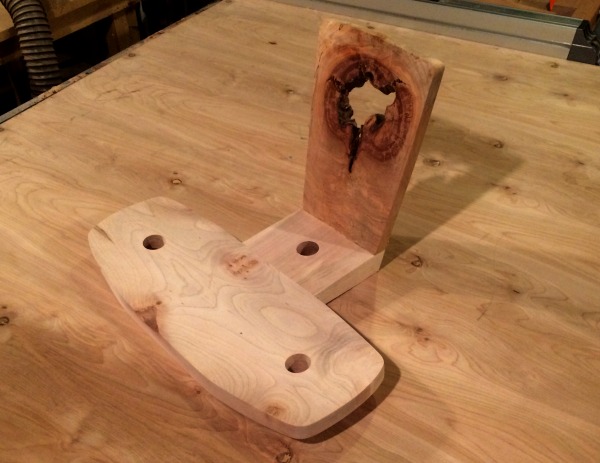
All together now — the seat, seat extension and back
It’s quite an accomplishment to finish the seat extension, with angled dovetails on one side and a tenon on the other, and the back, with its dovetails, oval handle and curved sides. Shaping the seat involves several steps, so I’ll describe that process in the next installment of this series. I’ll also describe how to cut holes in the seat and seat extension for the three legs. Stay tuned.
[box type=”shadow”]
Did you know Bluprint now offers online woodworking classes?
From marquetry techniques to making dovetail joints, in the coming weeks we’ll be rolling out exciting new classes on the woodworking techniques you said you’d love to learn most!
Join Bluprint for free today to stay up to date on the newest classes and special offers!
[/box]
Share tips, start a discussion or ask one of our experts or other students a question.
No Responses to “Making a Tage Frid-Style Stool: Start With the Seat”