
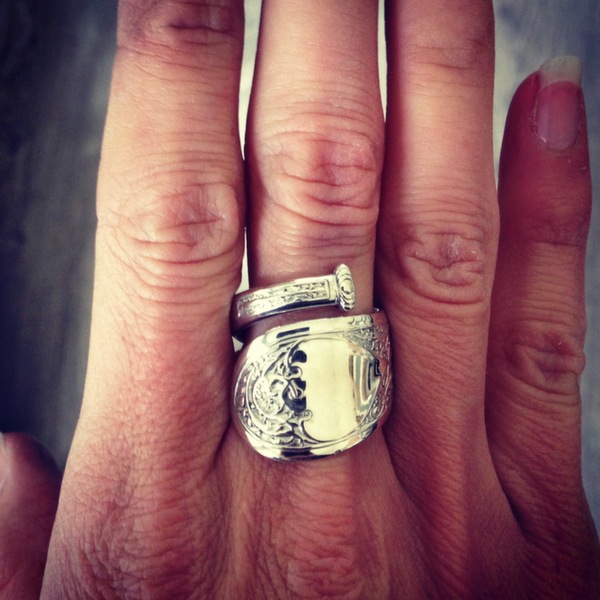
There are pieces of jewelry that come and go based on current trends, then there are those that last a lifetime and longer. The spoon ring is an excellent example of a timeless classic. Some think that the rings origins date back to the 1600s. That’s what I call time-honored style!
This tutorial will teach you how to make a spoon ring. Maybe you’ll give them to your friends, or maybe you’ll end up making your very own family heirloom that your great grandchildren will inherit.
Grab your tools and let’s get to work!
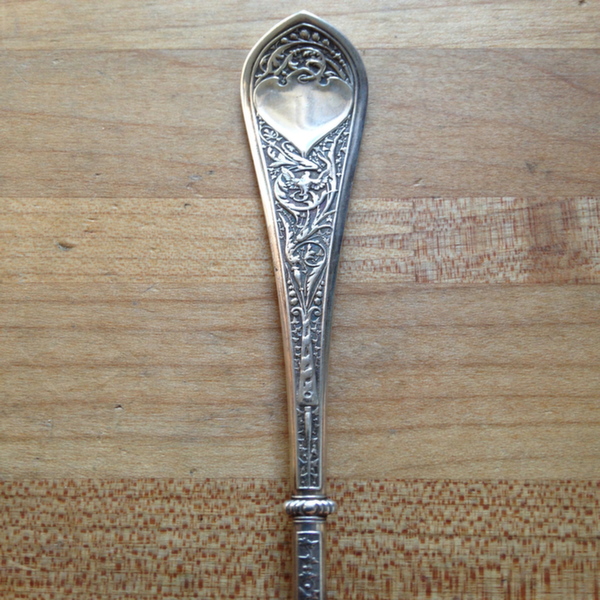
I’ll admit that the first time I tried this I thought it’d be a no-brainer. Oh sure, maybe I can use a stainless steel fork from the thrift store. Let me tell you — I didn’t think that one all the way through. There is a reason why these are made of sterling!
When you do go searching for your material, you’ll want make sure it’s sterling by checking the stamping on the back. It should either say .925 or sterling. If you’re hitting up you local antique stores look for one that is a little on the thin side. If you get one that’s beautiful but thick, it’ll make things a lot harder to bend. If, on the other hand you inherited something, keep that tip in mind. Hollowware might be impossible but a thick piece could be doable. It’s a good thing sterling will soften as you anneal!
Tools you’ll need:
- Spoon or fork
- Jewelers saw or other cutting tool
- File
- Ring mandrel
- Nylon or rawhide mallet
- Torch
- Pickle pot
- Ring bending pliers
- Strip of thick leather
Step 1:
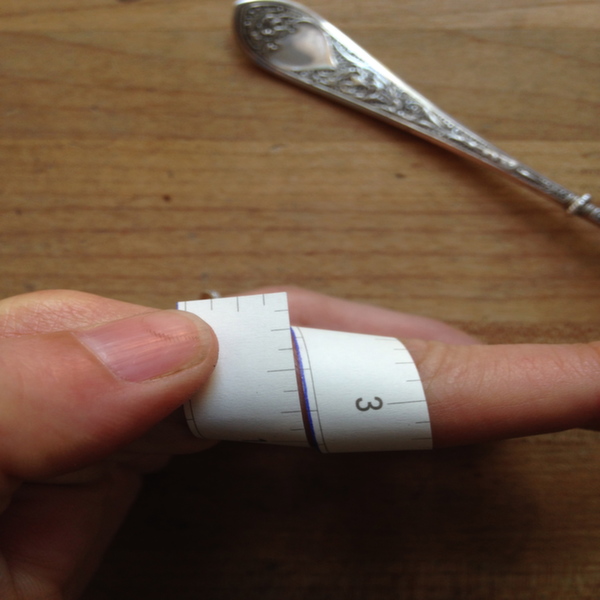
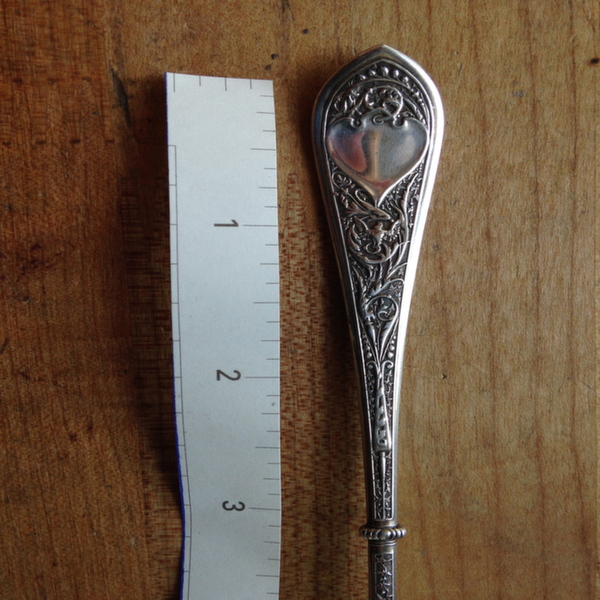
Get a general idea of the overall length that your ring will need to be. Take into account the fact there will be some overlap so this measurement doesn’t need to be super precise. Just take a look at where you’d want things to be when complete.
Step 2:
Mark that length on your utensil.
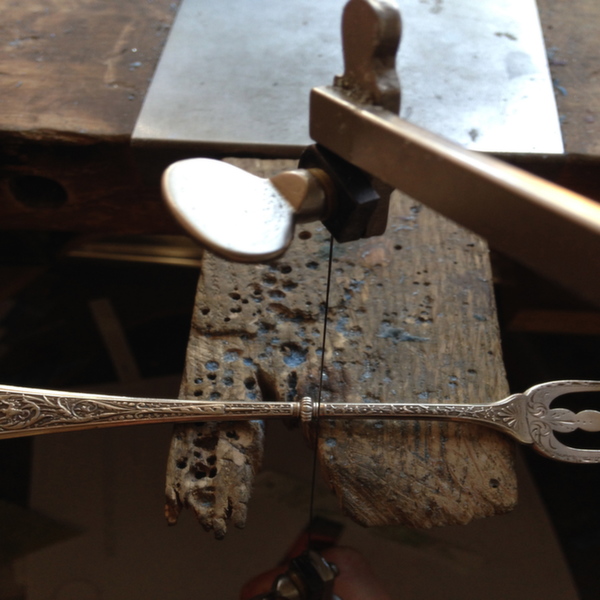
Step 3:
Using your jeweler’s saw, cut right through that mark you just made.
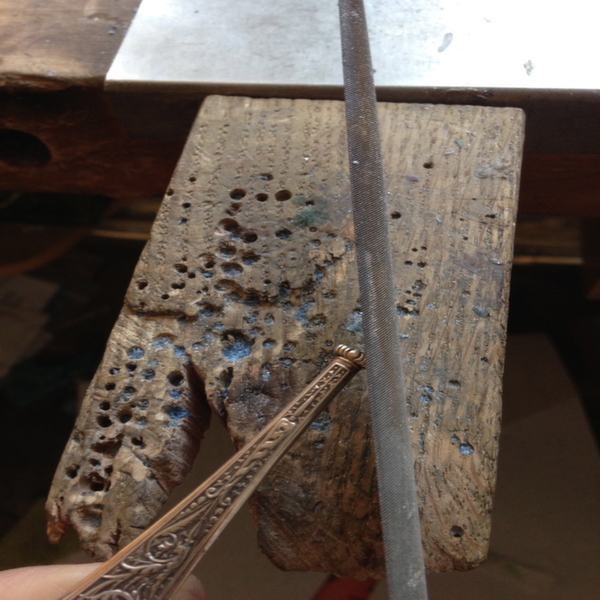
Step 4:
File the edges of the piece you just cut so you have nice rounded edges. Of course, as always, this is based on the design I’m making. Feel free to get creative here and make this your own style.
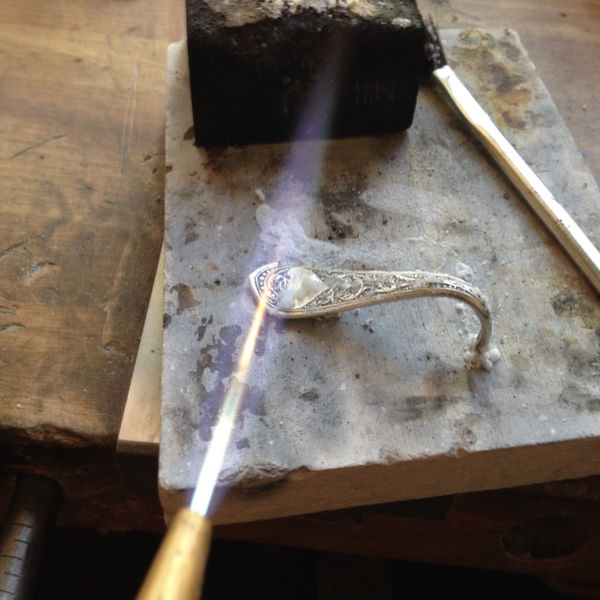
Step 5:
Anneal your piece and then pickle it. Don’t skip this step! As you can see, I started working with my metal before this step and it was nearly impossible to move.
Need a refresher on annealing? You can find that here.
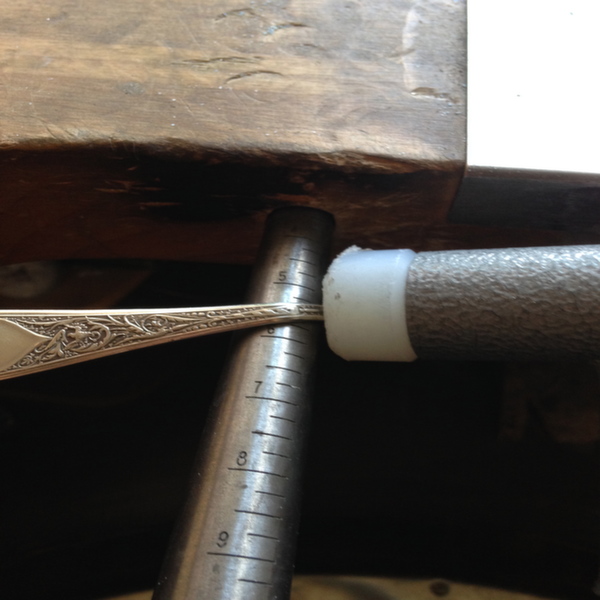
Step 6:
Begin to form the metal around your mandrel using your nylon hammer. I prefer to start about 2 sizes smaller than my piece will be, typically when the two ends come together it’ll be pretty close to the size you had intended. The spoon ring can be hit or miss so your might need to experiment. I’d rather give it a little stretch that a squeeze, but that’s just my hands talking.
Step 7:
Flip the metal and begin forming from the other side as well. You should start to get some good movement here.
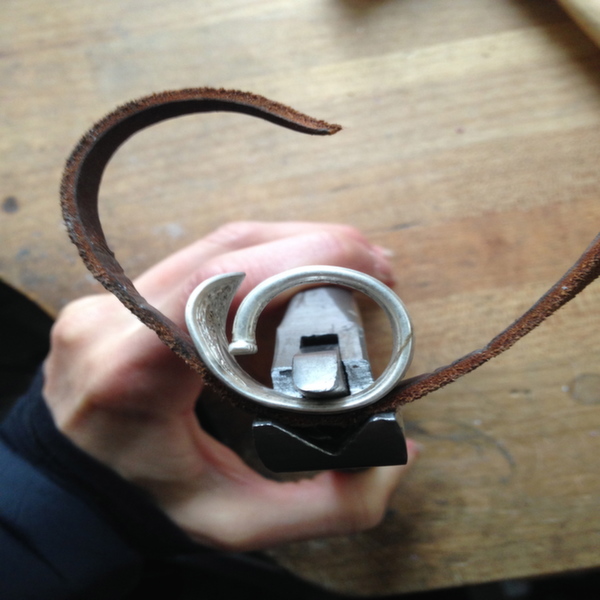
Step 8:
If you can’t quite get the sides to match each other feel free to use your ring bending pliers to help you close the gap. I like to use a thick piece of leather between the jaws and my piece so as not to leave mark on the metal.
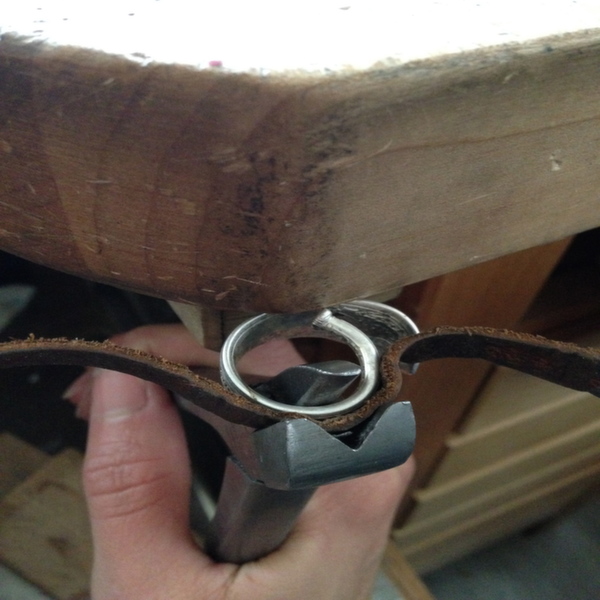
Step 9:
If, for your finished design you want your pieces to lay side by side, you might need to get creative with your forming. I grasped mine with my ring-bending pliers and, while pressing the overlapping piece against my workbench, was able to move the pieces so they laid side by side. It’s your piece though and you might be perfectly happy with the piece sticking above a bit.
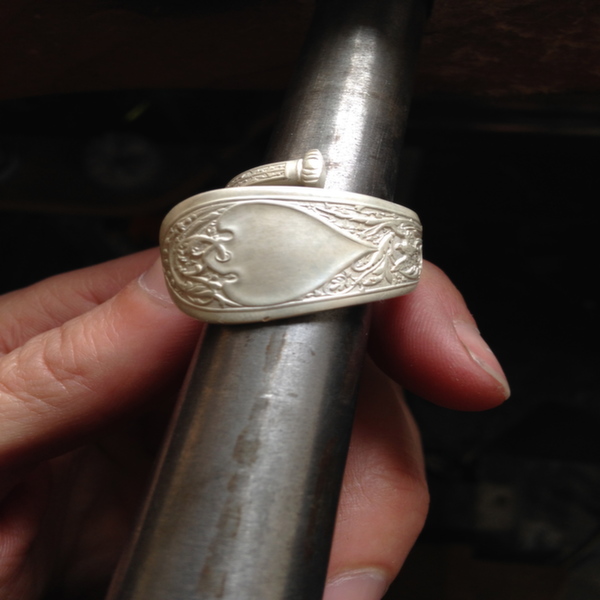
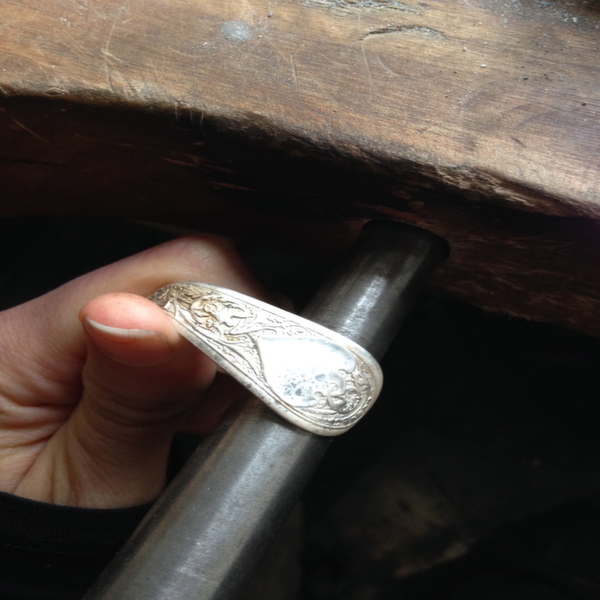
Step 10:
Finish rounding your ring on your mandrel.
Step 11:
Make any last minute tweaks with your ring-bending pliers for sizing and your shaping is done!
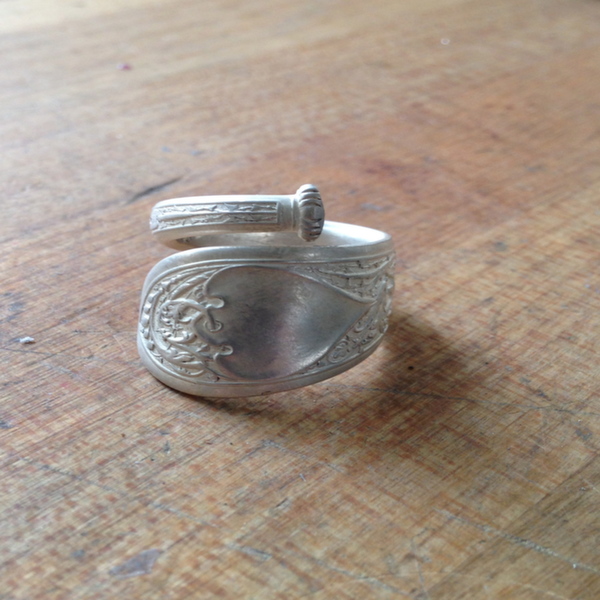
Step 12:
Polish with a polishing cloth or a buffing wheel if your studio has one!
Congratulations! You’ve just made your own family heirloom! Maybe it’s not for family, maybe it’s a silverware set that you and your friends pick out. Get creative, I know you can come up with all kinds of great things!
Imagine a statement-making piece that shows off your style! Create your own custom jewelry with pearl knotting, chain making and photo etching with a front-row seat to expert instruction from Max Goodman in Craftsy’s Jewelry Workshop class.
Do you have a recommendation for a ring bender tool?
Forks seam to be harder to bend what can I do.