
Learning how to make a cuff is not only a simple and fun project, but it also helps you get familiar with a lot of the processes you’ll use elsewhere in your jewelry making endeavors. Follow along with this step-by-step tutorial to learn how to make a cuff, then see how many different ways there are to make this jewelry design all your own.
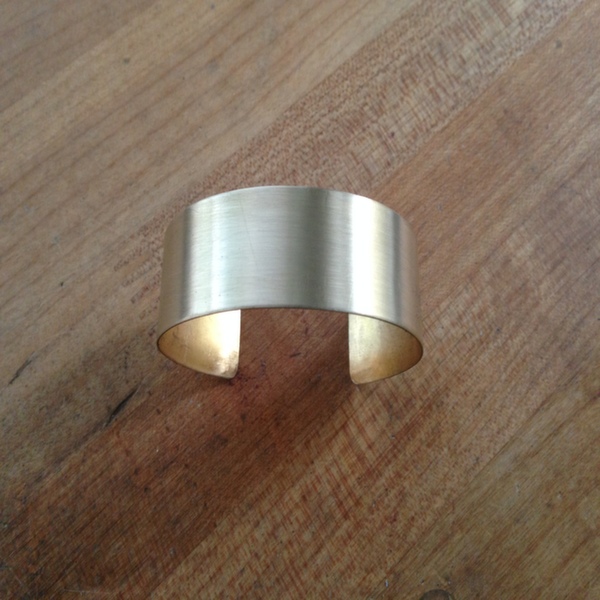
How to make a cuff
Tools you’ll need:
- Nylon hammer
- A mandrel, weight, baseball bat or other reasonably solid round object for forming
- Metal shears
- Sheet metal (20-18 gauge is ideal; you’ll want about 6″ in whatever thickness you decide. For smaller wrists think about bringing that down to 5.5″. If possible, use dead soft sheet metal.)
- File
- Ruler
- Optional: Texturing hammers, stamping sets, drill bits of varying sizes for holes
Notes on tools:
- When making a simple cuff I like to use my guillotine shears, which ensure nice straight edges. If you don’t have these, no worries! Metal shears should work just as well, but you first confirm that you can in fact cut through whichever metal you chose with them. A jeweler’s saw could also work, but remember you’ll likely need to do more finish work and filing if you chose that route. As you advance in your designs, more curves and intricacies will necessitate a jeweler’s saw. So they’re handy to have ready to go.
- Re: sheet metal — There are lots of supply houses out there who will gladly sell you bracelet blanks. They’re a great option if you think this might be something that you want to do on a pretty regular basis. Buying them premade will cut down on time spent cutting and filling, and you’ll know that you’re getting the same thing every time. Keep in mind that 20 or 18 gauge is ideal for a cuff.
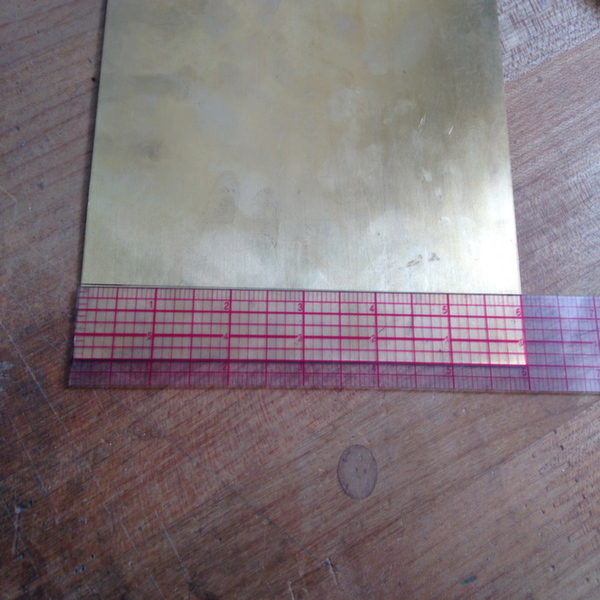
Step 1:
If using sheet metal that is NOT pre-cut, make note if you have a straight edge on your sheet metal. Using your graphing ruler, you can draw lines that are either parallel or perpendicular to the straight edge so you end up with a piece with squared edges. I like to use a Sharpie because it helps me get bearings of what the overall shape and size will be. Plus, we can always build upon lines if we need one that is thicker than the width of the ruler.
Step 2:
Using your metal shears, guillotine or jeweler’s saw, cut along the lines you just made until you have an elongated rectangle. Note: When cutting long lines like this, I stop about 3/4 of the way before a full cut. Sometimes, as the blades of the scissors come together, you’ll get a little crimp at that spot in your metal. Not only does it create a less than straight line but it can be a HUGE pain to remove. If you continue the length of your cut using the 3/4 technique, you’re less likely to create problems that will need to be fixed after.
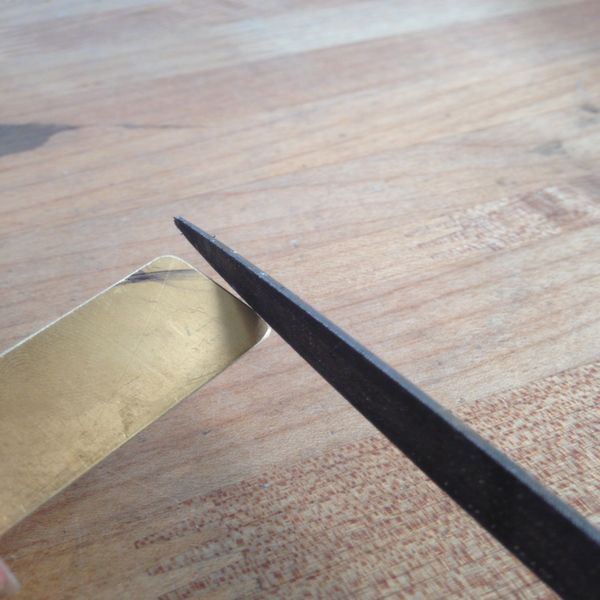
Step 3:
Using your file, round the sharp corners of your metal. You want this to be comfortable to put on and take off, so make sure there aren’t any sharp edges or places that would snag clothing or cut skin. While you have your file out, consider slightly beveling the edges of the piece for a more finished appearance. I like to go over all my beveled/ filed edges with a cushy nail file just to make sure everything is smooth.
Step 4:
I’m going to skip ahead here since my cuff will be pretty simple, but if you’re wanting more detail, this is a good place to stop and do some customizing. Drilling holes is much more simple on a flat surface than an already curved one. Texturing metal here will not deform a piece the way it would if you do it after. Be wary of too much hammering and stamping as it may “work harden” your piece. If in the next step, you notice that your piece is very difficult to bend, this is likely what happened. It will require heating with your torch to re-soften the metal.
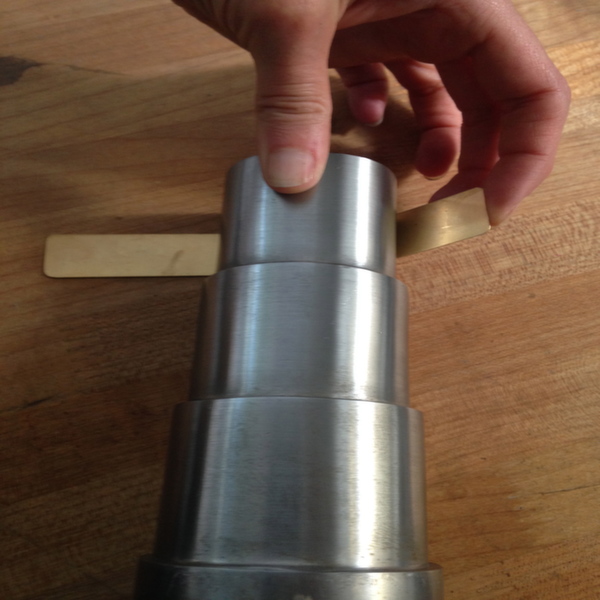
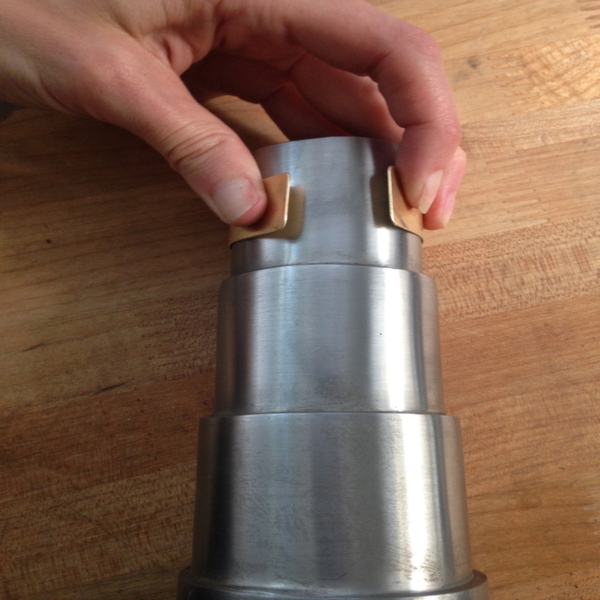
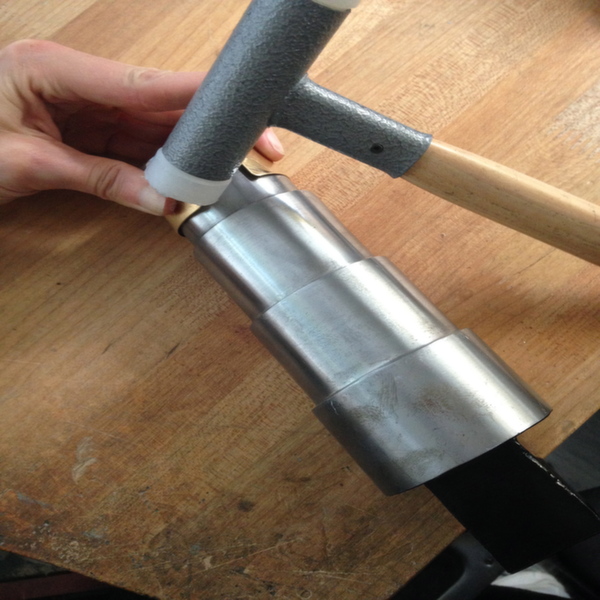
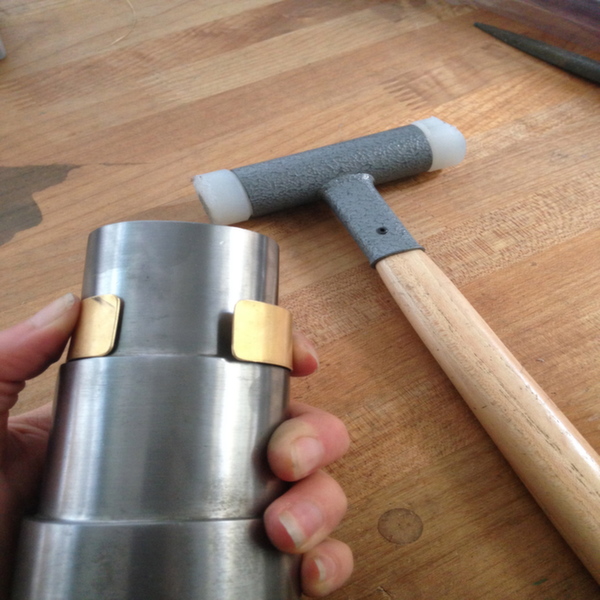
Step 5:
Choose your curve making tool. My first choice is a step cuff mandrel since it gives you lots of options for sizes, but you can also use a hand weight, a baseball bat, piece of pipe or even a cuff-making tool.
Step 6:
Begin by using your fingers to bend the metal blank around your mandrel. You can start with one side and then follow the curve around to bend the other side as well. Using your nylon ended hammer, begin making hammer blows on the ends and around the entire piece so that your metal will form to the mandrel. If you did any sort of texturing or stamping to your metal and did not anneal, this is where you might notice more resistance than might otherwise occur.
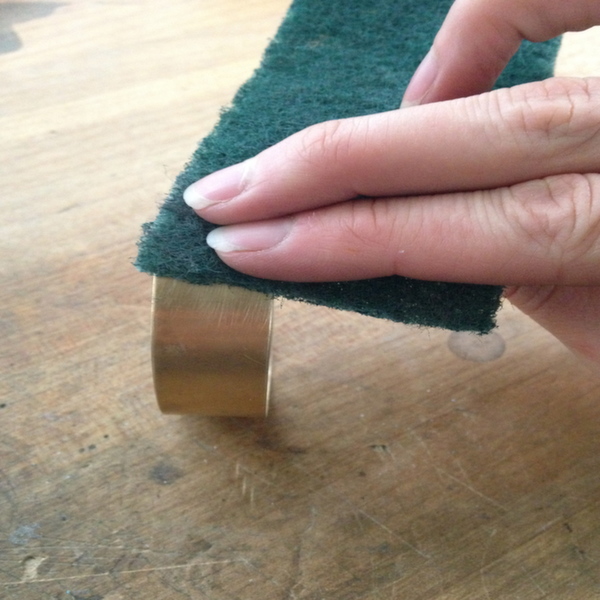
Step 7:
Choose a finish. You can use varying types of sand paper to create a finish closer to a polish. Or, use Scotch-Brite like I did here for something closer to a satin finish. If using Scotch-Brite, you might consider using a clear coat or renaissance wax to coat the exterior to keep fingerprints at bay.
Step 8:
Customize away! There are a lot of finishing accents you can do after your cuff is formed and sanded. Some of my favorites are wrapping wire, adding leather or string accents, and playing with your files to create different textures. Also, making a few of these in varying sizes is a great way to add interest to the pieces you already have.
Learn how to make artisan accessories you’ll love to wear and gift in the Craftsy class Metalsmithing at Home, taught by expert jewelry designer Kate Richbourg. She demonstrates useful techniques for soldering brass, copper and silver into industrial chic pieces that are sure to showcase your style!
most useful thank you