
Do you need an adorable little reminder ribbon to wear around your finger? Maybe you are just looking for a great handmade accessory. You’re in luck! This tutorial will quickly teach you how to make a cute little bow ring.
Follow along for this bow ring tutorial!
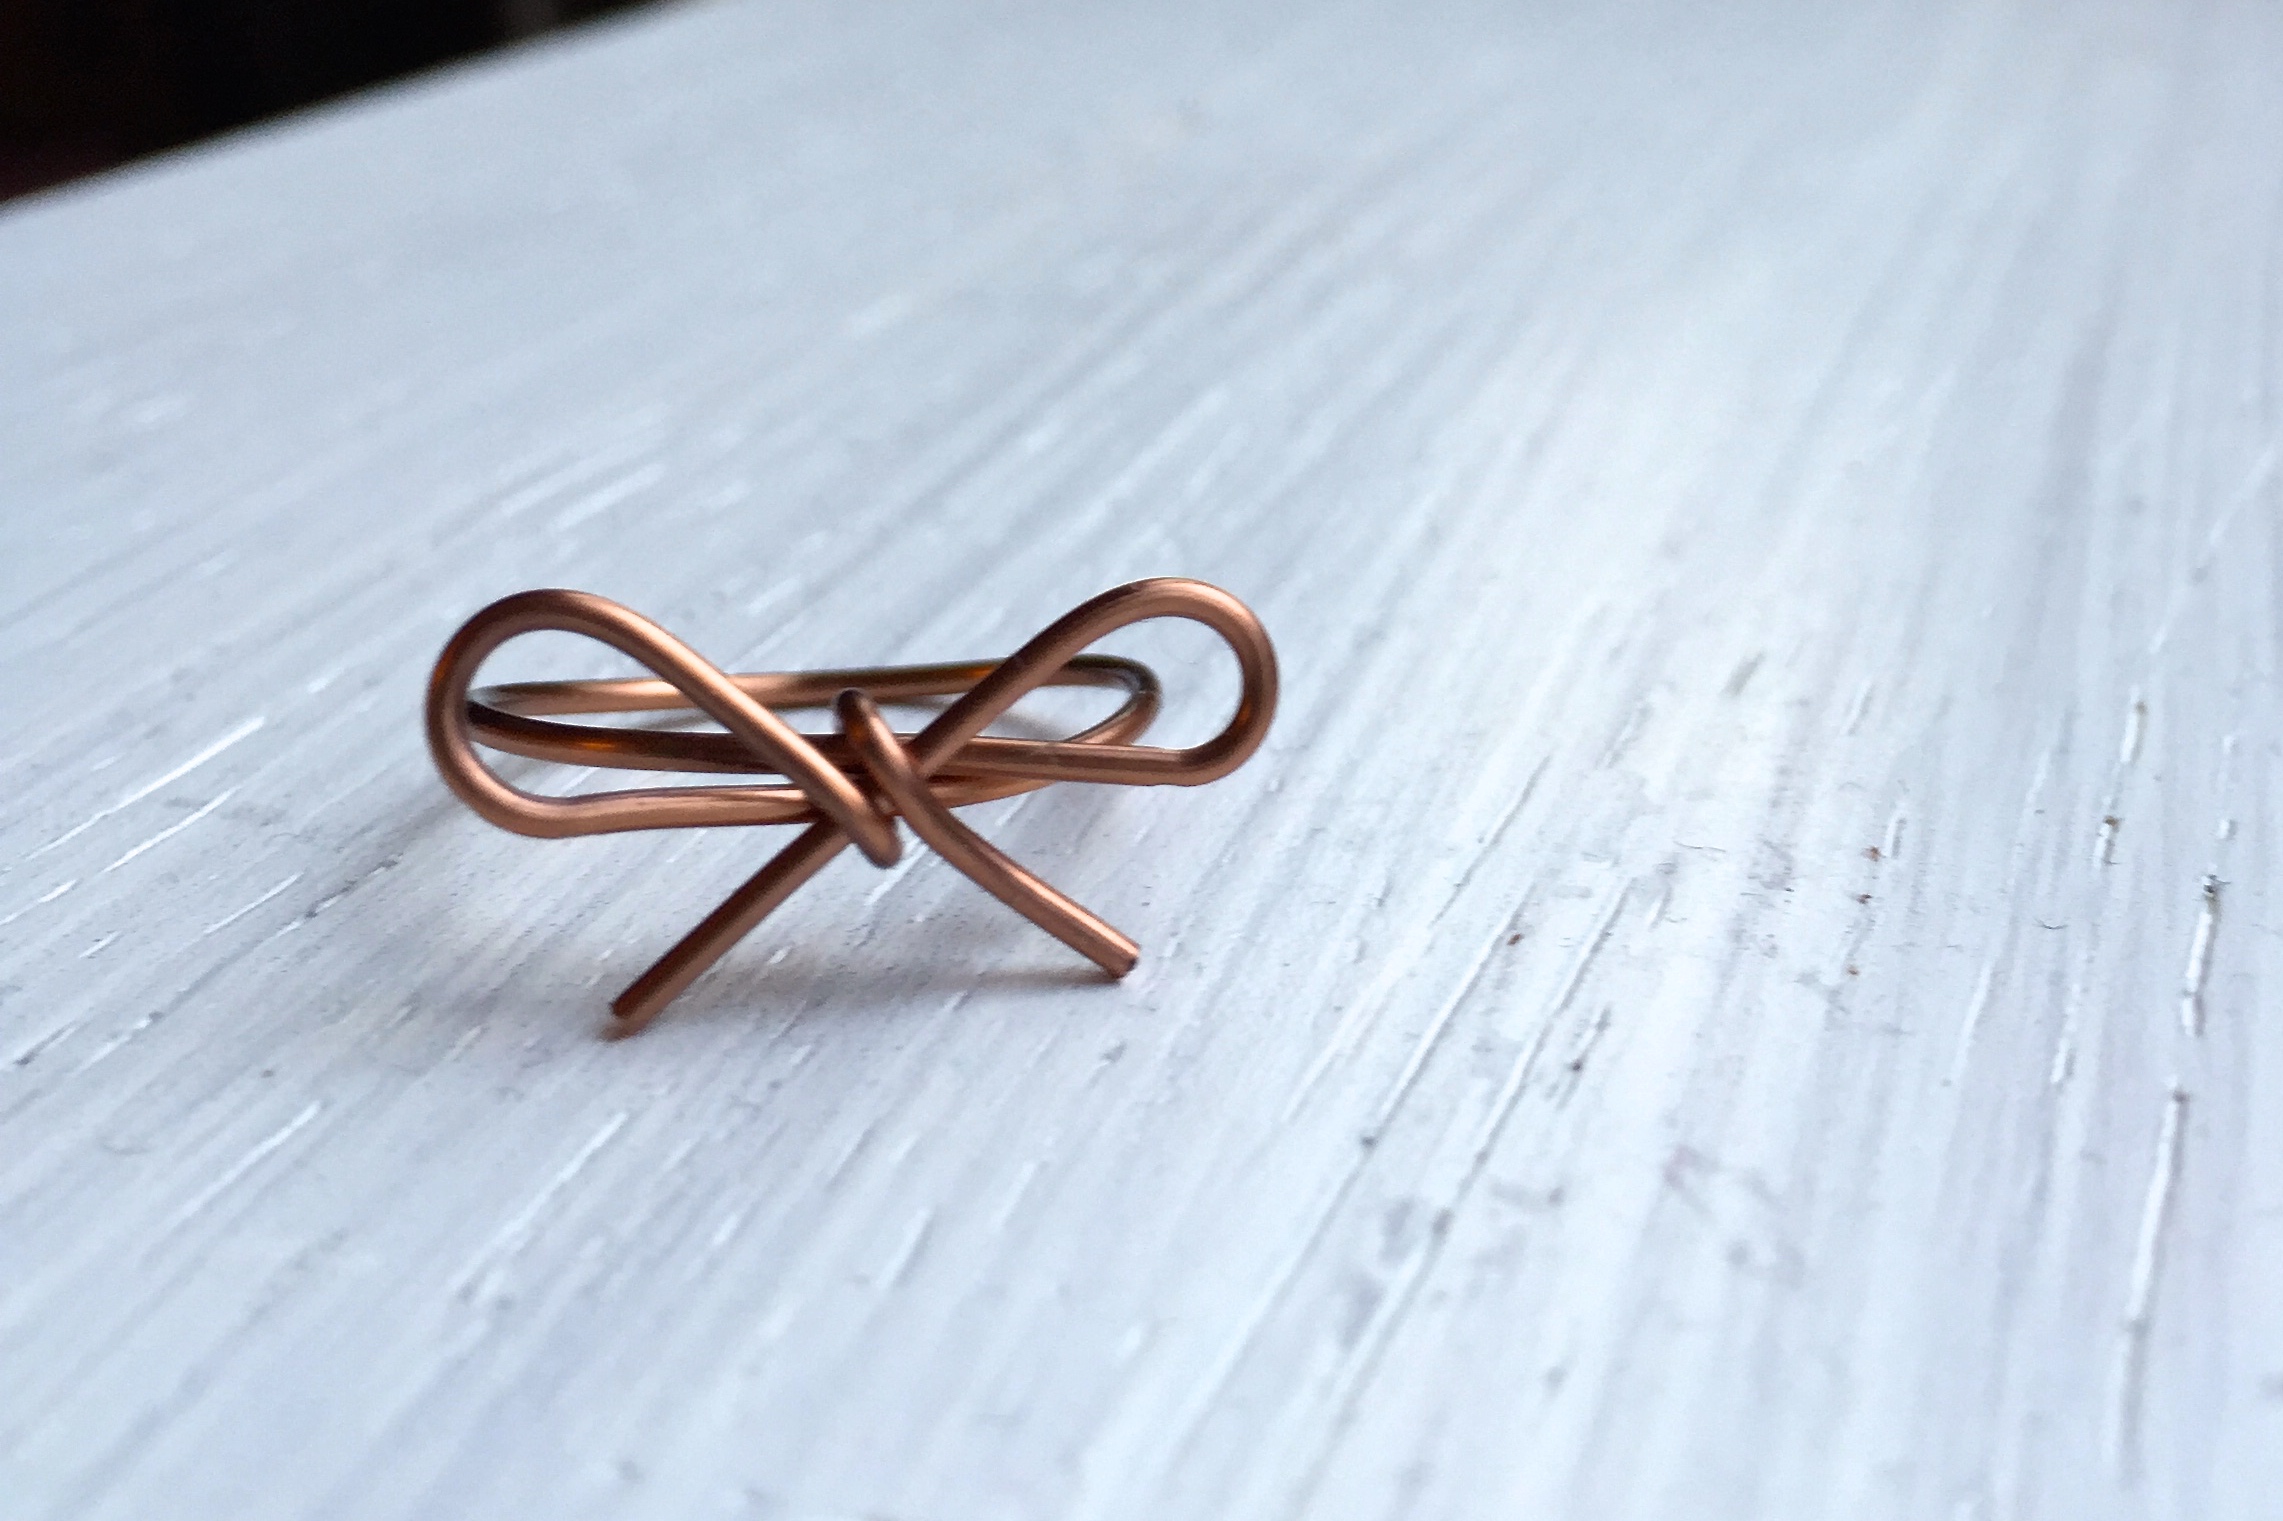
These rings are so quick to make, you’ll be hooked in minutes! They are a sweet, easy project whether you are just beginning with wire or have been at it for years. Don’t worry about the bow being too perfect — that’s half the joy of handmade, after all!
Materials:
- 20g craft wire
- Round-nosed pliers
- Flat-nosed pliers
- Flush-cutters
- Cylindrical object, like a lip balm
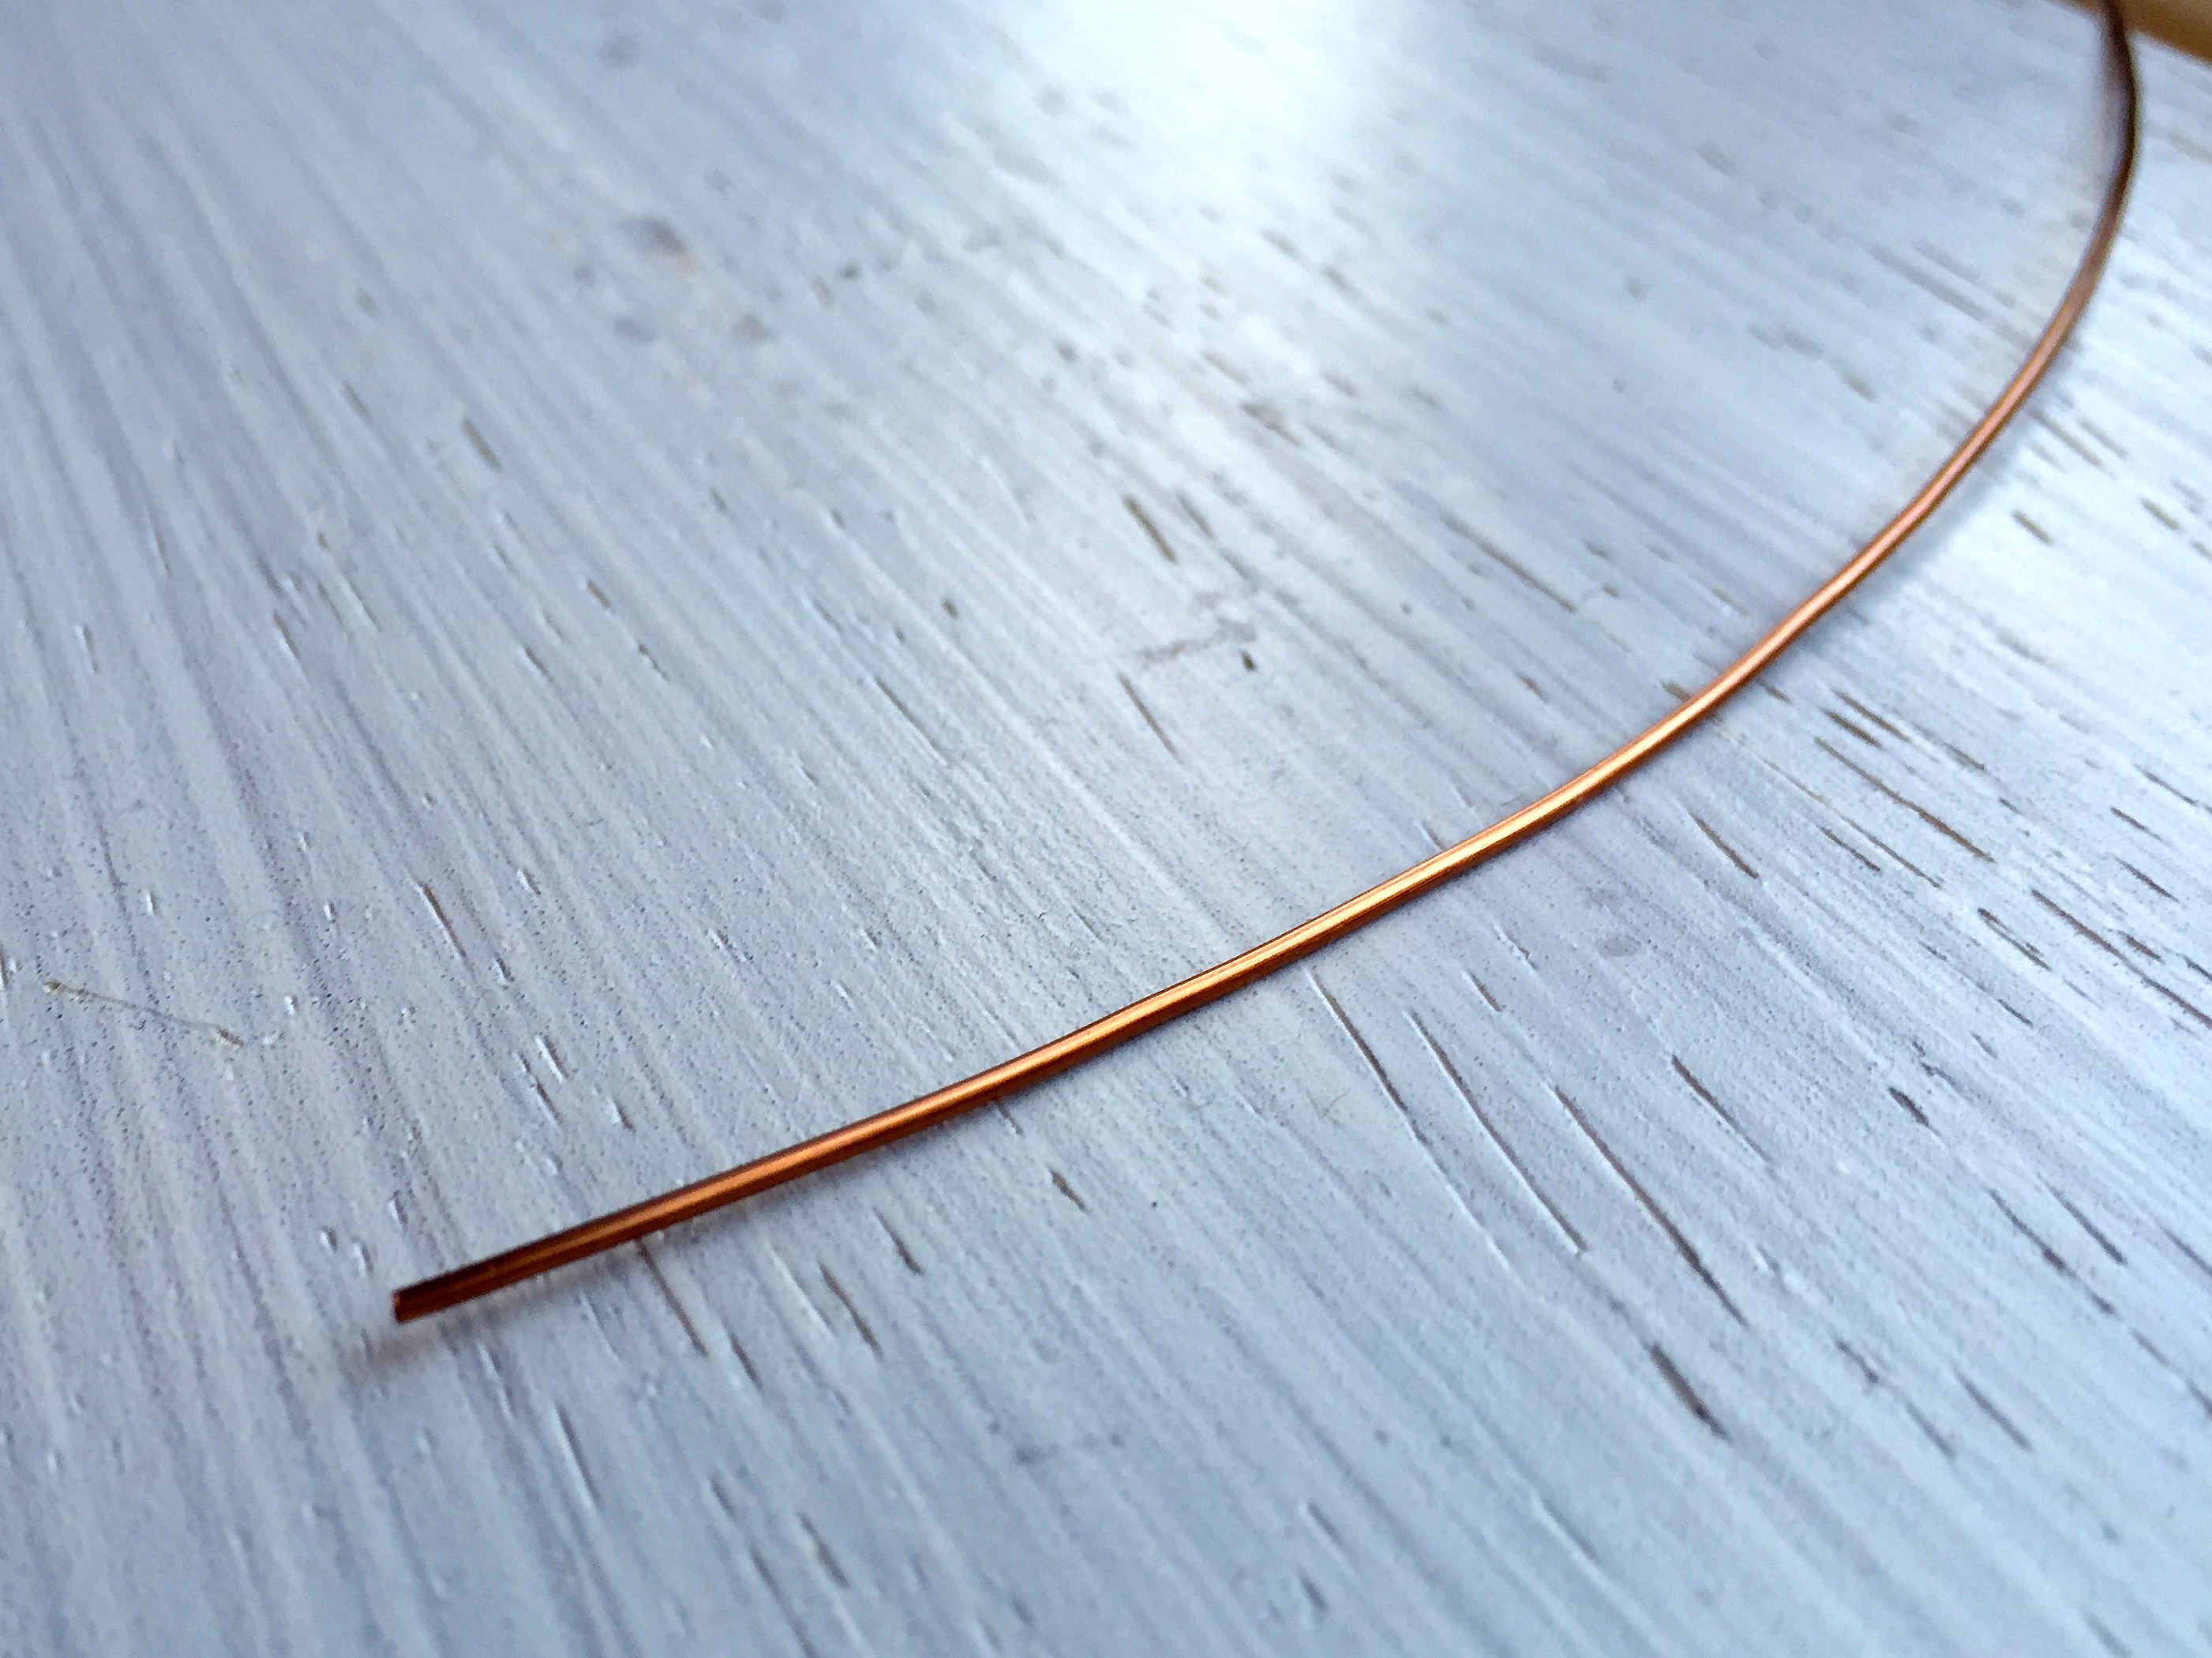
1. Cut a 4-inch piece of 20g wire. Take a moment to smooth it out. (If you are anything like me, spooled wire can get a little kinked once I’ve had it in my possession for a bit!)
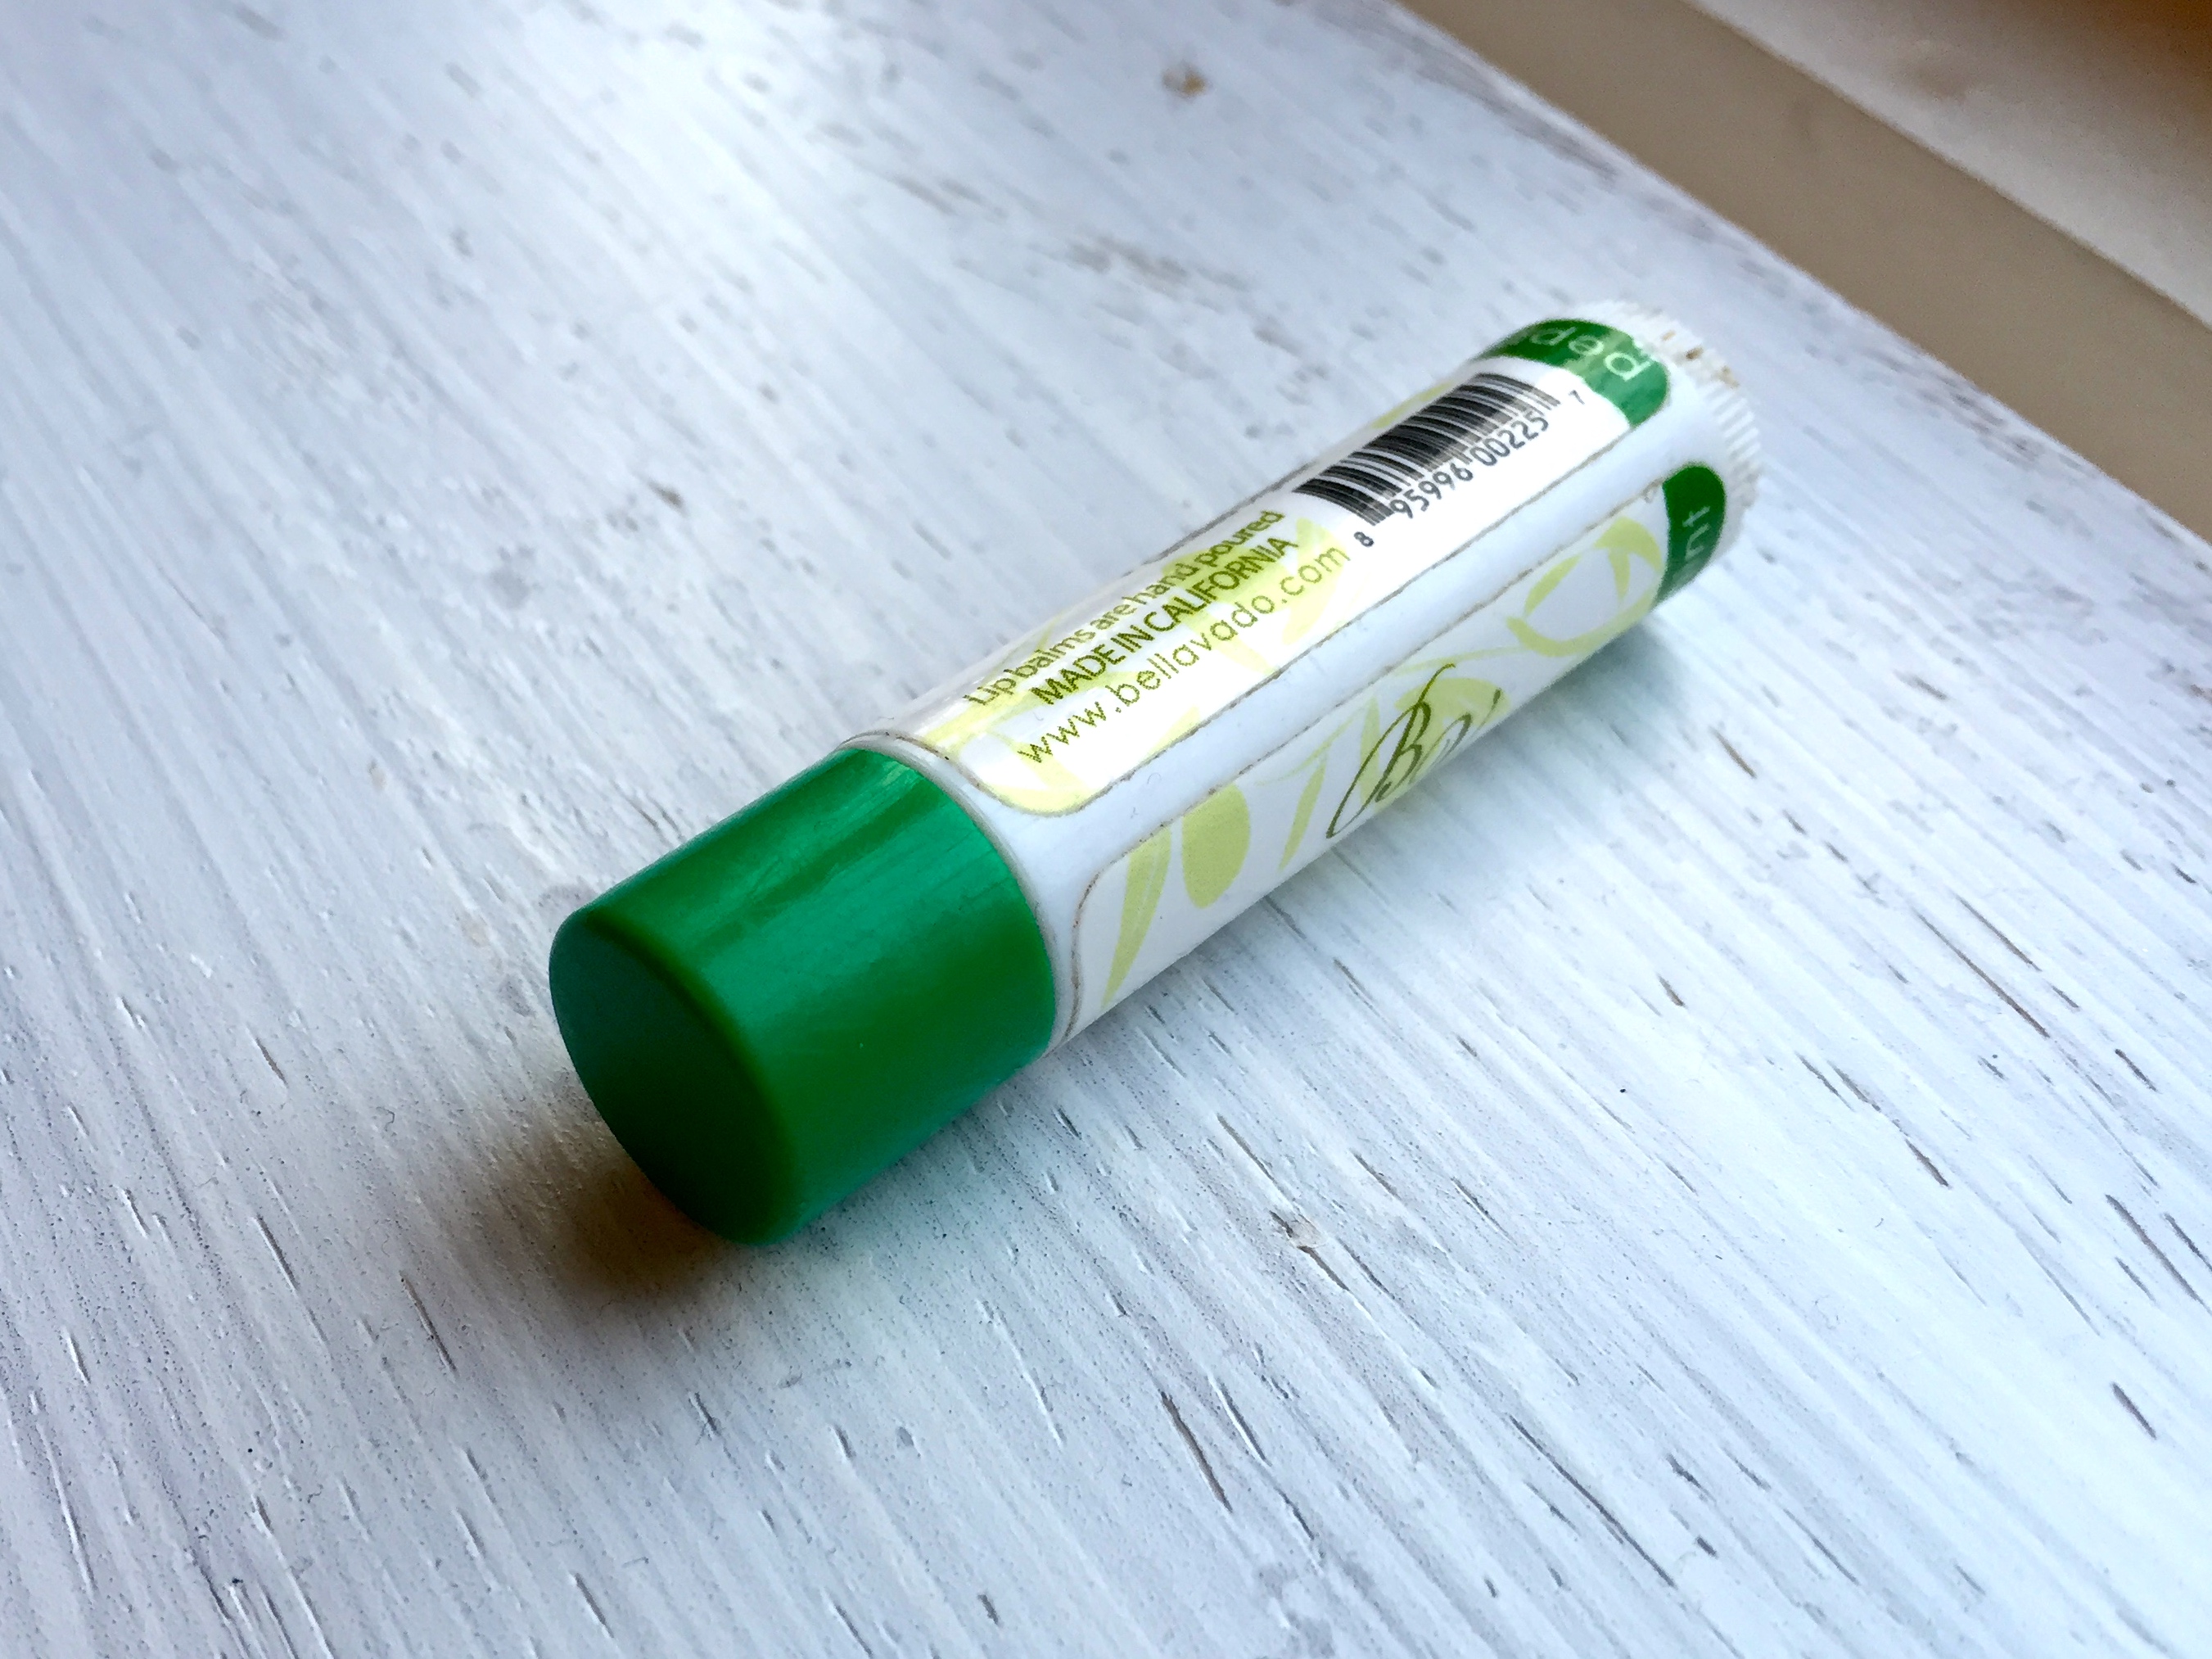
2. Take a cylindrical object — I use a lip balm but anything similar will do! If you want to be more precise then you can upgrade to a ring mandrel to give you more control over the size of ring you are creating.
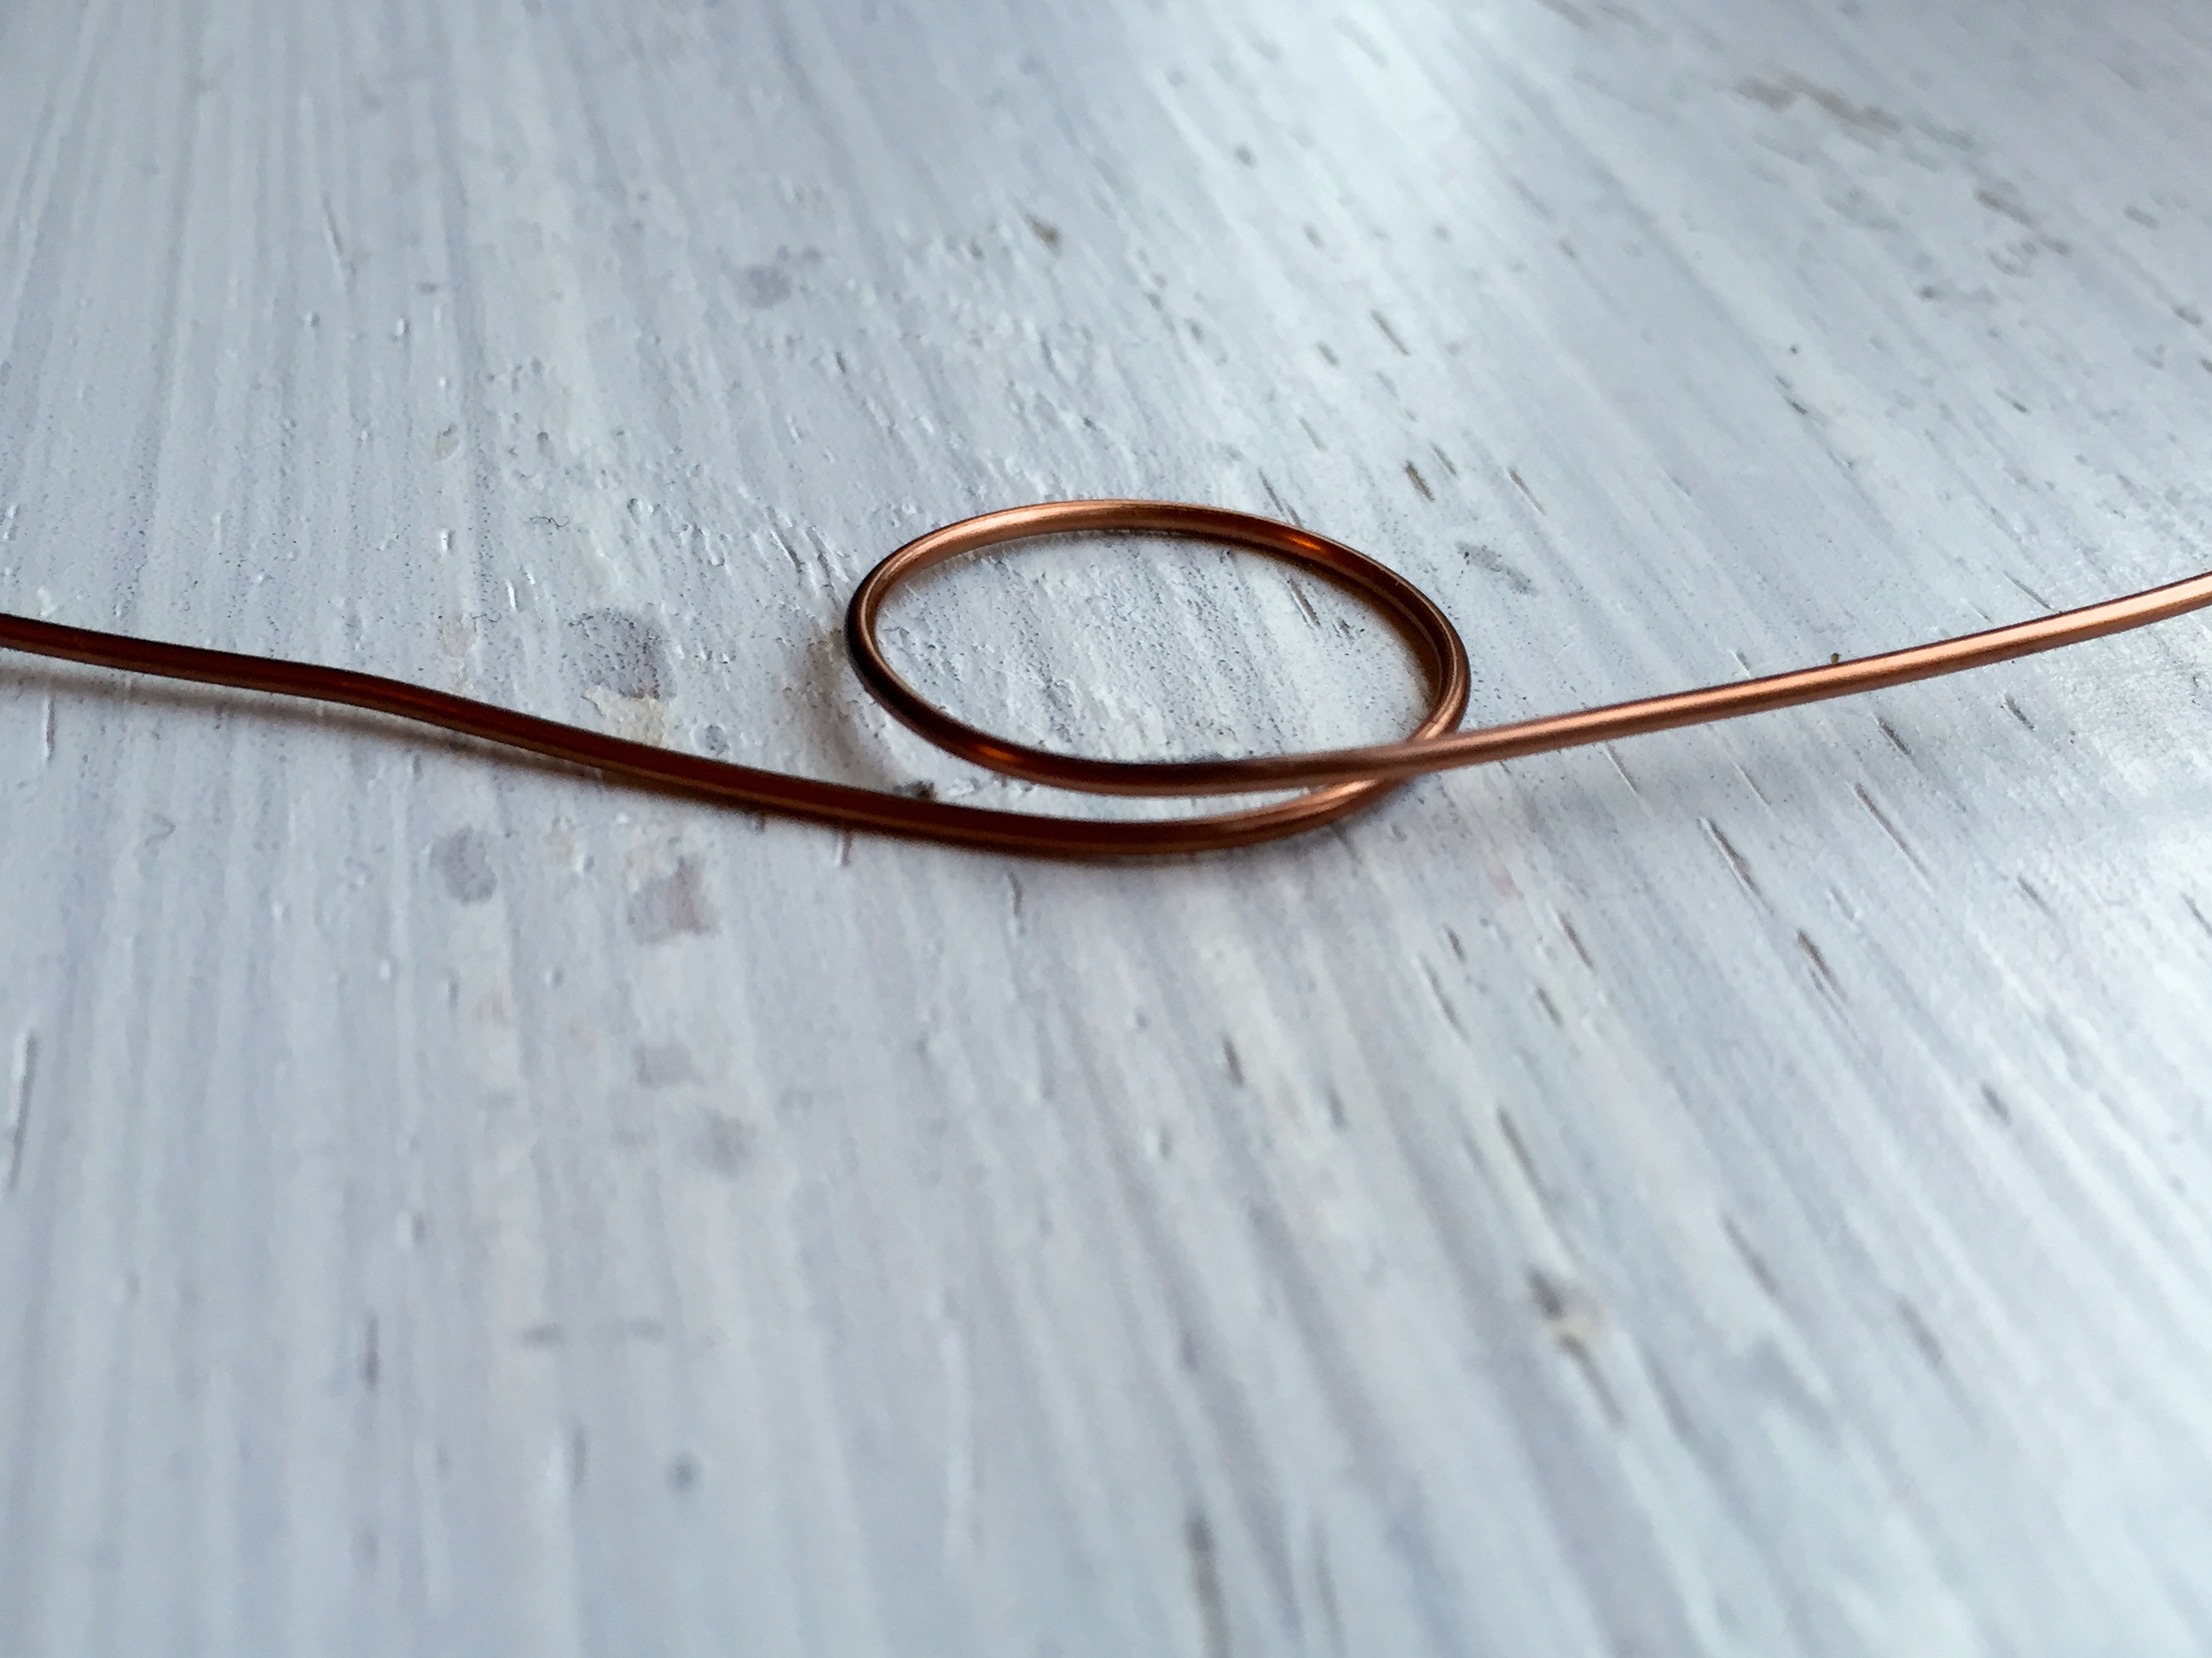
3. Wrap the center of the wire firmly around the lip balm, overlapping the tails in the centre. The tail going from left to right should lie above the second tail.
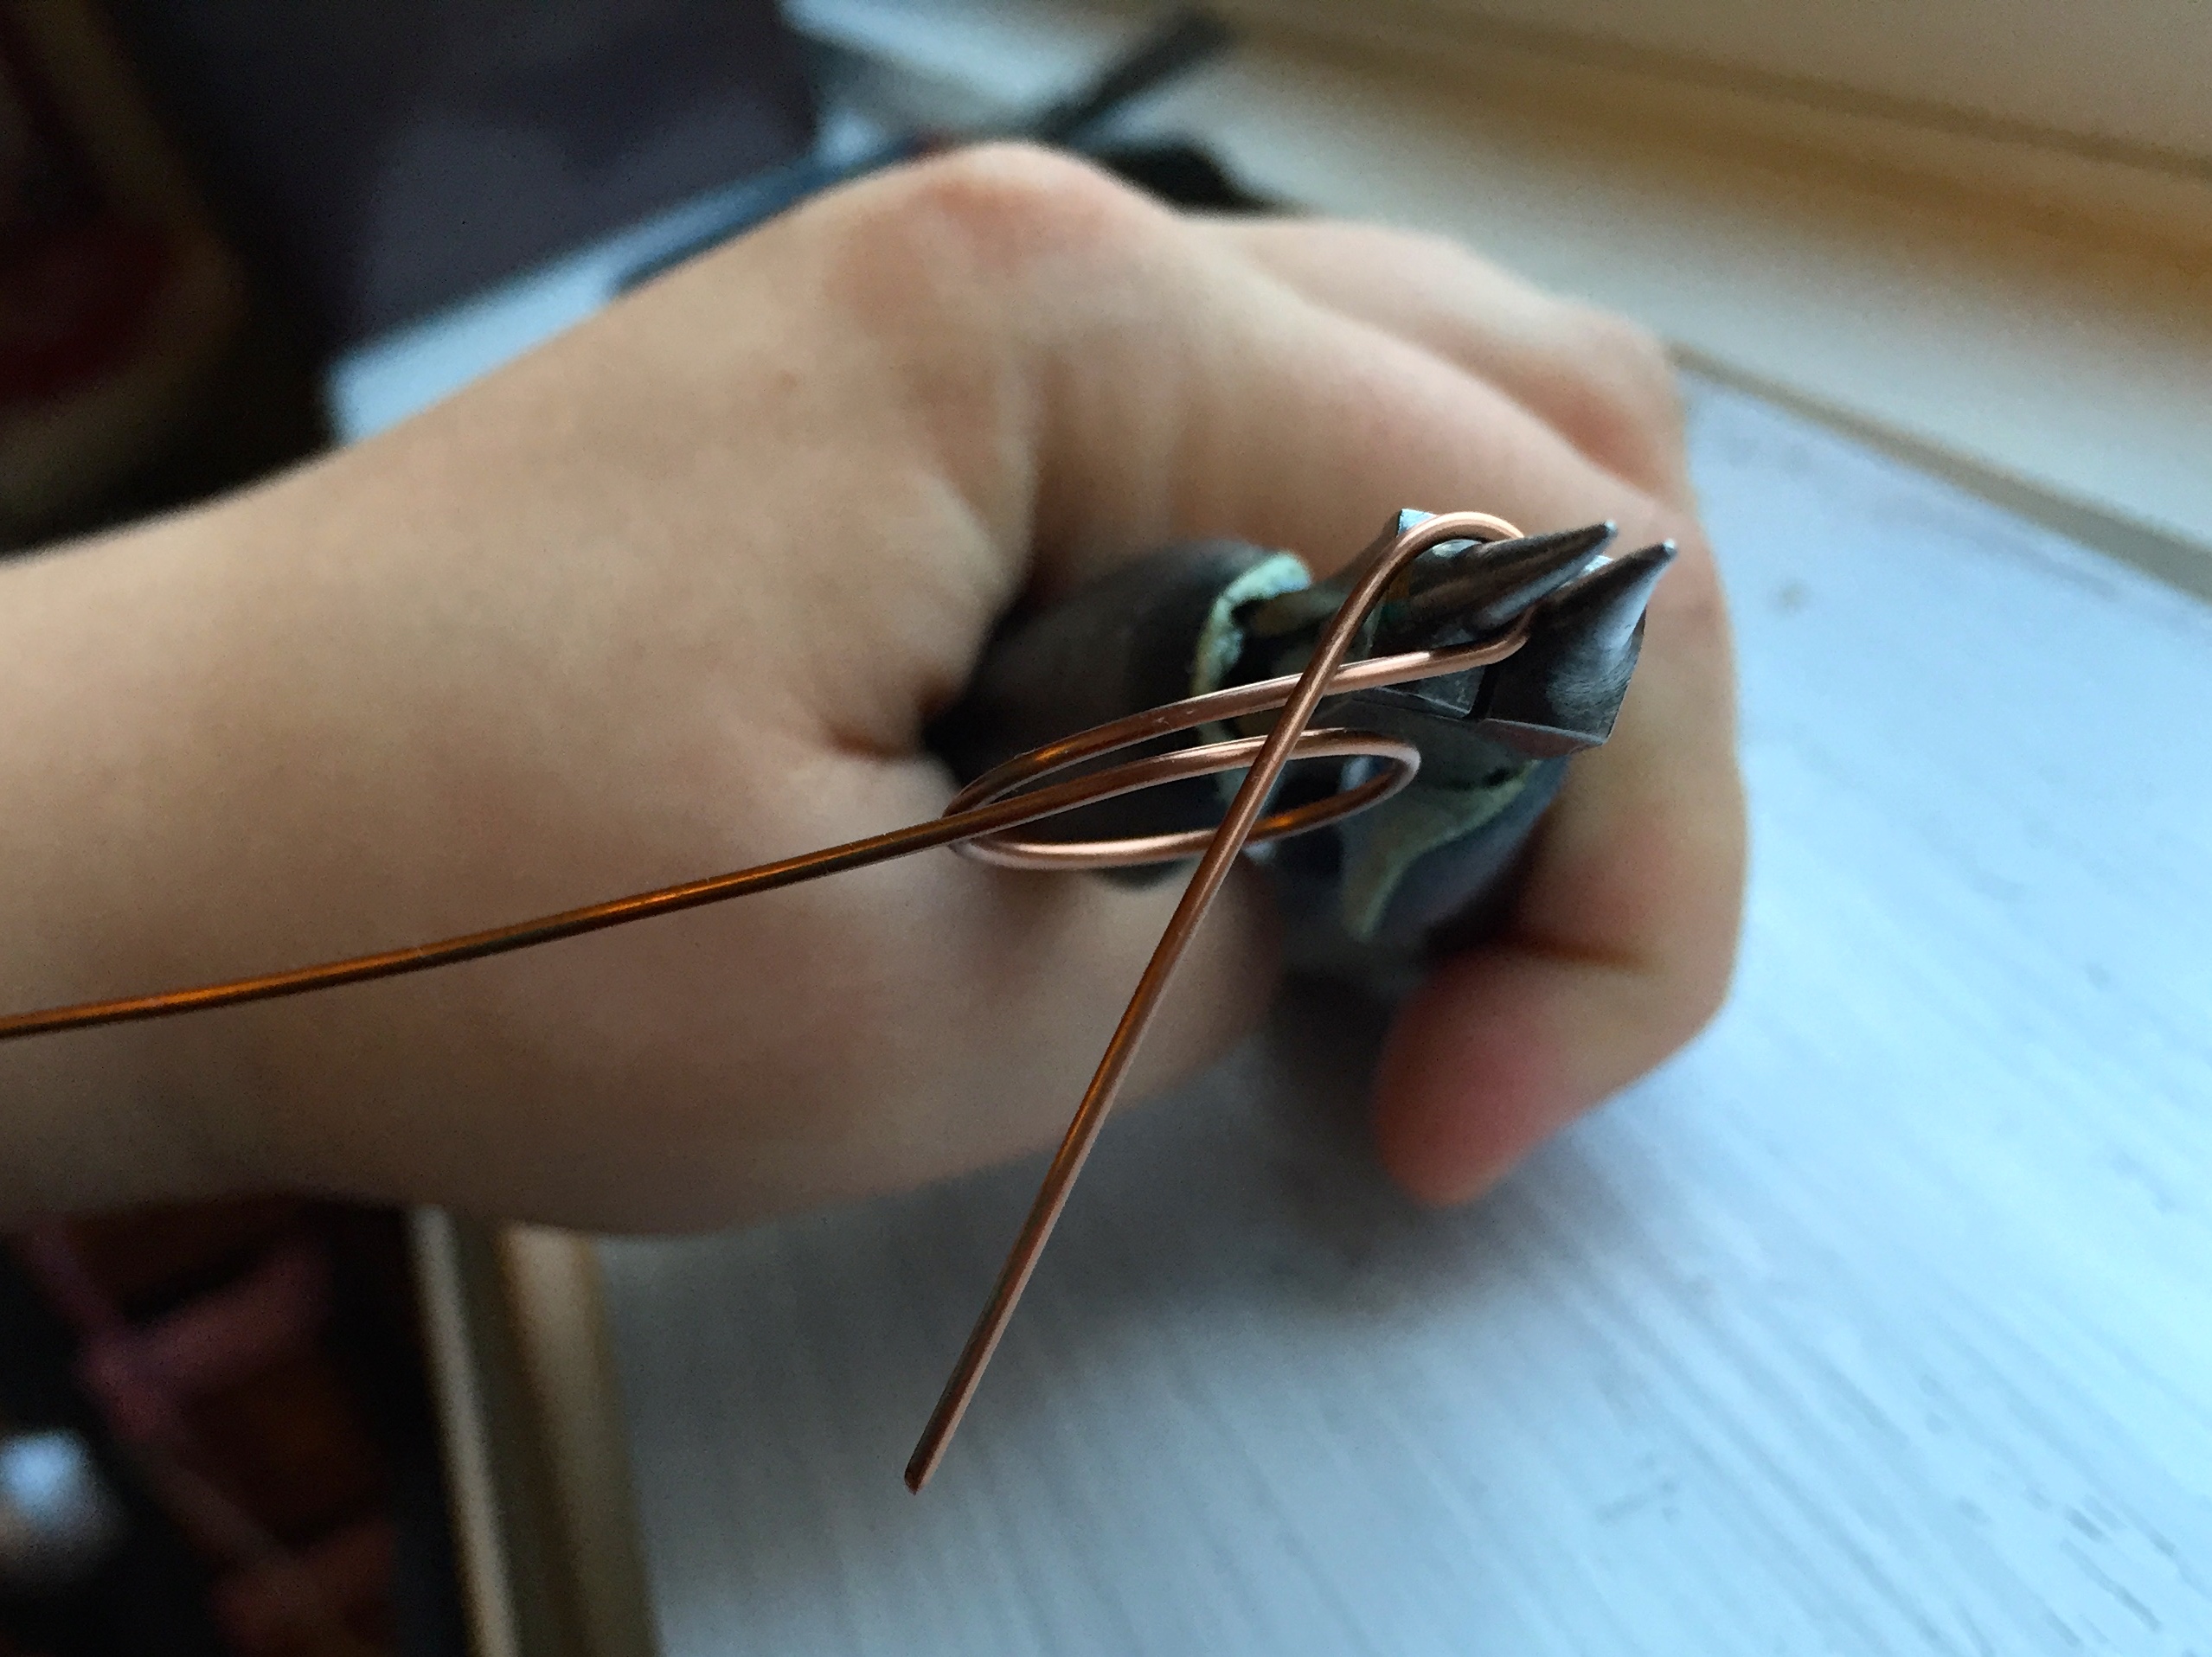
4. With the fat part of your round-nosed pliers, turn a loop with the wire tail to the right-hand side, like the loop of a bow — folding back on itself and down.
5. Repeat this action with the left-hand wire tail, with the loop also going up and over then the tail pointing downward.
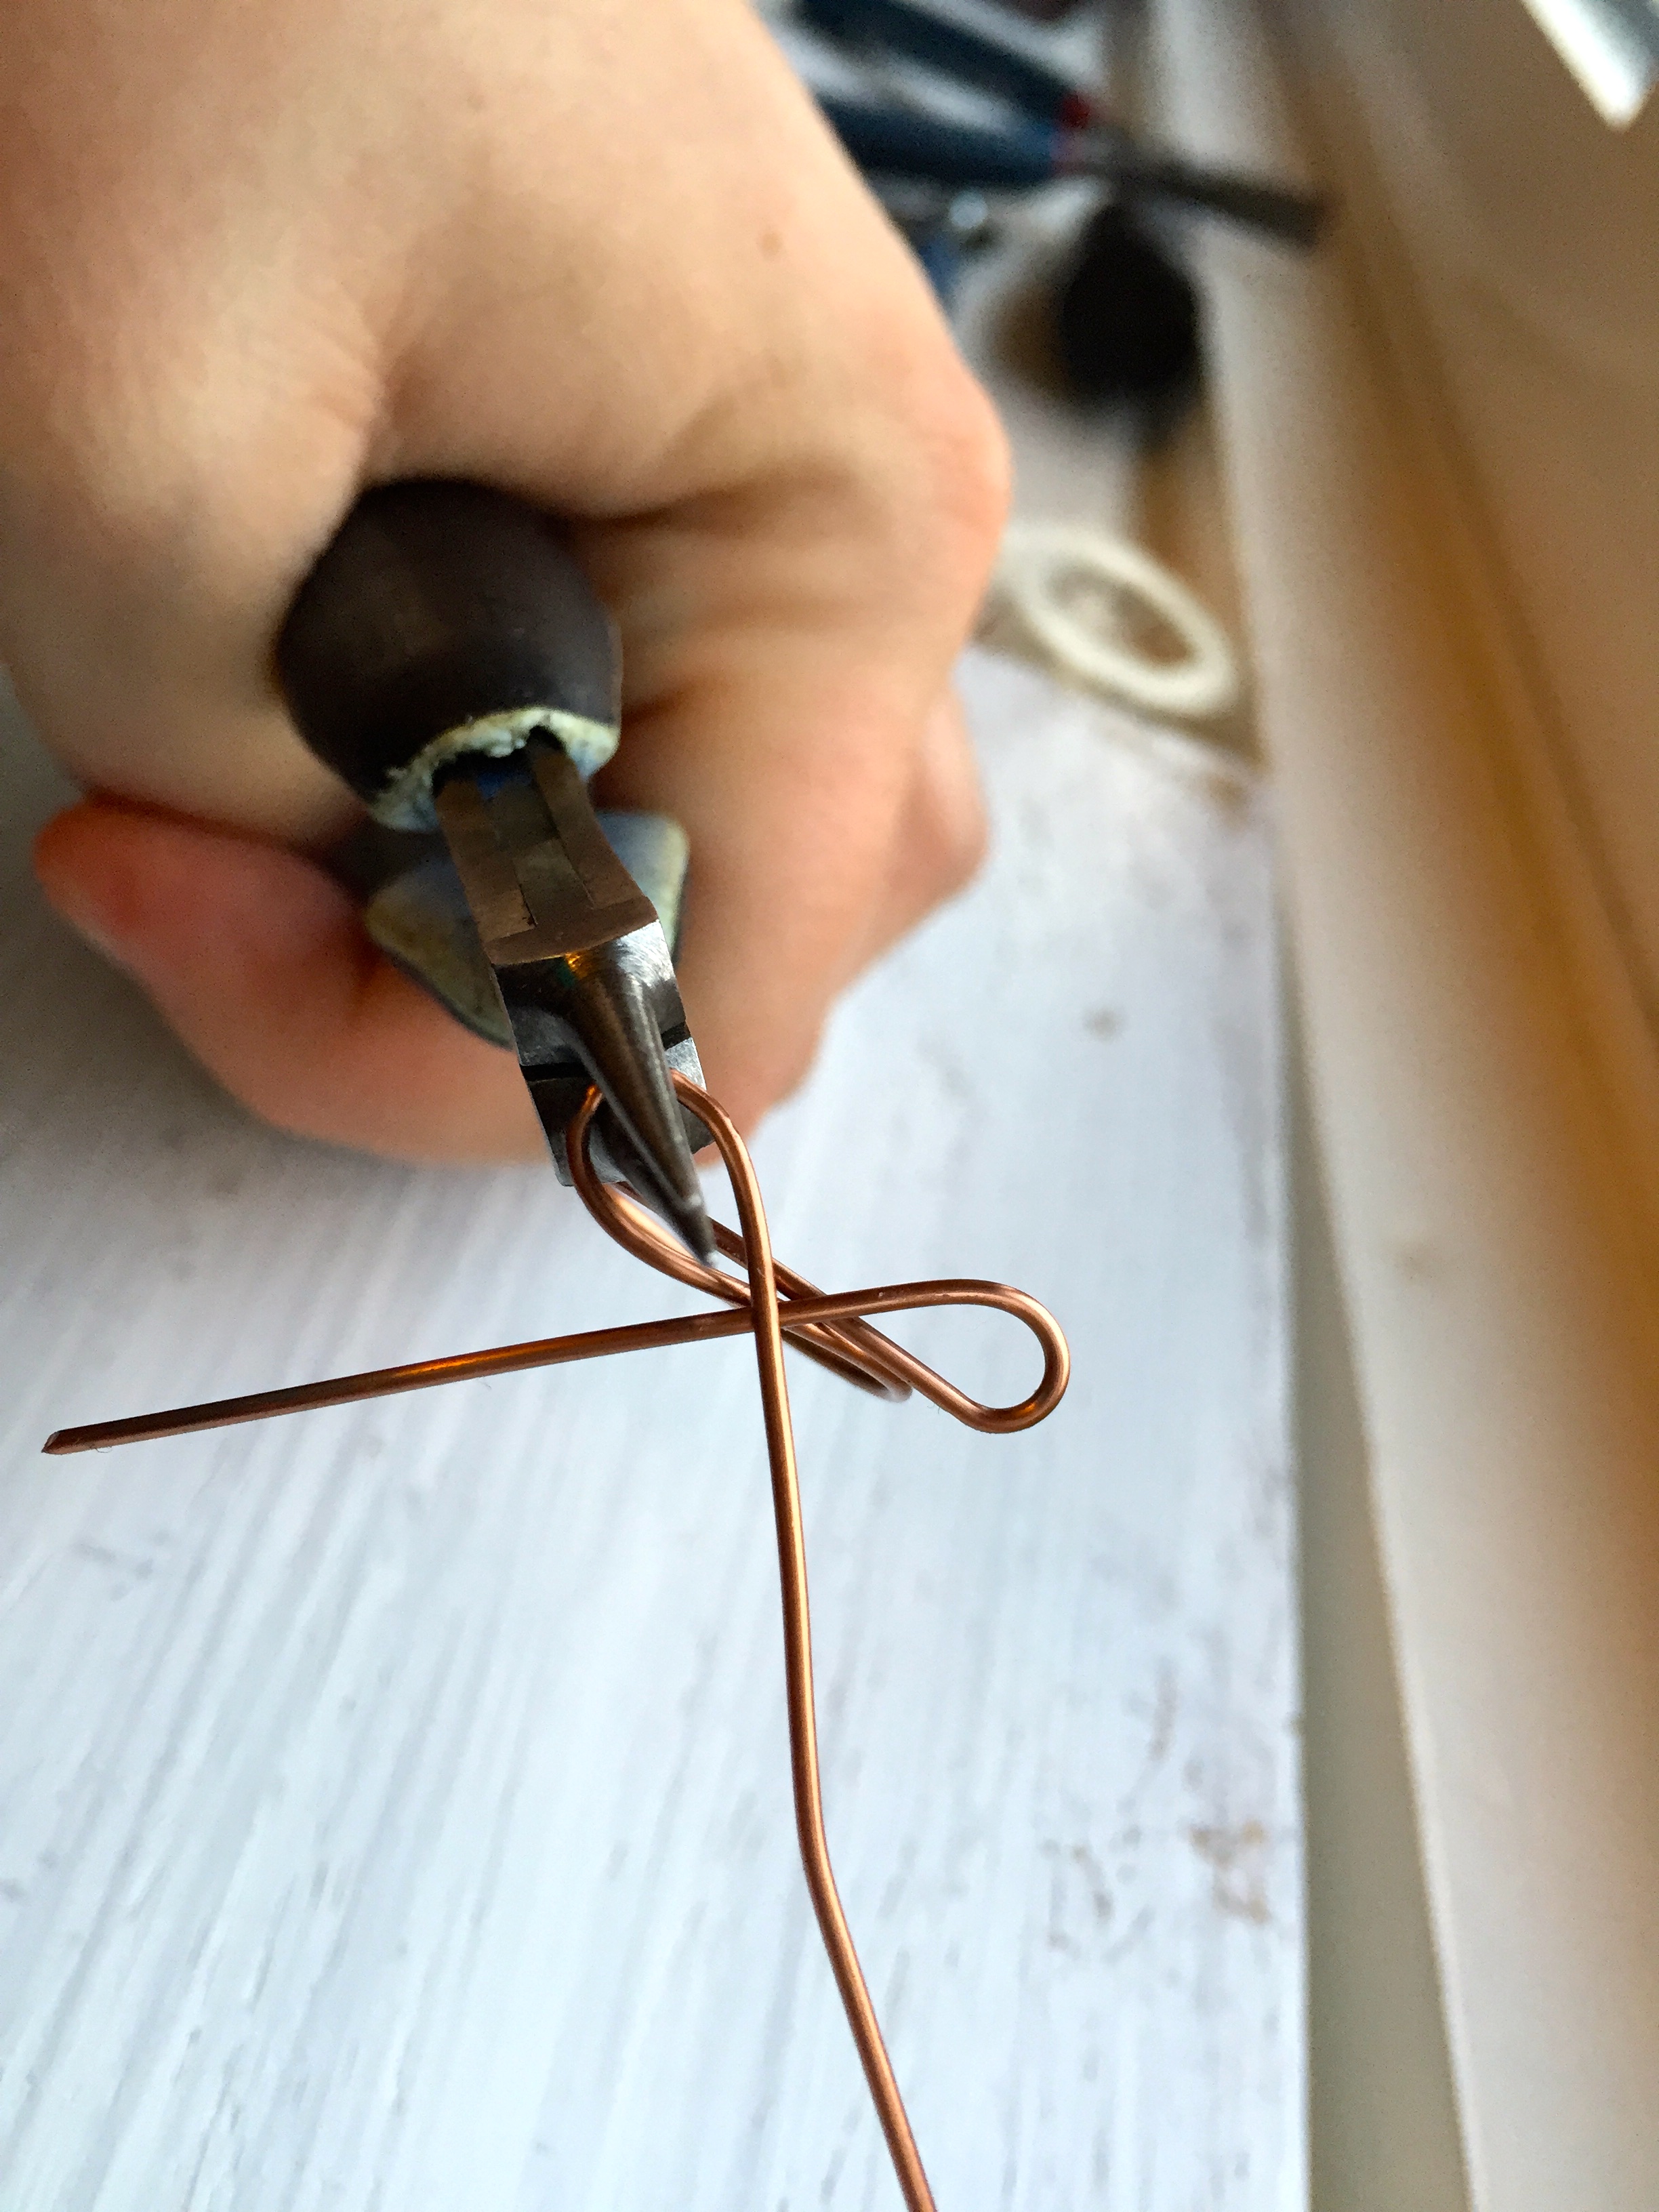
6. Take the tail from step 4, and bring it underneath and through the main ring
7. Bring this wire down and over the two bow loops, “knotting” them together.
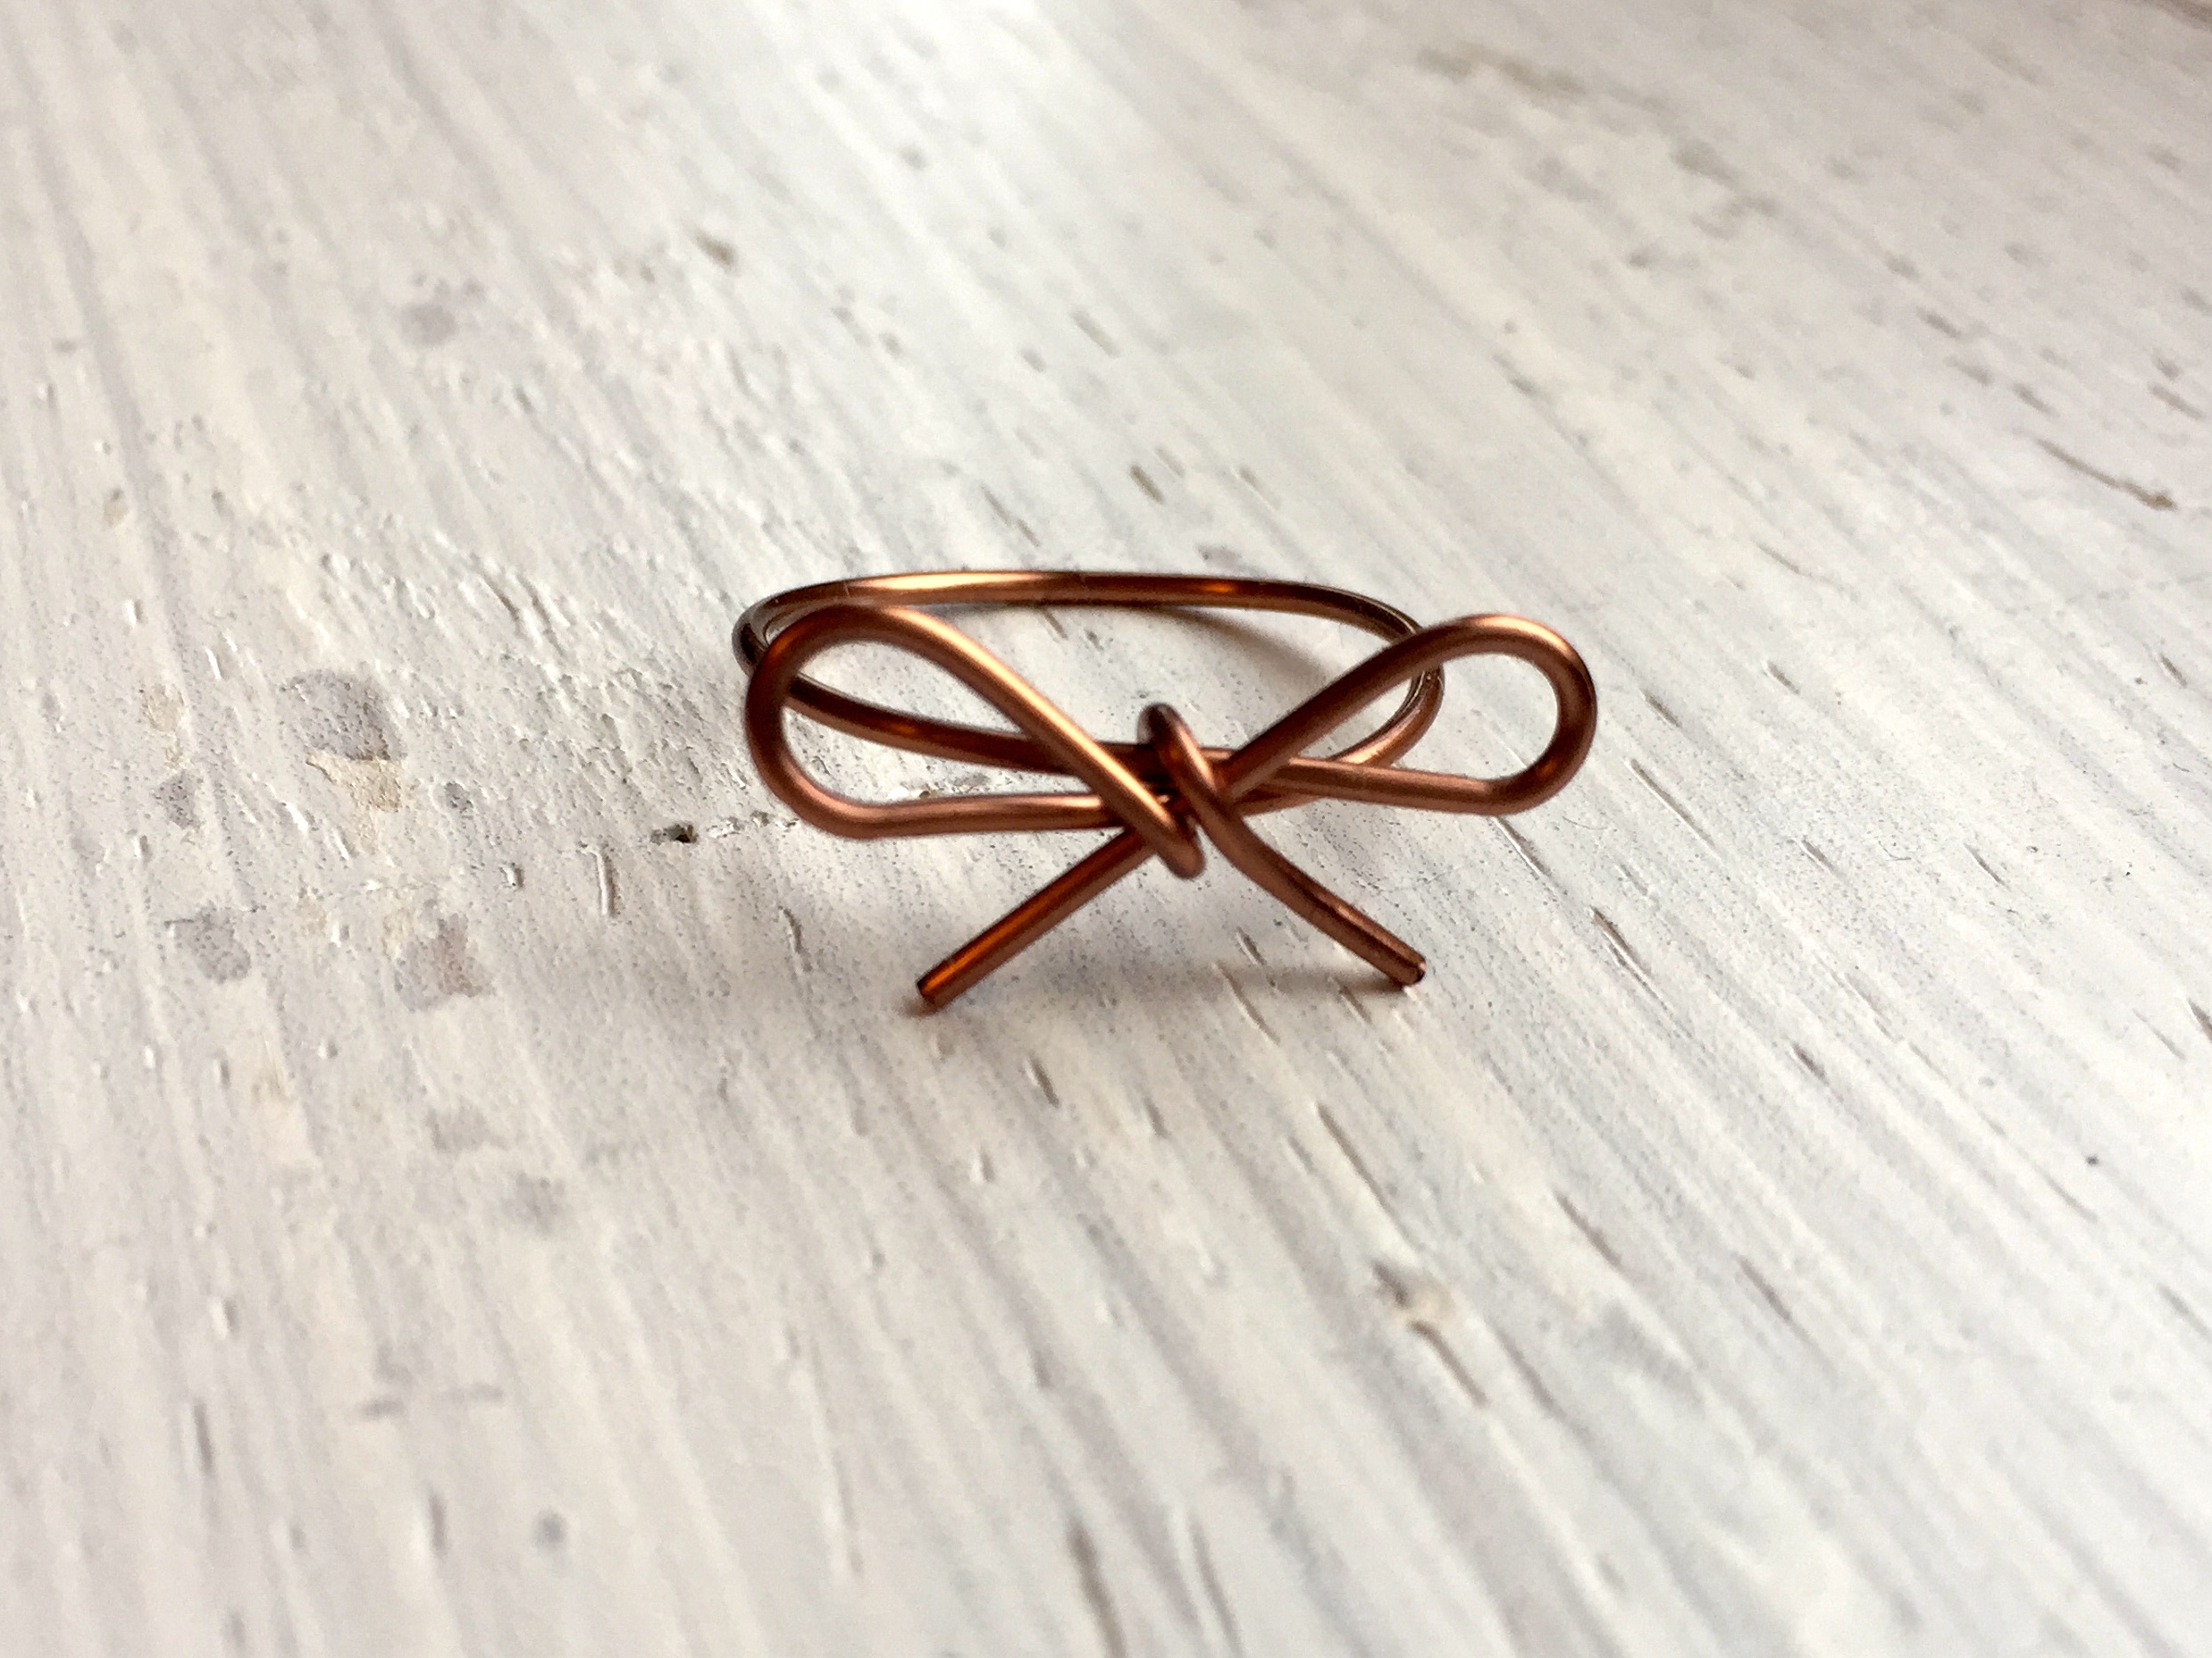
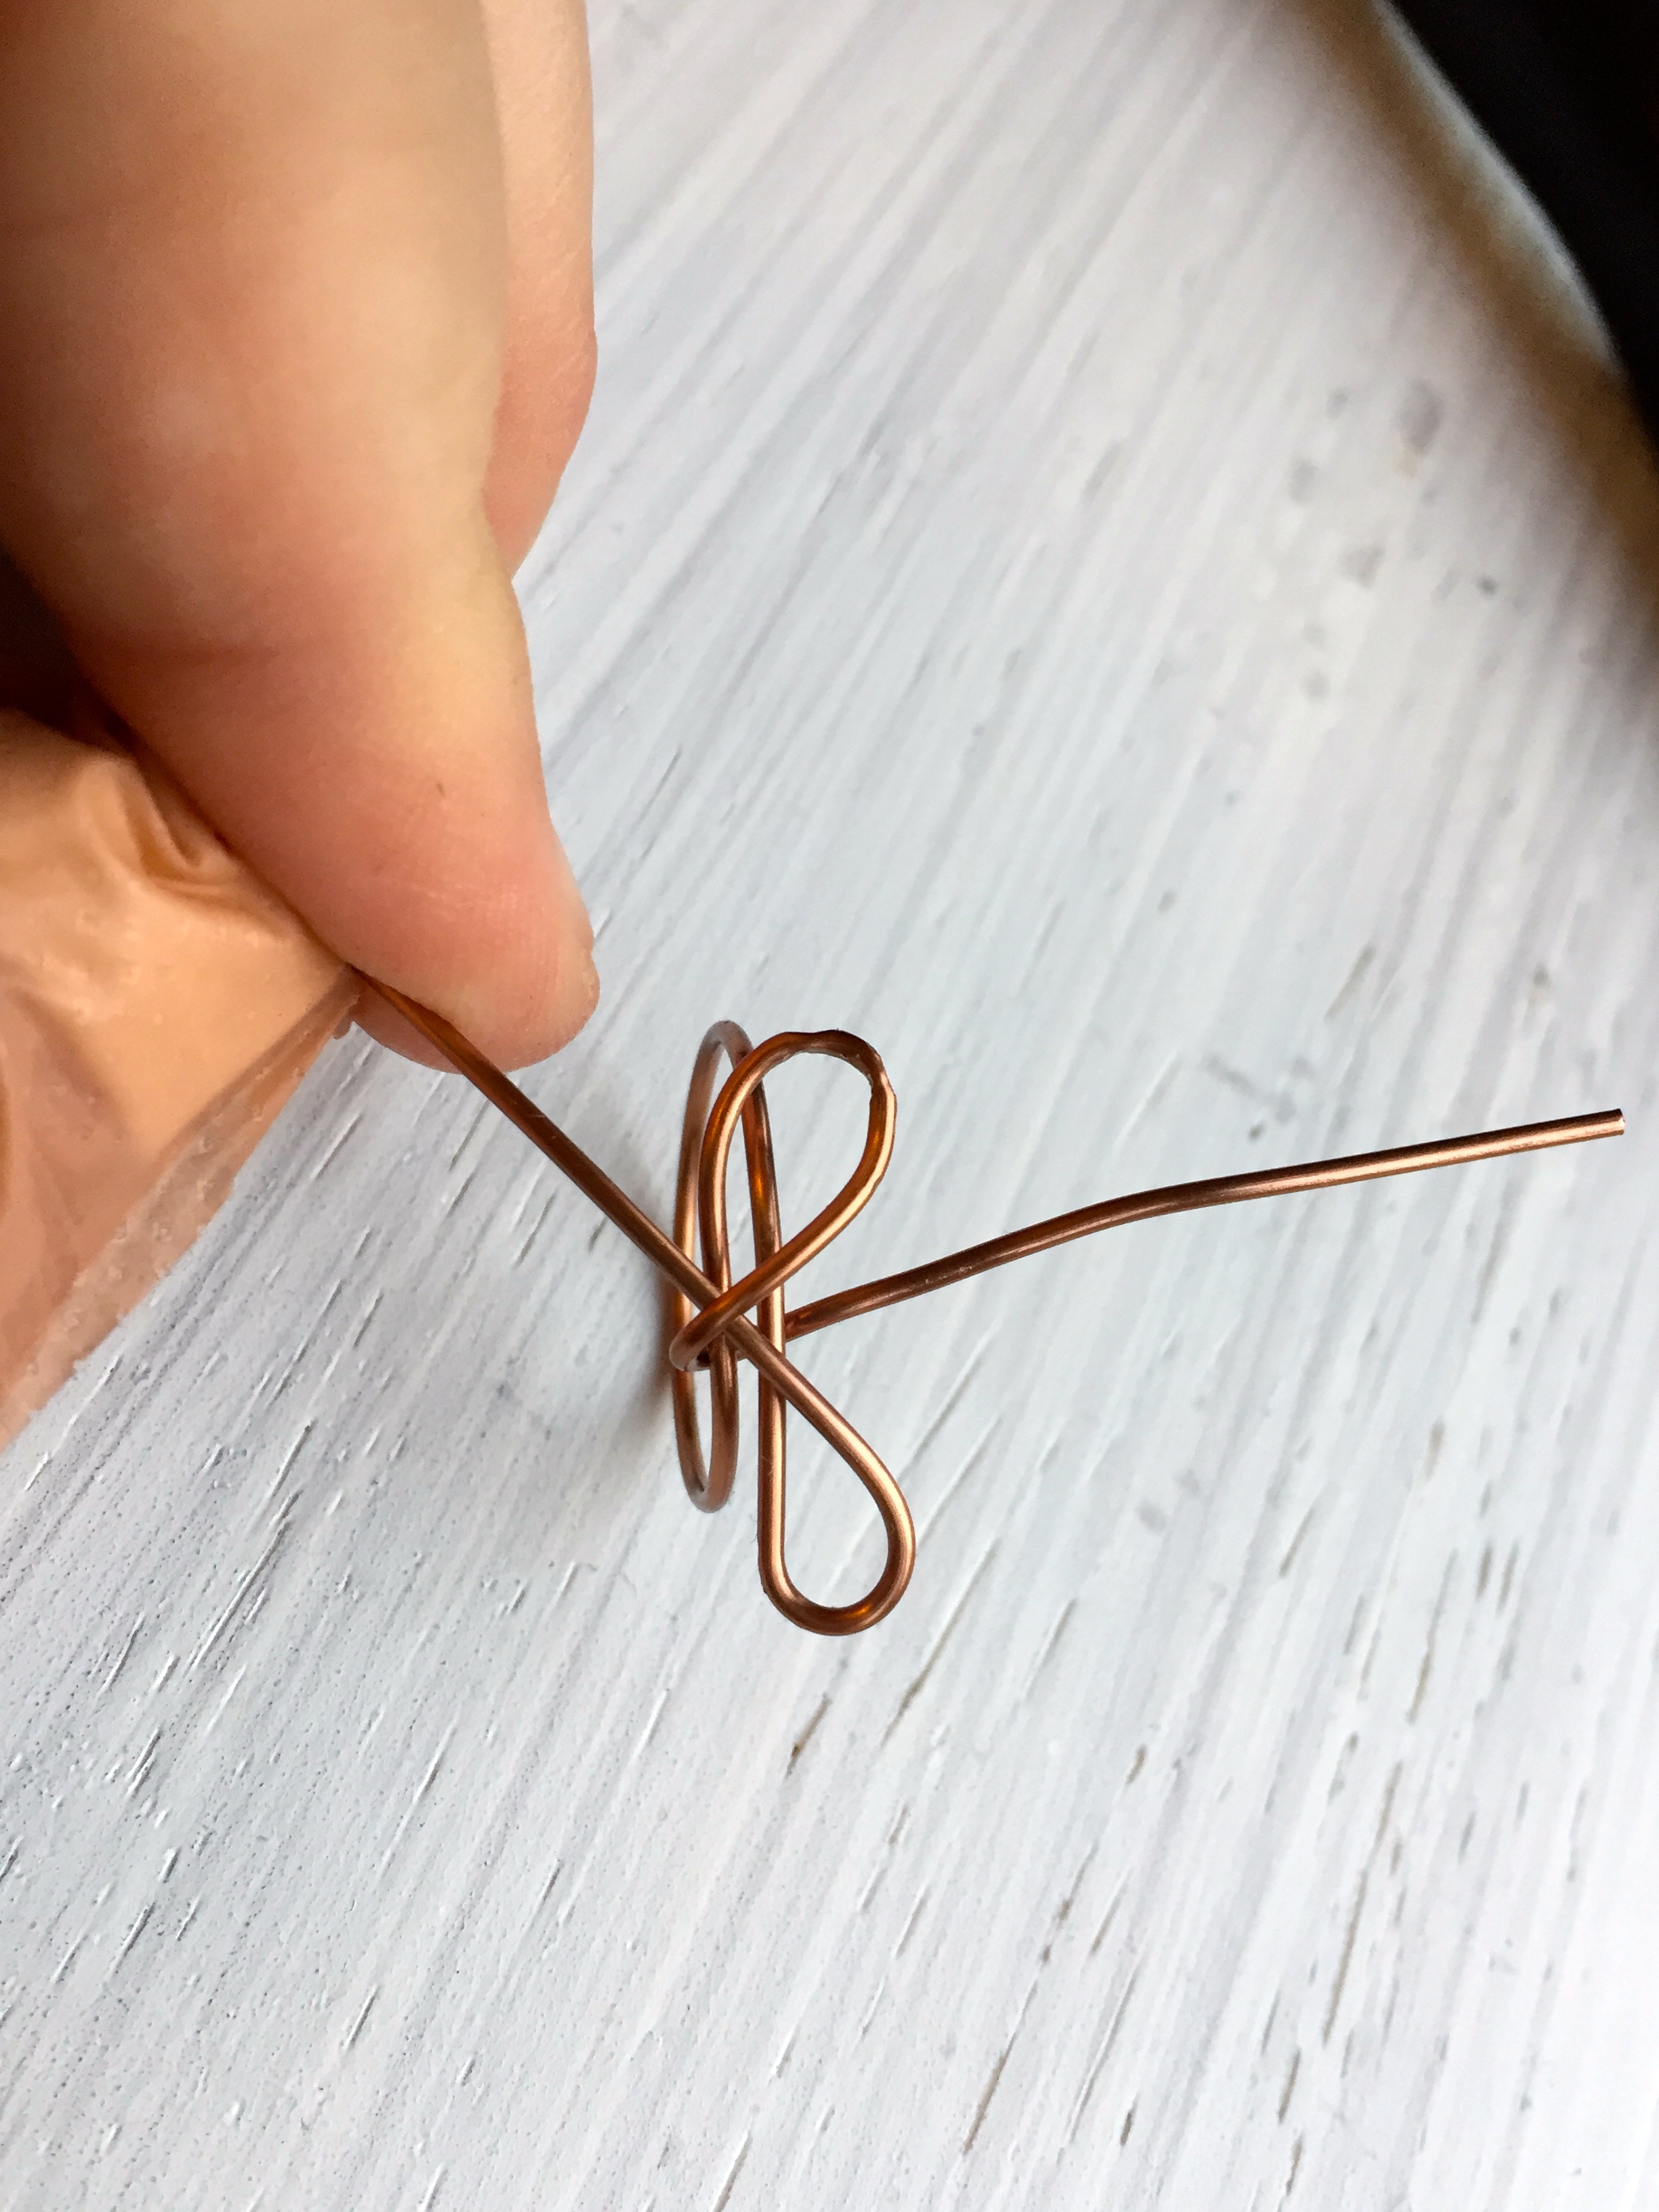
8. Trim the tails to a nice, neat and short length. If they are too long, I find they can catch when this ring is worn.
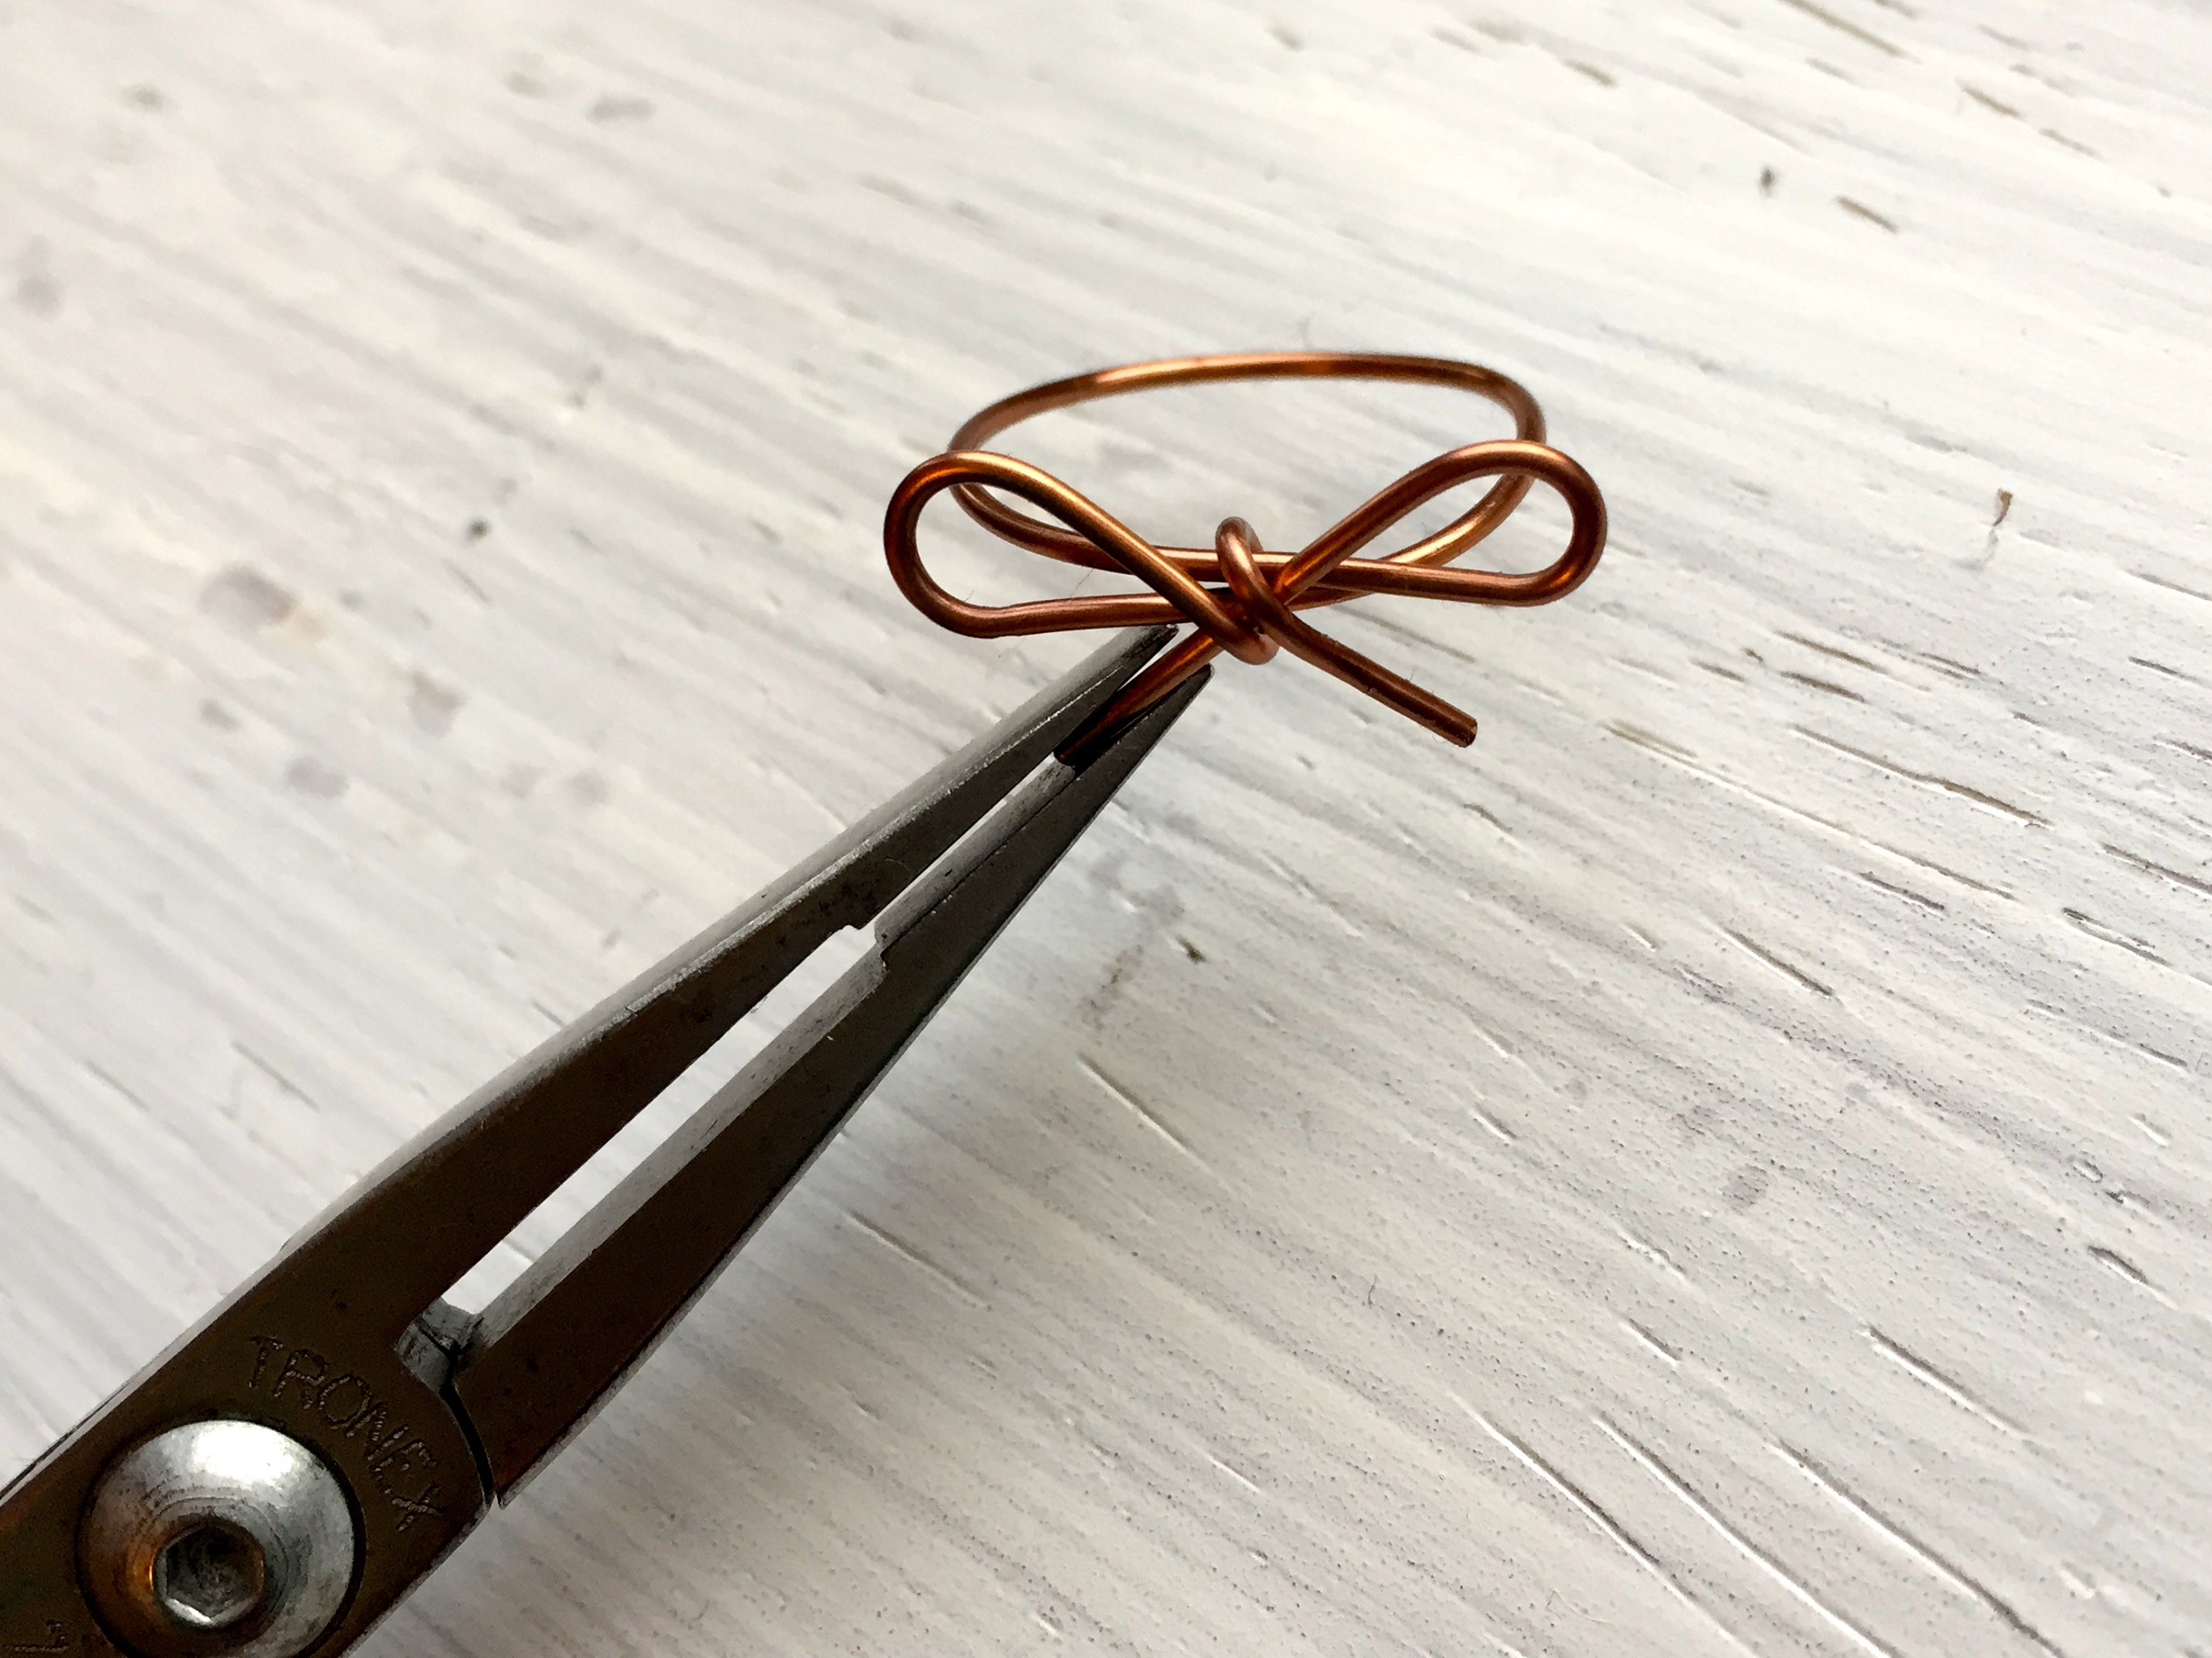
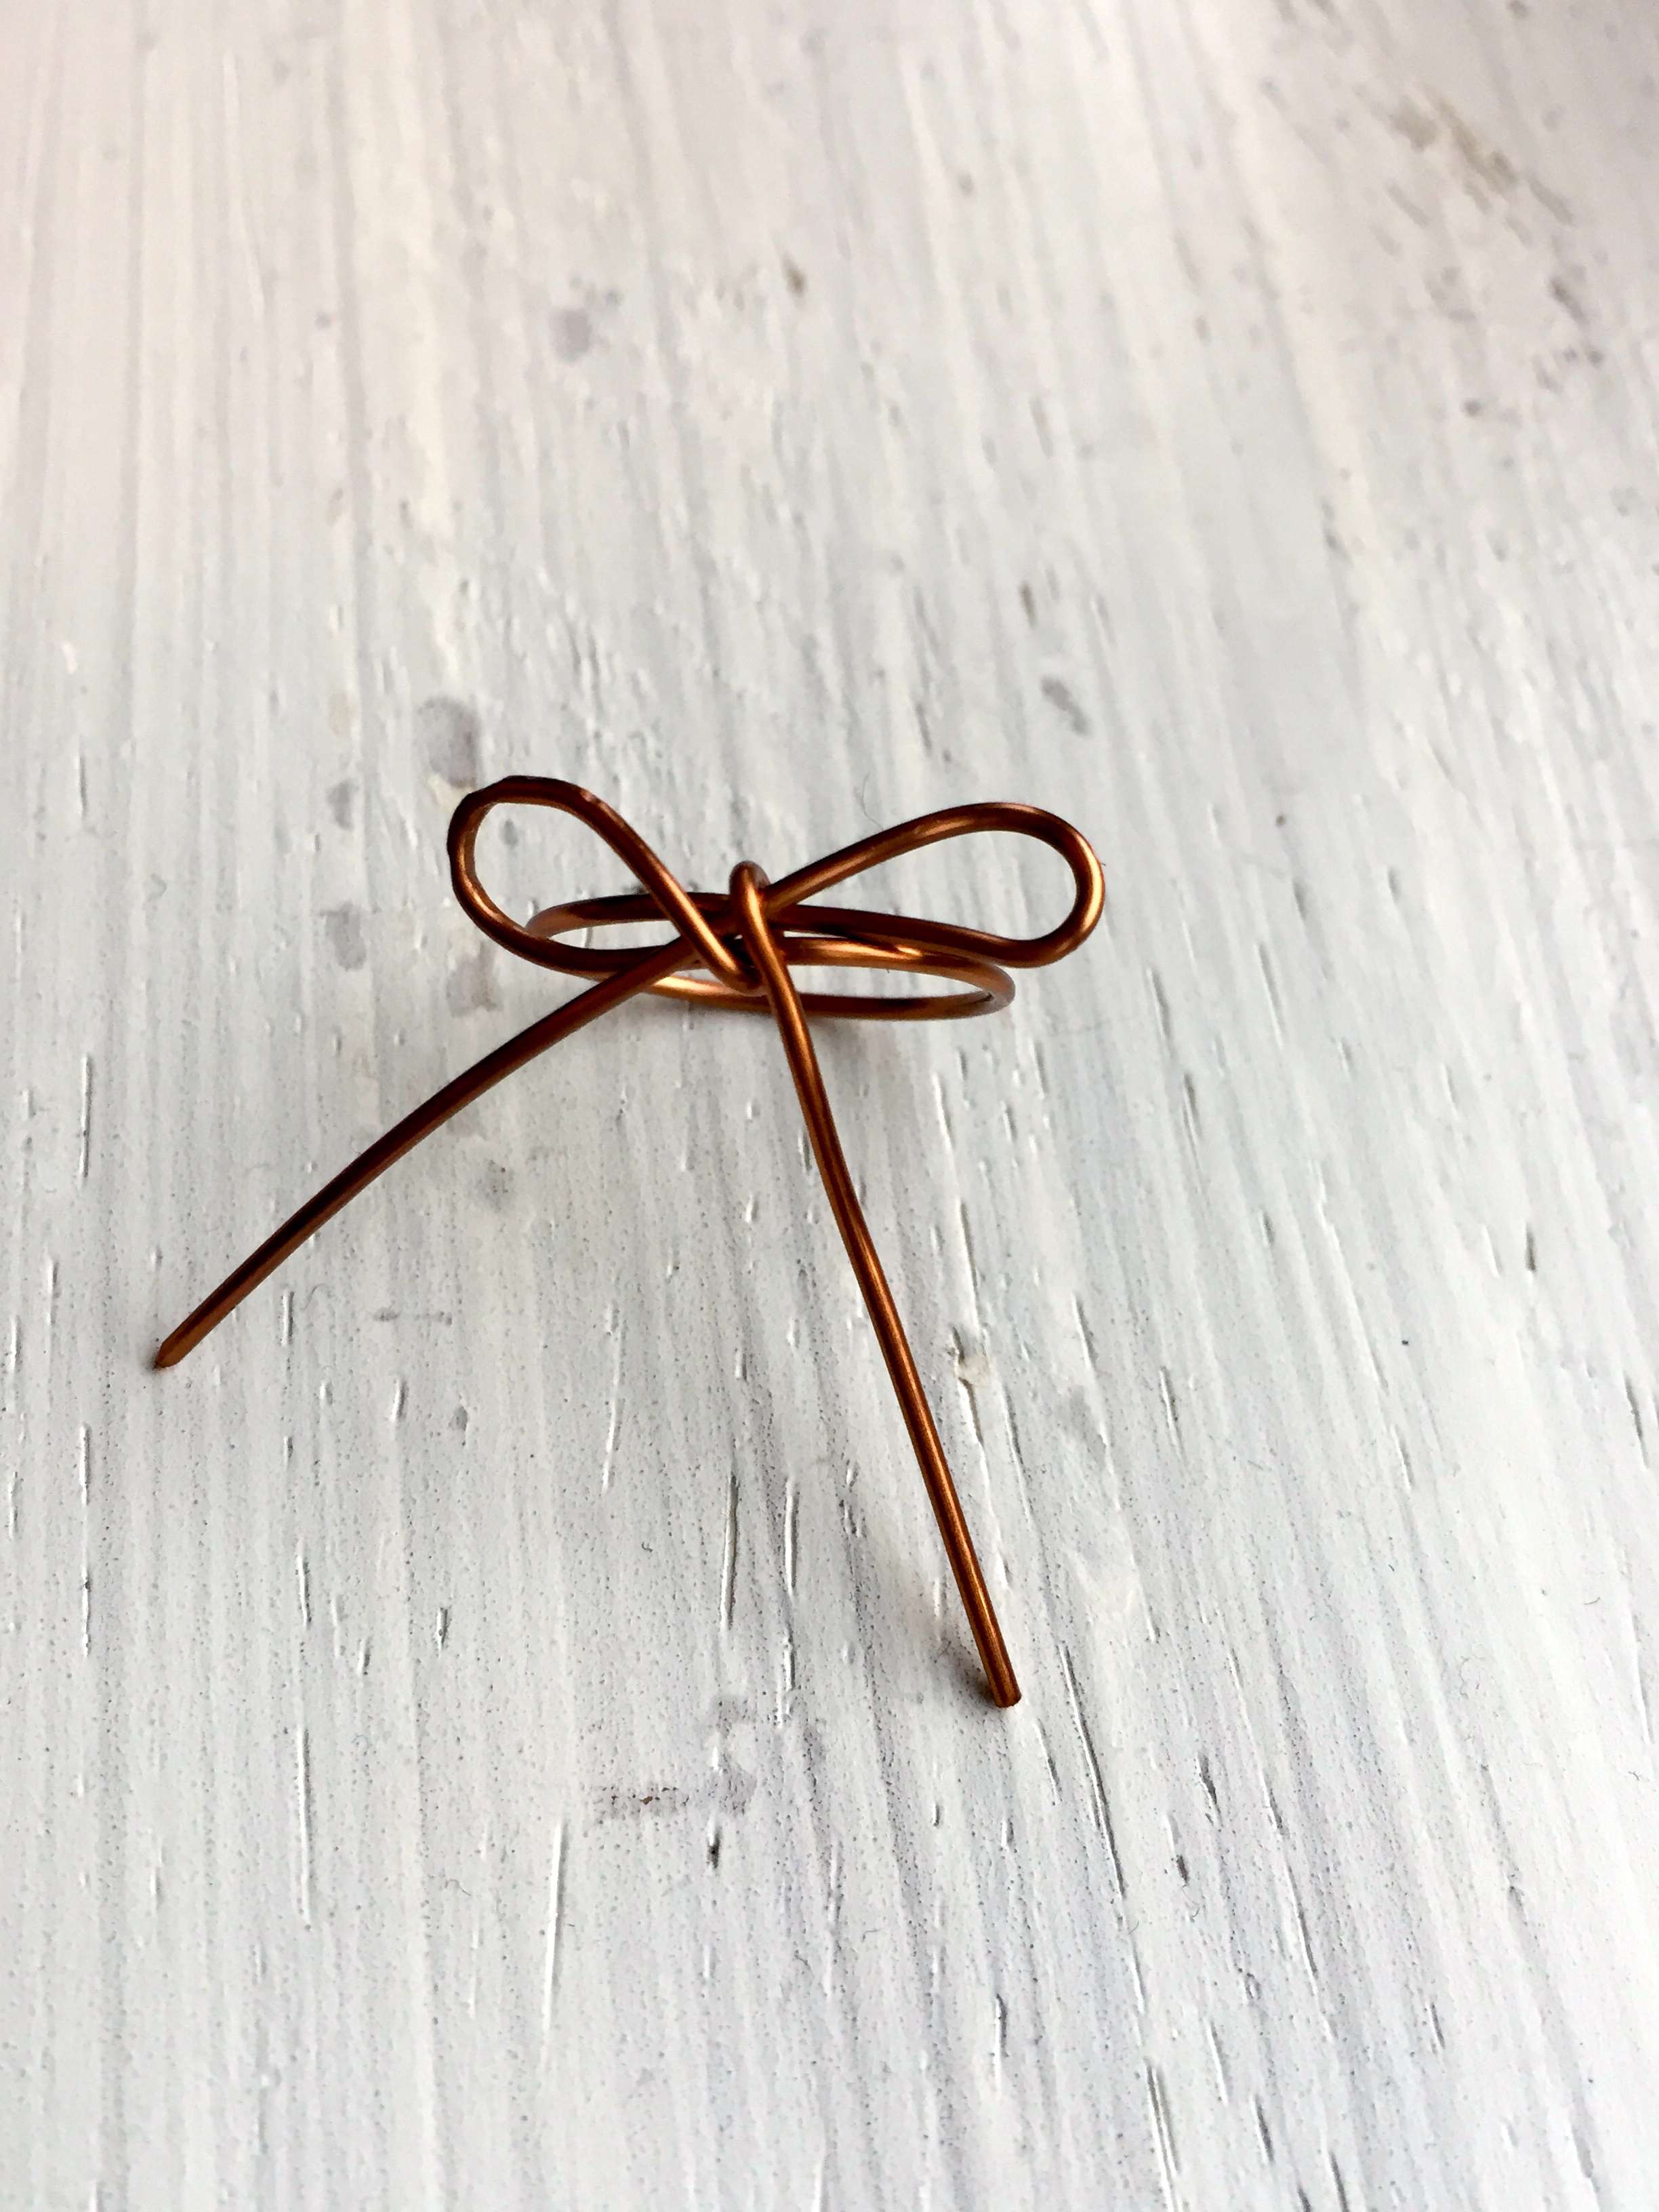
9. Now that you’re finished, you may want to do a little reshaping with your pliers – making sure the angle of the loops and tails are just how you want them, and that the ring band is nice and round.
You can make these bow rings up so quickly, they are great fun and easy to do, and a sweet gift, too. You can also try making these with wires of different finishes and colors! If you had fun learning this quick project, why not share it on Facebook and Pinterest?
Share tips, start a discussion or ask one of our experts or other students a question.
No Responses to “Wrapped Around Your Finger: A Bow Ring Tutorial”