
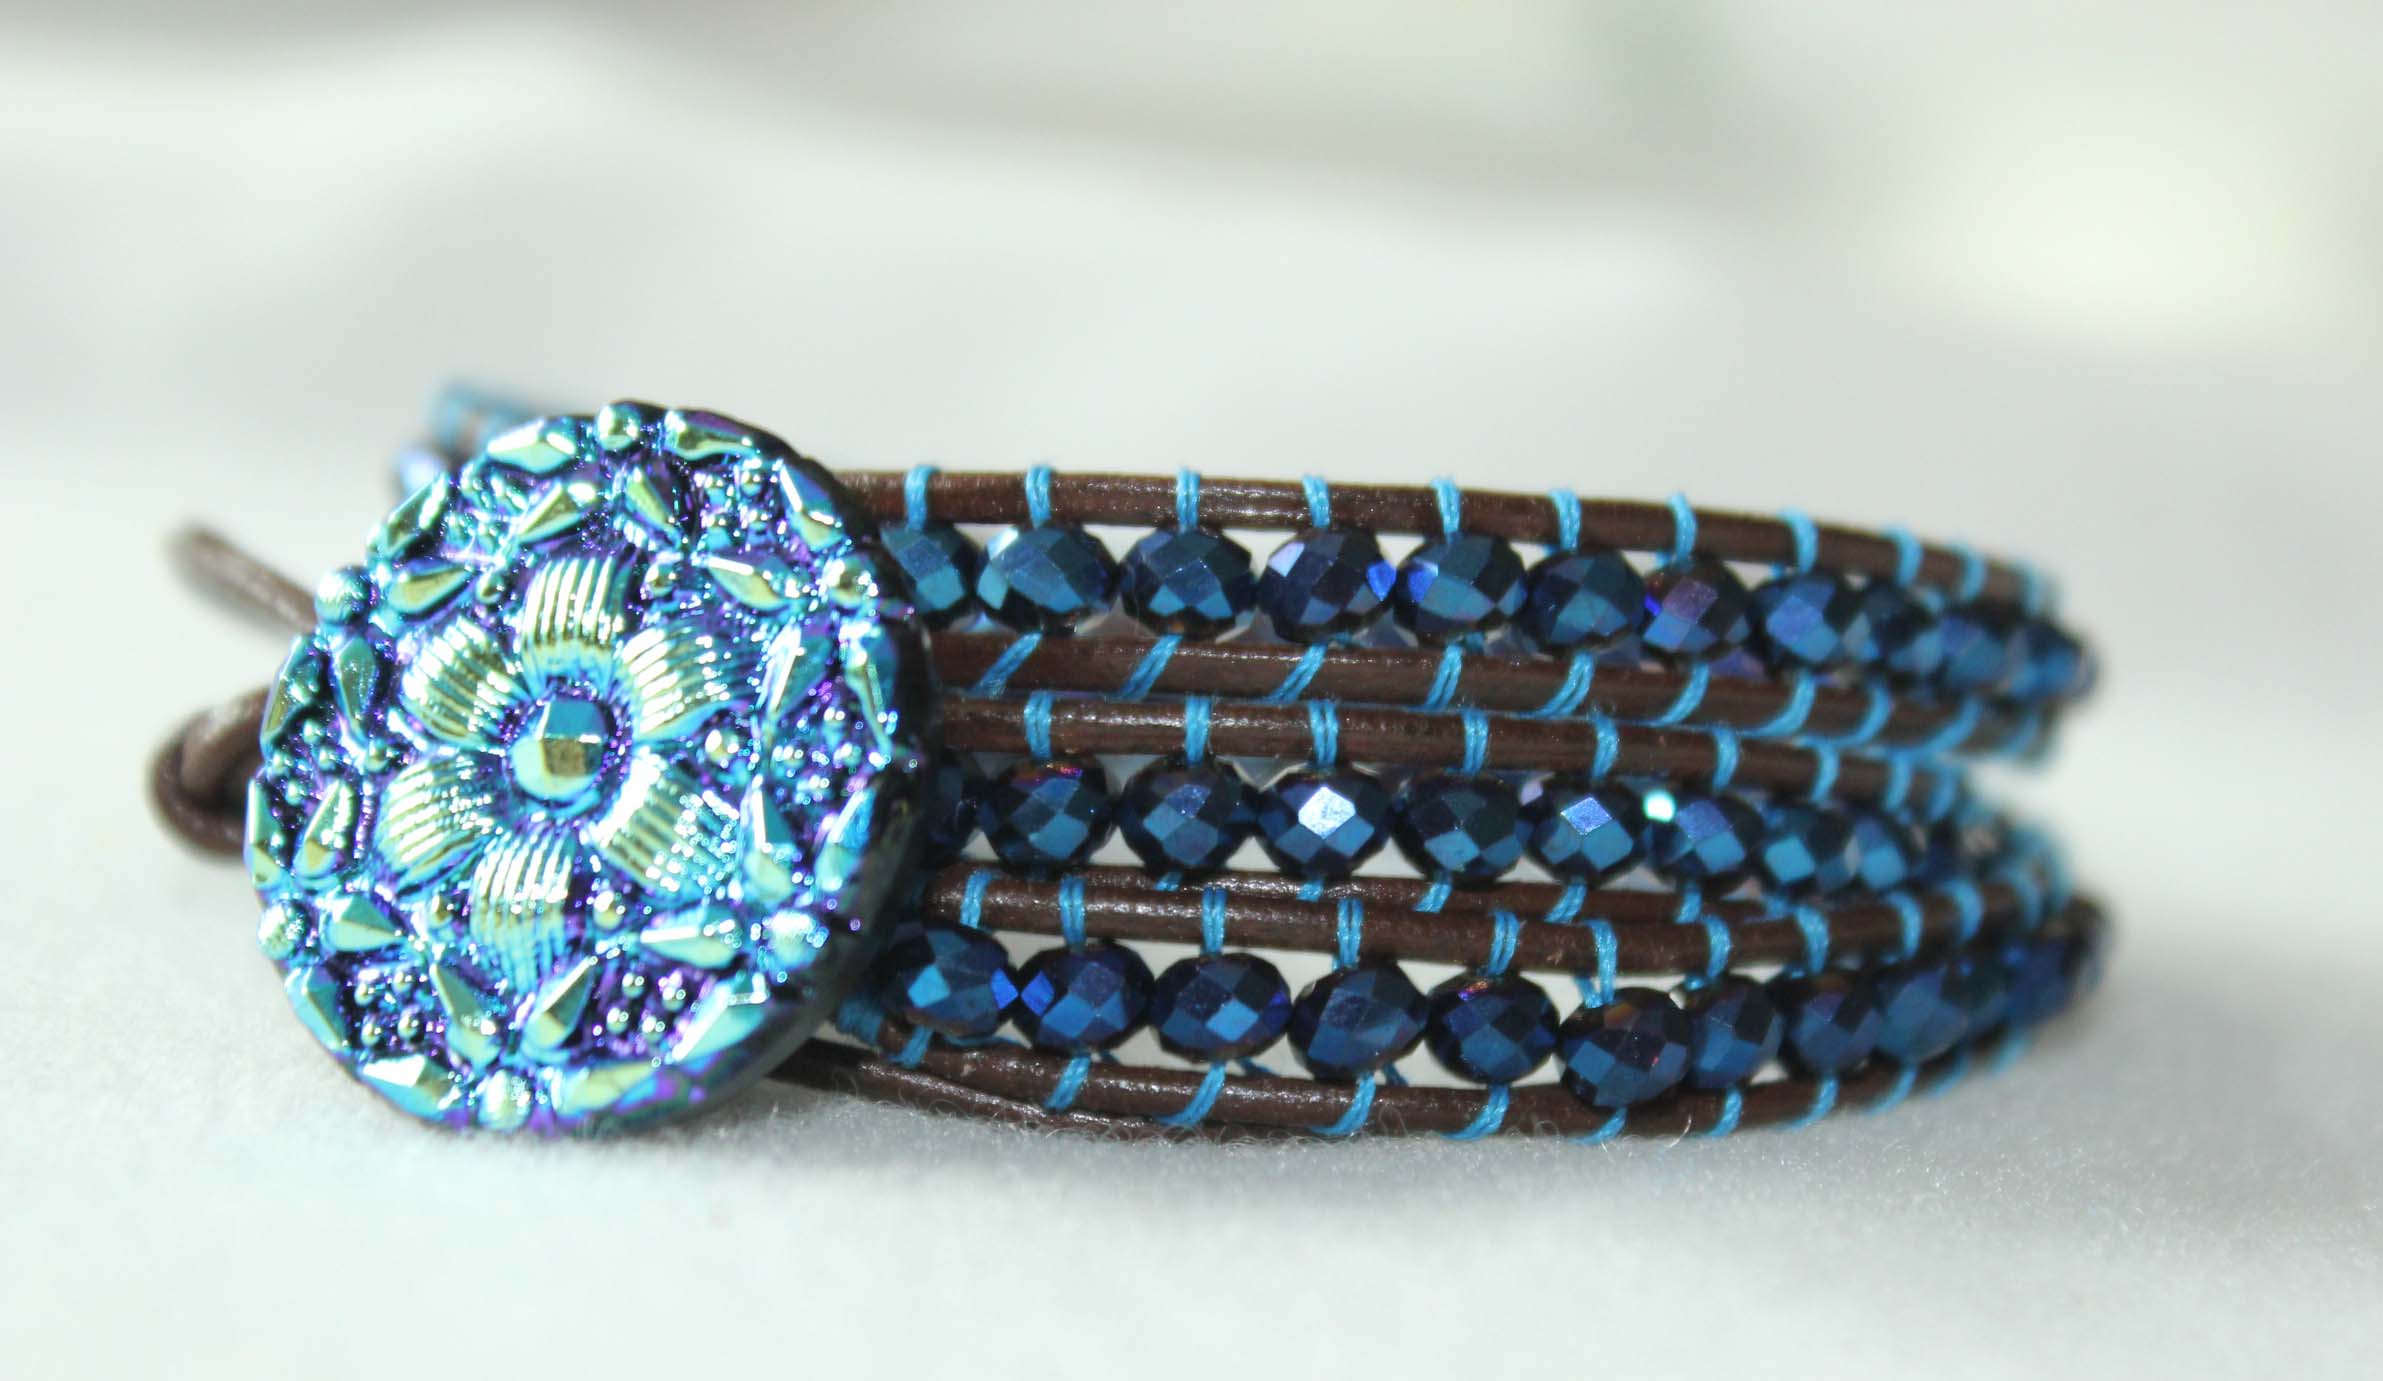
Stacked bracelets are on-trend this summer. The perfect way to begin your stack is by creating your own bead wrap bracelet. We show you how to make a bead wrap bracelet in this step-by-step tutorial. The possibilities for customization are endless once you learn the technique.
Learn more wire wrapping and looping, multi-strand beading and more in the Craftsy class Wire-Wrapped Stones, Crystal & Clusters. You’ll make 7 beautiful projects while enjoying exclusive access to instruction from designer Aga Kruk.
Bead wrap bracelet tutorial

Materials you will need:
- Leather cording 1.5 mm
- Czech glass beads – 4 mm
- Czech glass button – 22 mm
- Beading Needles – size 10
- Sewing thread
- Scissors
- Bead board
- G-S Hypo Cement
Step 1:

Cut 58 inches of leather cording. Fold in half. At the center point of the fold, create a loop large enough to slide the button through and knot the leather cords together.

Attach the looped end to a clip board, bead board, or, as pictured here, a homemade board. The idea is to secure the leather in order to maintain tension as you add beads.
Step 2:
We will be using a double strand of sewing thread to add our beads. I find 25 inches of thread comfortable to work with. You could go longer, but I find the thread becomes unruly. We will need to add thread as we continue adding beads. (I’ll cover adding a new thread in Step 4 of this bead wrap bracelet tutorial)
Cut approximately 50 inches of sewing thread. Fold the thread in half and thread both ends onto the needle.
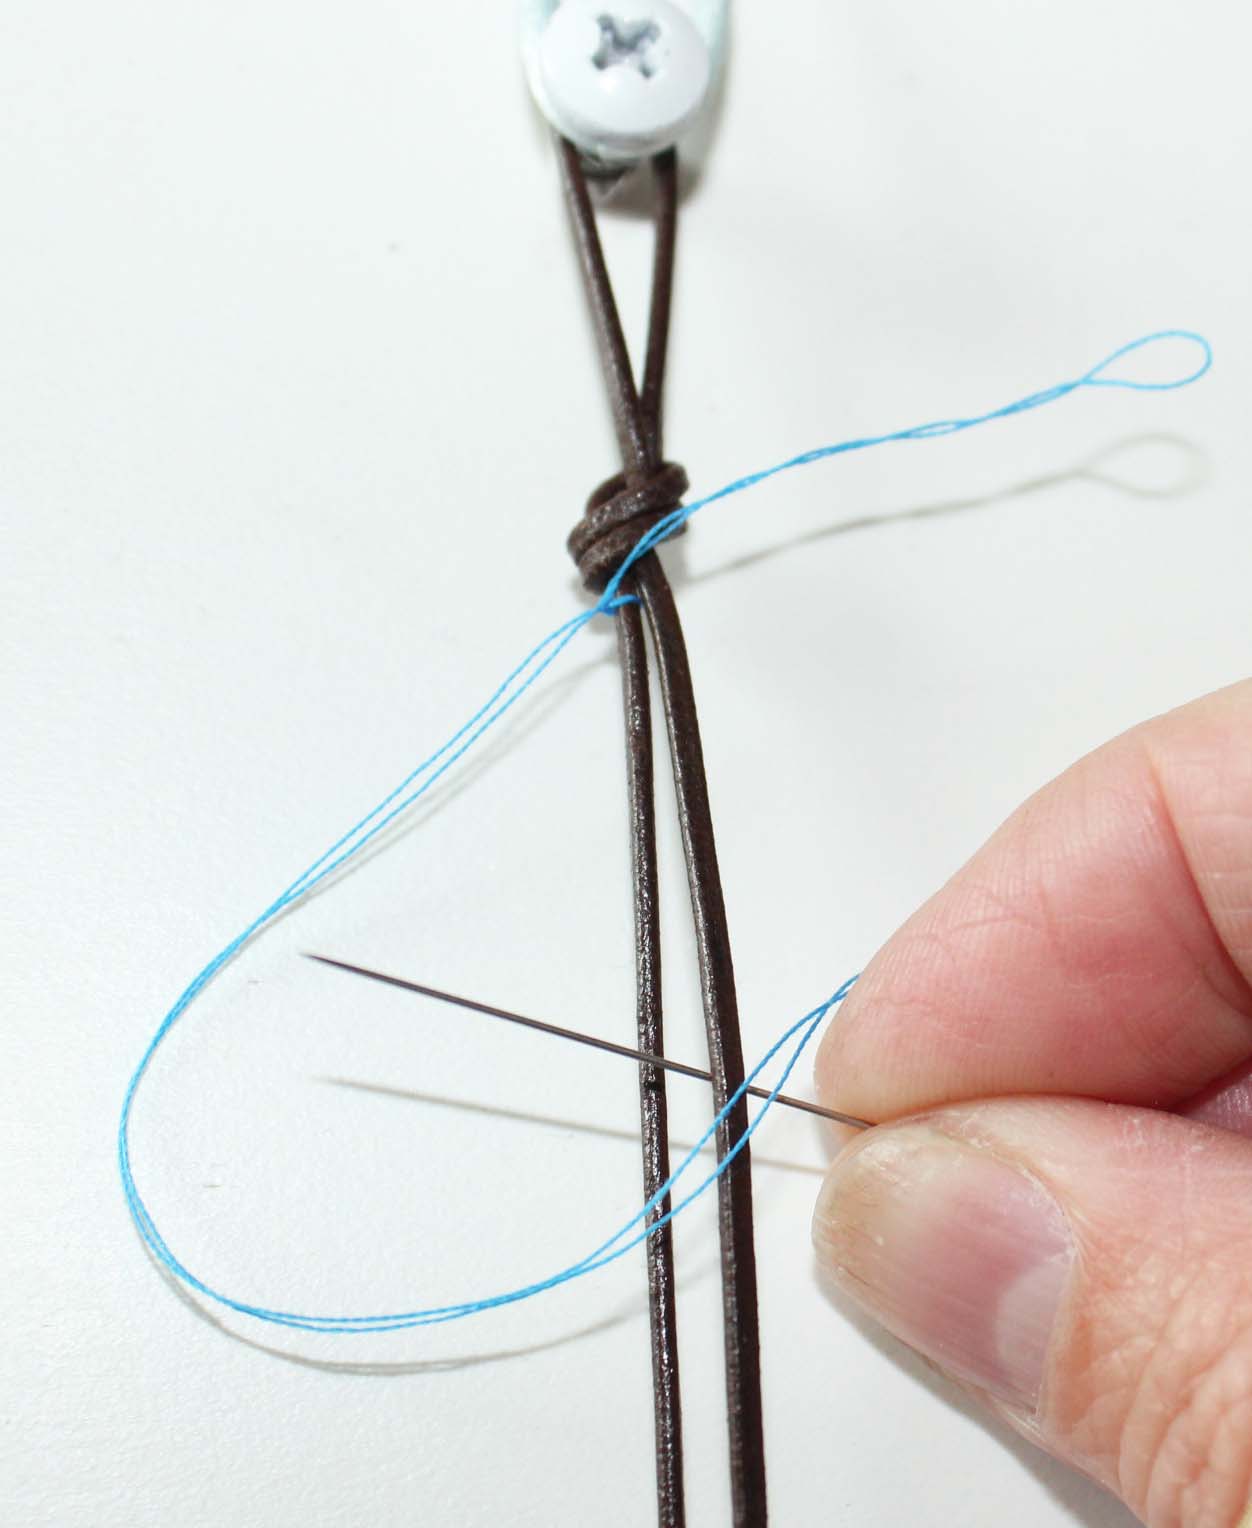
Knot the thread onto one of the leather cords. Create a loop with the thread, bring the thread over the top of the two leather cords, feed it under the cord on the opposite side and up through the center of the two cords. Pulling tight to secure.

Repeat on opposite side of leather cord. Create a loop on the opposite side of the cords, lay the thread over the top of the two cords, feed it under one cord and up through the center of the cords. Pull tight.
Repeat this two more times. This is a simple way to secure the thread before you begin adding beads.
Decide which direction you’re most comfortable working and maintain that left-to-right or right-to-left direction as you work on your bracelet.

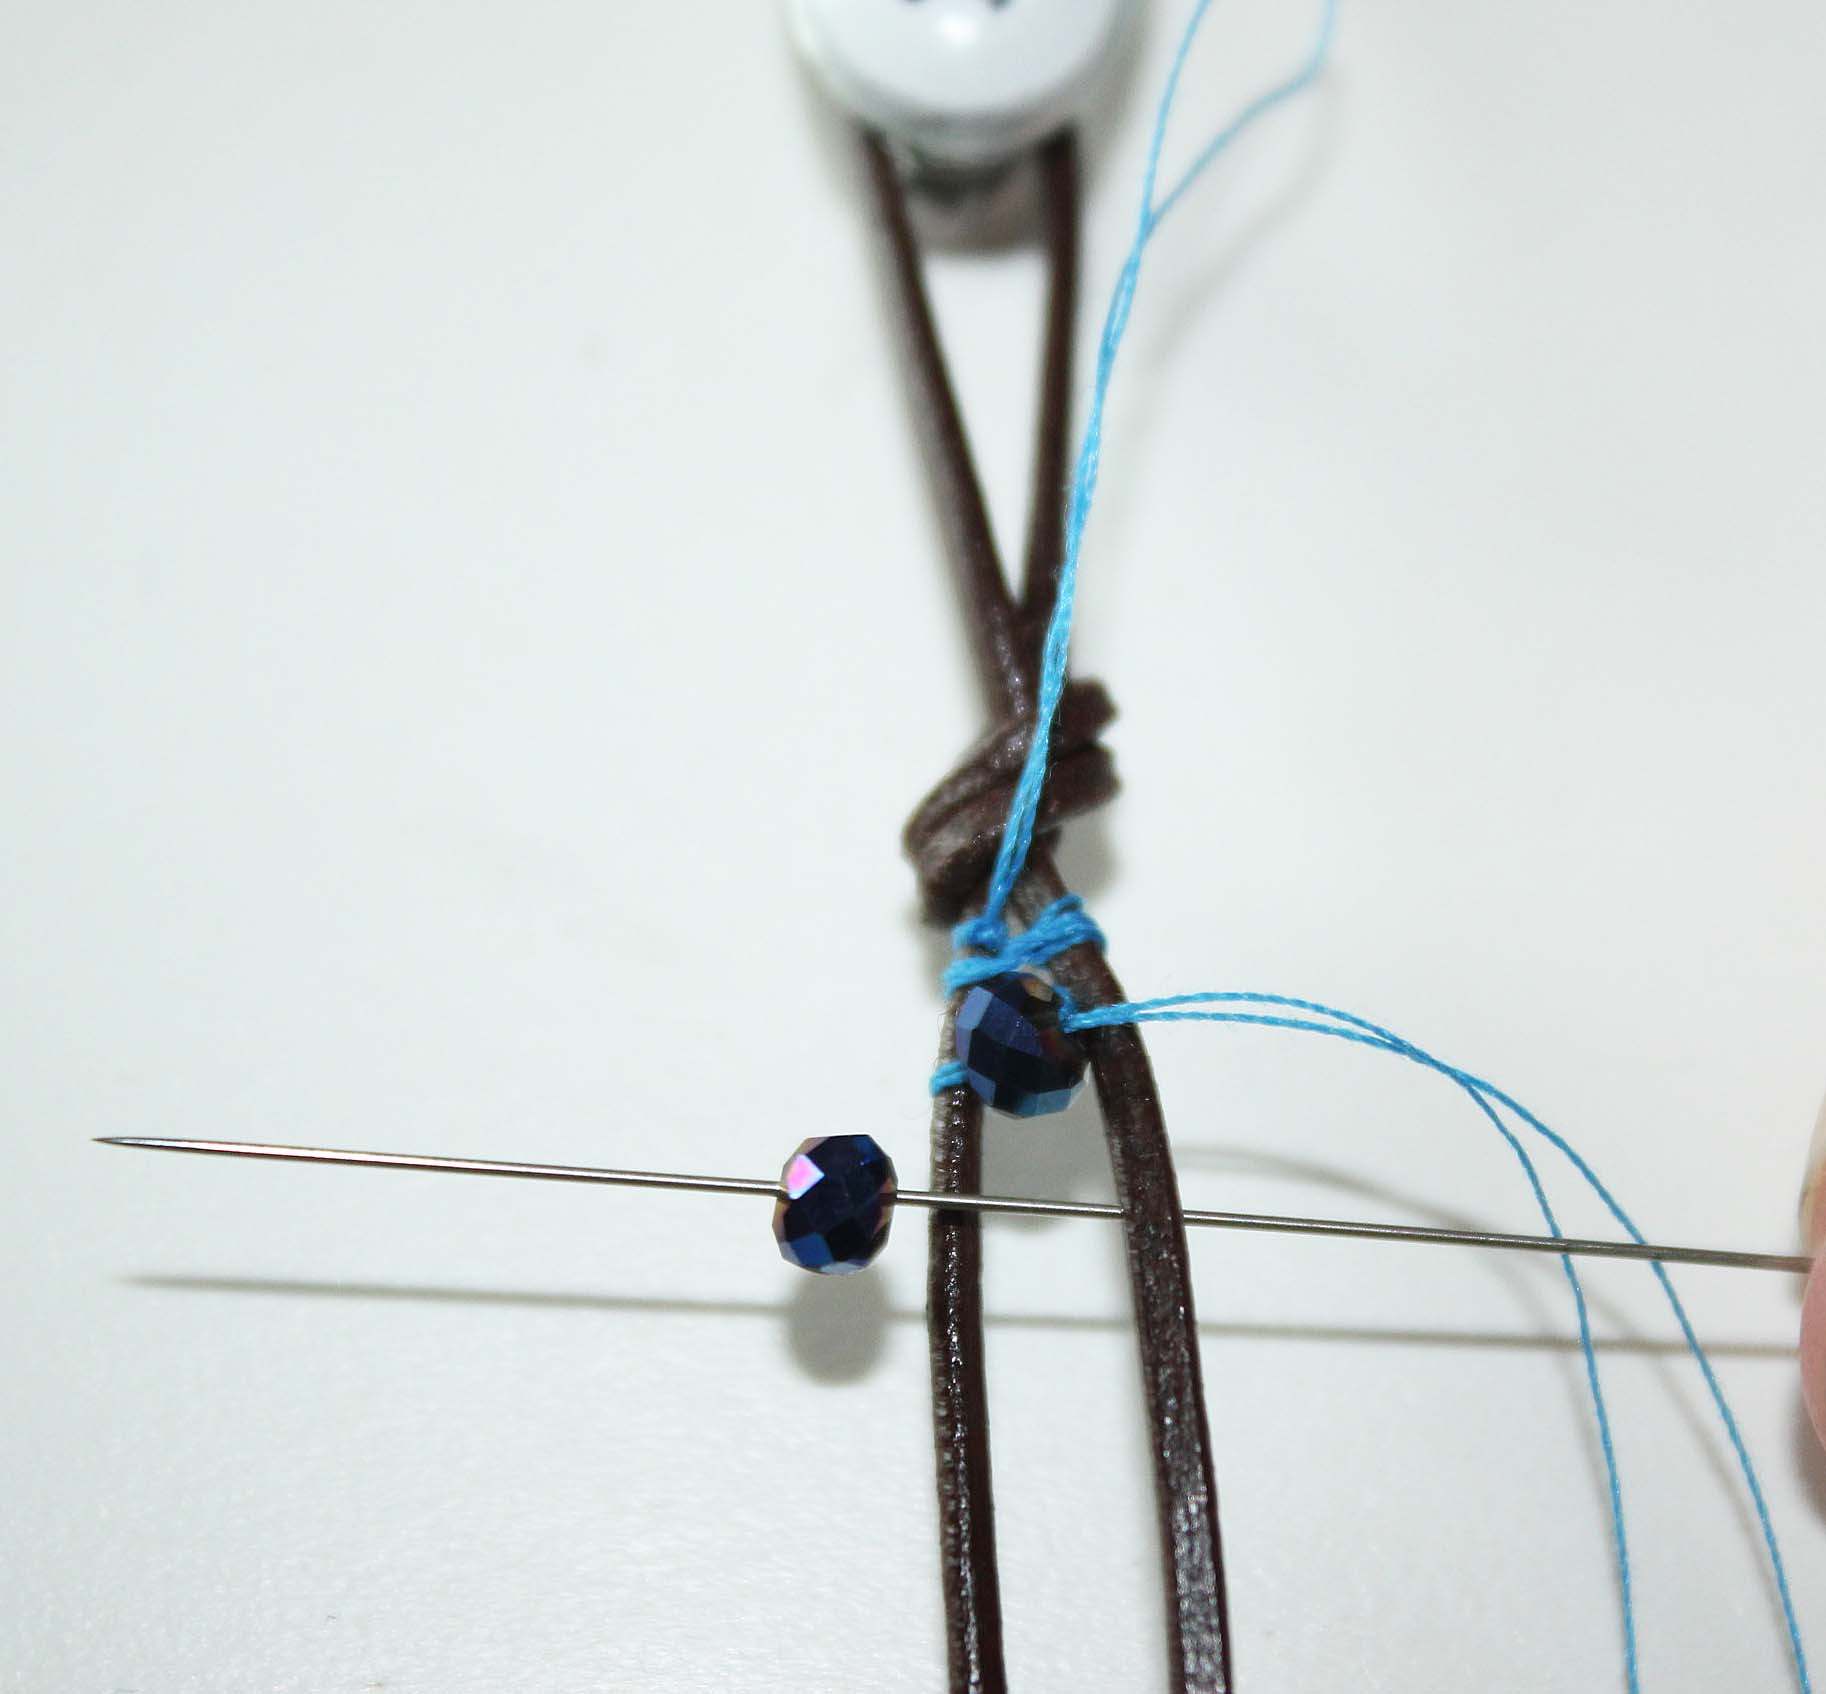
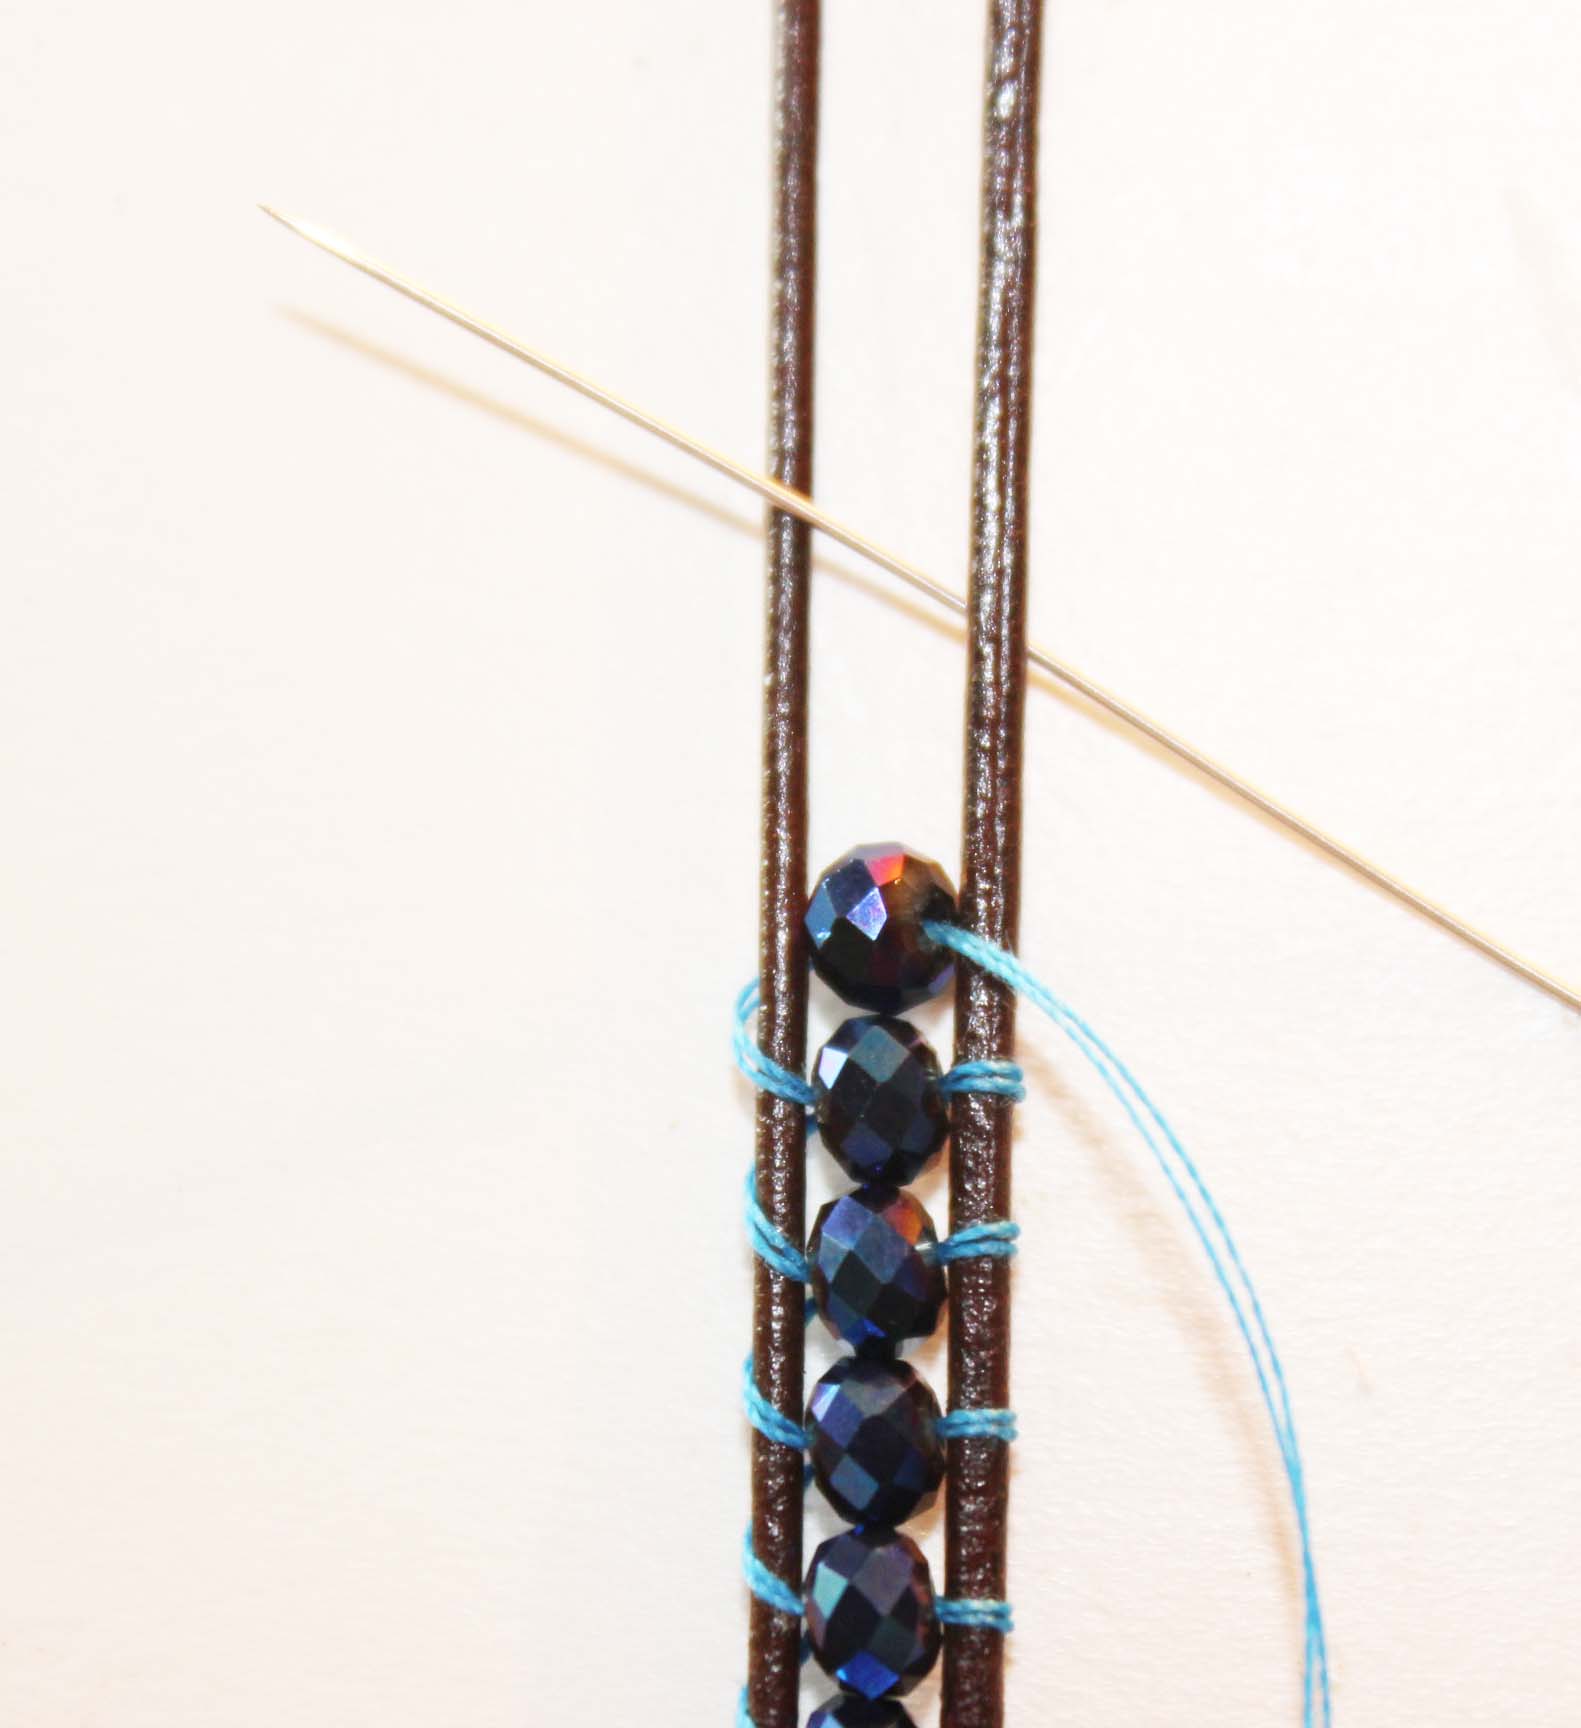
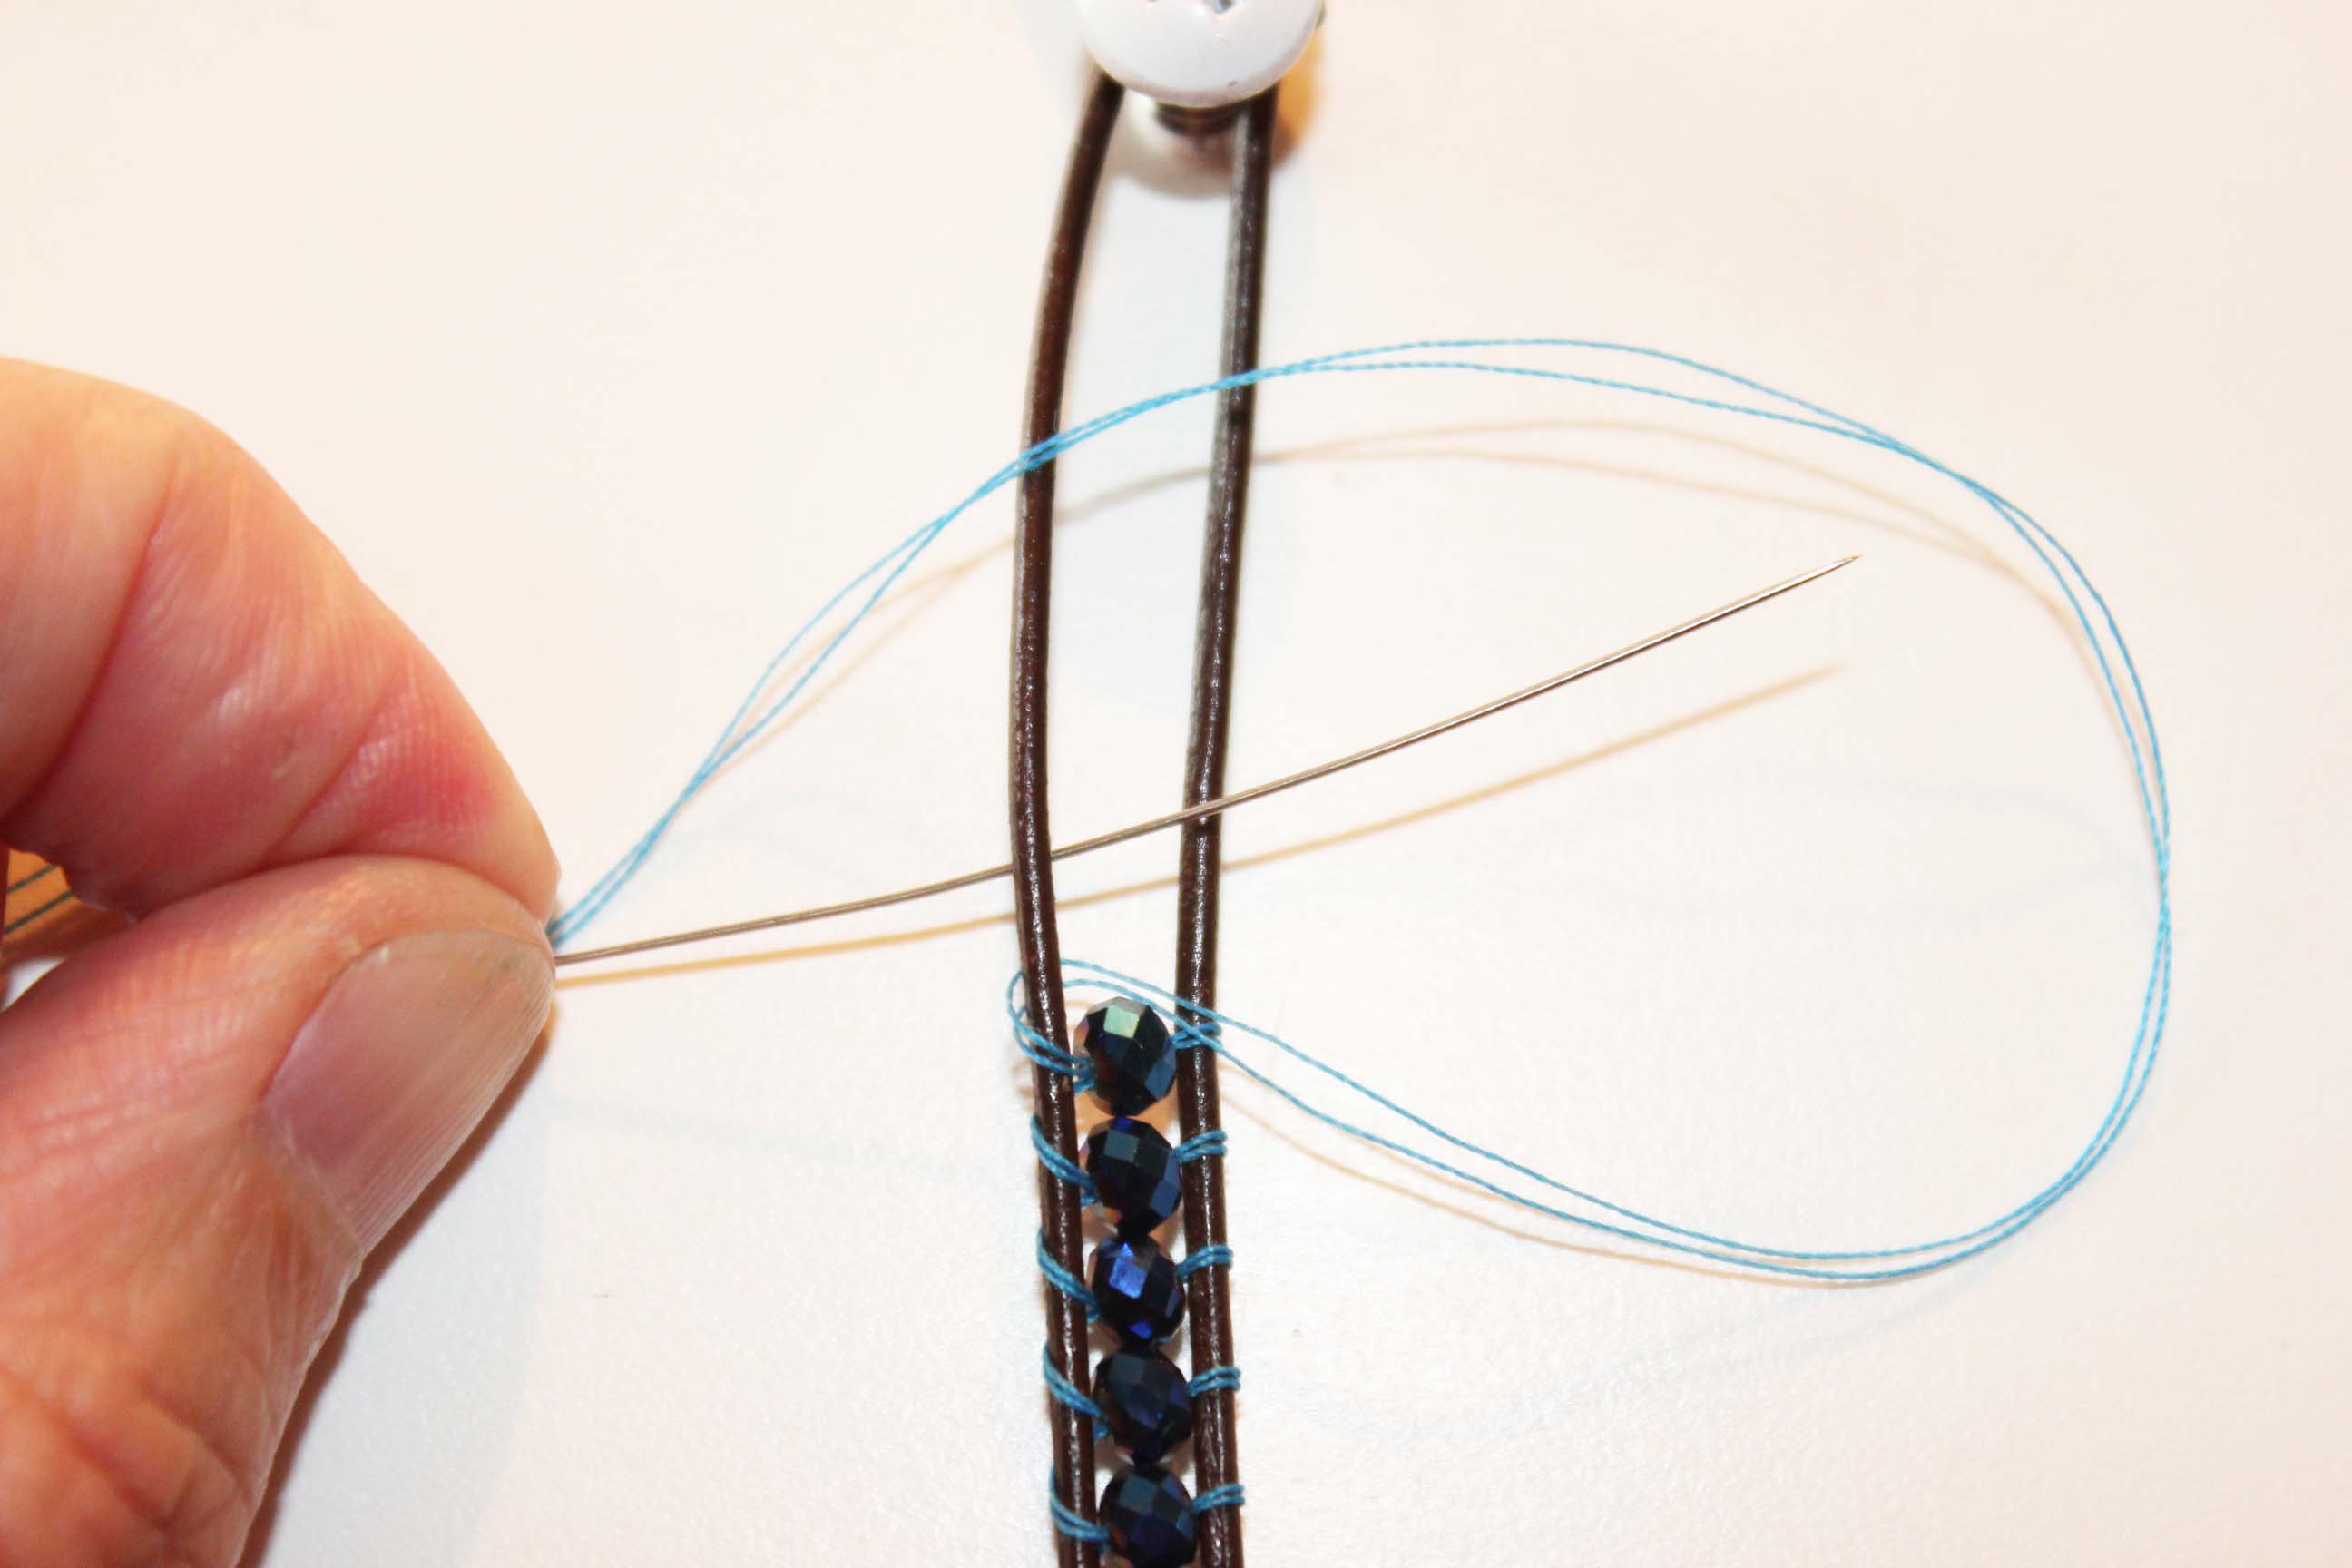
Bring your thread under one side of the leather cord, up through the center of the two cords, and over the top of the other leather cord.

Add the first bead and pull thread tight.

Thread under the leather cord, up through the center of the two cords, back through the first bead and over the top of the leather cord, securing the first bead between the two leather cords.
Thread under the leather cord, up through the center of the cords, add a bead and tighten thread. Finish with thread landing over the top of the leather cord.

Thread under the leather cord, up through the center of the two cords, through the center of the bead and over the top of the leather cord.
Step 3:
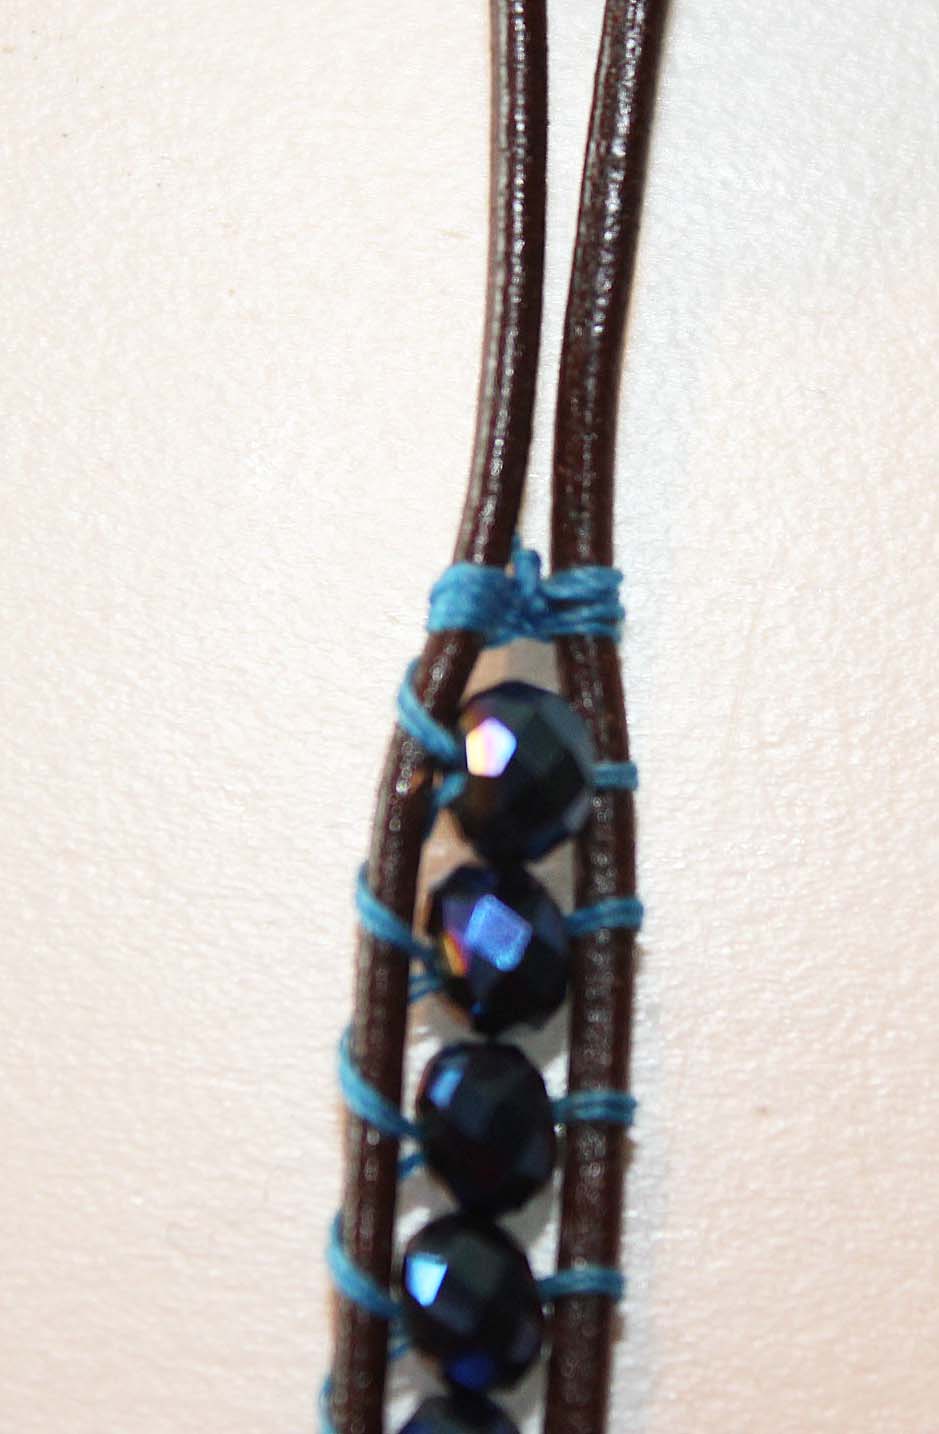
Continue adding beads until your desired length is reached.
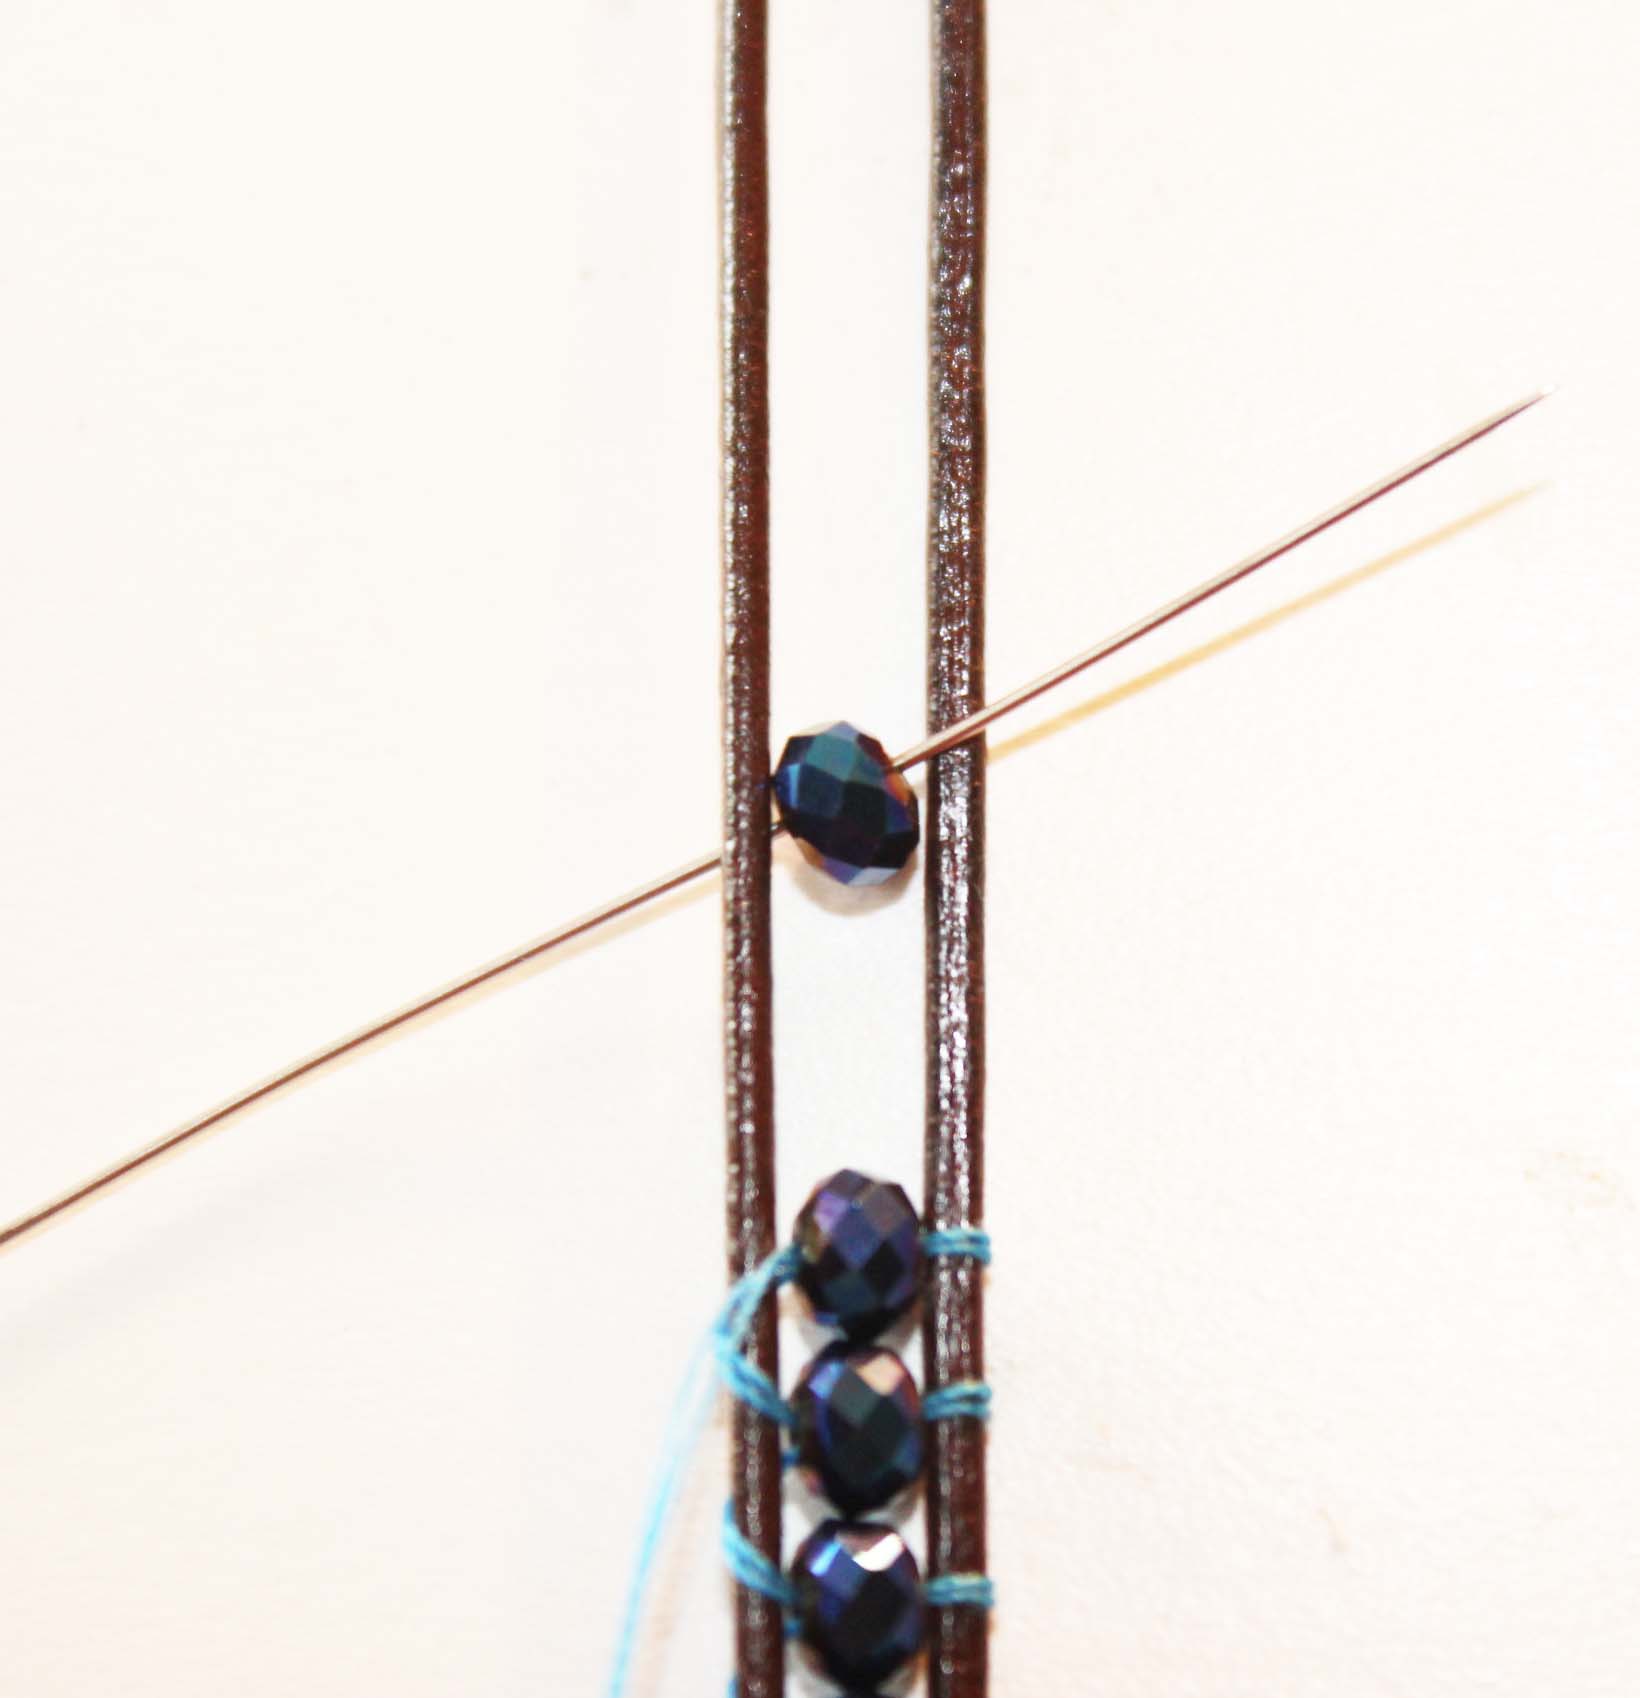
Under leather cord, add a bead, over leather cord.
Under leather cord.
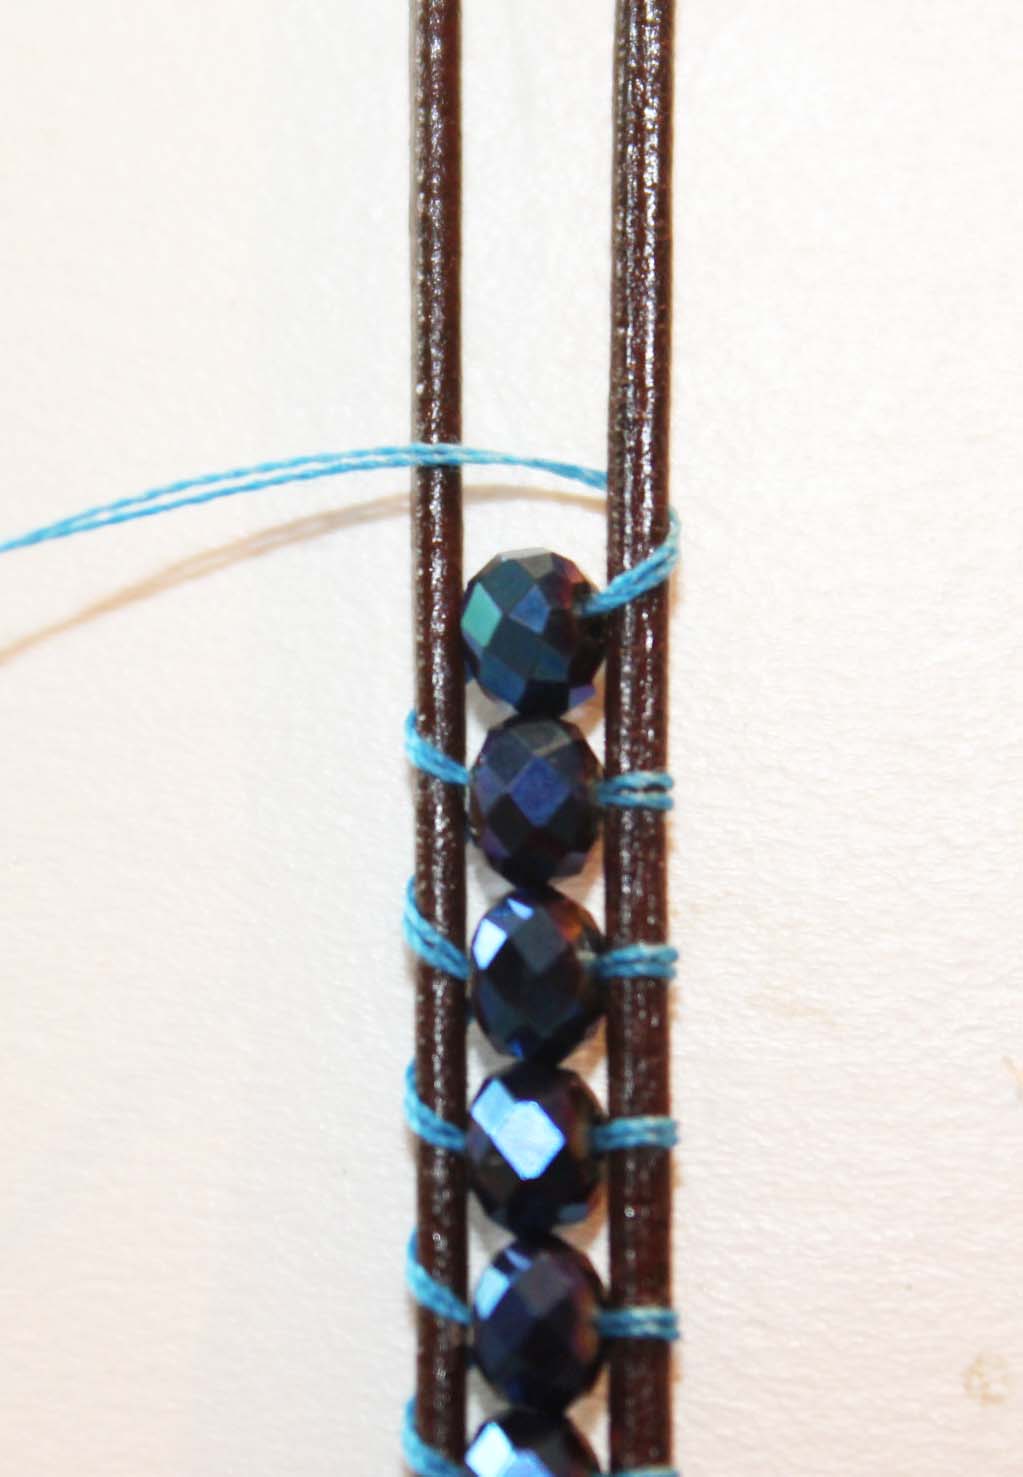
Pull thread tight.
Back through center of the bead. Finishing over the top of the leather cord.
Under leather cord, add a bead, over the top of leather cord.
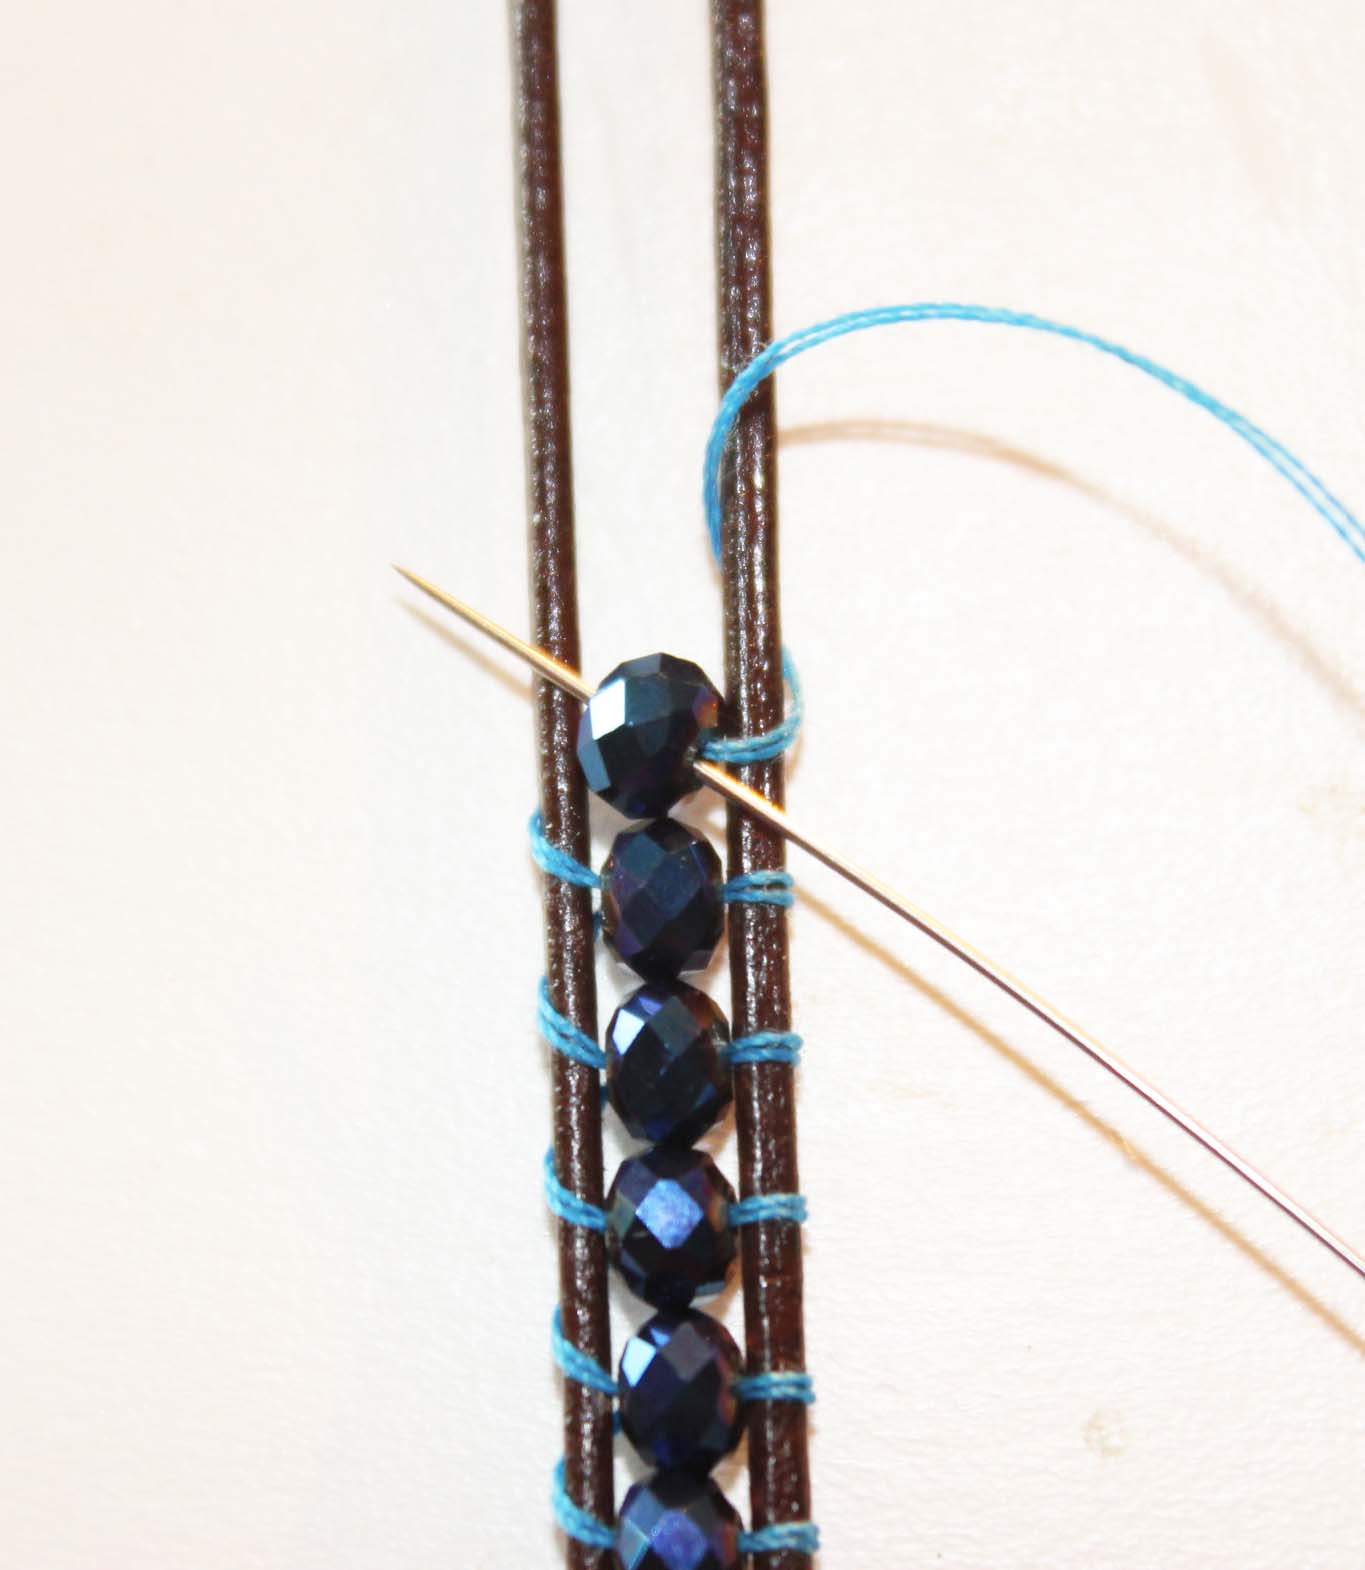
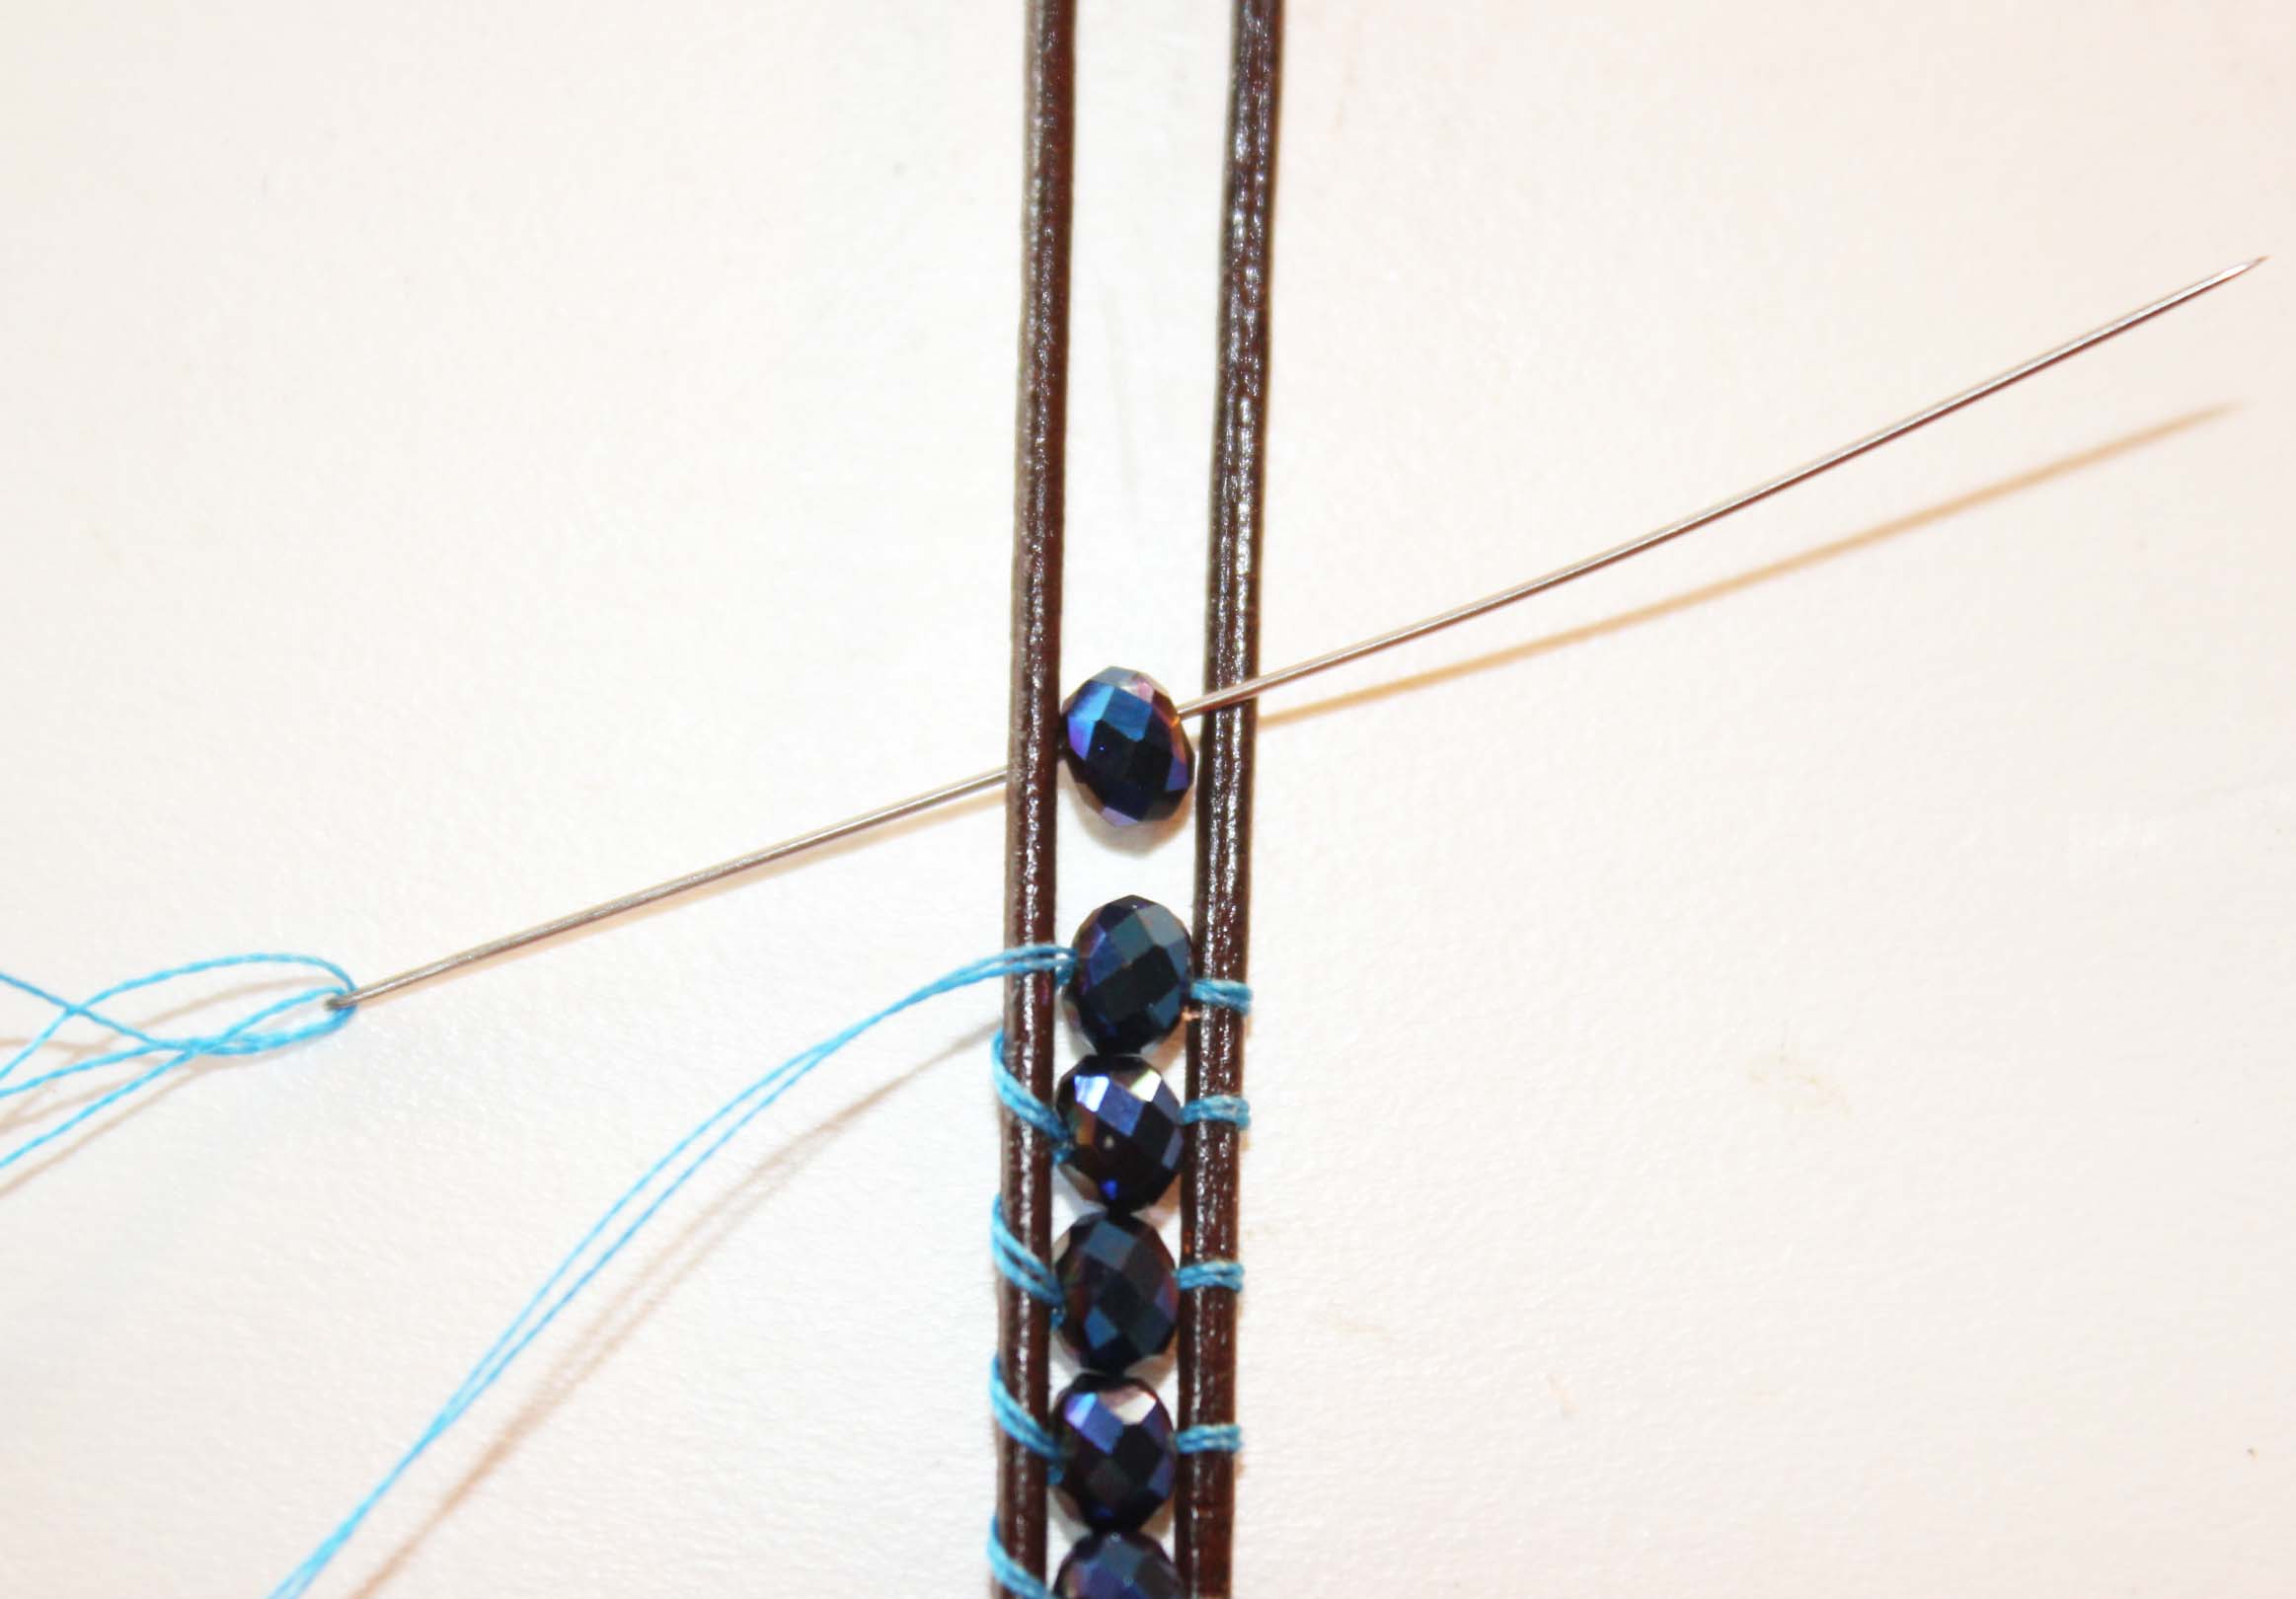
Step 4:
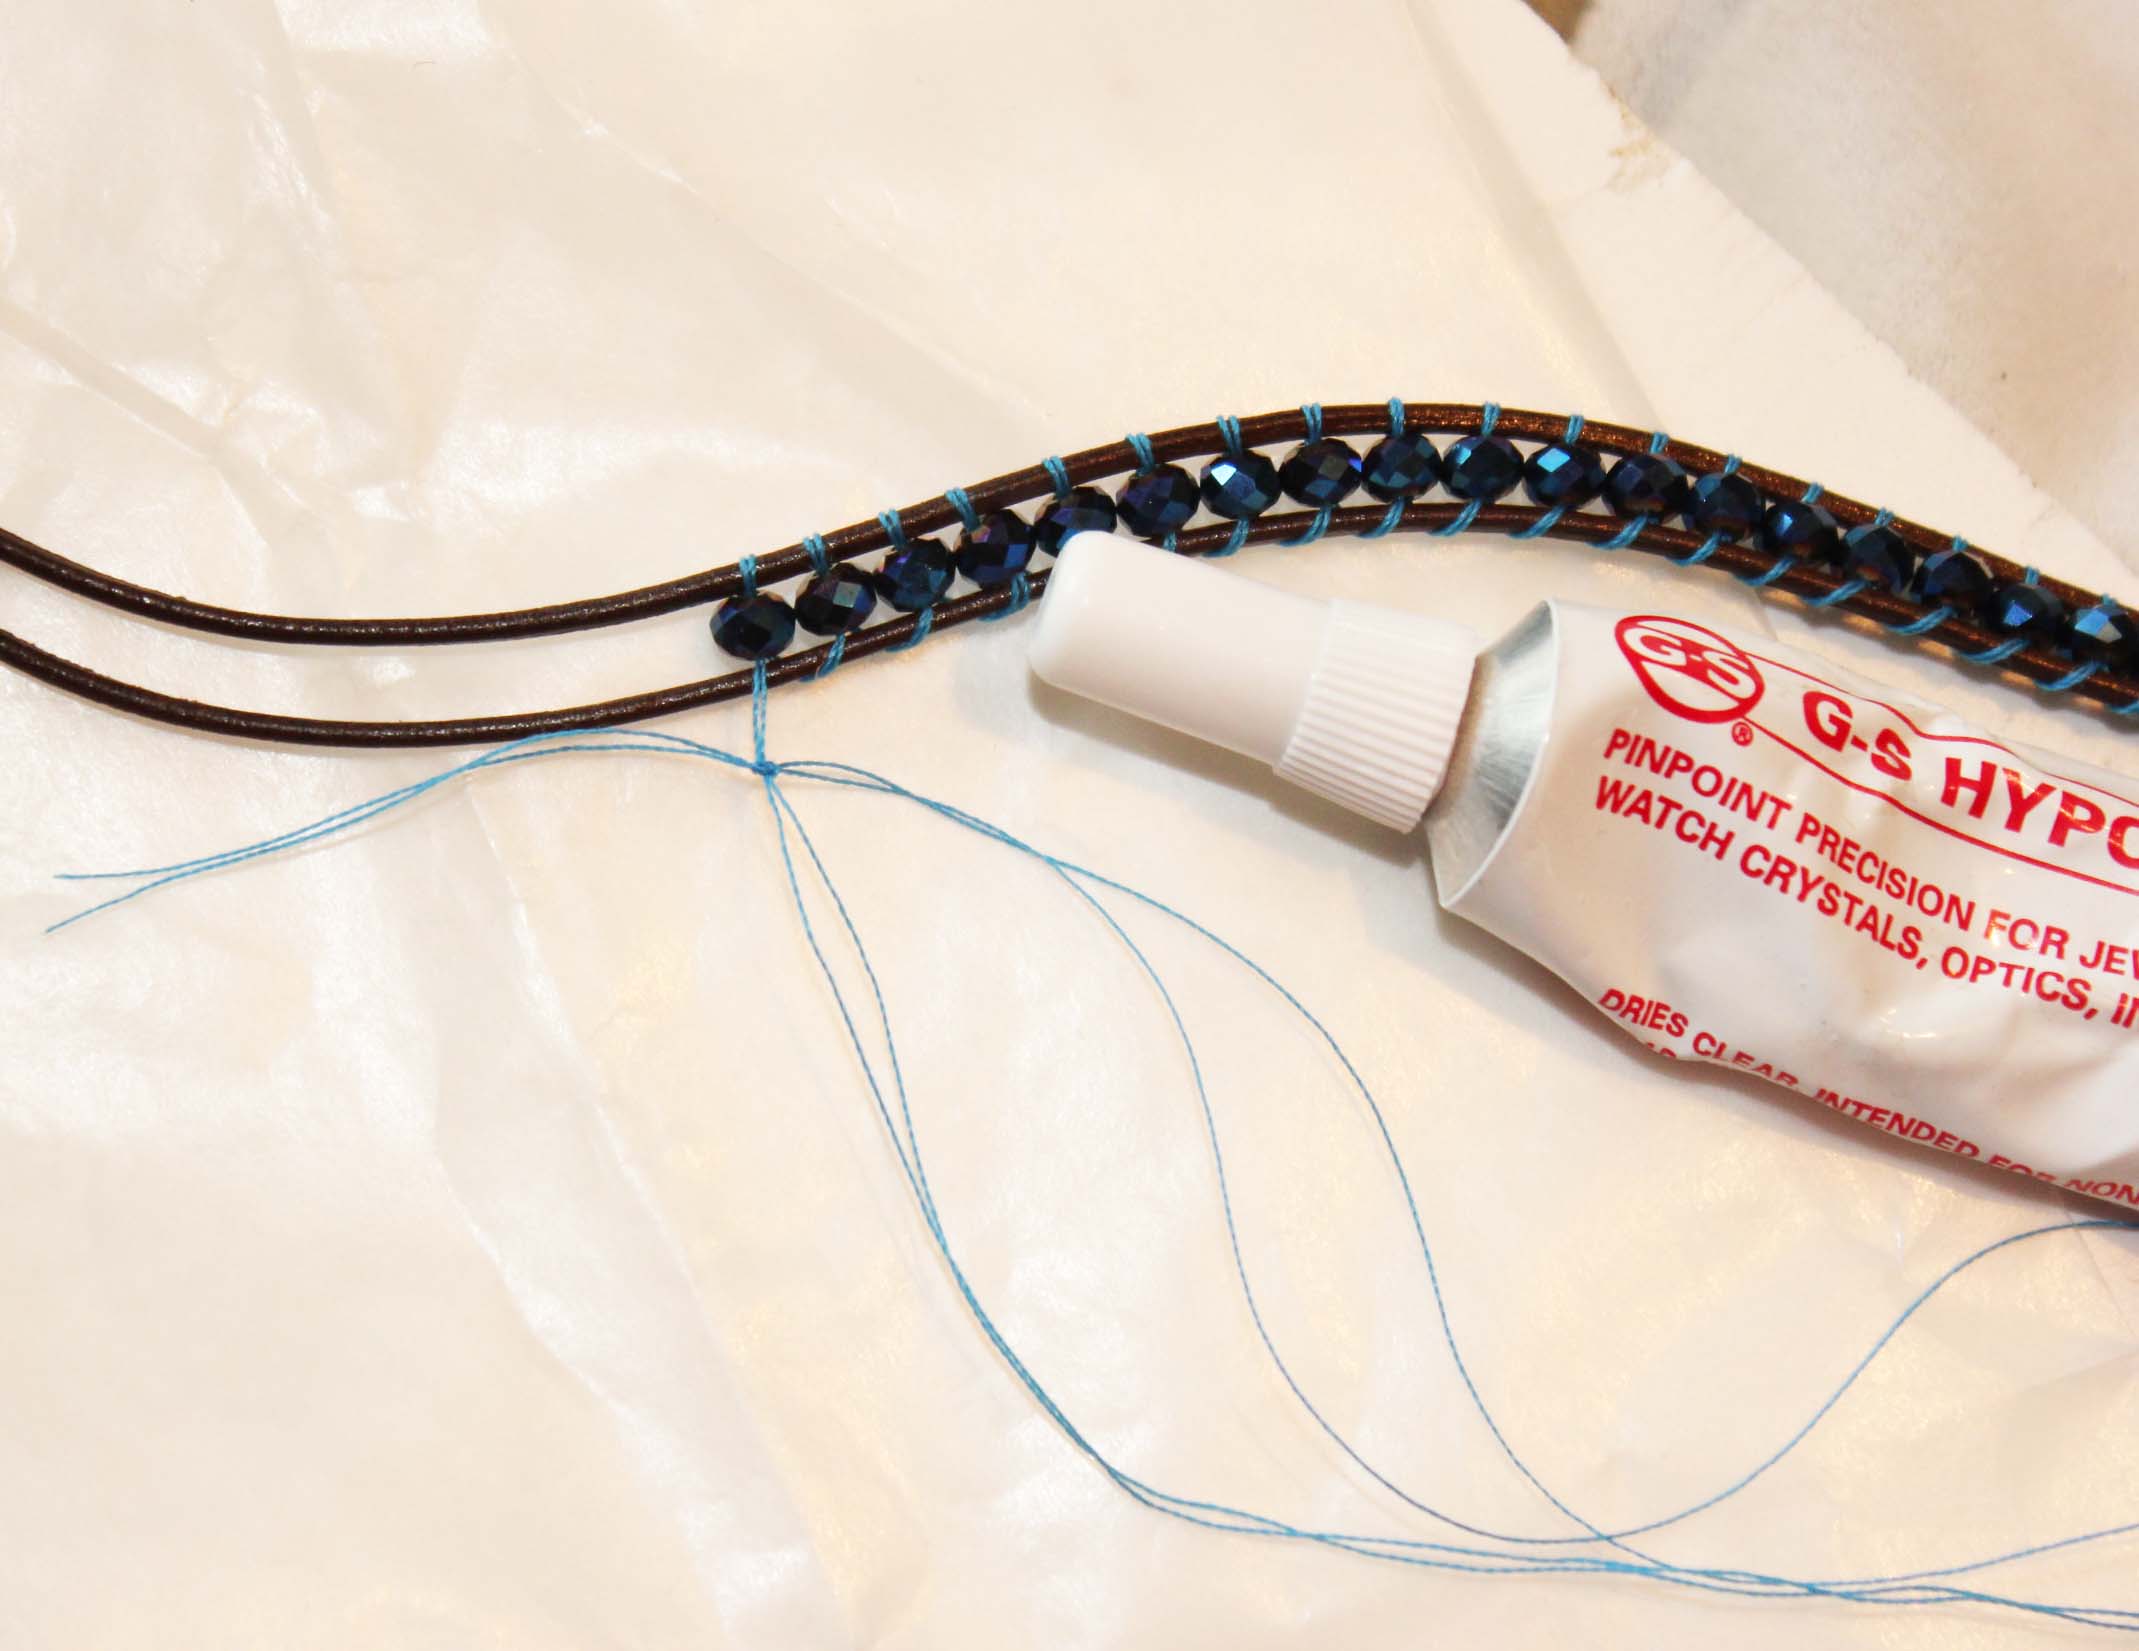
Add a new thread by cutting 50 inches of thread. Tie a knot to secure the new thread ends to the existing thread ends. Add a dot of hypo cement to the knot.
Step 5
Finishing and adding the button closure.
We will finish the same way we began, by securing our thread. Create a loop with the thread, go over and under one of the leather cords, up through the center of the cords and pull tight.

Do this on opposite side of leather cord. Repeat one more time on each side.
Knot the thread and trim the loose ends.
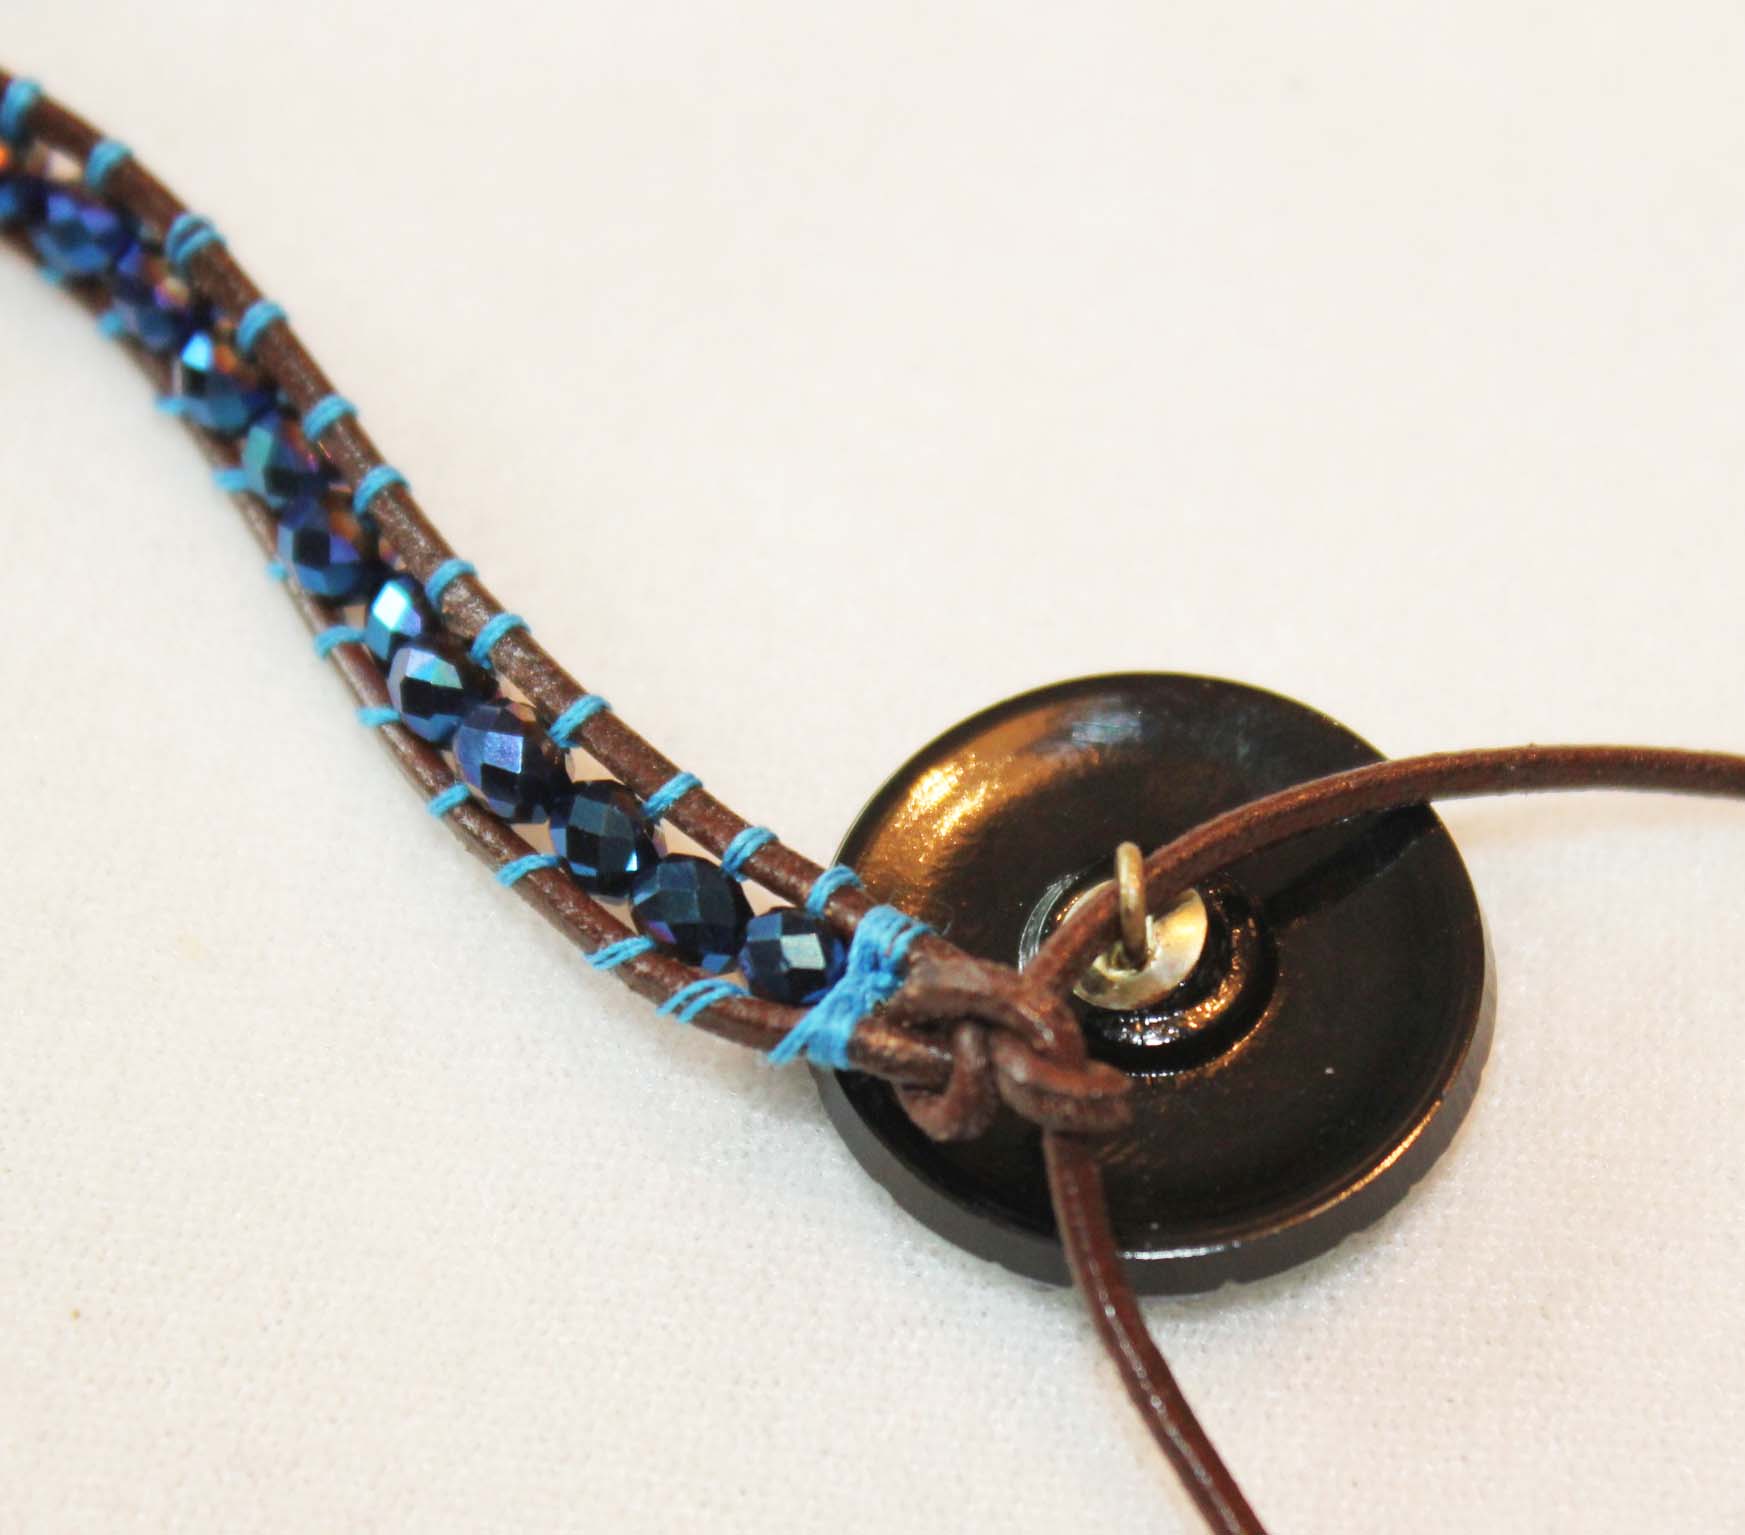
Tie a knot in the leather cord. String button onto one of the leather cords.
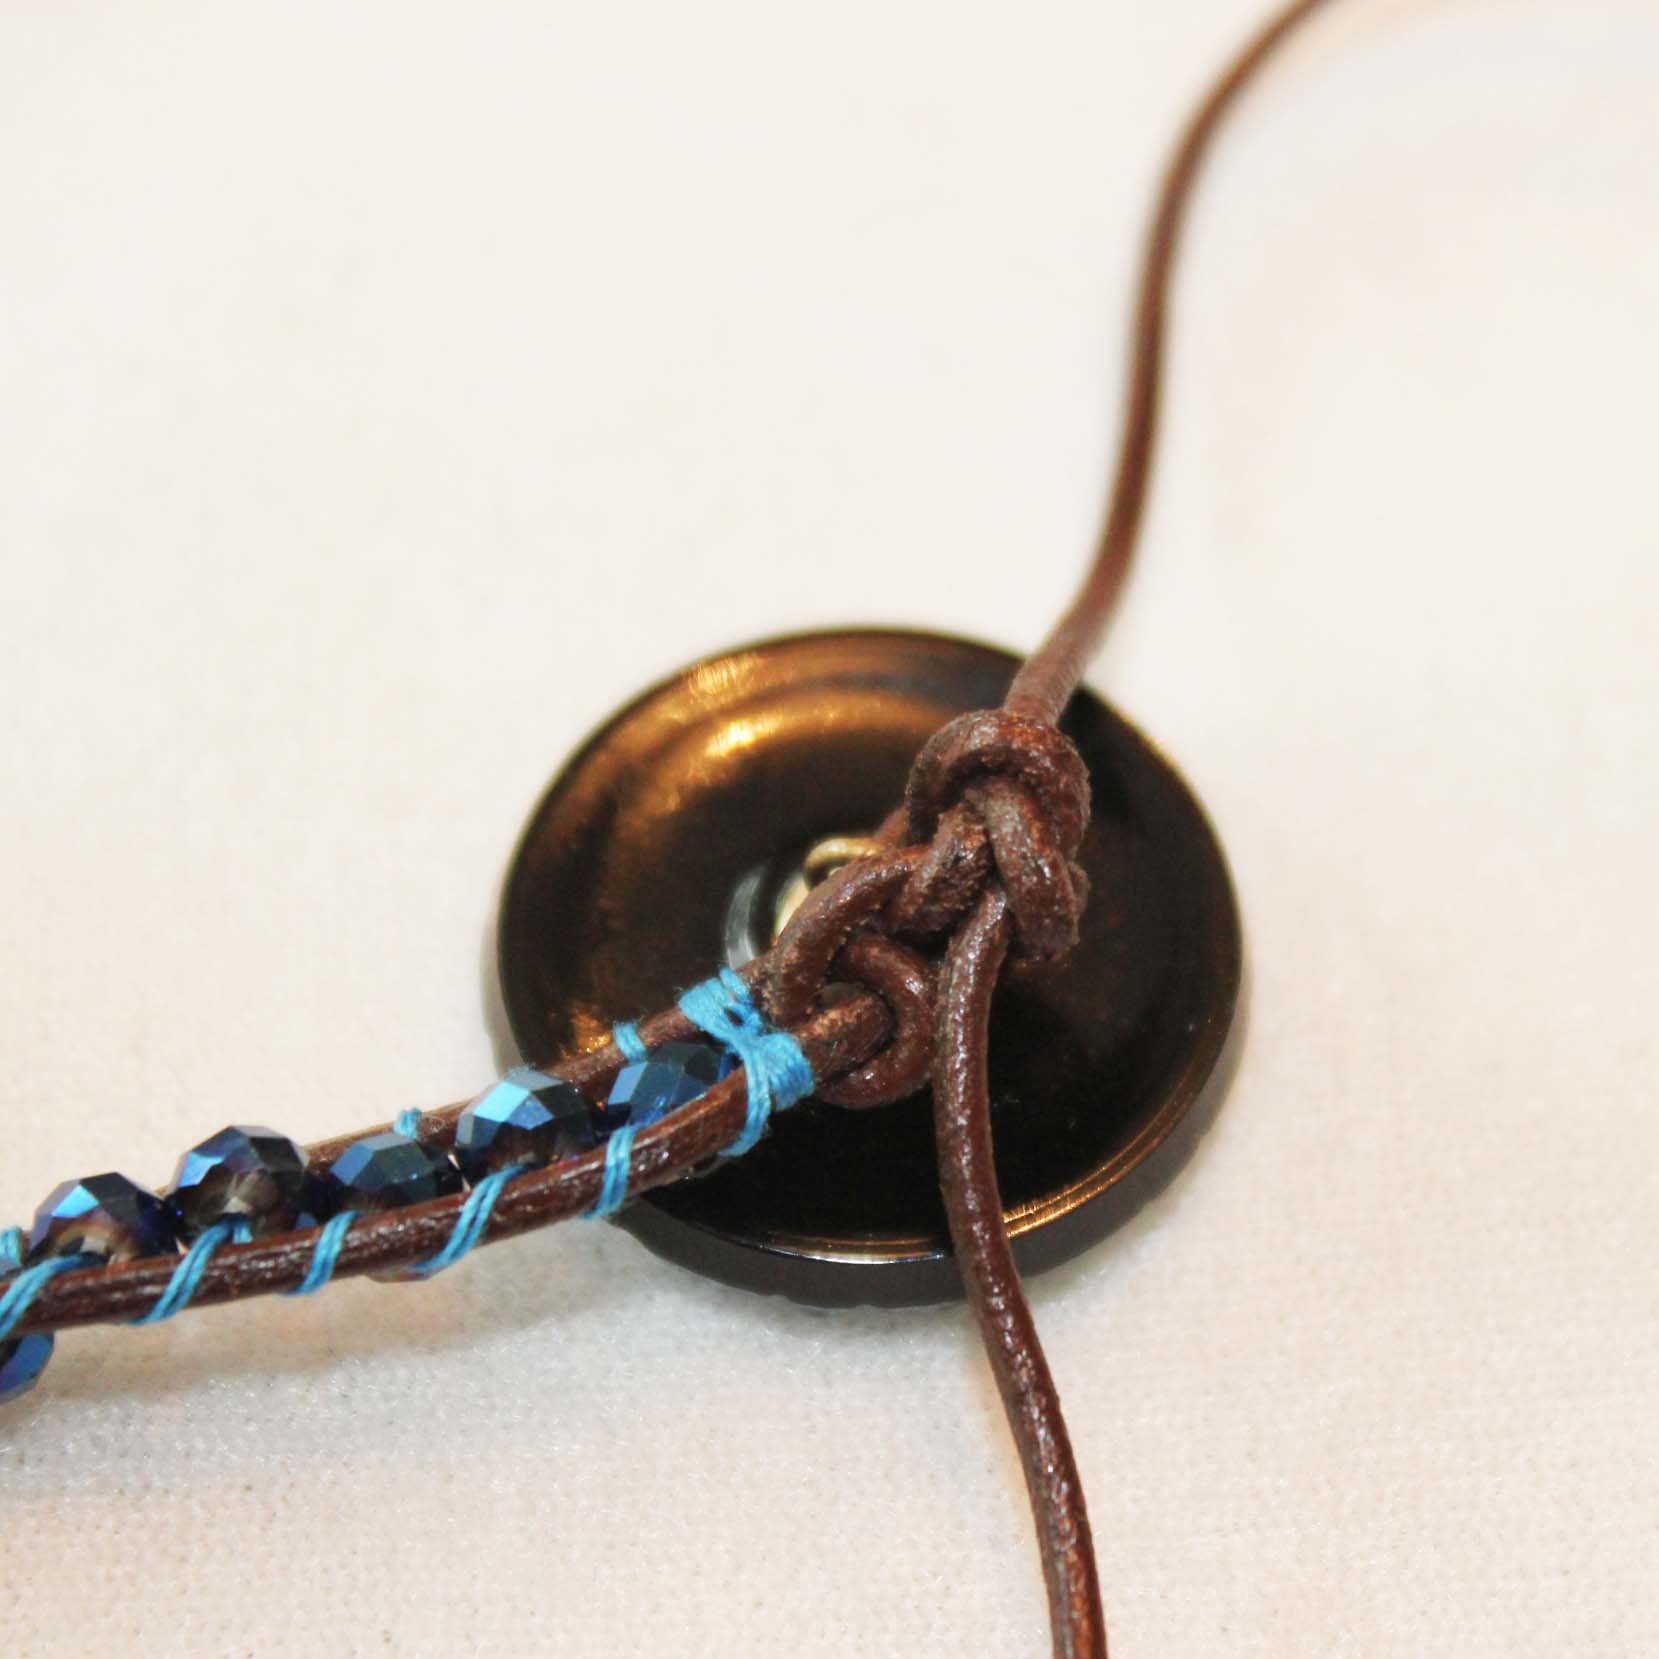
Knot the leather cords and pull tight.
Finish by adding a dot of Hypo Cement to the knotted threads at the start and end of the piece and to the leather knots. Allow glue to dry and trim the leather tails.

Share tips, start a discussion or ask one of our experts or other students a question.
No Responses to “Be On-Trend This Summer With Bead Wrapped Bracelets”