The first sweater I ever knitted was worked in garter stitch and required knit increases. I panicked, broke into a sweat, and learned the inc 1 knit stitch to tackle the sweater. And guess what? It turned out pretty lovely!
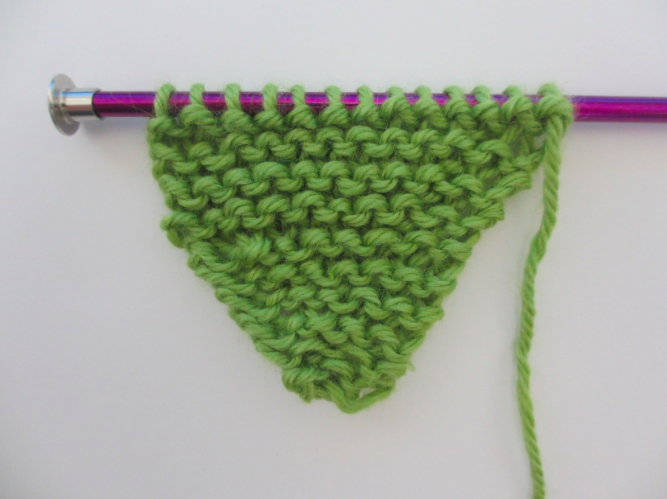
This particular increase stitch is usually denoted in a pattern with “inc 1.” There are other types of increases, like M1, but for today we’ll concentrate on inc 1. This type of increase is sometimes denoted as kfb or kf&b (“knit front and back” — you’ll see why). It’s also referred to as the bar increase because it results in what looks like a little bar running across your work.
Invisible increases
The bar increase can be visible or invisible depending on the type of stitch you’re knitting. If you’re like me, you prefer an invisible increase most of the time. The bar increase is not very noticeable in bumpy stitches like the seed stitch or garter stitch (which is what I’ve used in my swatch above), but it can be pretty noticeable on the right side of a stitch like stockinette.
Sometimes it doesn’t matter if the increase is visible. For instance, some sweaters have you work the increase near the edge of the work, so the increase will be buried under your arm or in a seam. No one is going to see that increase unless you decide to point it out!
A visible increase can actually be helpful in some situations. A visible increase can help you keep up with the last place you increased — great for distracted knitters like me who like to talk while they stitch.
Try Knitting Increases in 7 Common Stitches

Stitch your way to knitted joy! Master these seven popular patterns, then try the knit increase stitch in each one.
How to Increase 1
To make the increase 1, you just need to know how to make a knit stitch. Here’s how it’s done:
Step 1:
Knit your row up until the point when the pattern instructs you to Inc 1. (For my swatch, I knit the first stitch in the row, then made the Inc 1.)
Step 2:
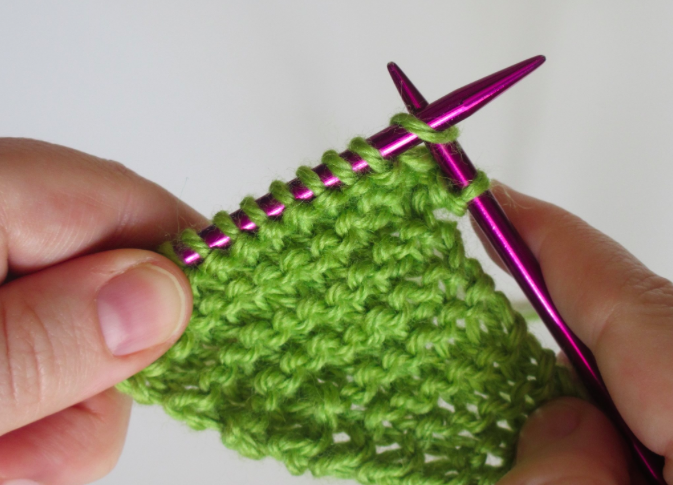
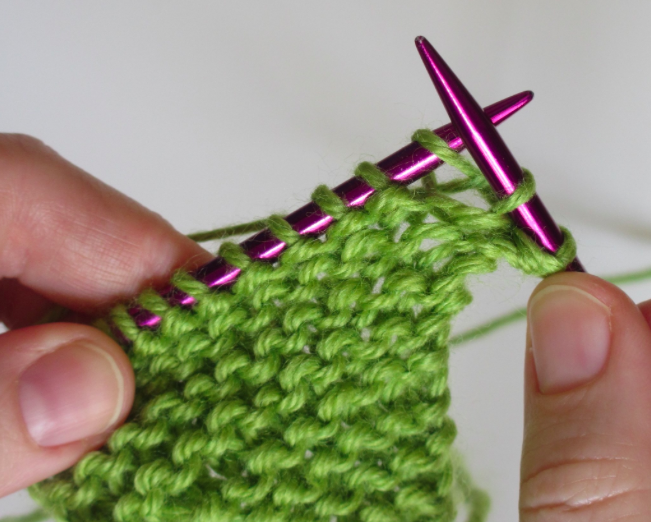
Knit the next stitch on the needle as you normally would, stopping just before you drop it from the left needle. Don’t drop it from the left needle once you’ve completed the stitch; just leave it hanging out on the left needle. If you’re following my swatch, you’ll have two stitches on your right needle.
Step 3:
Now, knit into the back of that same stitch you just knit. To do this, insert the right-hand needle into the back of the stitch from front to back. (Do not knit it in the same way that you usually knit stitches.)
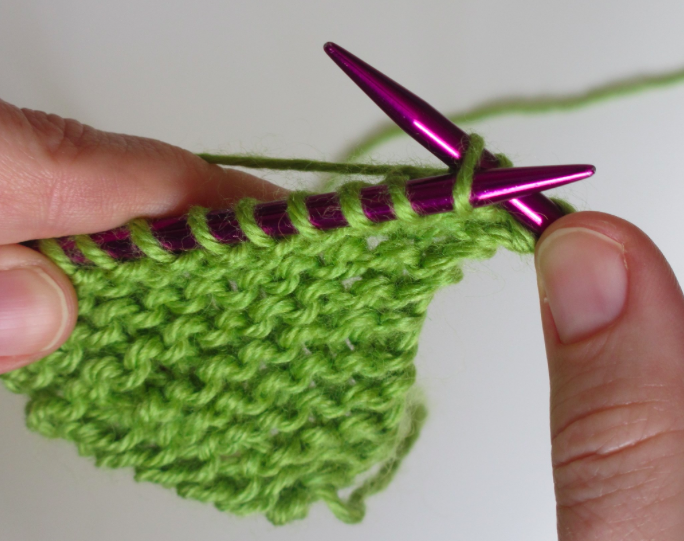
See how the needle is going into the stitch from a different direction than the usual knit stitch?
Step 4:
Now you can drop the stitch from the left needle.
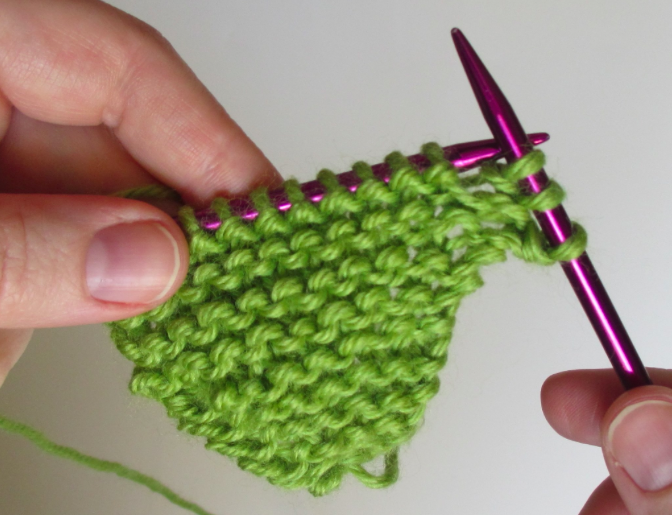
Ta-da! What was once two stitches has now created three stitches. Those three stitches are hanging out on the right-hand needle.
Your pattern will always tell you when to increase the stitches, and it will also have a nice note at the end of the instructions to tell you how many stitches should be on your needle when you complete the row, like this: Row 3: K1, inc 1, k to end of the row. (17 <sts)
Try Knitting Increases in 7 Common Stitches

Stitch your way to knitted joy! Master these seven popular patterns, then try the knit increase stitch in each one.

Just re learning how to knit again