
I love many of the various jobs I do as an illustrator of picture books, but perhaps my favorite thing is to design the characters. I love everything about it, from the exploration of sizes and shapes and faces and clothing, to the formalization of the design and the selection of colors and other finishing touches. It is what I do when I’m doing nothing at all, and I have a paper and pencil in front of me.
Everyone does character development differently; here’s one method.
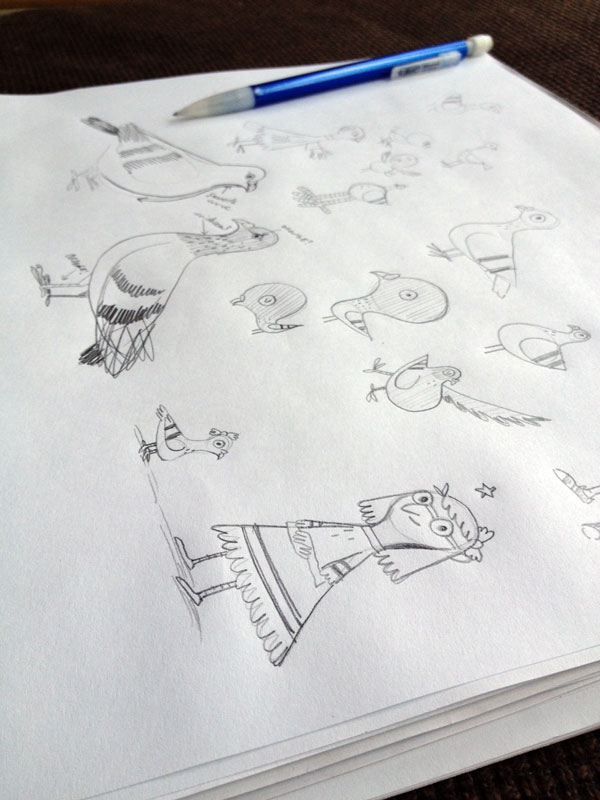
Step 1) Exploration
Every story I draw – picture books or comics – has a main character or a cast of main characters about whom the story is being told. If I already have a story in mind or a manuscript to work from, I will focus on drawing the main character or characters first. If I’m just trying to come up with ideas for a new story, I will draw whatever comes to mind, and see if it sparks an idea for a something I might want to write about.
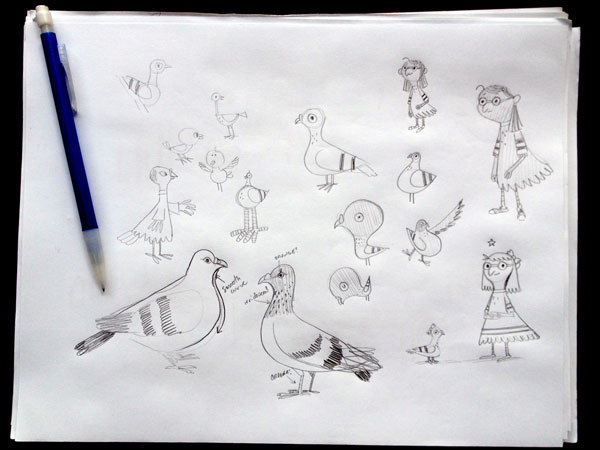
There are infinite ways to draw a little boy, or a cute elephant, or a terrifying monster, so I always begin with a blank sheet of paper and something to distract me a bit, like TV or a movie. I also like to draw while I talk with friends or my family. The idea here is that I’m letting my subconscious have the reins for a while.
There’s lower pressure to produce something interesting this way, which means that I can fill a few pages without worrying, and something along the way usually grabs my attention. I allow myself total freedom to explore tangents or write down a silly rhyme that pops into my head or make a grocery list. It is a kind of meditation that calms me while also producing sheets filled with visual reference for the current project, and potential future projects, too. Including that trip to the market this Saturday.
Step 2) Iterations
Once I stumble into a look that I like, I can take a character’s basic shapes and push and pull them until I find just the right configuration for my story. I take cues from the story I’m working on, and from the tone and “voice” of the text and the character in the context of the story. For this stage, I can’t have visual distractions like a movie running in front of me, but music can be helpful to keep me moving and motivated.
Now I try out extreme versions of the character. If this character is going to stand out on the page, what will make him distinctive and eye-catching? What if his head is huge? What if his face is tiny? Long legs? Short hair? What are the eye shapes? Nose shapes? Mouth shapes? Three fingers, or all four? How many tentacles or spikes does it have?
I once spoke with 2003 Caldecott Medal winner, Eric Rohmann, about the subject of both characters and writing, and his advice was to push to the most extreme, and then dial back in until it works with the story you want to tell.
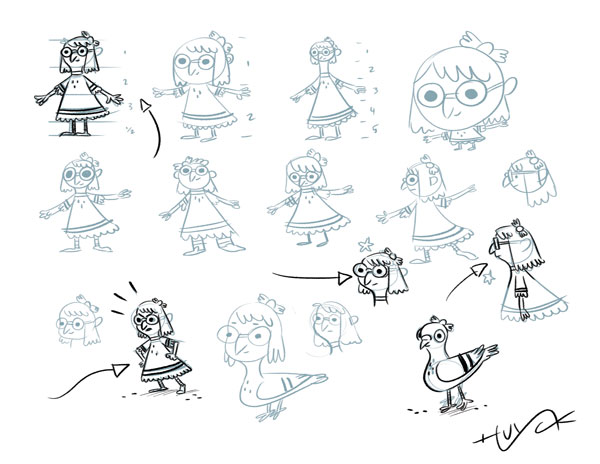
There are other tricks to drawing a character for different effects. Eyes low on the face, and larger eyes, and fewer details, make a character look younger. More lines and higher eyes can age her. Round shapes are kinder and gentler, while angular designs feel more volatile or even dangerous.
The bigger the head, the more “appealing” and cartoony the character is, and a more natural proportion can make your character more complex and distant. I spend a lot of time deciding whether my characters will be two head-heights tall or three heads. Grown-ups are more like four or five heads tall when I draw them, but a real person is closer to seven or seven-and-a-half.
If it is an animal character, the same kinds of proportions will help create the level of appeal you are after. When I draw animals, I refer to reference photos a lot at the beginning, trying to decide which features describe that sort of critter well enough to make is recognizable as that particular animal. Once I figure out the right formula, I can riff on it, simplify it, clean it up, etc., until it is just right.
The iteration stage is usually the longest, trying to get the character just so, and then I can draw it correctly and consistently for an entire story. This is the star of my show, and I need to cast him/her/it, just right, so my reader will want to stick with the story all the way to the end. It also makes drawing that character easier for me later, since I have worked out all these decisions up-front, and I’ve practiced drawing the character dozens of times by this point.
Step 3) Model sheet
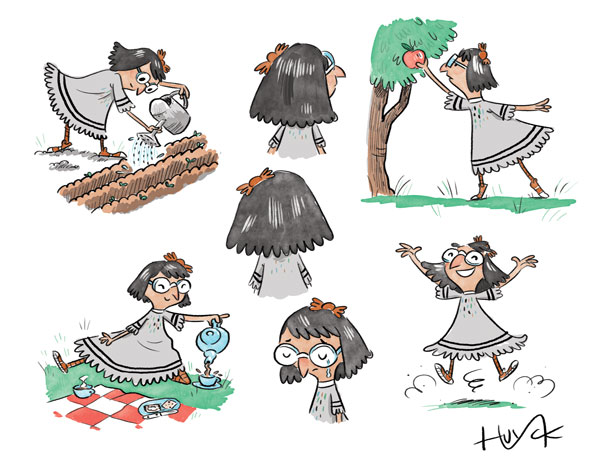
The last step I do is to take my finished design, and pose it all sorts of ways to make sure I understand it in three dimensions. I also add color and try out finishing touches like the particular brush or pencil or digital tool I will use to draw the character for the finished art. I will often use a detail or moment from the story I’m working on to illustrate with my newly designed character, so I can see if my design truly works in the context it will need to live in.
If you do an image search for model sheets, you will see all different ways these can look. I like to make mine fit onto a printable sheet of paper – either letter or tabloid size – so I can tack it to my wall and refer to it as I draw the rest of the story. It helps me stay anchored to that character, both visually and emotionally, as I work out the other part of the illustrations.
[box type=”shadow”]
Explore your creativity + elevate your passion — discover our growing section of new drawing classes today!
Did you know Bluprint has online drawing classes? You can enjoy classes taught by expert instructors anytime from the convenience of your home. And, for a limited time, enjoy an exclusive discount of up to 33% off select classes! We guarantee you’ll love it or your money back!
[/box]
Share tips, start a discussion or ask one of our experts or other students a question.
No Responses to “How to Design Characters: Discover a Foolproof Methodology”