
For the professional photographer or the serious amateur, the ability to calibrate a monitor is essential. A calibrated monitor allows you to create: consistency in your editing, files that look good on other displays and prints that are accurate reproductions. Calibrating your monitor will ensure you are getting the most out of your software and hardware.
Here are 4 steps for getting your monitor calibration under control.
Step one: Find your tools.
First, turn on your monitor and let it run for a little while. You want to make sure it has warmed up and the pixels are all able to be at normal operating conditions. Then, take note of your environment. Do you typically work during the day with all the windows open? Do you work in a dark room with overhead lights? Ambient light does affect your ability to see colors correctly, and you should calibrate with that in mind.
Make sure there are not glares on your screen and the room light isn’t so bright that it washes out your monitor color. Lastly, find out where your monitor controls are so you can adjust them. For some computers (like the all-in-one machines) the controls are part of your operating system’s control panel or system preferences. Other monitors will have them built into the side of the screen or as part of the keyboard controls.
Step two: Use the built-in utilities.
Most computers come with a built-in utility to automatically calibrate color. On my Mac, running OS X Mavericks, there is a “Display Calibrator Assistant” found in System Preferences -> Displays -> Color (If you know the Windows equivalent, feel free to educate us in the comments).
On the Mac, this tool allows you to change the gamma setting, white point as well as trying preset profiles and saving custom profiles. This is a quick and easy way to make sure you have your general settings in place.
Step three: Use online tools.
One you have found the controls for contrast, brightness, color depth and resolution, you can use online tools and your eyes to get the most out of your monitor. Websites, like this online monitor test, help you to adjust your monitor settings until you can see slight variations in color.
You can also test to see if you have any pixels not functioning correctly, and if there are problems, exactly which channel (red, green, blue) are the culprit. Even if you can’t fix the problem, knowing your monitor’s limitations can help you with editing by adjusting for the limitations.
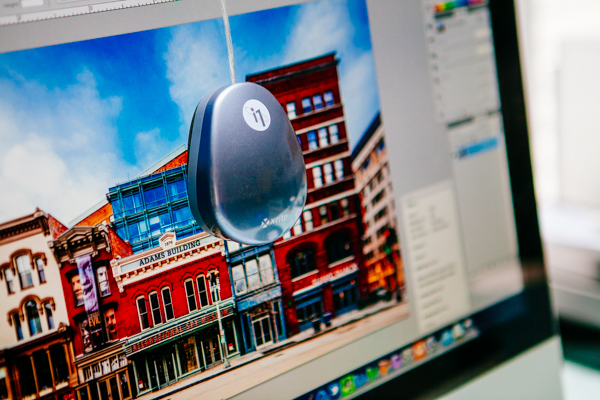
Step four: Use a calibration device.
For about $150, you can get a piece of hardware that measures the color accuracy of your monitor and automatically sets a profile up to industry standards. Datacolor’s Spyder4 devices and X-Rite’s devices are a good place to start if you want something easy to use and accurate.
Each of these calibration devices come with software, which do all the hard work for you, walking you through a step-by-step calibration of your monitor. Of course, having a decent monitor helps, and the quality of your monitor will limit how well it reproduces color.
Once you have your monitor calibrated, you can feel confident that what you see on your screen is what other people will see on their screens (providing they have calibrated too!) and that when you go to print you will get the color you want.
[box type=”shadow”]
Learn more tips and trick for expertly edited photos with the Bluprint class 25 Innovative Photoshop Techniques for Photo & Video.
[/box]
Share tips, start a discussion or ask one of our experts or other students a question.
No Responses to “Picture Perfect Editing: How to Calibrate a Monitor Properly”