
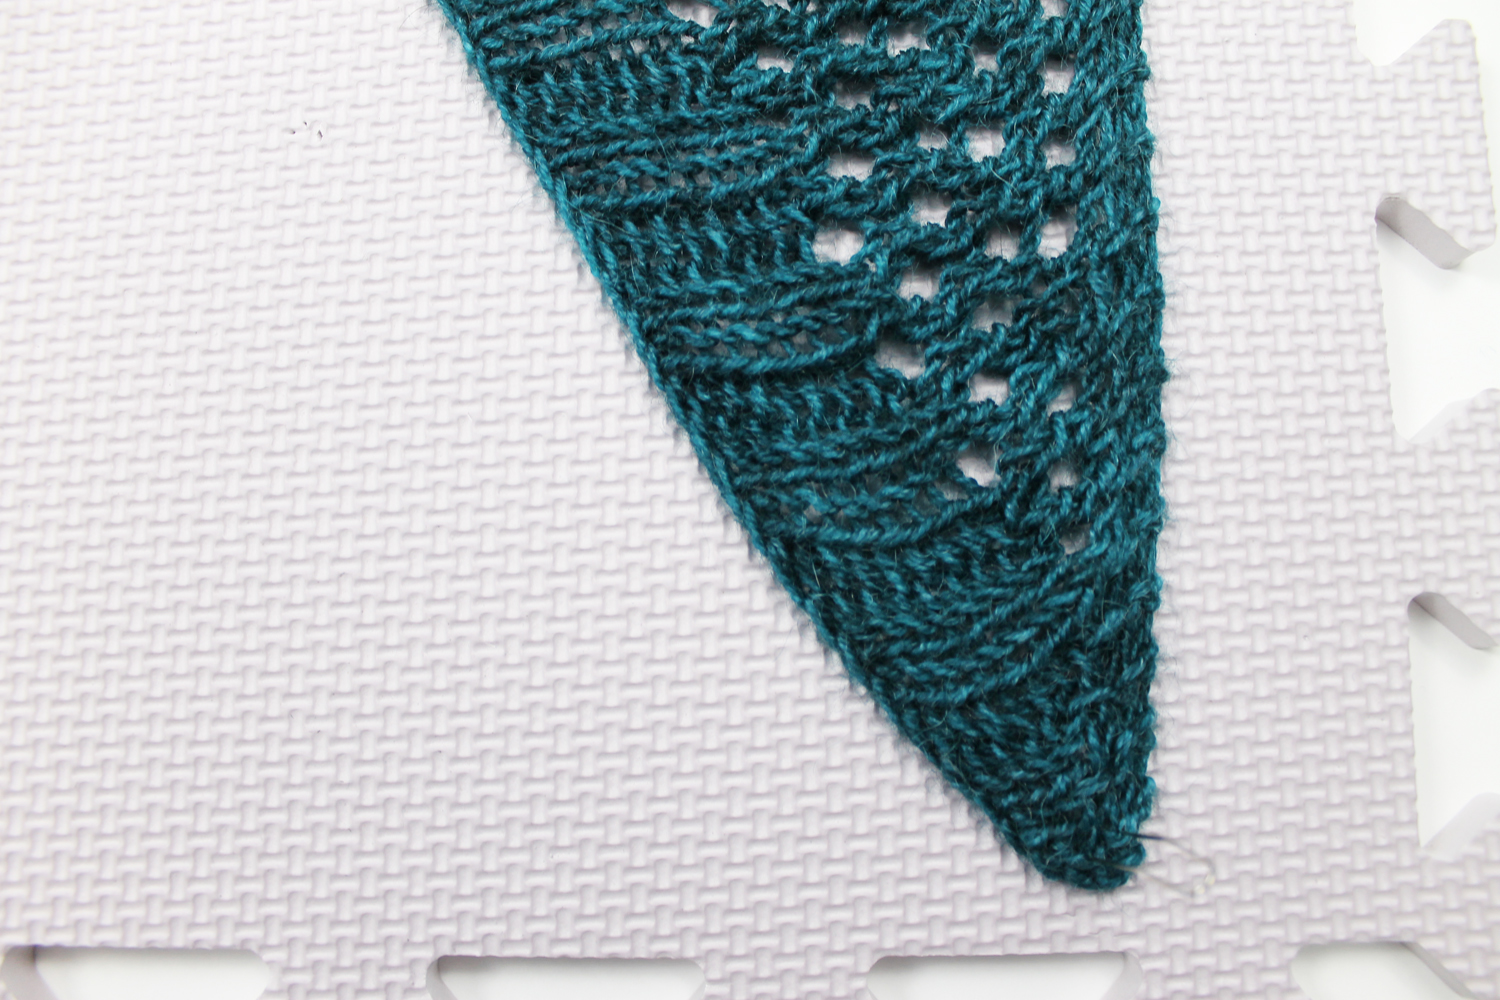
When you knit a shawl, you might notice that while you’re stitching it and even when you bind off, the shawl looks all scrunched up. Triangle shawls look more like big blobs than like a triangle, and you can’t quite make out those gorgeous yarn overs that you stitched.
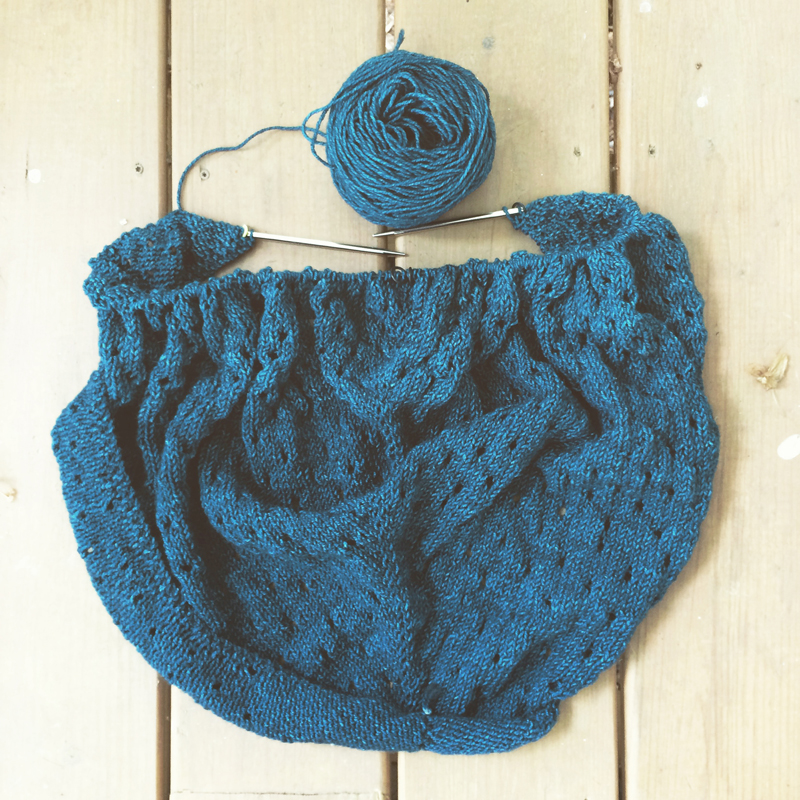
Pictured above is Campside by Alicia Plummer, a shawl I recently completed. See how bunched up all the stitches look, even the stitches that are far away from the needle? There’s an easy way to solve all those problems: blocking.
Sometimes I skip the blocking step (don’t call the knitting police, please), but I never skip it for shawls. Blocking gives shawls so much shape, and it really brings out the stitch pattern.
Blocking tools
To block your shawl, you’ll need:
- Soap that’s safe for your fiber, like Soak Wash (optional)
- Basin or sink for soaking
- Large towel
- Blocking pins
These supplies are certainly not required, but they do make blocking your shawl easier:
- Blocking mat
- Blocking wires
How to block your shawl
Step 1: Soak
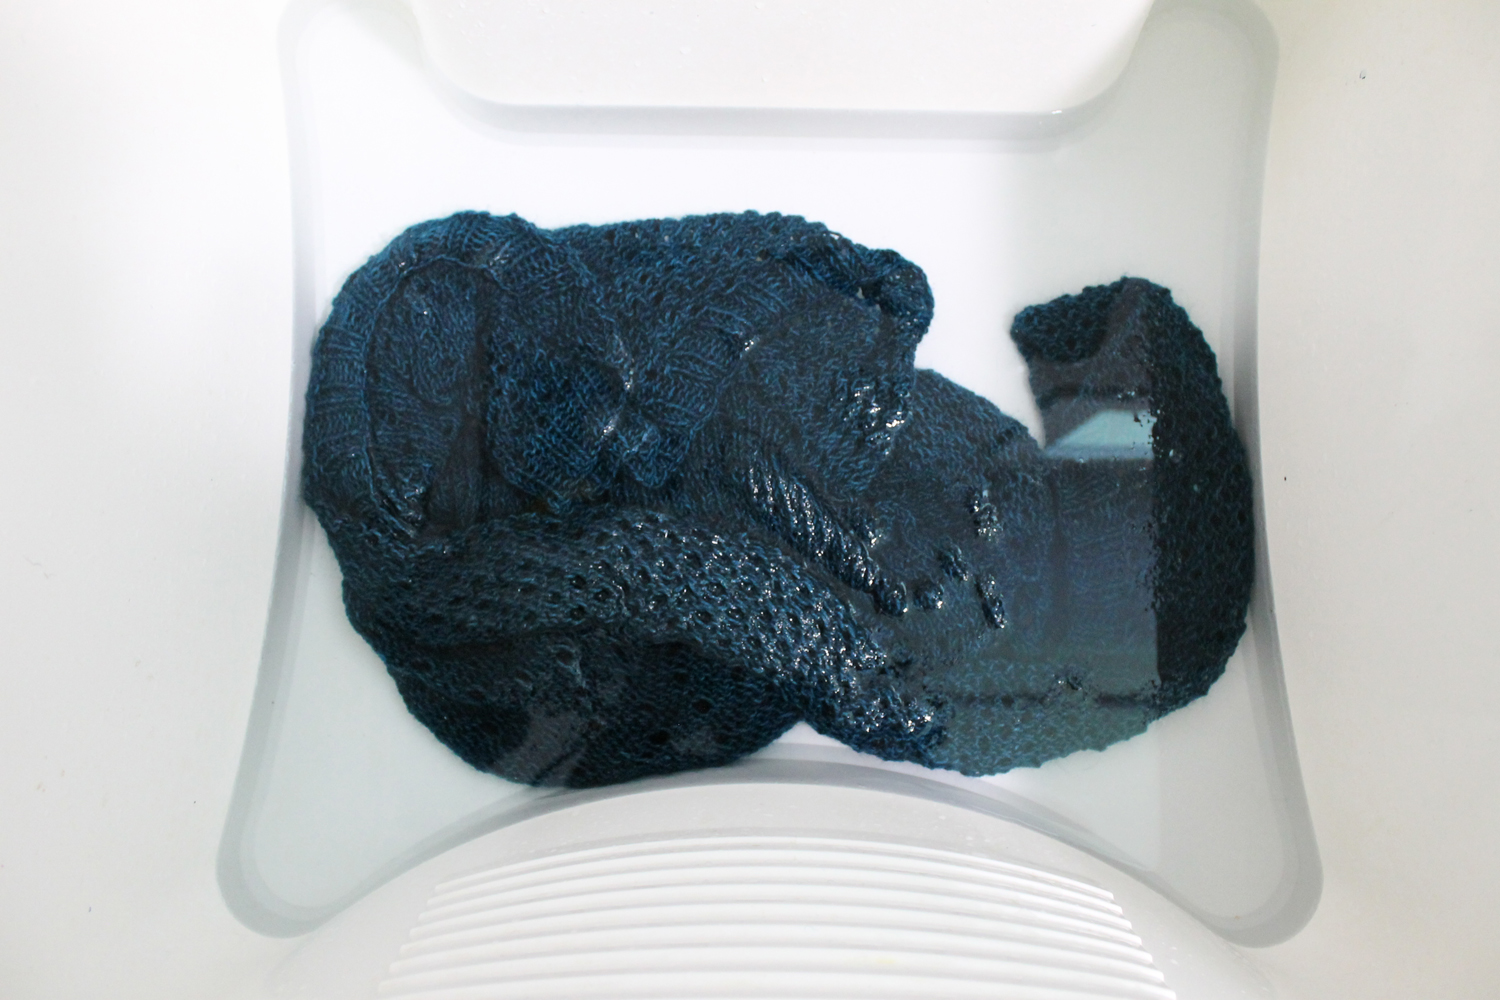
After you bind off and weave in the loose ends, soak your shawl in a basin or sink filled with lukewarm water.
If you’d like, you can also add a soap like Soak Wash to the water. This is a great idea if you are like me and tend to knit in environments where your yarn might get dirty, like outdoors or in breweries!
Push the shawl into the water and squeeze it, soaking it completely with water. Allow the shawl to soak for about 15-20 minutes.
Step 2: Dry
After 15-20 minutes, drain the sink or basin. Gently squeeze water out of the shawl, being careful not to twist or wring it. (That can pull on the yarn, and we don’t want to do that!)

I also like to push the shawl up against the sink and push down on it with the palms of my hands to remove excess water.
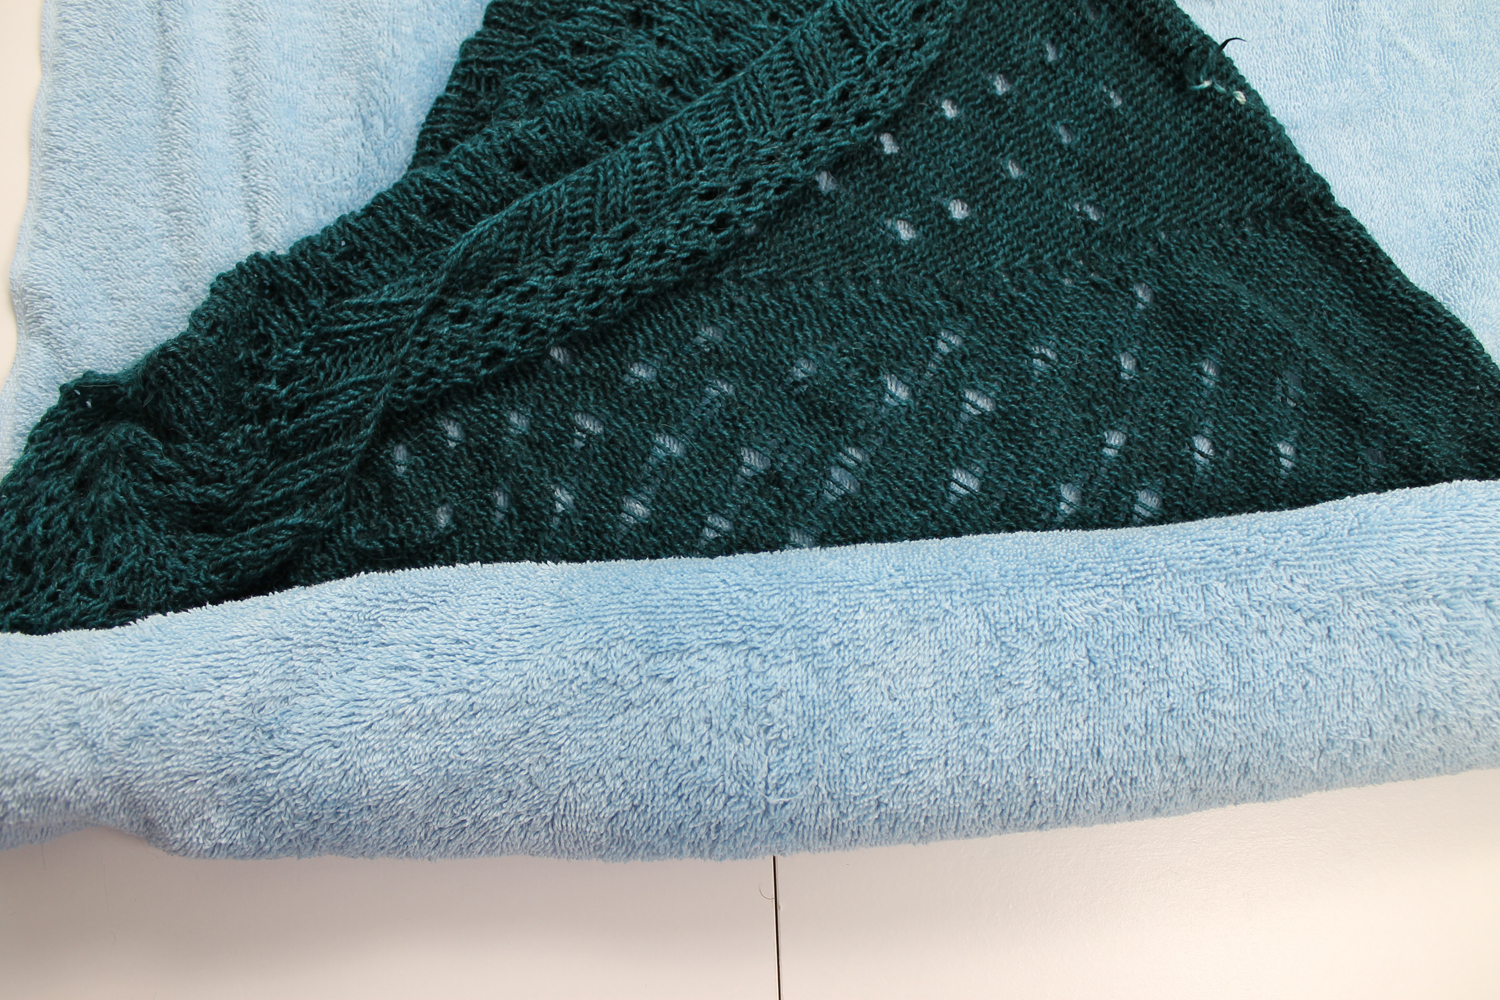
Place the shawl in a towel, then roll up the towel. Push down gently to squeeze even more water out of the shawl.
Step 3: Spread it out
Remove the shawl from the towel and spread the shawl onto a blocking surface. Some surface options include:
- Blocking mats
- The kitchen table
- A fresh towel
- A bed
Just be sure the surface of whatever you use is clean.
If you’re using blocking mats and don’t have enough surface to accommodate your shawl, you can move the puzzle-like pieces around so that they form the shape of your shawl. For example, if your shawl is a triangle shawl, arrange the blocking mat into a triangle shape.
Step 4: Block with pins and/or wires
You can choose to use just blocking pins, just blocking wires, or both.
Using blocking wires
First identify a couple of spots where you want the shawl to be straight. Examples might be the spine of the shawl or the long edge across the top of the triangle.
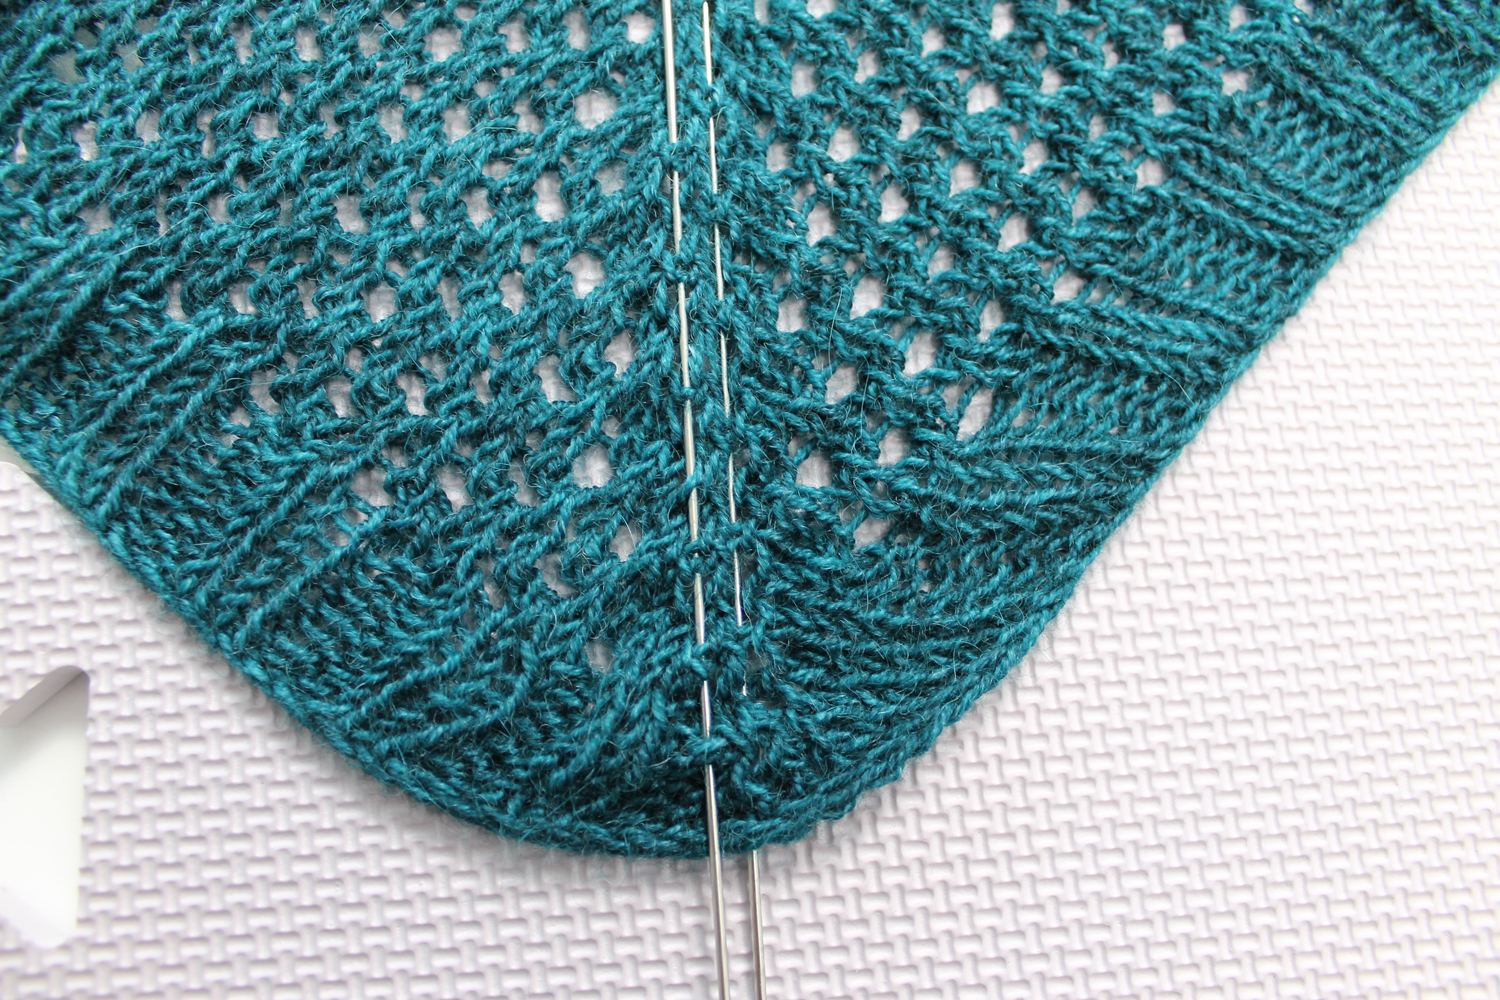
Thread the blocking wires in and out of the shawl, moving them in and out of the stitches. Spots where you have yarn overs are great for threading the wires. For example, if your spine is made up of two yarn overs like mine is, you can thread blocking wires through both yarn overs to really straighten the spine.
Using blocking pins
Starting at the center of the shawl, pin the center spine to the surface. Be sure to pull the spine on the top and the bottom. Check the pattern schematic for the length and stretch the shawl to that length.
When the center spine is in good shape, pin the outside corners of the shawl. If your shawl is a triangle shawl or a shawl that has distinct points, make sure you pull the points out and pin them to shape the corners.
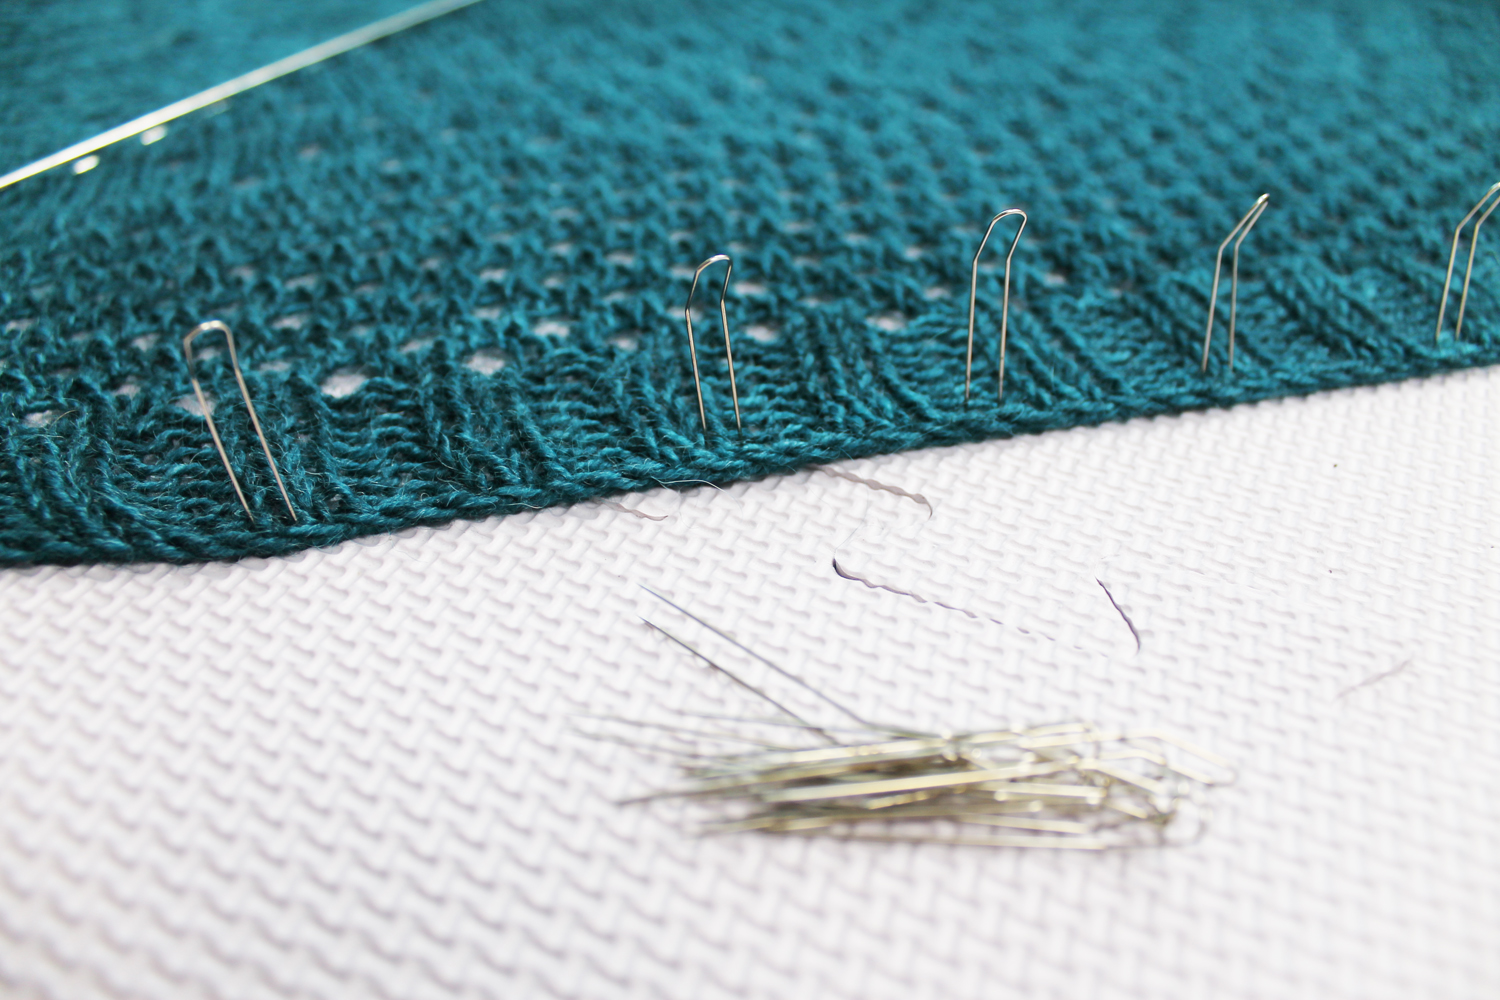
Place pins along the edges of the shawl, pulling the shawl to even out the stitches as you work. You may need to shift some of the pins around as you go. Just keep adjusting until you’re happy with the shape of your shawl.
Using blocking pins and wires
If you have both pins and wires, you can mix these two approaches to block your shawl even more accurately. You’ll still want to use wires and pins at the shawl spine, and place pins at the shawl corners.
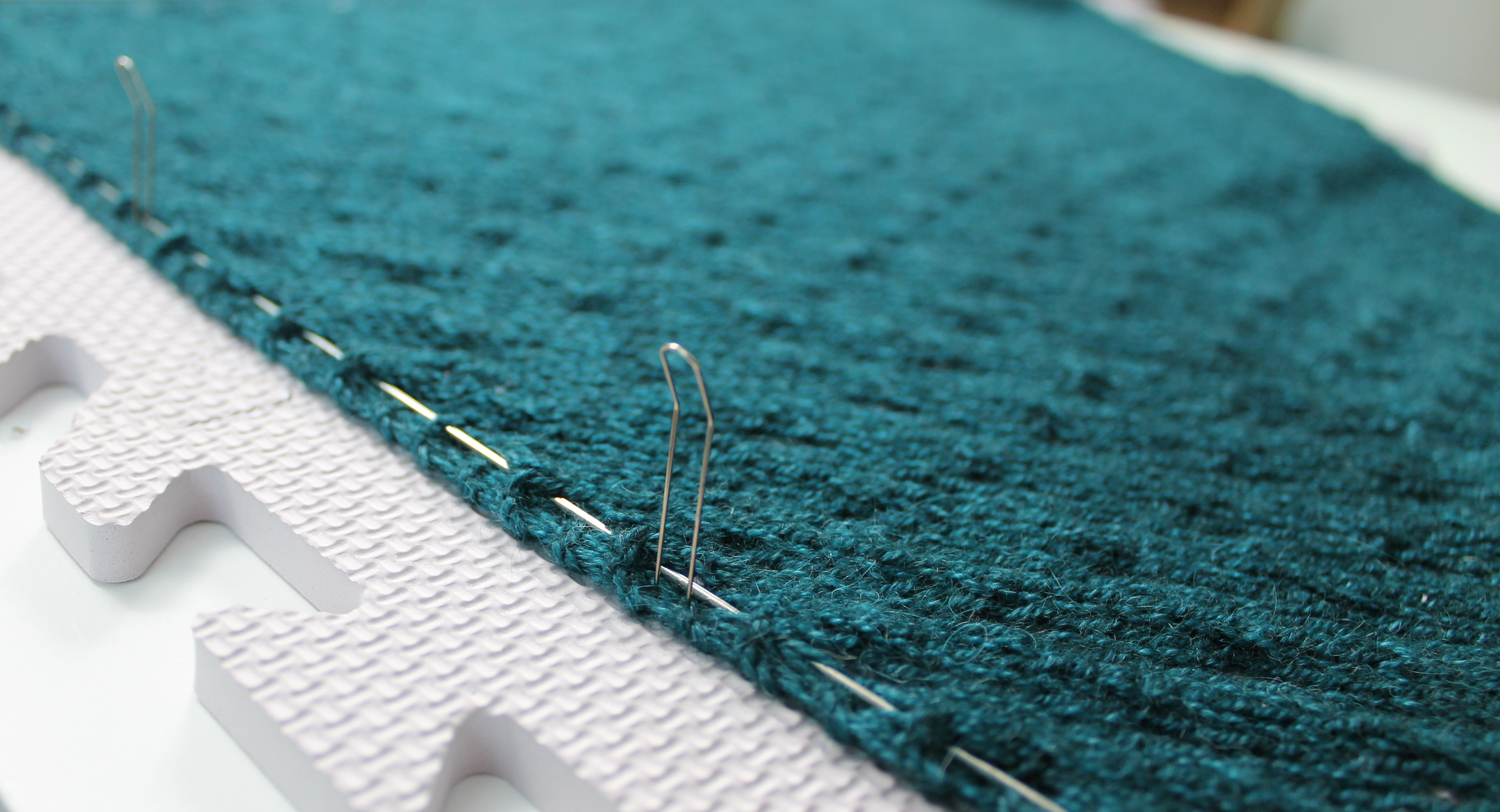
For the edges of the shawl, use blocking wires for shaping and use pins to keep everything in place on your surface.
Let the shawl sit out the blocking surface until it dries, then remove all the wires and pins. Even after it’s dry, you can always re-block it if you’re not happy, but you’ll probably be too excited to do that!
Share tips, start a discussion or ask one of our experts or other students a question.
No Responses to “How to Block Shawls for a Sharper Finish”