
Admit it, quilters: You’re not fans of binding. It’s one of the more tedious parts of the quilt-making process. You’ve pieced the top and quilted the layers, but you still need a binding to frame the beautiful artwork you’ve created. Luckily, there’s a long-held secret to creating a perfect quilt binding without having to use pins or quilting clips: glue!
Yup: glue. Gaining popularity in the modern quilting circles, glue has long been used for basting, piecing and appliqué. It’s cheap, easy to find, easier to use, and makes quilt bindings look amazing.
Afraid that glue might gunk up your machine or ruin your quilt? Don’t be. The glue is dry when you sew your binding down, and if you use the right kind, it’s completely washable.
Follow these easy steps to learn how to apply quilt binding with glue. Whether you prefer to hand-stitch or machine-stitch your binding, we think you’ll be stuck for life!
How to apply quilt binding with glue:
1. Getting started
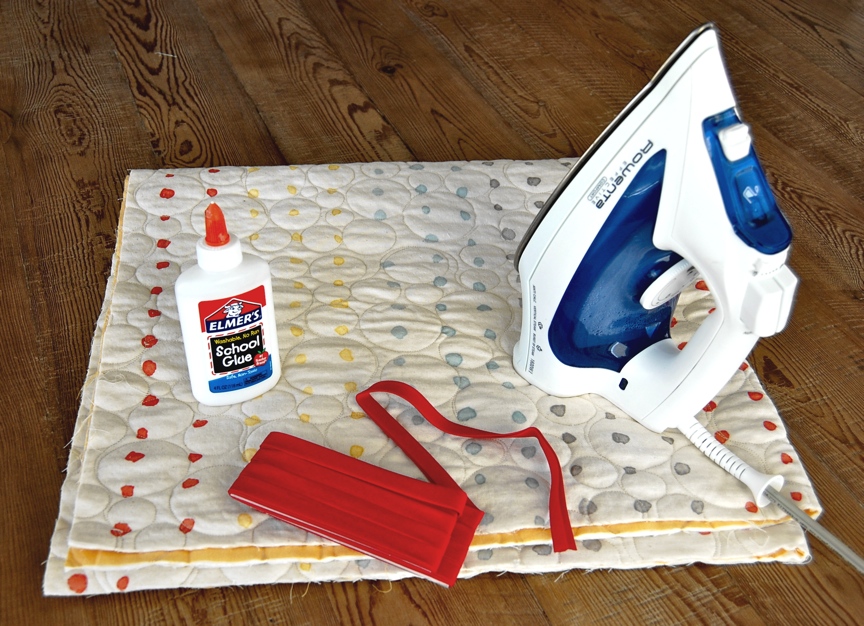
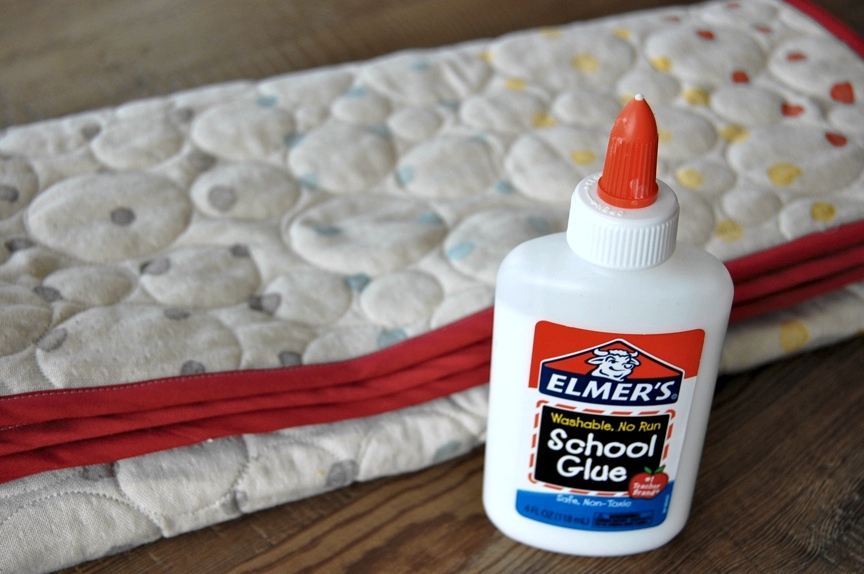
In addition to your sewing machine, you’ll need your quilt with edges squared up, bias tape (either store-bought double fold or handmade), a hot iron without steam and school glue. The brand of glue doesn’t matter, but it must be school glue so that it washes out. You may use a school glue stick, but make sure it doesn’t have any additional color added to it, even if it claims to “disappear” when dry. White is best.
2. Sew edge of binding to quilt
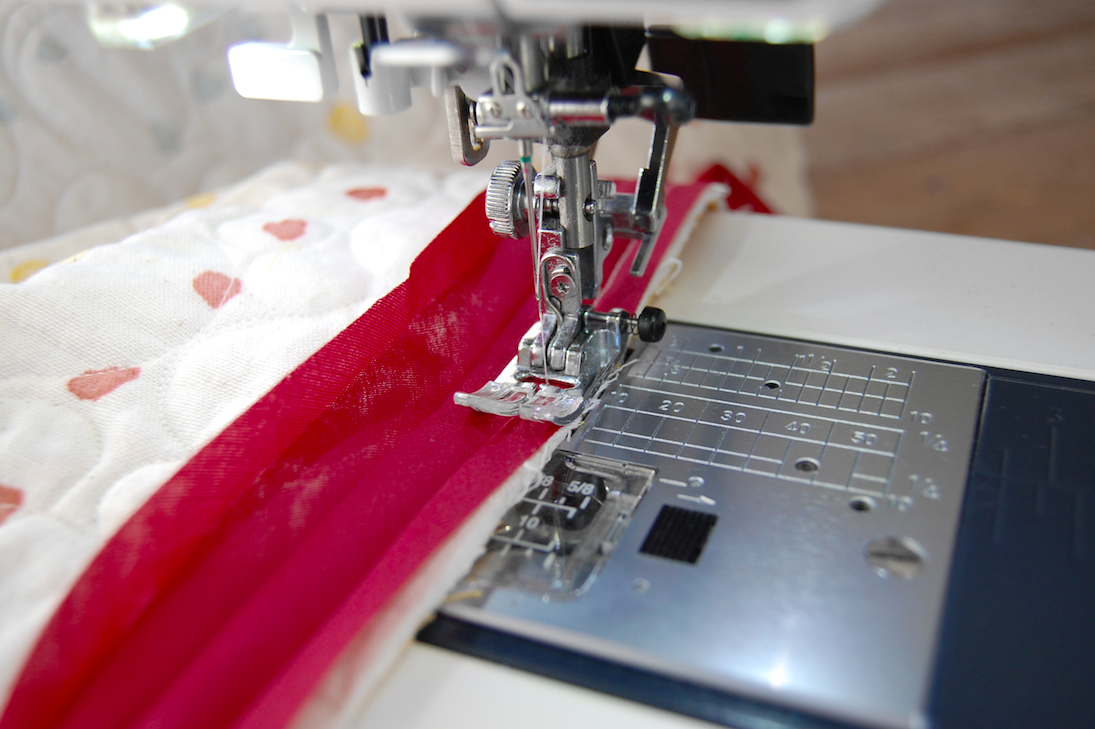
Stitch the edge of the binding to the front of your quilt as you normally would. If you are using double-fold bias tape, make sure to stitch the thinner edge at the fold. This will ensure that the quilt looks perfect on both sides when it is finished. If you are using 2½” handmade bias tape, stitch both raw edges to the quilt edge with a 1/4” seam.
3. Apply glue
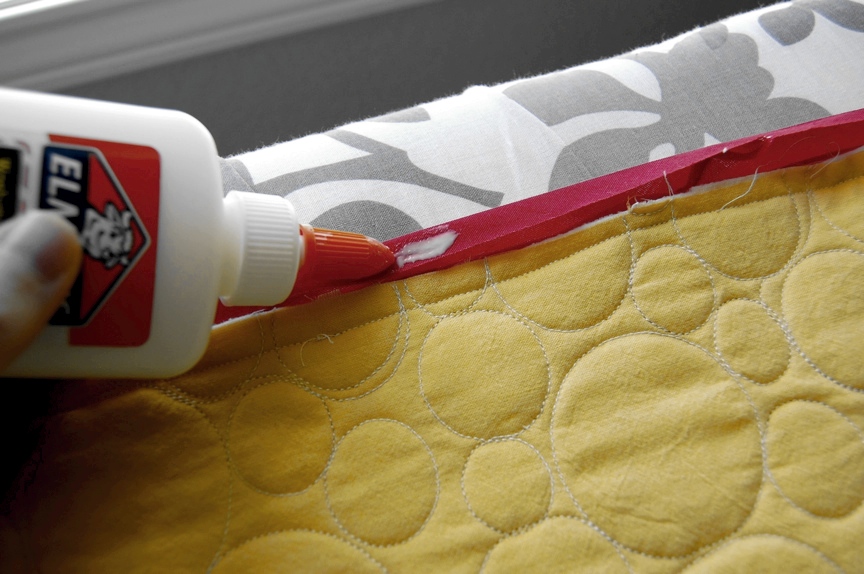
Flip the quilt over to the back side and stretch the bias tape over the edge. The folded edge of the tape should extend beyond the stitch line. Rather than pinning or clipping the edges here, we will use glue instead! Spread a thin layer of glue over 2-3 inches of binding, then finger press to the quilt.
4. Iron the binding to the quilt
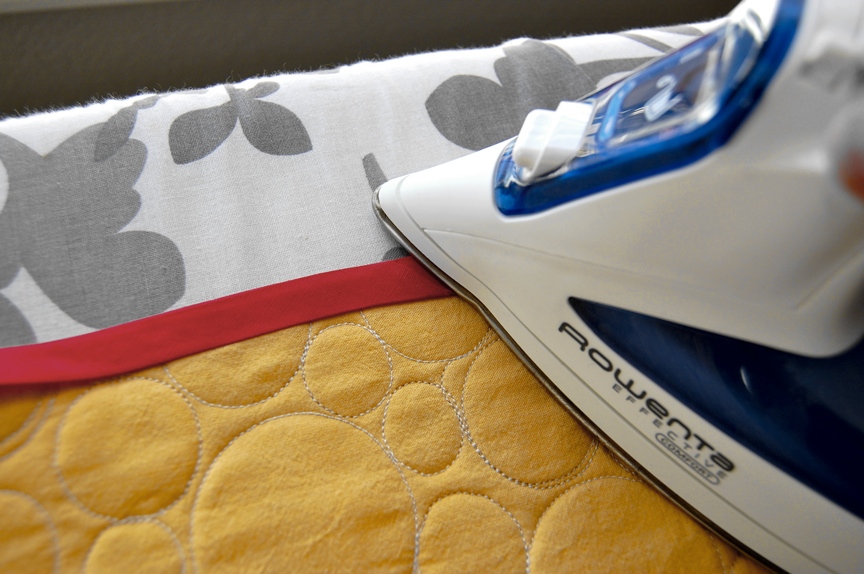
Make sure your iron is nice and hot, and your steam turned off. A dry heat is needed to set the starches in the glue. After applying your thin layer of glue, press the binding to the quilt. Only a few seconds are needed to set the glue. It will feel slightly stiff when it is dry.
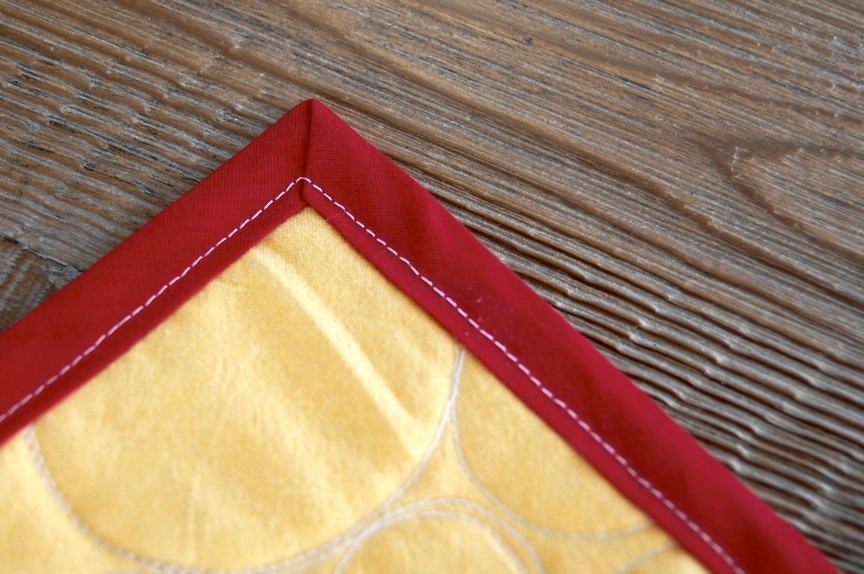
Repeat the gluing/ironing process until you have finished glue-basting the binding to the quilt. The neat thing about this technique is that you can set your mitered corners so that the points line up exactly right. If some extra glue gets on the front of your quilt or binding as you’re finagling your corners, don’t worry! It will wash out. Just make sure everything is as you want it before you press it. Crunchy fabric is harder to manipulate.
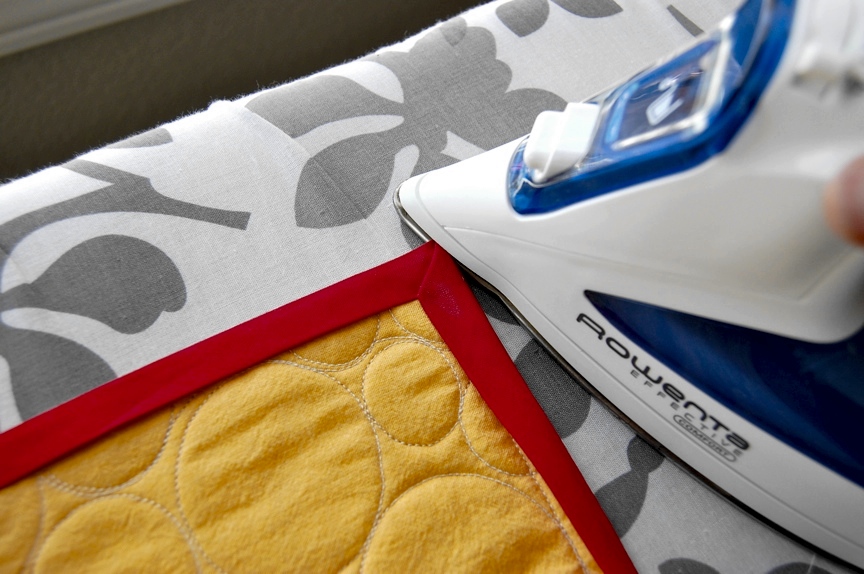
See? Perfect!
5. Hand-stitch or topstitch binding to quilt
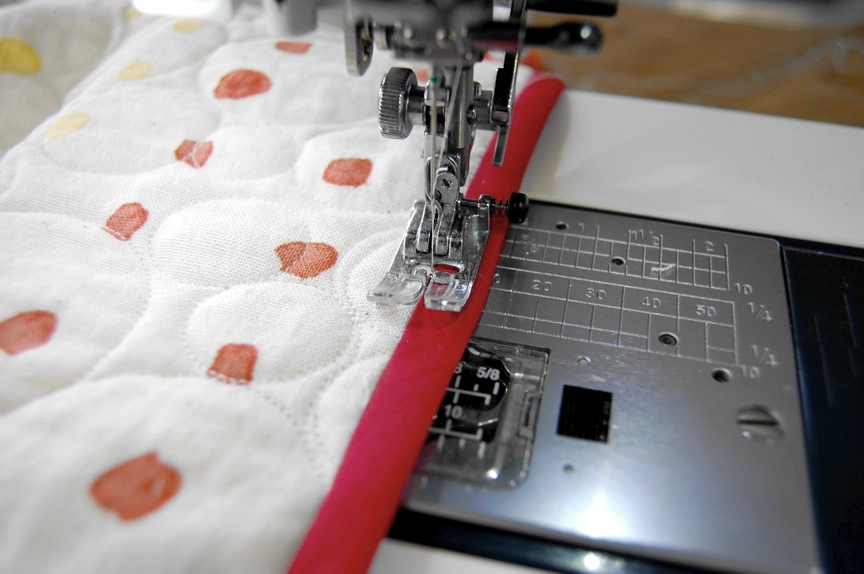
Now that your binding is basted to your quilt (and completely pin-free), it’s time to stitch it down. If you prefer to hand-stitch your bindings, you can do so now. But not having pins or clips to worry about means that you can do a beautiful job machine-sewing the binding on; the fabric won’t bunch up or slide around on you.
If you are feeling confident about the placement of your binding over the original ¼” seam, you may “stitch in the ditch” between the quilt and binding. The stitching will look invisible from the front, and it should catch the slightly wider side of the bias tape in the back. I prefer to err on the side of caution and do a very narrow top-stitch (a scant 1/8”) just over on to the binding. This way I’m doubly sure that everything will catch on the back.
My finished binding from the front…
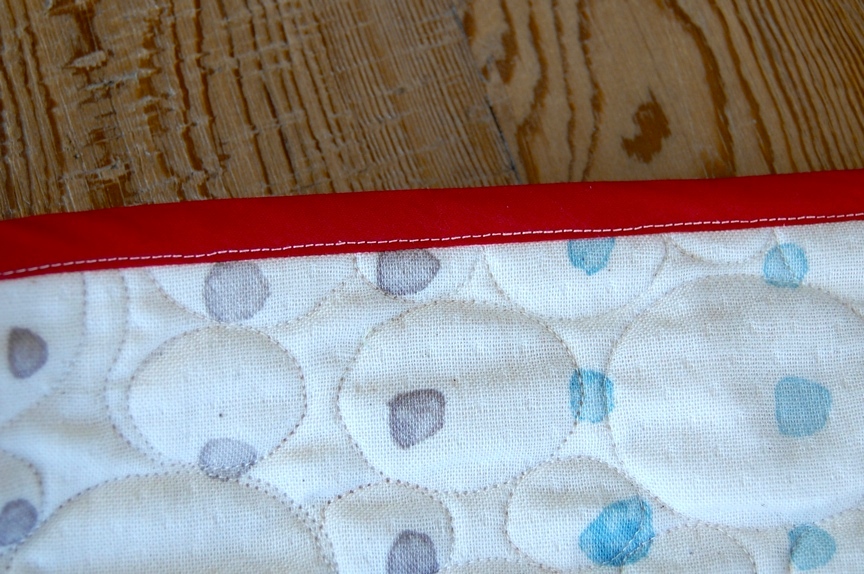
… and the back!
Voila! Easier and faster than traditional binding methods, and with better results. What’s not to love?
FREE Guide: How to Finish Your Quilts in Style

Frame your quilts like the masterpieces they are! Learn how to add beautiful borders and binding today.
Share tips, start a discussion or ask one of our experts or other students a question.
No Responses to “The Secret to a Perfect Quilt Binding? Glue!”