Freestyle quilting is a technique that takes practice to feel comfortable with. You may have heard it called freestyle quilting or free-motion quilting—both refer to a technique of quilting with the feed dogs lowered.
In freestyle or free-motion quilting, the fabric is allowed to move freely, back and forth or side to side. This freedom lends itself to a variety of machine quilting design and creative possibilities. Whether you consider yourself a traditional, contemporary, modern or art quilter, practicing freestyle quilting will help you to create unique designs that truly complement your quilt tops.
When practiced on a test swatch, these freestyle quilting instructions will help you discover your favorite designs as well as others that could use some more testing before you try them out on a quilt.
Prepare Your Machine
Before you being free-motion quilting, you’ll want to lower your feed dogs, set the stitch length to zero, and attach an embroidery or darning foot. You can read more about free-motion quilting supplies and settings here.
Make A Quilt Sandwich
Before I start a large quilting project, I grab a square of scrap batting and make a small quilt sandwich. This is a practice swatch that I use to test out different quilting designs and adjust the tension or other settings on my sewing machine before getting started on a quilt.
To make your own practice swatch for freestyle quilting, grab a long strip of scrap fabric, and fold it in half lengthwise. Insert the batting in the center of the fold, so there is fabric on each side. Secure the swatch with basting spray or safety pins, or just leave it as is if you feel comfortable holding the fabric in place. Alternately, you can use different scraps of fabric on each side of the batting.
Freestyle Quilting Practice
Now is your chance to go crazy with your quilting designs. There are no rules and you are free to cover this blank canvas with any type of freestyle quilting that you’d like! For my latest practice swatch, I stuck with a few familiar designs and also tried some new patterns that I made up as I quilted.
For this swatch, I stitched the designs in a contrasting thread, just to illustrate the designs. For your quilts, you’ll likely want to use a color of thread that matches your quilt blocks or sashing.
If you prefer, you may wish to sketch the designs first with a quilting marker or refer to photos of quilting designs you like.
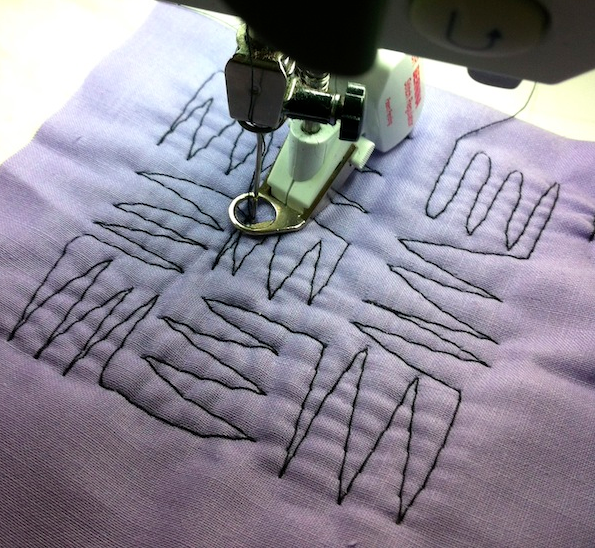
Zigzags
Stitching zigzags is a great way to practice points in your freestyle quilting. Try stitching several points and then changing directions. The zigzags can also “grow out” of a central spoke, to make a flower shape, or they can be drawn wider to resemble a comic book speech bubble (“Pow!”).
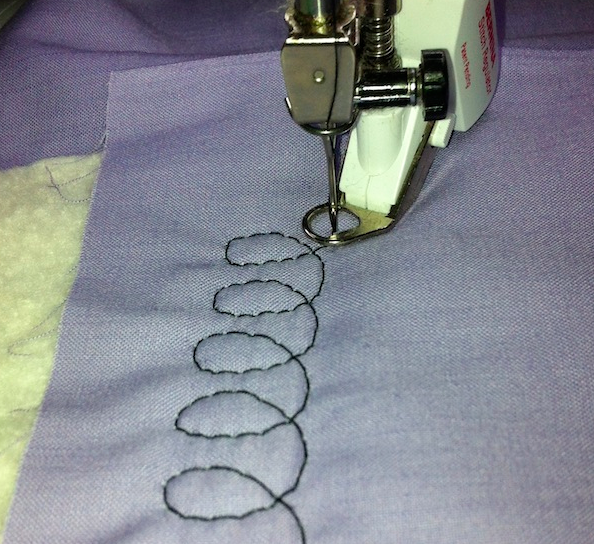
Loops
Freestyle quilting is good practice for getting a consistent size in a repeated design. By quilting small loops in a straight line, I paid attention to the height of the row and also the width of each loop. Try quilting loops in a circle or changing the size of the loops for variety.
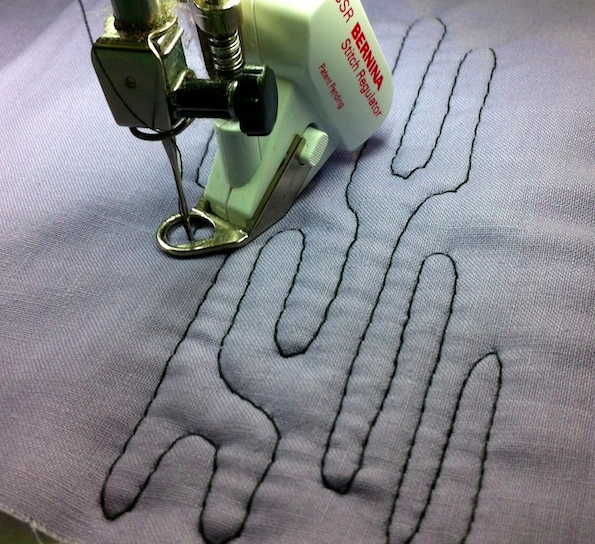
Cactus Arms
To make this pattern, I started stitching long wavy lines of different lengths. At each turnaround, I traveled back inward, to create sections of roughly the same width. I think these resemble the arms of a cactus.
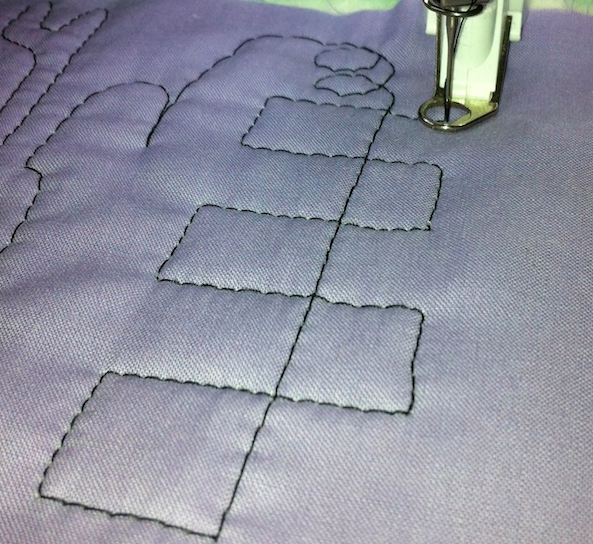
Stacked Squares
Squares are one of my favorite freestyle quilting designs. In this sample, I started by stitching the central line and then created similar-size squares to the left and right sides of the line.
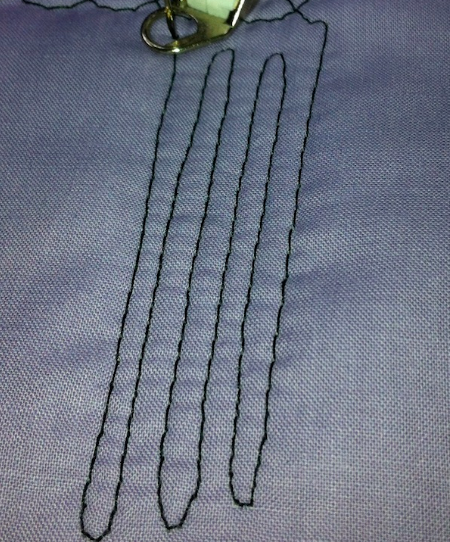
Long Wavy Lines
A freestyle quilting design I like to use in strips and borders is a wavy line. Try practicing until you can easily start and stop each row at the same point (see top), avoiding the difference in height seen here (see bottom).
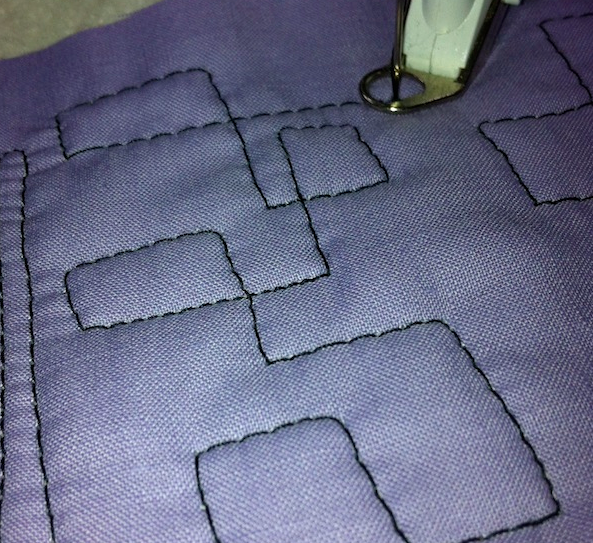
Connected Rectangles
For another take on squares and rectangles, try this freestyle quilting technique. Stitch a straight line and travel directly into a square or rectangle. Cross over the original line when connecting the fourth side, and continue going straight. Turn at another 90-degree angle one, two or three and continue into another square. I like to intersect the stitches at approximately halfway through the perpendicular lines.
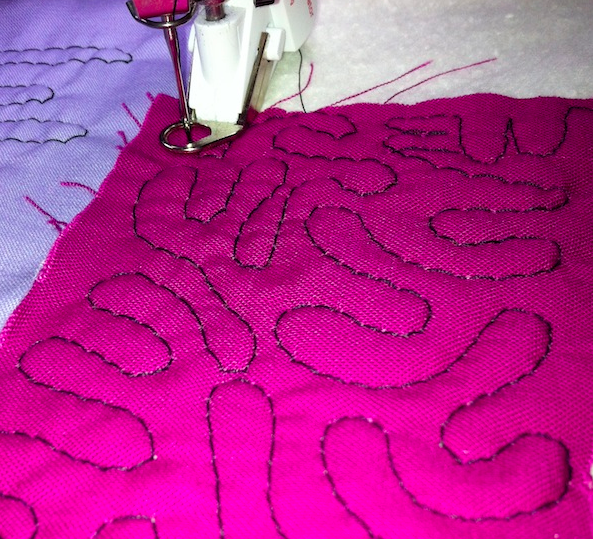
Meandering Stitch
It never hurts to practice your meandering stitch, otherwise known as stippling. There are no rules to this freestyle quilting design, although you’ll want to avoid any intersecting lines. It also helps to keep the size of each hump similar, including the space in between.
If you are ready for some freestyle quilting instruction from the pros, you’ll find great inspiration when you take an online class like Free-Motion Fillers, Vol. 1 with Leah Day or Machine Quilting Negative Space with Angela Walters. Both courses are filled with techinques for practicing your designs as well as demonstrations of quilting designs to make your quilts pop.
How do you practice your freestyle quilting designs before taking them to the quilt?

Share tips, start a discussion or ask one of our experts or other students a question.
No Responses to “Freestyle Quilting Instructions: Practice Makes Perfect”