

When you want the most depth of field without the inherent loss of sharpness that come from stopping down too far, it’s time to give focus stacking a try.
When we think of depth of field in landscape photography, more is often better. Usually when composing the photo, we want everything from the close foreground to the distant background to appear in focus. Achieving greater depth of field is most often accomplished by choosing a relatively small aperture such as f/16 or f/22. But there is a better way.
Stopping down is not the answer
Everyone’s first inclination when trying to get as much depth of field (DOF) is to stop the lens down to the smallest aperture they can. The problem is that even though you will achieve greater DOF with a really small aperture, choosing too small an aperture can result in a loss of sharpness due to diffraction. That’s why most of my landscape photos are shot with an aperture between f/11 and f/16. This gives me plenty of DOF in most cases.
Enter: focus stacking
To overcome diffraction and get extreme depth of field, there’s a technique known as focus stacking that allows you to overcome the downfalls of using too small an aperture.
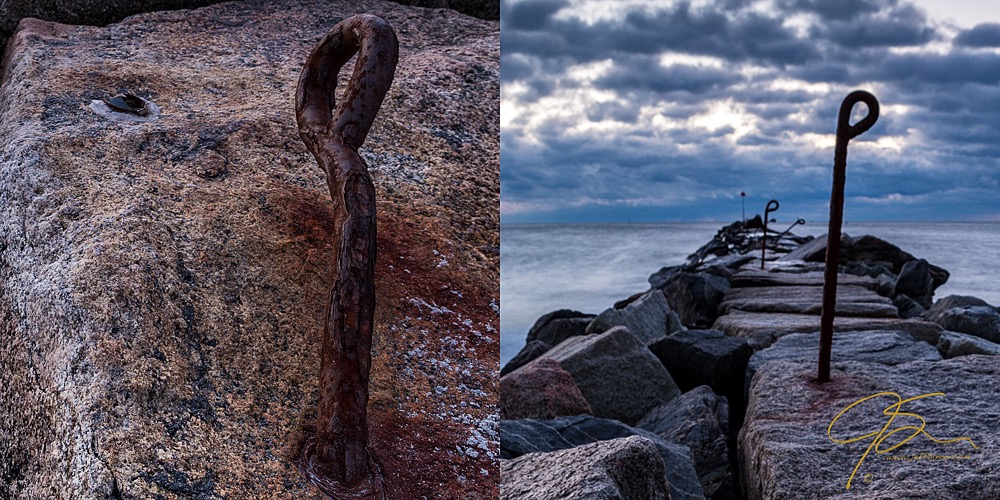
Once you’ve framed your shot, start by focusing as close to the camera as your lens will allow. Notice that by placing your point of focus close to the lens that the background is now soft and out of focus. Below is a side-by-side comparison of the foreground and the background in a close-in-focus photo. On the left, you can see the rusty piece of iron, as well as the rock, are in perfectly sharp focus.
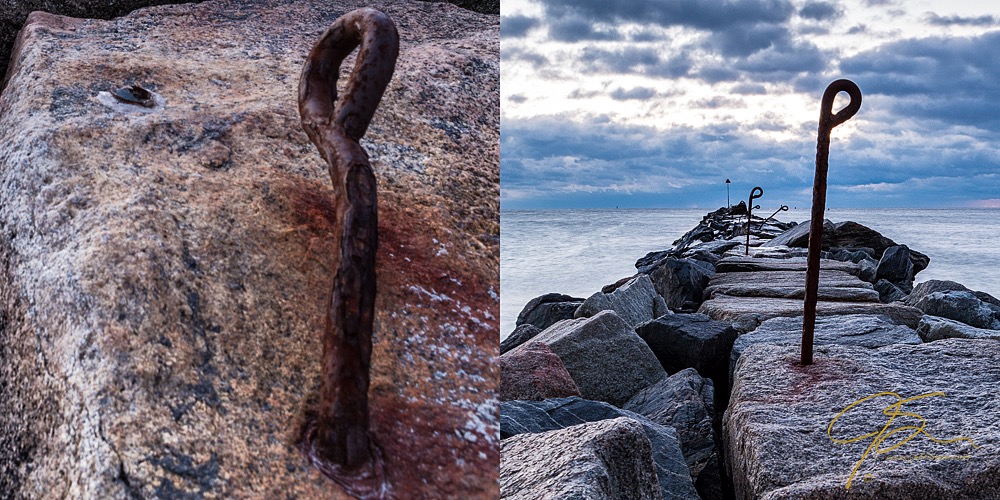
I took five more photos, moving from the foreground toward the background. I moved the focus point deeper into the frame until I had the entire scene covered.
The photo below is the fifth and final photo in the series; I focused on the farthest post on the end of the jetty. In the side-by-side comparison, can you see how the photo on the right is now in focus and the left image is out of focus?
Pro tip #1:
I’ve found that the easiest way to set the various focus points is to use live view and gradually move the AF point through the frame, starting from near the foreground. I also zoom in as far as I can and manually focus the lens. Use the switch on the side of the lens to turn off autofocus so the camera doesn’t try to refocus when you press the shutter.
Pro tip #2:
I usually select a mid-range aperture of f/11 when shooting a series of photos that will be focus stacked. This gives me a good amount of DOF within each image to hopefully make for a more seamless blending for the final photo.
Post-processing focus stacked images
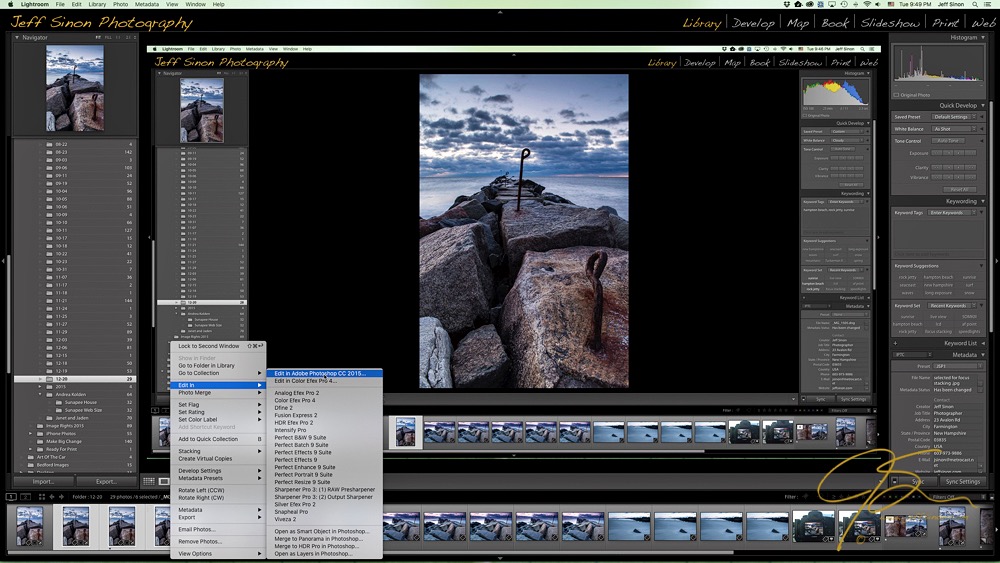
As you can see, I’m using Adobe Lightroom to organize and edit my photos. Here is where I’ll select the photos to stack. I’ll also make any basic corrections, such as white balance and exposure, making sure all of the files are processed the same way.
Now it’s time to move from Lightroom into Photoshop. Select the files you’ll be stacking, then Right click > Edit In > Photoshop CC 2015. Depending on how many images you’re using, this could take a few minutes. Once in Photoshop, select File > Scripts > Load Files Into Stack.
You should see this dialog pop up:
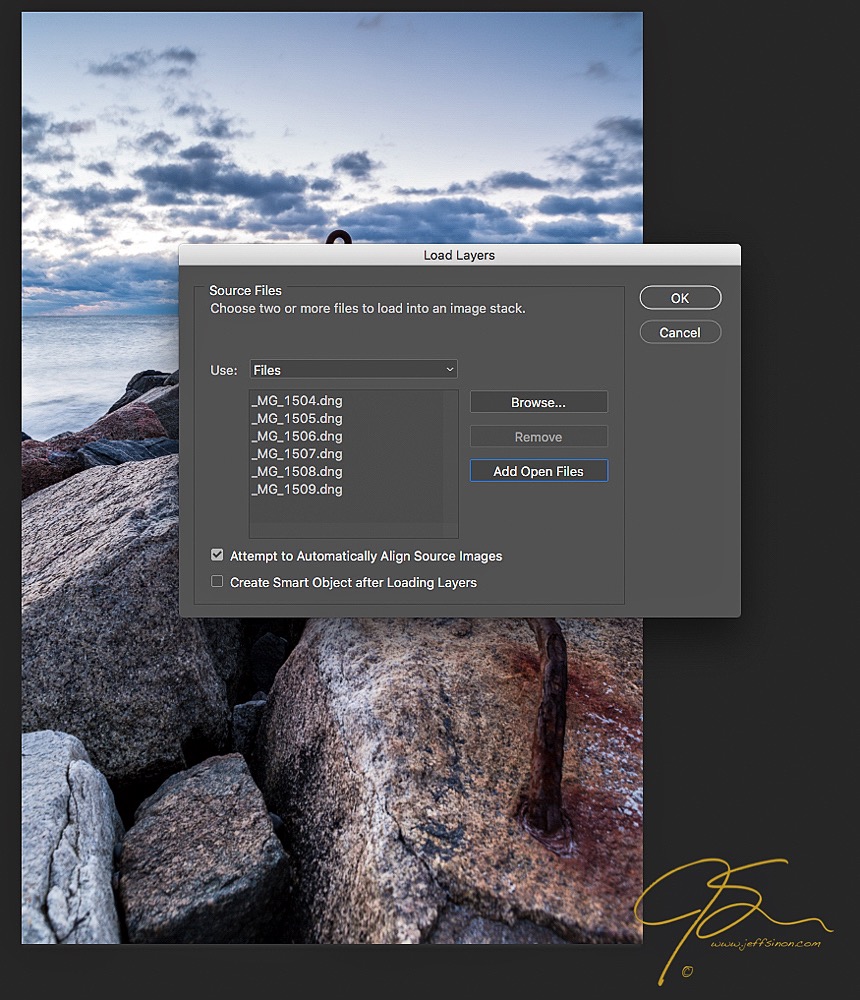
Click on Add Open Files. I also like to click the checkbox next to Attempt To Automatically Align Source Images. Even though I’m using a tripod, there’s always the possibility that I’ve moved the camera slightly when I’m refocusing for each shot. Then click OK.
This is going to open each image as a layer. Once this step is done, select all of the layers by clicking on the first one, holding down the shift key and then clicking on the last. Then go to Edit > Auto-Blend Layers, and you should see this.
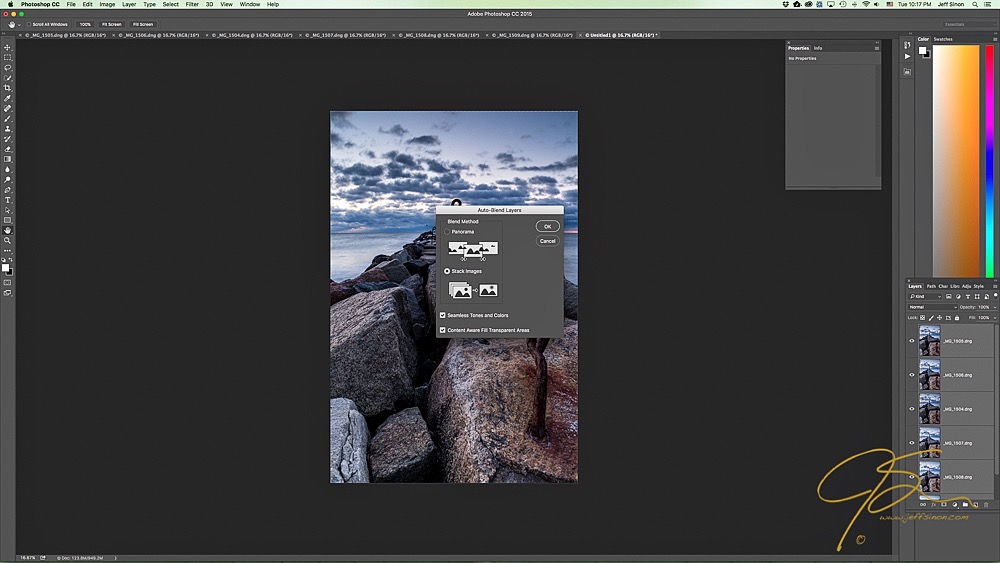
Make sure Stack Images is selected and click OK. Now let Photoshop work its magic! When it’s done, go to Layers > Flatten Image.
All that’s left now is to save the focus-stacked photo and continue with your normal image-enhancing workflow.
And there you have it: landscape photos with extreme depth of field and perfectly sharp focus from the close foreground to the distant background. And while this may seem complicated at first, after a few times, you’ll zip right through the whole process in less time than it took to read this article.
A special note
This works extremely well under most but not all conditions. It was very windy the morning I took these photos, with the clouds moving through the frame very quickly. The movement of the clouds from one frame to the next resulted in some very funky, alien-looking clouds once Photoshop blended the images. Because of this, I used the results of the focus stacking but replaced the sky and clouds with the sky from one of the source images for the final photo you see at the beginning of the article. If there is no movement in the scene while you’re capturing your photos, you should be able to avoid this problem.
Share tips, start a discussion or ask one of our experts or other students a question.
No Responses to “How to Use Focus Stacking for Maximum Depth of Field”