
A floating-top table has a pleasant look of lightness and allows exciting creative options. Here are the approaches to design and construction that will enable you to make beautiful, useful tables using this motif.
Opening up design possibilities
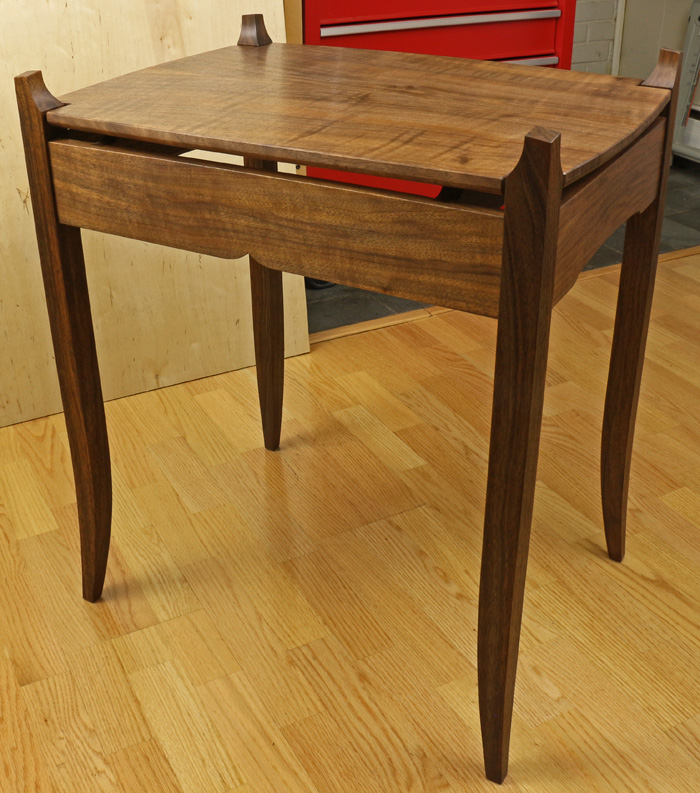
A familiar, conventional table consists in essence of four legs joined by four aprons, which are flush with the tops of the legs. The tabletop sits on the top edges of the legs and aprons, and is fastened to the aprons. In a floating-top table, there is distinct space between the tabletop and the top edges of the legs and aprons.
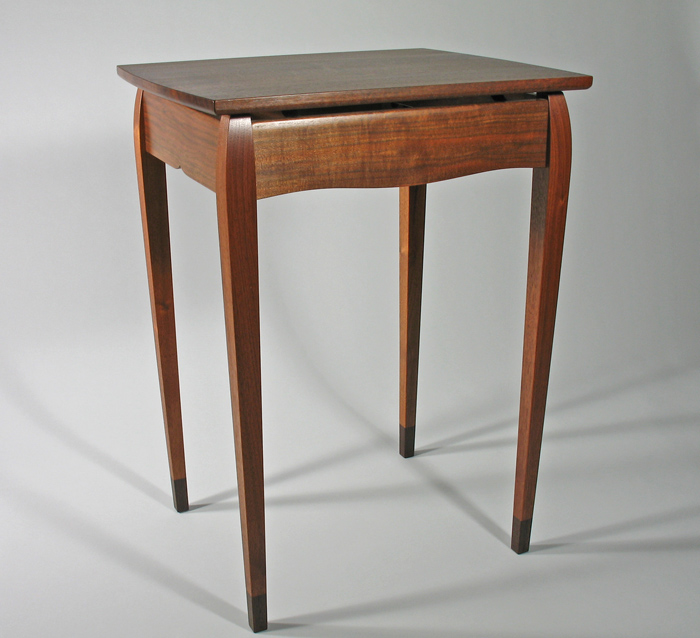
This produces an open look and light feel to the table, and affords additional creative benefits. It allows decorative shaping of the tops of the legs and aprons. The space around the aprons and upper legs also tends to accentuate beautiful wood. In fact, the legs can even extend above the tabletop for an interesting look.
Basically, once the legs and aprons are freed of their contact with the tabletop, you can have a lot of creative fun. And don’t worry, these are still strong, practical tables that will withstand everyday use.
How is it done?
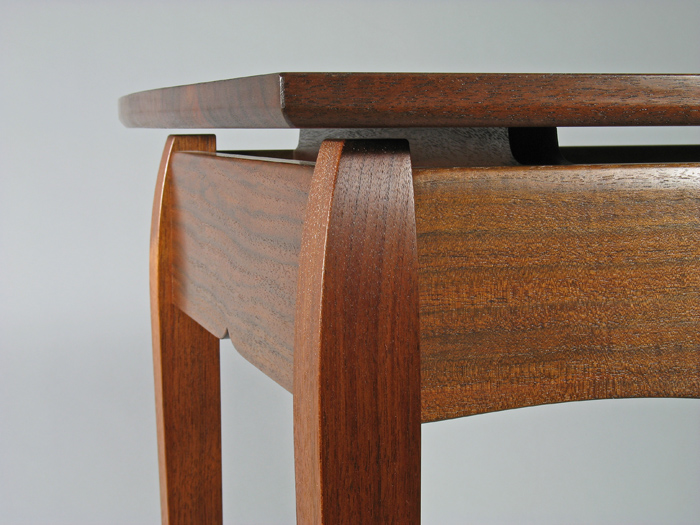
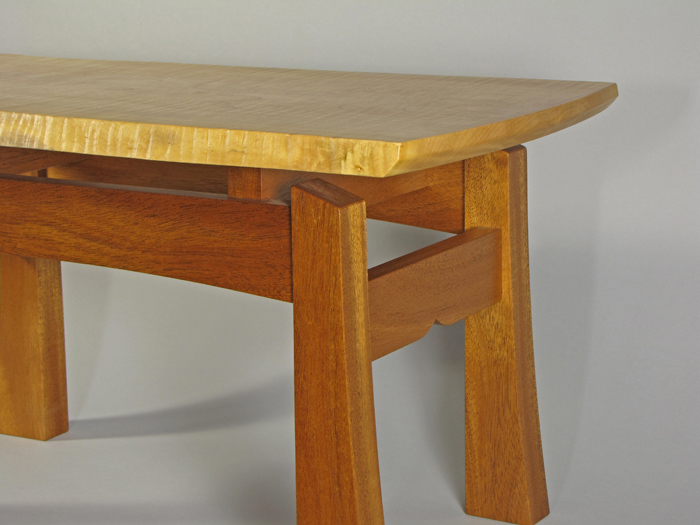
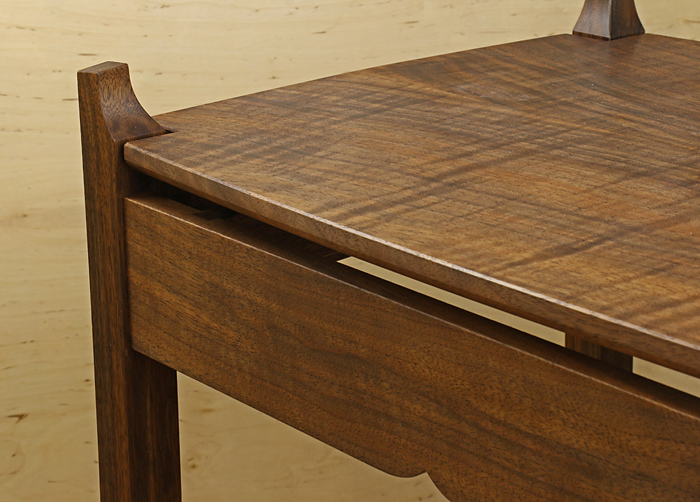
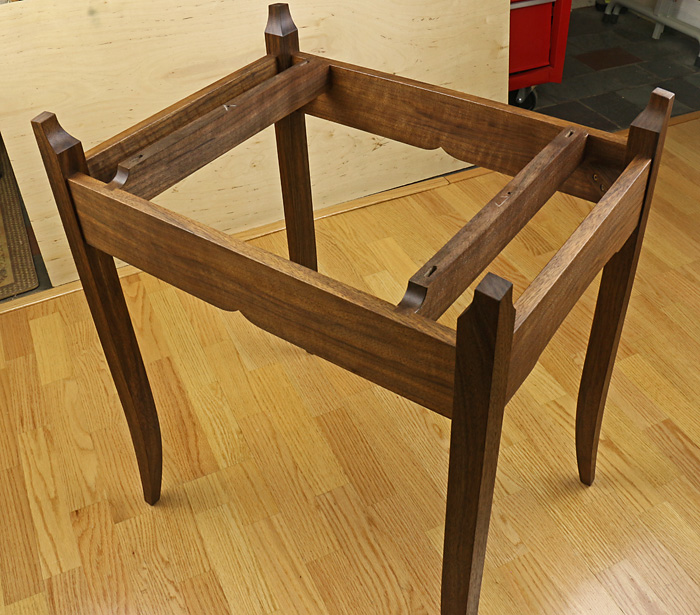
There are several ways. First, think of a basic assembly of four aprons joined to four legs — each leg receives two aprons. Now add two or more cross rails that bridge the longer pair of aprons. The width of these rails extends above the top level of the aprons. The tabletop sits atop the rails. The ends of the rails usually have a concave curve in the projecting portion of the width to help reveal the space below the tabletop.
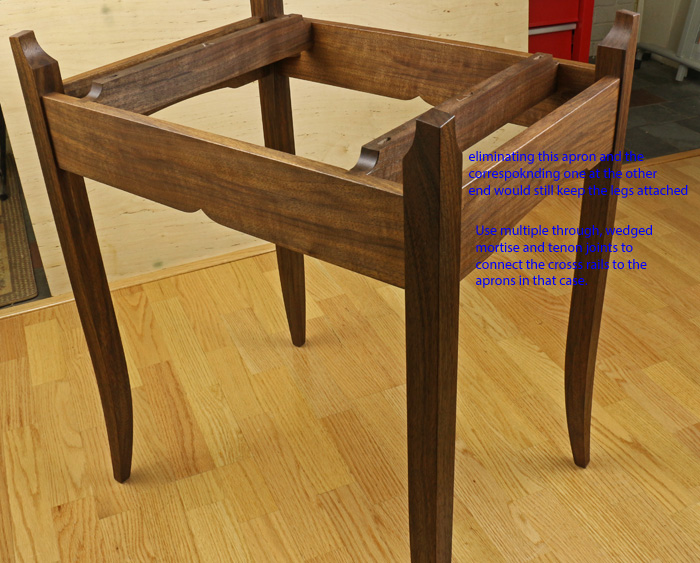
A variation that works particularly well in a long, narrow table is to eliminate the two shorter aprons, thus leaving the legs attached only to the longer aprons, which are themselves joined by the cross rails. This creates an especially airy look while maintaining sufficient rigidity as long as the appropriate joinery is used.
Yet another method that is generally less elegant but still can look good in the right design is to simply sit the tabletop on the shorter pair of aprons, which are made wider so they extend above the level of the longer aprons, and use no cross rails.
Of course, it would be remiss of me to not mention the simplest of all ways to make a floating tabletop. Construct only the tabletop and bring it to the nearest pond… never mind.
Joinery: One way
In all cases, the legs can connect to the aprons with conventional mortise and tenon joints. The connections of the cross rails to the aprons require different joints, and there are several options. Keep in mind that blind mortise and tenon joints are not the sturdiest choice because the tenons will be quite short – less than the thickness of the apron.
Where all four legs are connected to aprons, I prefer to join the cross rails to the aprons with sliding dovetails, 1″ – 1 1/2″ long. This is a strong, mechanically locked joint that also leaves the faces of the aprons undisturbed by through joints. Furthermore, the legs and aprons can be completely assembled unencumbered by having to fit the cross rails, which only comes after.
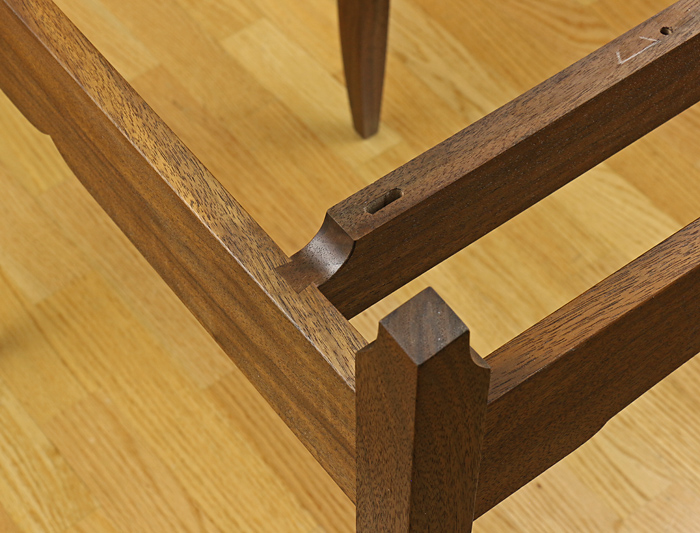
Consider the order of assembly. Make the dovetail sockets in the aprons, then glue up the legs and aprons. Next, the critical shoulder lines of the dovetails are knifed on the cross rails, gauging directly from the width between the assembled aprons. Finally, the dovetails are cut and the rails glued in place.
Joinery: Another way
For designs where the legs connect only to the long aprons (no short aprons), multiple wedged, through mortise and tenons make a strong and attractive joint. In this case, first glue up these M&Ts that join the cross rails to the long aprons, taking care to avoid any twist in the assembly. After this, it’s hard to go wrong — glue up the regular M&Ts that join the aprons to the legs.
In the photo below, I’ve explained how this alternate construction would differ from the actual table pictured.
Always make your joint designs commensurate with the size and intended use of the table. You want your work to last.
Attaching the top to the cross rails
Glue up and finish the tabletop. Pass screws up through clearance holes in the cross rails and drive them into pilot holes in the underside of the tabletop. Take up some of the width of the rail with a counterbore preceding the clearance hole.
The clearance hole in the middle of each cross rail should be round to anchor the tabletop at the midpoint of its width. The outer clearance holes should be elongated to allow for seasonal movement across the grain. This can be seen in the three photos immediately above.
A subtle design decision
How much space do you want between the tabletop and the aprons and legs? To achieve the look you want, consider the height of the table, the angle at which it will usually be viewed, the amount the tabletop overhangs the aprons, and the contour of the ends of the cross rails. This is a great example where there is no substitute for mockups while designing.

Give it a try
I think you will find, as I do, that making floating-top tables is more interesting and fun than the standard table configuration, especially for occasional tables, hall tables, and so forth. Enjoy exploring the design possibilities!
[All the pieces in this article were designed and built by the author.]
New Online Woodworking Class

Build a high-end coffee table that will serve friends and family well for years to come.Enroll Now »
Share tips, start a discussion or ask one of our experts or other students a question.
No Responses to “Take Your Tables to Another Level: How to Design a Floating-Top Table”