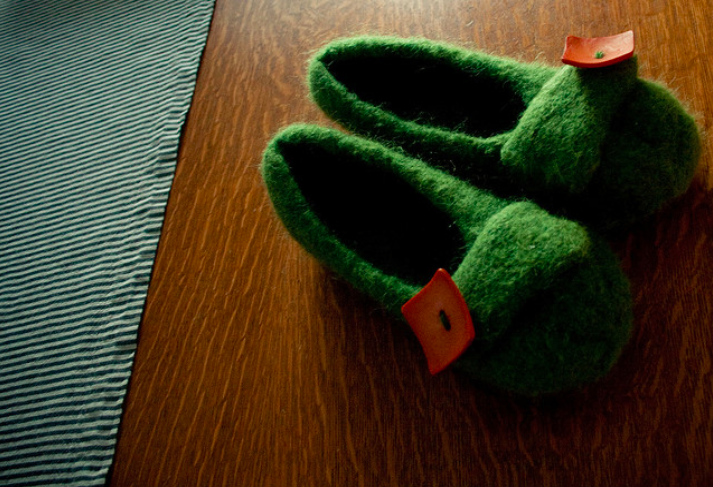
Have you ever wanted to make a knitted item that didn’t have so many holes? Perhaps somehow a little more solid? Well you can, thanks to the wonders of felting! Felting is the magical process by which you can transform a knitted fabric into a solid, making for a more useful bag or slippers, for example.

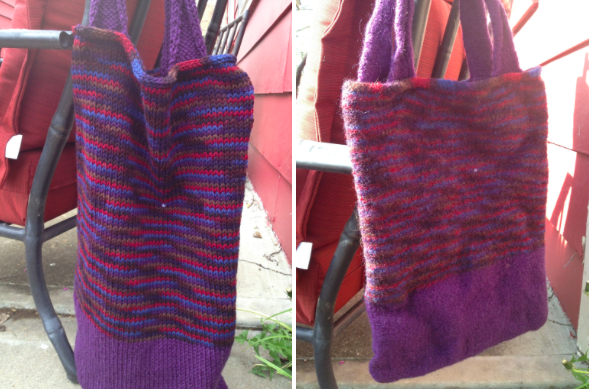
But it’s really not that mysterious. Have you noticed that many of your store-bought sweaters say they shouldn’t be machine washed? This is because the agitation of a washing machine will fundamentally alter those sweaters’ appearance. Check out these pictures below to see how.

Notice that the left picture shows a large knitted item, with all the individual stitches clearly displayed. While the right picture has the appearance of a solid piece of fabric, with the individual stitches having all melted into one another. That’s what putting the right kind of yarn through a washing machine at high heat can do. Also notice how much smaller the item is after it has been felted. While following a pattern for a felted item, you be confused by how big it is, but that’s just because felting shrinks the item later.
The keys to felting are:
- Using the right yarn.
- Using hot water in the washing machine.
- Letting it agitate for the right length of time.
Yarn is important because some yarns are specially treated so they can be put through a washing machine. That type of yarn obviously isn’t right for felting. So don’t buy a super-wash yarn. Instead, look for a pure wool or something that even says on the label that it’s ideal for felting. I’ve heard Wisdom Yarns Poems yarn works well.
Before felting, you want to have all the knitting parts of your project done. Sew it all together and weave in all the ends. (Buttons can wait. It’s just all the yarn stuff that must be complete.)
Once that’s done, find a pillowcase. A pillowcase that zips, like one of those allergy pillow covers, is easier. But if you don’t have one of those, use a regular pillowcase and a rubber band to seal it. The goal here is to contain all of the yarn fuzz so it won’t clog your washing machine. So a mesh laundry bag won’t work. A zipper is easier because you’ll want to check on your project. A wet rubber band on a wet pillowcase is harder to work with.
Next, put the pillowcase in the washer and throw in something else (an old towel, perhaps) to increase agitation. Some people swear by adding a small amount of detergent (about 1/4 the usual amount) while some say it isn’t necessary. So it’s up to you! Set your machine to hot wash and cold rinse and start it up. Check on your project after about 10 minutes. If it still needs a lot of time, just keep an eye on your machine and keep checking it. You want to make sure you stay on the hot water wash cycle until you have achieved the level of felting you want. This may require stopping the machine and starting the wash cycle again.
I have heard some knitters suggest that a front-loading machine won’t work for felting, but that’s what I have and it works for me. Again, when in doubt, felting always works best with the right yarn.
When it’s finally where you want it, let it rinse a bit in the cold cycle. Then remove it and shape it. And, voila! You know have a whole new way to finish your knitting projects. Come back to the Bluprint blog tomorrow to learn all about circular knitting patterns!

Share tips, start a discussion or ask one of our experts or other students a question.
No Responses to “For a Fabulous Finish, Felt Your Knits”