
Add embroidery to a candle? It’s possible with embroidery on tulle or organza. Here we’ll show you how to attach the sheer appliqué to a candle to create a shimmery silhouette that shows through. It will have everyone asking, “How did you do that?!”
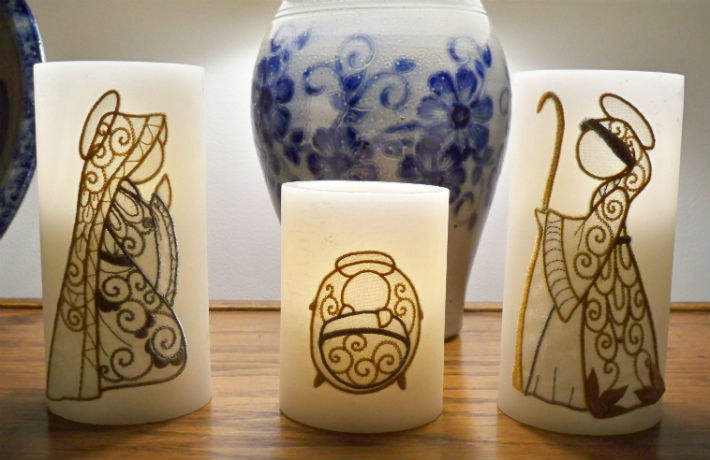
Create a freestanding appliqué on organza and apply it to a candle for illuminating embroidery!
Materials:
- One 4-inch and two 6-inch pillar candles (mine are battery-operated)
- Organza or tulle the color of your candle
- Fabric-type, water-soluble stabilizer
- Embroidery design (mine is from Sew Inspired by Bonnie)
- Tacky glue
Directions:
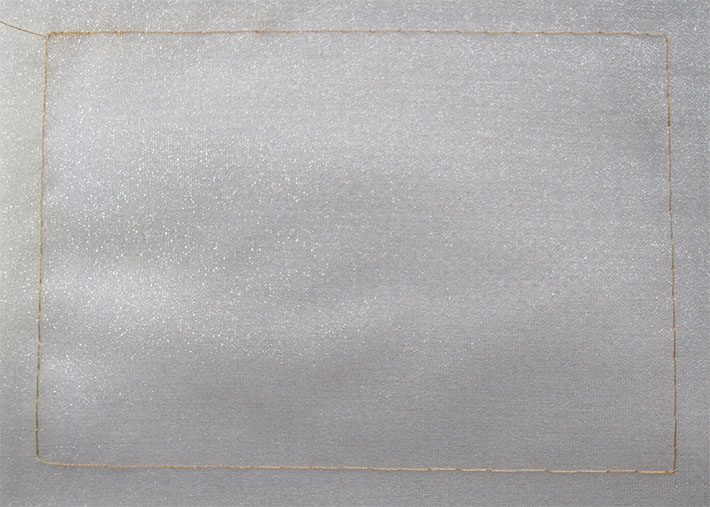
Step 1: Hoop materials
Hoop a layer of fabric-style water-soluble stabilizer (WSS). You can use film-type WSS but the fabric style rinses out much easier. Cut two pieces of organza or tulle the size of the hoop. Spray between the layers of organza/tulle (away from the machine) and smooth them out flat with your hand so that there are no bubbles or bulges. Spray the back of the organza/tulle sandwich and finger-press it in the hoop on top of the WSS stabilizer. Run a basting stitch to secure the three layers together.
Note: Running a basting stitch before embroidery is almost like hooping within the hoop. It keeps layers close to the design from shifting, creating a crisp, clean finish.
Step 2: Stitch the designs
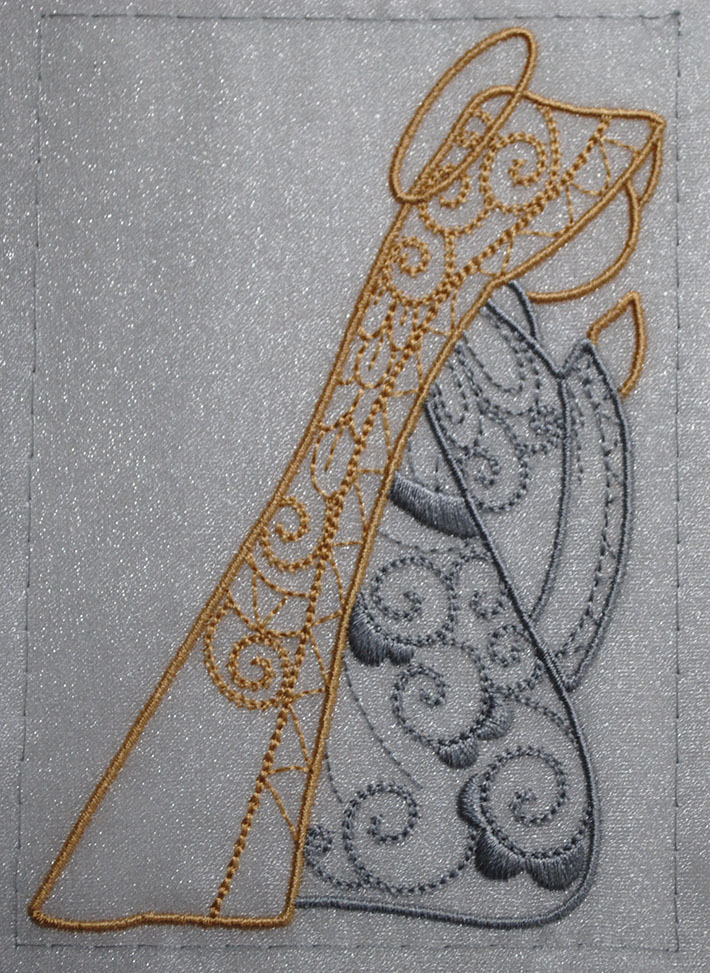
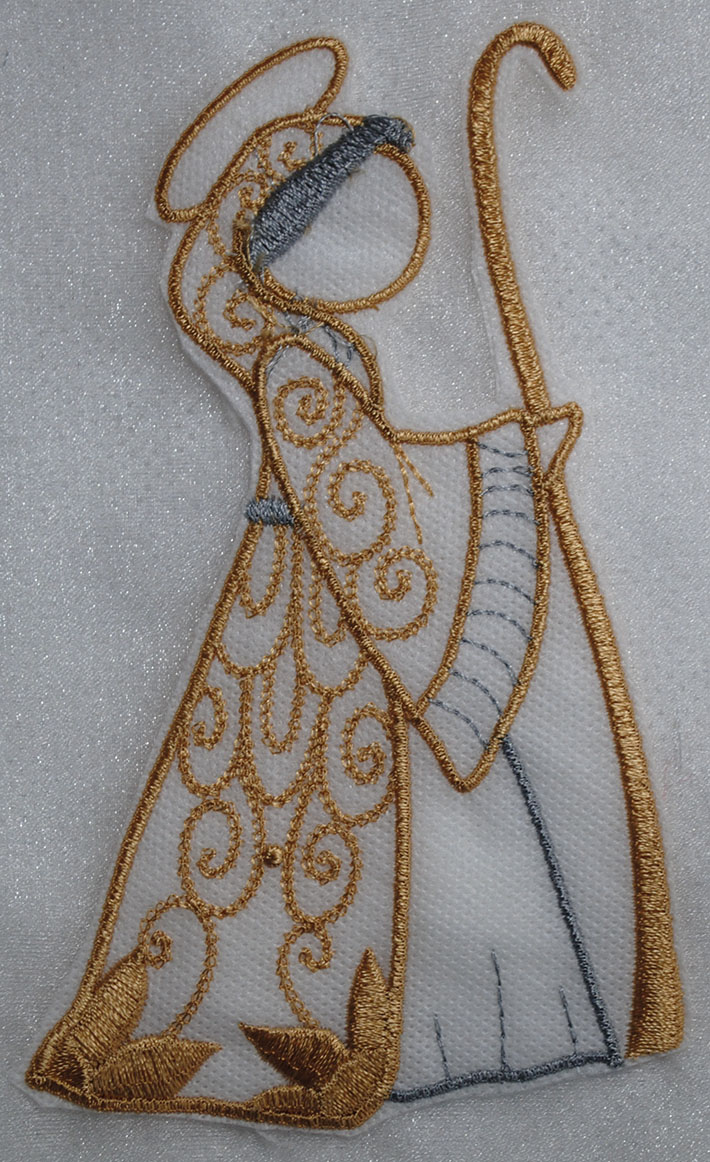
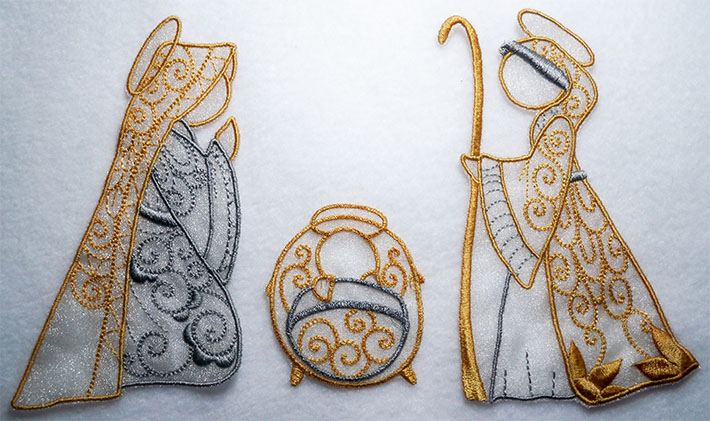
I used design numbers 3 (Joseph), 4 (Baby Jesus), and 6 (Mary) from the Nativity design set design set. You can stitch more to place on additional candles if you like. Because the organza is transparent, I used the same thread color in the bobbin as that with which I was stitching. Each design uses only two colors, so they stitch up fast.
Step 3: Remove WSS
When stitching is complete, remove the basting stitches and cut away excess WSS on the back, around the outside of the design area. Soak away the rest of the WSS per manufacturer’s instructions and let the pieces dry on a flat surface.
Step 4: Trim the fabric
When the pieces have dried, trim the organza/tulle close to the stitching lines around the outside of the design, being very careful not to clip the stitches. If you should nick the embroidered area, dab it with clear glue, smooth threads in place, and let it dry.
I left organza inside the enclosed areas of the faces, hands and halos for support. I did clip (oh, so carefully!) between Joseph’s staff and his robe.
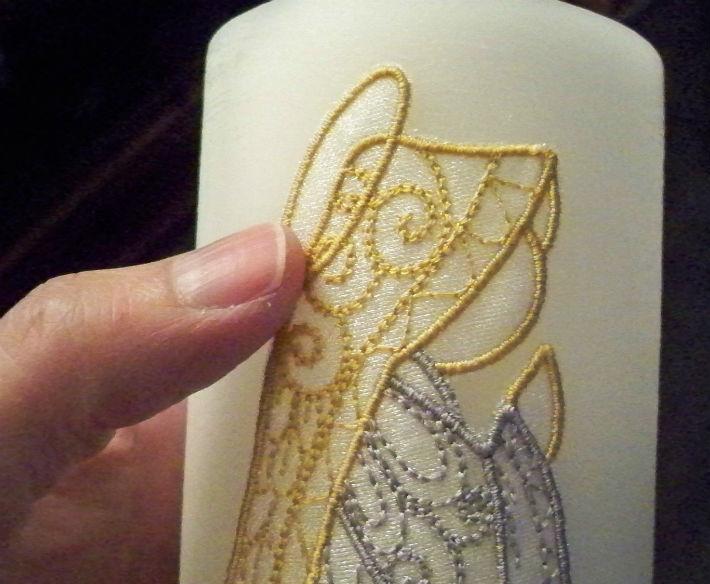
Step 5: Glue to candles
A tacky craft glue worked really well when applying the appliqué pieces to the candles. Put a tiny amount of glue on the embroidery ridges on the back of the Nativity pieces and press onto the face of the candles. Hold in place to secure. Set them aside to dry but check frequently to be sure none of the edges pull away from the candle.

Step 6: Light it up
Turn on the lights and enjoy! You can use this technique with any embroidery designs that have satin stitching around the outer edges like this one.
Share tips, start a discussion or ask one of our experts or other students a question.
No Responses to “Embroidery on a Candle? Yes! An Illuminating Appliqué Tutorial”