Dry brush painting is the art of using very little paint on your brush. Or in the case of water-based media, very little paint and water to create a scratchy, “scraped-across” brush stroke in your painting. It’s a technique that can be used for an entire painting, but it’s also perfect for creating texture in small areas of a non-dry brush painting.
Here are a few tips to get you started dry brush painting.
While dry brush painting can be done in just about any media, it is less commonly used in oil because of oil paint’s slow drying time. Going over a previously dry brushed passage in oil with more oil can obliterate the previous brush strokes if they aren’t dry yet. Watercolors, gouache, and acrylics are ideal media for dry brush, however. We’re going to demonstrate some dry brush techniques in gouache by painting the pear above. Gouache is an excellent medium for dry brush because it is just like watercolor except it’s opaque, allowing you to go over dark areas with lighter paint, as you’ll see.
For this exercise, use a #8 shader brush on cold press watercolor paper. The colors we’ll be using are deep yellow (yellow ochre can be substituted), burnt sienna, sky blue, light green, black and white.
Step 1:
Mix your deep yellow and burnt sienna first, using water. For the underpainting, we’ll be using a regular wet brush technique.
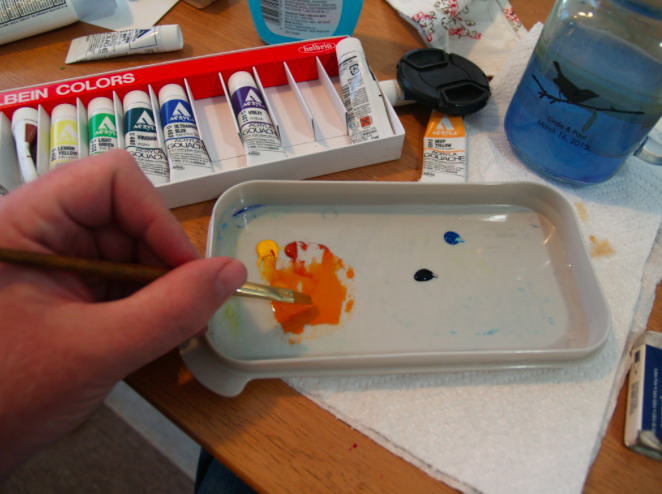
Step 2:
Draw a general outline of the pear in light pencil. Then fill most of this outline with a wash of the burnt sienna and deep yellow mixture, leaving the left-hand side and top white. These areas will become highlights.
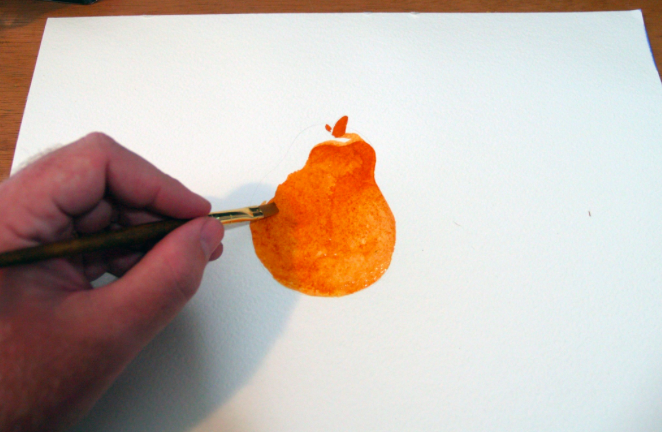
Step 3:
Add a gray-blue wash in the background using your black and a tiny bit of sky blue and plenty of water to lighten the mixture. Don’t add white, as the wash should be translucent. Use slightly more sky blue for the underside of the pear. This will be the underpainting for the pear’s shadow.
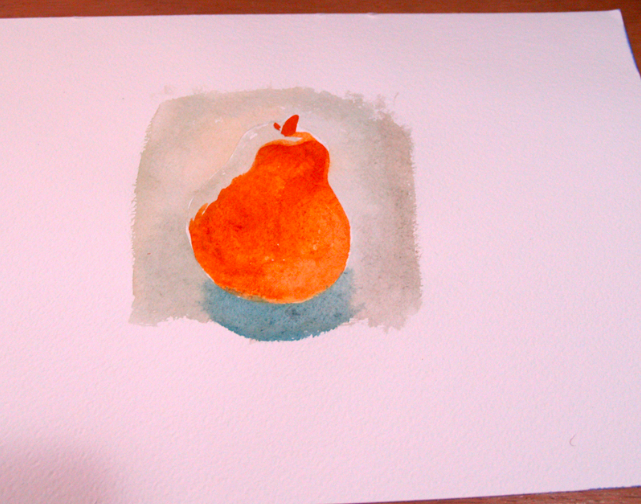
Step 4:
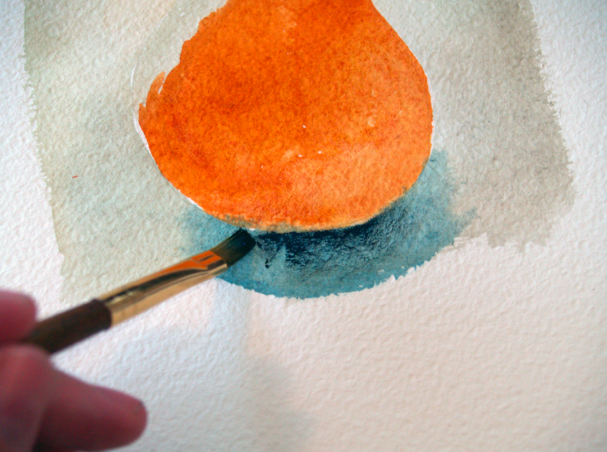
Allow your washes to dry completely. Now comes the dry brush part! Dip your dried brush in a mixture of mostly black and some sky blue, then dab it on a paper towel.
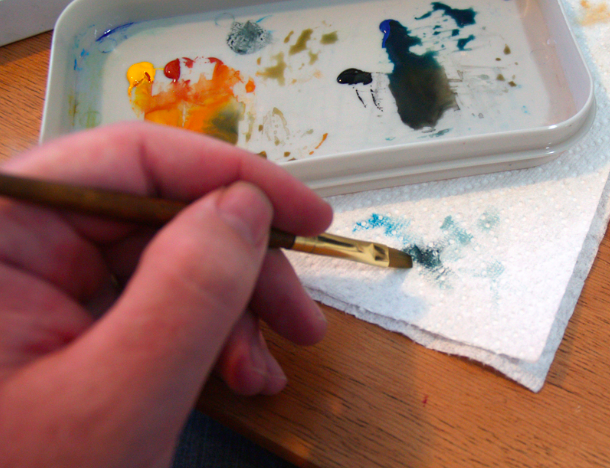
Working away from the pear, fill in the shadow, brushing lightly across the surface, to retain the texture of the paper. Reload your brush as necessary, but not too heavily! You should be slowly building up the amount of paint on the paper.
Step 5:
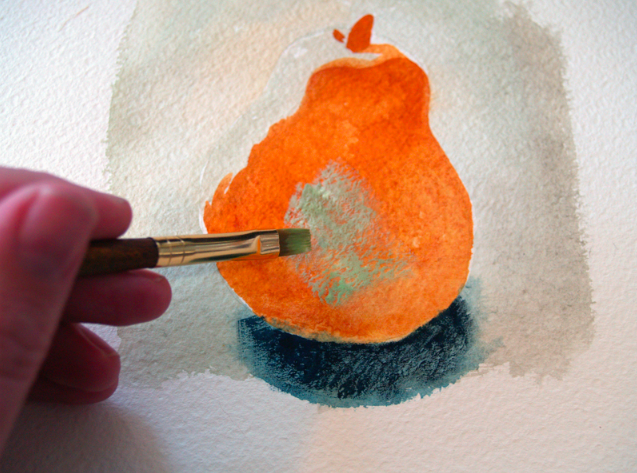
Using a mixture of light green, deep yellow and mostly white, do the same for the interior of the pear to the right edge. You are building an ambient light reflection. Don’t go to the left edge of the pear’s underpainting; leave that area darker.
Step 6:
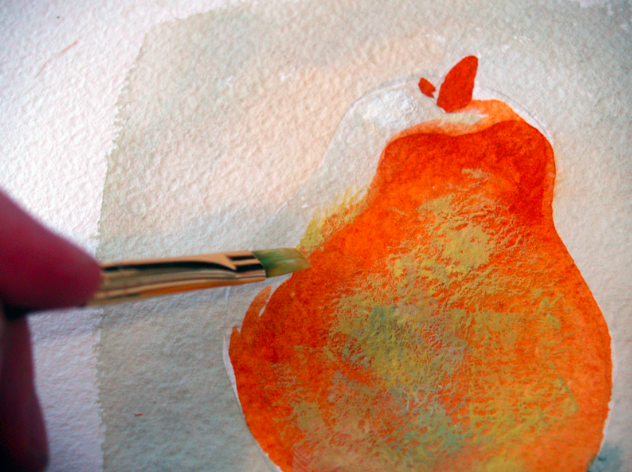
Using the same mixture, blend the shadow into the left highlight.
Step 7:
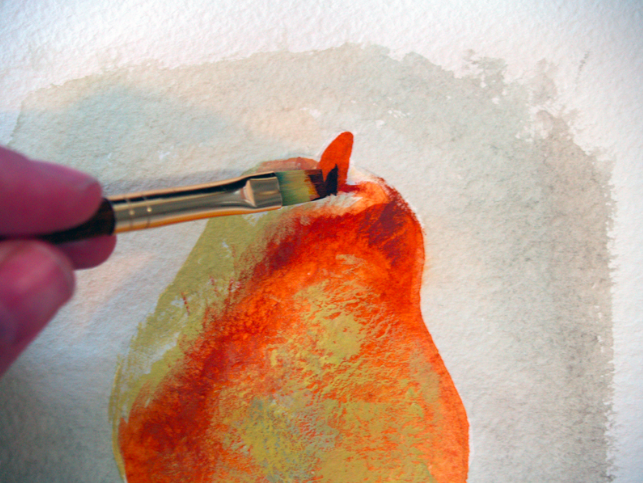
Darken the stem and its shadow with a mixture of black and burnt sienna. You can make the core of the pear’s shadow darker using a little burnt sienna mixed with sky blue, and gently brushed in.
Step 8:
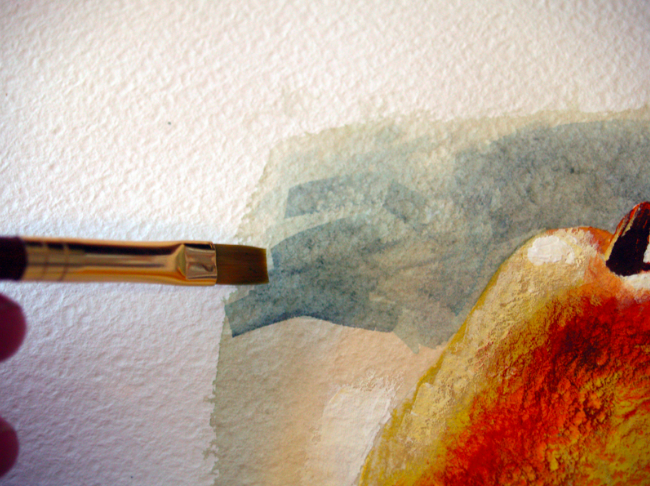
Work back into the left-hand highlight of the pear with a mixture of white and deep yellow, and solid white for the top of the highlight, and the highlight on the stem. Darken the background a bit with a light sky blue wash to bring out the highlights.
Step 9:
Touch up any light or dark areas as needed. Remember to use a light touch to retain the texture of the cold press watercolor paper.
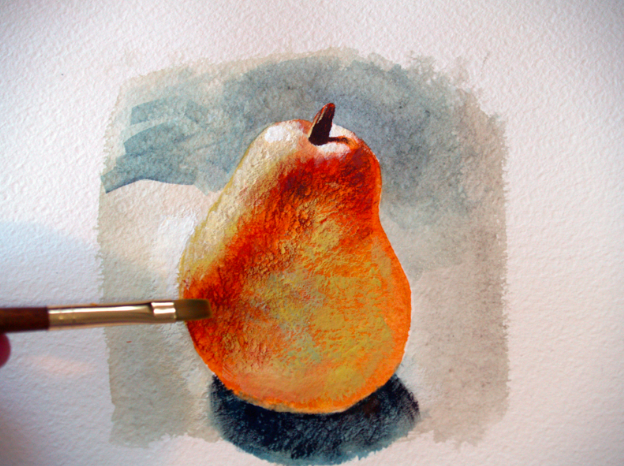
You’re done! As you can see a dry brush technique can help you get great textures in your painting, and you can use it on more than just fruit!

Share tips, start a discussion or ask one of our experts or other students a question.
No Responses to “Enhance Your Paintings with the Dry Brush Technique”