
When using Photoshop for editing photographs, you have a whole arsenal of tools that could make your photos amazingly memorable, all at your fingertips. Figuring out which tools to use, how to use them and where they’re most beneficial can be overwhelming. Instead of losing yourself in the sea of options, it’s best to focus on a select few and put them into practice.
Some of the most useful and impactful tools in Photoshop? The dodge and burn tools. That’s what we’ll cover here.

What are the dodge and burn Photoshop tools?
Simply put: The dodge tool lightens you image and the burn tool darkens it. The two are often used in tandem to create dramatic compositions.
FREE Guide: Explore Essential Photoshop® Functions

Transform your photos with valuable Photoshop tips and techniques!
Using dodge and burn
Located on the left-hand side of your Photoshop screen (or wherever your toolbar is positioned), you will find these icons:
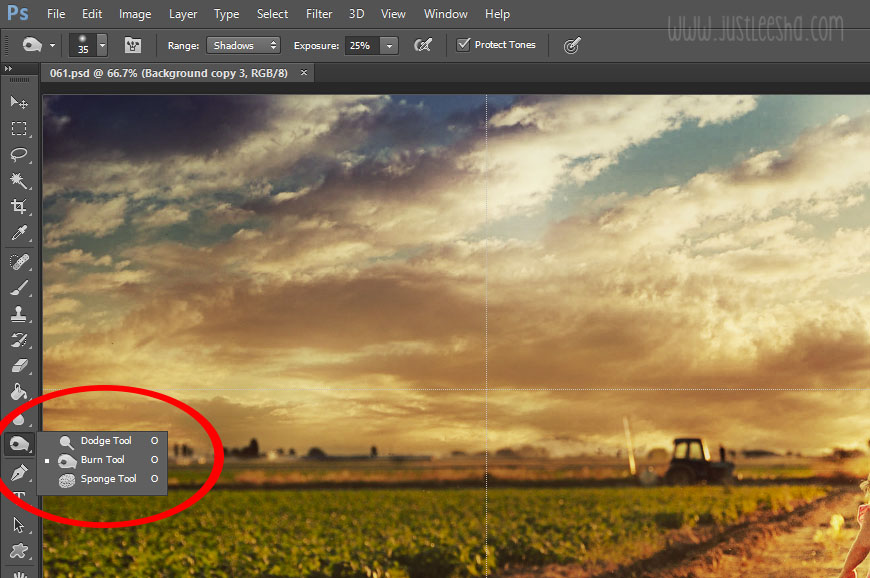
To allow for more personal customization (and to keep you on your toes), there are additional options within both the burn and dodge tools. In each, you can adjust the range and exposure.
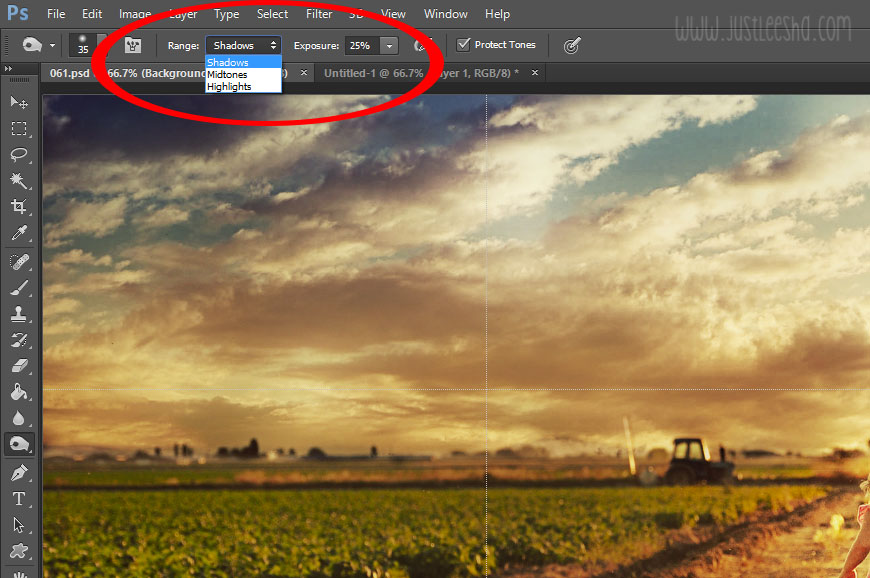
Range
When choosing a range, you have three options: shadows, midtones and highlights. Selecting one lets you work solely on that aspect of the photo. For example, if you are using the dodge tool and select highlights, you’ll notice you are only lightening up the highlights of the image. If you remain in dodge but change the range to shadows, you’ll now only lighten up shadows in the image.
Exposure
This option is a little more self explanatory. Adjusting the exposure option simply changes the strength with which you brush your image. At 1 percent exposure, you’ll notice little to no change; at 100 percent, you get the full-on effect of your dodging or burning. I find starting out with a small exposure works best.
When to use dodge and burn
The dodge and burn tools are particularly useful when you want to use light to draw attention to one part of your image. Because the tools let you change the light balance, you can easily create drama and alter the focal point of an image by dodging and burning.
Note: Always use the dodge and burn tools on copies of the background layer, never on the original photo. This prevents damage to your file and lets you adjust the layer’s opacity to make the effects more or less intense.
I used the dodge tool with the range set to highlights to amplify the highlights on the right side of the road, the sun and the right side of the subject’s face and body. All of this editing can be seen in green.
Then, using the burn tool with the range set to midtones, I darkened the shadows on the left side of the sky, as well as the trench on the left and right. You can see these adjustments in blue below.
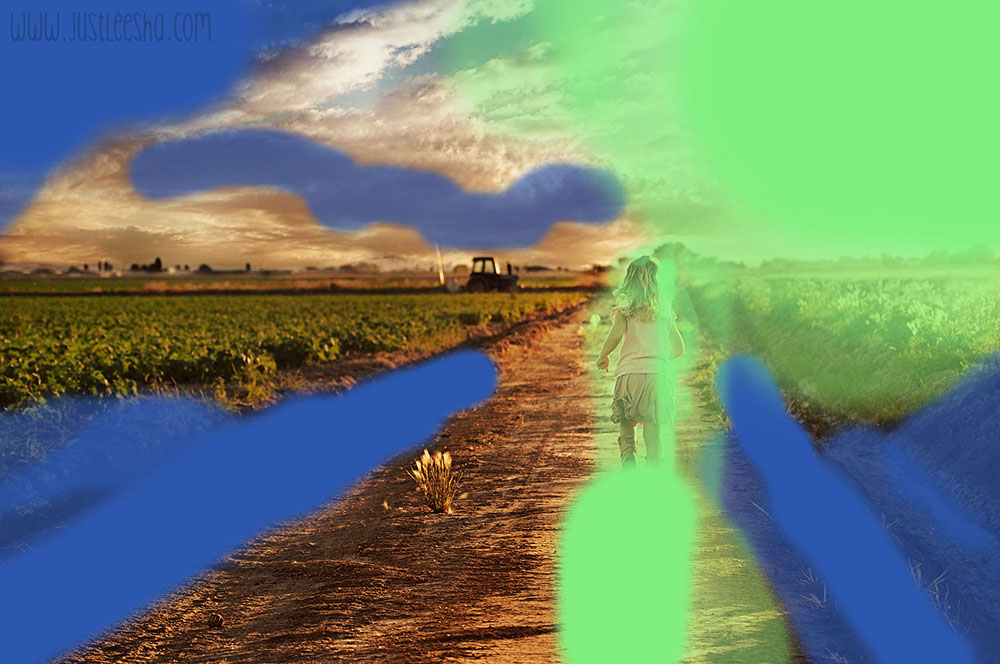
The final result:
The dodge tool allowed customization of light in the image, which brought attention and focus to the subject. Using the burn tool, I was able to darken some of the shadows and let the light to steal the show.
FREE Guide: Explore Essential Photoshop® Functions
Transform your photos with valuable Photoshop tips and techniques!
Share tips, start a discussion or ask one of our experts or other students a question.
No Responses to “Want Remarkable Photos? These 2 Photoshop Tools Can Get You There”