
Have you seen some of the unique holiday garlands offered in high-end retail shops? These garlands add a fun, whimsical feel to your holiday decor, but can be rather expensive. The good news is that with just a few materials and very little effort, you can create some modern and fun garland of your own. I am sharing two DIY holiday garland tutorials with you today, but with a little creativity, the possibilities are endless. These are projects your whole family will enjoy!
[box type=”shadow”]
 Special offer!
Make custom cards for everyone on your “nice” list this Christmas and satisfyingly check one more thing off your holiday to-do list!
Purchase a curated cardmaking kit packed with paper, die cuts, stickers and more, and get exclusive access to FREE Fun & Festive Holiday Cards video lessons taught by expert Kimber McGray.
DIY holiday garland #1: Circle garland
Supplies you’ll need:
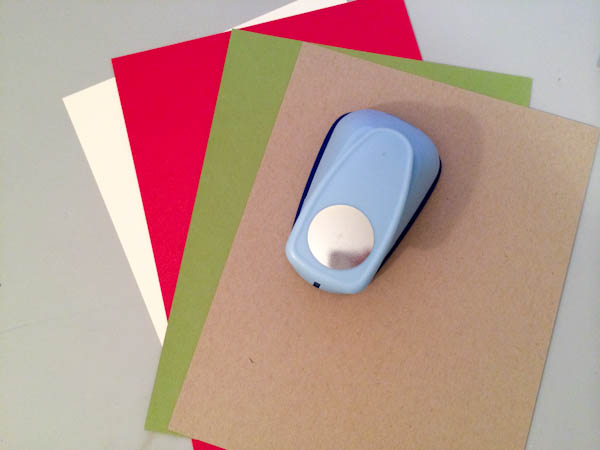
- Card stock in varying holiday colors
- Circle punch
- Sewing machine and/or Scotch Tape
- White thread and/or string
Step 1:
Gather some card stock in your favorite holiday colors. I chose to keep mine simple with red, white, green and kraft.
Step 2:
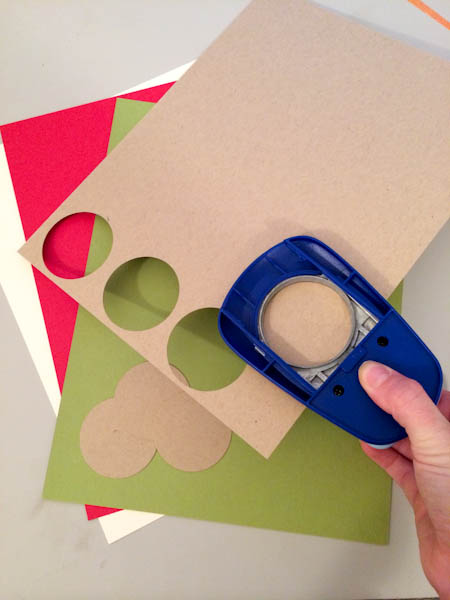
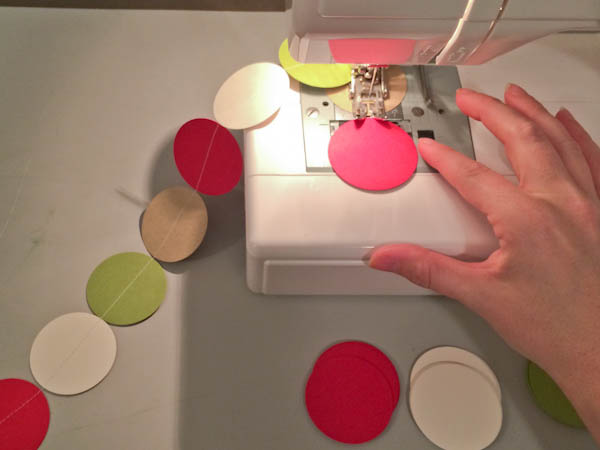
Use a circle punch to cut out circles from your card stock. You will be surprised how many long strands of garland you can make from just a few pieces of card stock! The circle I’m using here is 2″ wide, but you can use any size that you have on hand.
Step 3:
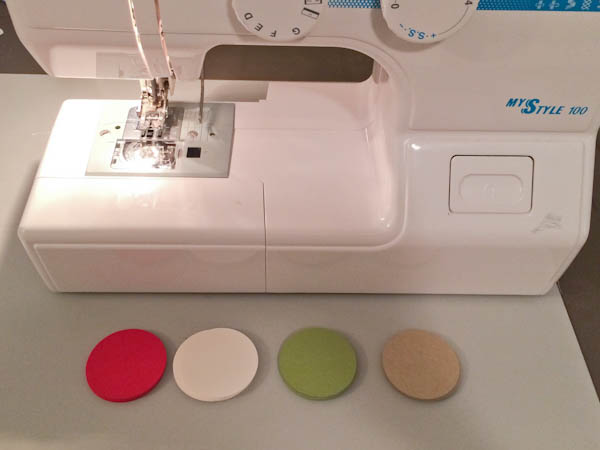
Now that you have all your circles are punched, it’s time to string them together. I simply ran them through my sewing machine using white thread and a straight stitch.
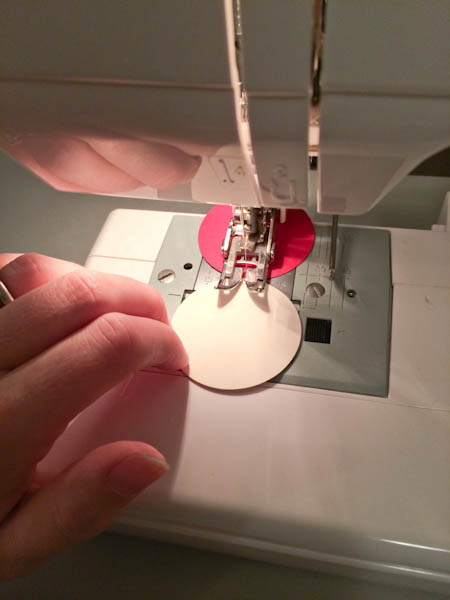
Step 4:
Feed the punched circles through the machine one after another, sewing on a medium/low speed. This is a wonderful project for beginner sewers, but if you don’t know how to sew, you can achieve the same look by taping each circle to a piece of thread or string.
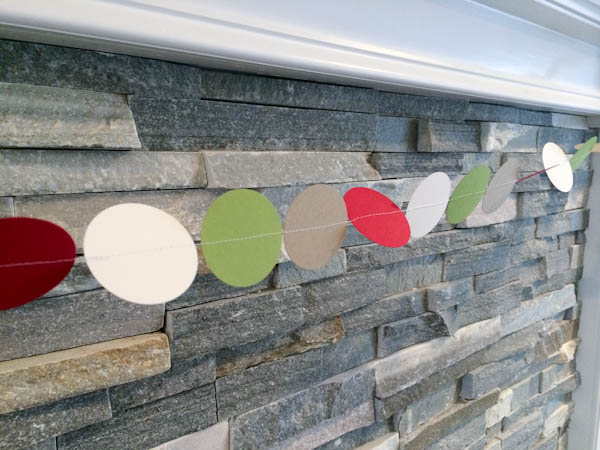
You will end up with quite a long string of circles. Using thread to string them together will allow them to twist and spin when you hang your garland, adding to the fun effect!
After that, you’re finished! Hang your garland on your mantle, tree or use as fun and festive DIY holiday party decor. These can even be neatly wrapped up and re-used year after year!

If you thought that was easy, our next DIY holiday garland idea is even easier — it requires no sewing at all! Kids of all ages will love this project, as it’s very easy for them to get involved with. These chain garlands make for great decor in a child’s playroom or bedroom during the holiday season.
DIY holiday garland #2: Chain garland
Supplies you’ll need:
- Double sided 12″ x 12″ scrapbook paper
- Paper trimmer
- Stapler
Step 1:
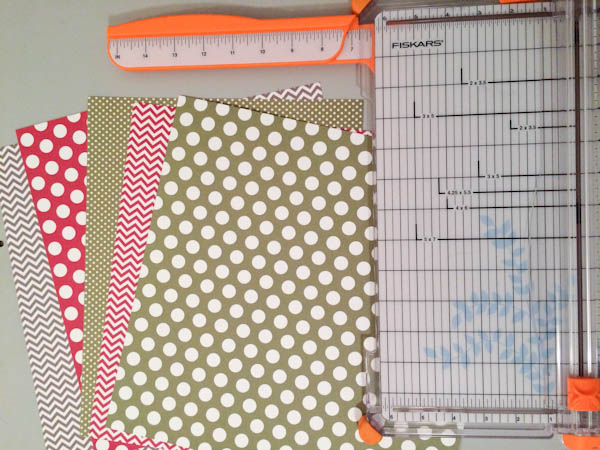
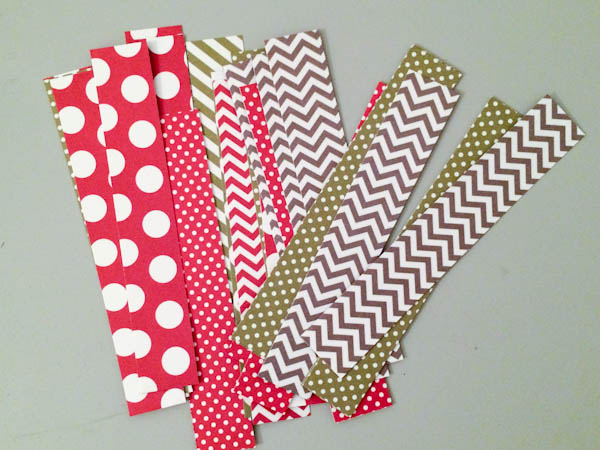
Gather some double-sided scrapbook paper in your favorite holiday colors. I am using 12″x 12″ paper for this project.
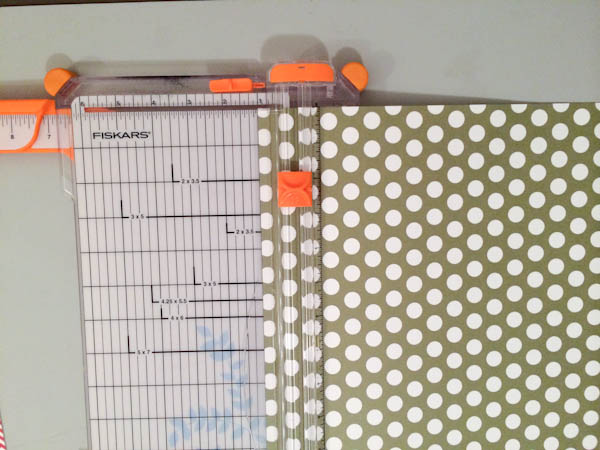
Step 2:
Trim your paper into strips measuring 1″ x 6″. The easiest way to do this is to trim all the paper into 1″ strips, and then cut them in half.
Step 3:
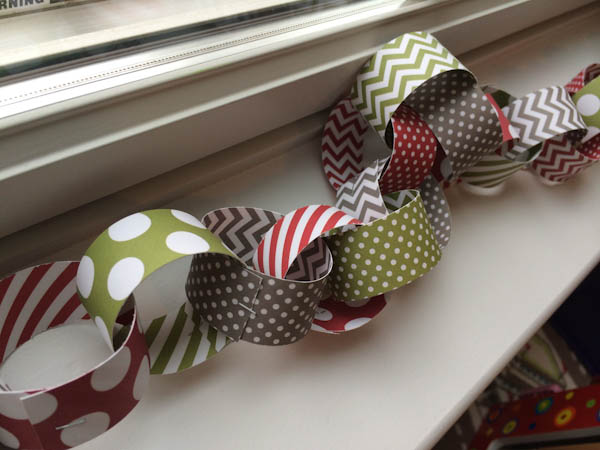
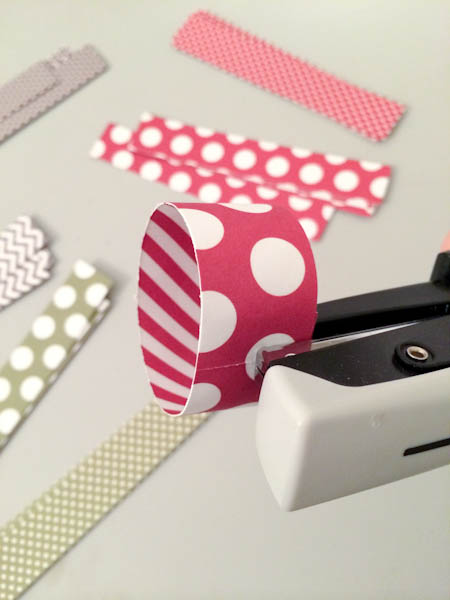
Start assembling your paper chain by taking one strip and connecting the ends to form a circle. Staple the ends together to keep them nice and secure.
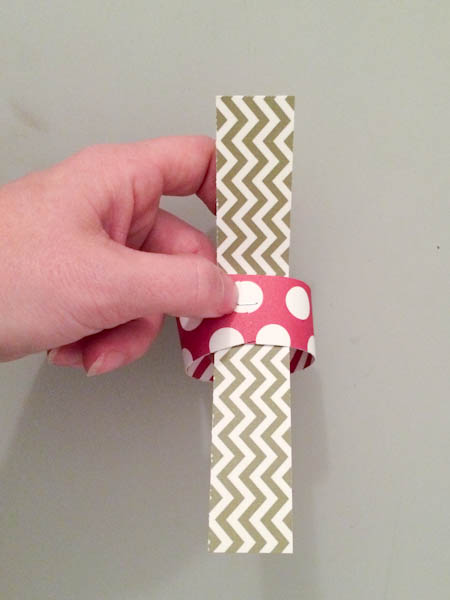
Step 4:
Connect another strip by looping through the existing circle and stapling into place. Continue doing this with all remaining strips, alternating colors and patterns of paper as you go. This is where having paper that is double-sided truly makes this project fun. You will have various colors and patterns showing from all sides of your garland.

In just a few minutes, you will have a festive paper garland that will add a fun element to your children’s holiday decor. Where else in your home would you display these DIY holiday garlands? Let us know in the comments!

Share tips, start a discussion or ask one of our experts or other students a question.
No Responses to “DIY Holiday Garland: Two Fun Projects To Do With the Family!”