
So, you’ve bought yourself a new DSLR camera and want to take the best photographs possible. However, you’re not exactly sure the meaning behind the various digital camera modes, such as when to use them and how each affects the final picture. I’m here to help, beginning your instruction in the digital photography basics by demystify the modes, so you can make the most of your new camera!
To start your digital photography training, I’m going to explain what each of the modes on the camera dial is, how they work and the advantages and disadvantages of each. I’ve also added a few photo examples to illustrate several of the various modes.
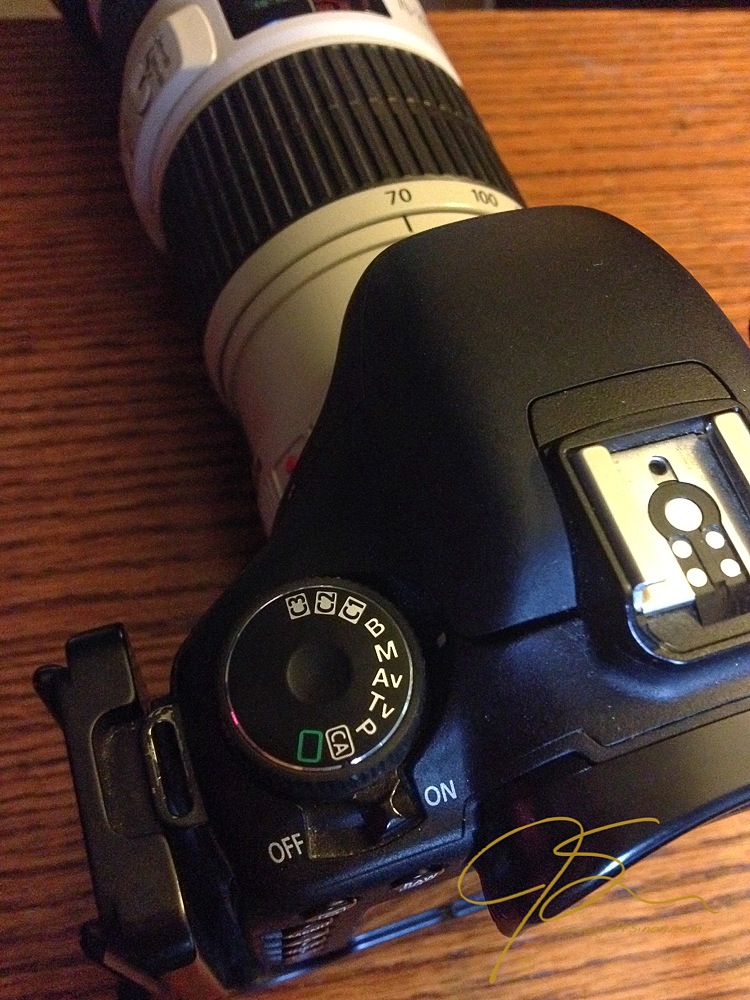
The mode dial on my Canon 7D
Get more out of your DSLR!
For in-depth guidance on how to use your DSLR camera, sign up for the new Craftsy class Basics of Digital Photography, produced in partnership with the renowned Santa Fe Photographic Workshops. In the class, expert instructor Rick Allred shows you how to master your DSLR camera, from basic settings to finding the right light and adjusting depth of field and composition. You’ll discover how to get tack-sharp focus, add artistic blur and create beautiful, professional-quality shots that you’re proud to share.
Digital camera modes: from basics to bulb
Note: I’m a Canon shooter, so I’ll be explaining the modes based on Canon’s description of them as found in the manual for my Canon 7D. Some terms may be slightly different for other brands, but the function should be pretty much the same.
Fully automatic
In the Fully Automatic setting, usually the little green box on the camera dial, the camera does everything for you but press the shutter. The camera will select the aperture, shutter speed and ISO based on the available light. It also chooses what in the scene it thinks you want to focus on. This mode relegates your DSLR into the role of expensive point and shoot, removing all creativity from you, the photographer.
The photo below is of a favorite local waterfall, captured using the Fully Automatic setting. The photo is so bad, I’m almost too embarrassed to show it.
Advantages
No thought required on your part, just point the camera and press the shutter. If you’re not interested in creating art, only capturing memories, say of a family vacation, this is the easiest way to go.
Disadvantages
You’ve just turned your DSLR into an expensive (and heavy) point and shoot. You could have saved a ton of money and bought just that — a point and shoot. In this mode, you essentially give up all creative control, so if you are interested in making more than just snapshots, you’ll be leaving that completely up to the whims of the camera.
Program AE
In Program Auto Exposure mode, “P” on the dial, the camera sets the shutter speed and aperture to obtain a correct exposure. Or, at least the one the camera thinks is correct. The difference between Program AE and the Full Auto setting is that in Full Auto, the camera selects everything, while in Program AE, the camera only sets the shutter speed and aperture. You have the ability to set the Auto Focus (“AF”) mode, the pop-up flash, the drive mode and several other settings (see your owners manual for model-specific details).
Advantages
The pros are the same as with Full Auto with the addition of some added controls. You can control where the camera focuses, and whether or not the pop-up flash fires.
Disadvantages
Again, same as with Fully Automatic, you give most of the creative control over your photography to the camera. Two of the most important settings for creatively capturing a scene, aperture and shutter speed, are still controlled by the camera.
Shutter Priority
In Shutter Priority, you select the shutter speed and the camera will select the aperture to maintain a correct exposure based on the lighting conditions in your scene.
Good examples of when you might want to use Shutter Priority could be when you want a fast shutter speed to freeze action, like when photographing your always moving kids.

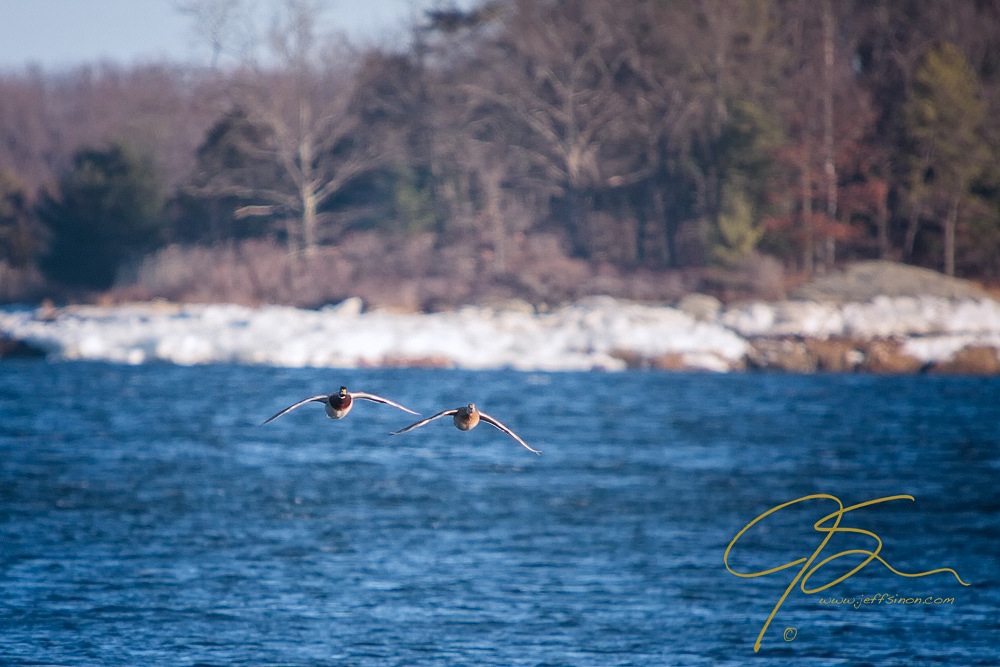
Or, you may want to use it for photographing wildlife, especially birds in flight, where you want to stop the motion of their wings.
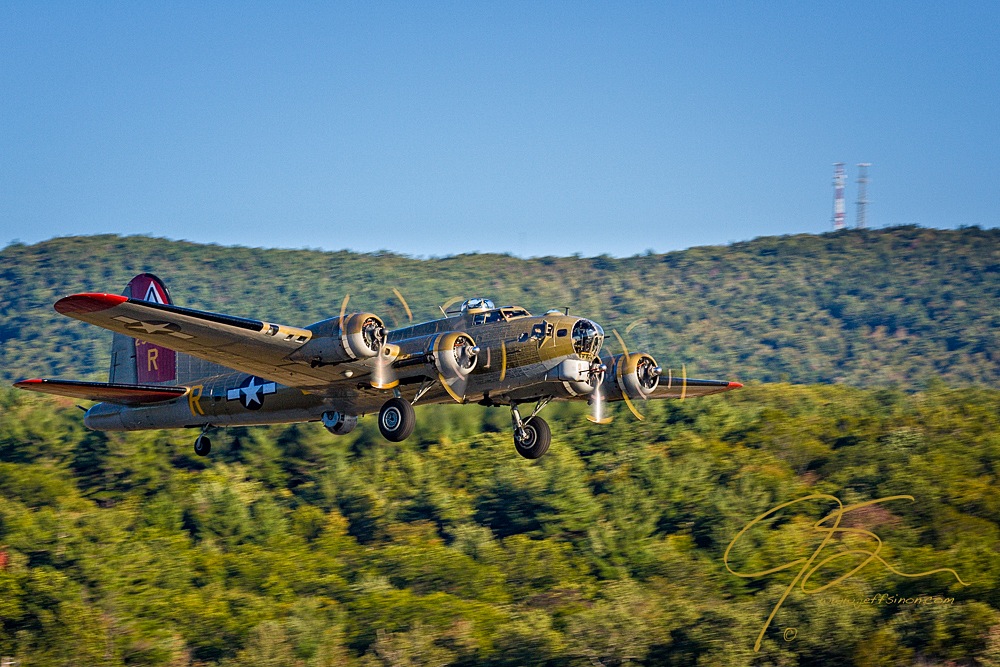
Or, when you intentionally want to use a set a slower shutter speed that will allow you to capture motion blur, like the propellers on an aircraft in flight. In a case like this, using a fast shutter speed would freeze the propellers, which would look rather unnatural while the plane is in flight.
Advantages
Whether you want to freeze action with a fast shutter speed or capture motion blur by intentionally choosing a slower one, you are now taking some control over your photography.
Disadvantages
As the camera will choose the aperture based on the shutter speed you’ve chosen and the available light in an effort to maintain a correct exposure, you still have no control over the depth of field.
Aperture Priority
Aperture Value, “AV” on the dial, is where you select the aperture and the camera selects the shutter speed. Thus, this setting, also referred to as Aperture Priority, gives you control over the depth of field in your photograph. Aperture Priority is the go-to setting for many landscape and nature photographers, as they are often more concerned with depth of field than shutter speed.
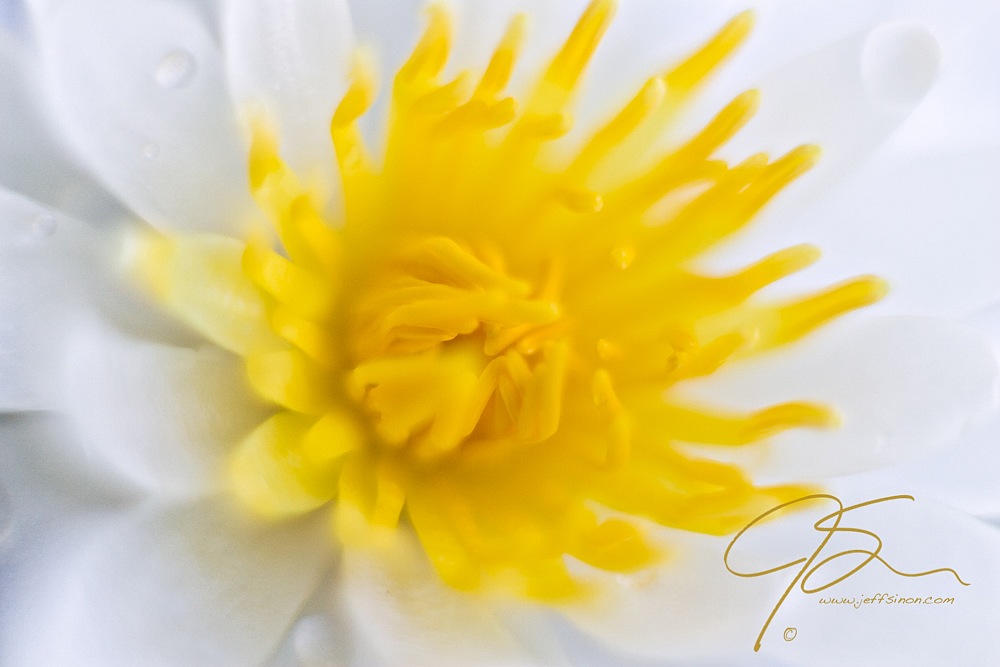
To illustrate how aperture effects depth of field, look at the photos below:
The first image, shot at the very wide aperture of f/1.4, shows a razor thin depth of field with only a very thin area of the yellow stamen at the center of the flower in sharp focus.
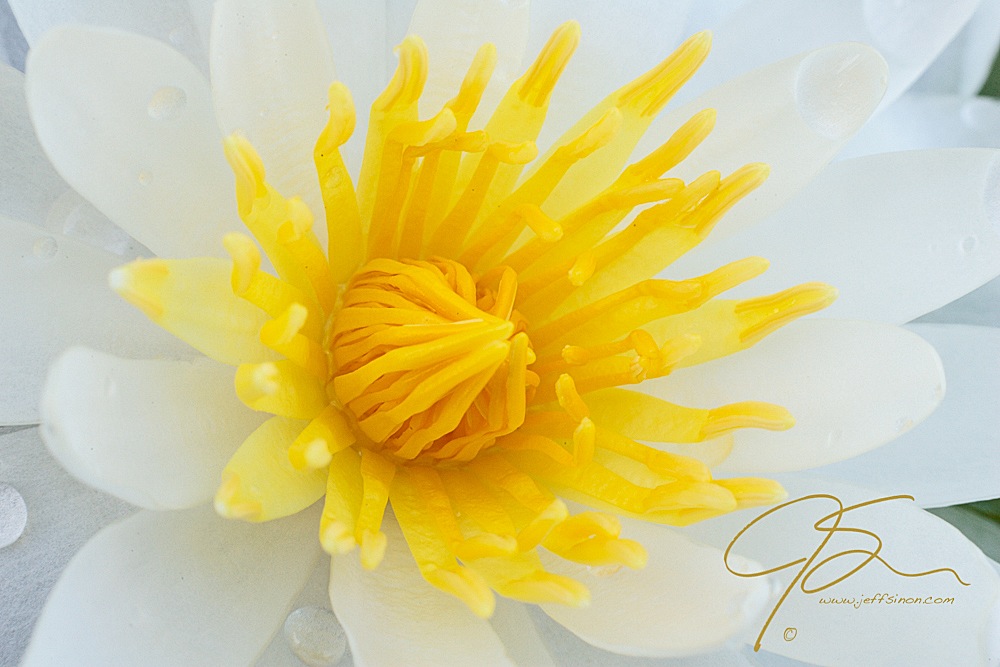
In this second photo, shot at f/16, you can see that due to the greater depth of field created by the smaller aperture, the entire flower is now in sharp focus.
Advantages
You control the depth of field. Whether you’re shooting a grand scenic landscape, or a delicate flower, the amount of the photograph that appears in sharp focus is yours to decide.
Disadvantages
The shutter speed chosen by the camera may be too slow, requiring the use of a tripod in order to hold the camera steady during exposure to prevent unintentional camera movement.
Manual
Labeled “M” on the camera dial, Manual mode gives you complete control over every aspect of the photograph you want to make. Deep or shallow depth of field, slow or fast shutter speed, everything that it takes to make a good photograph is entirely up to you.
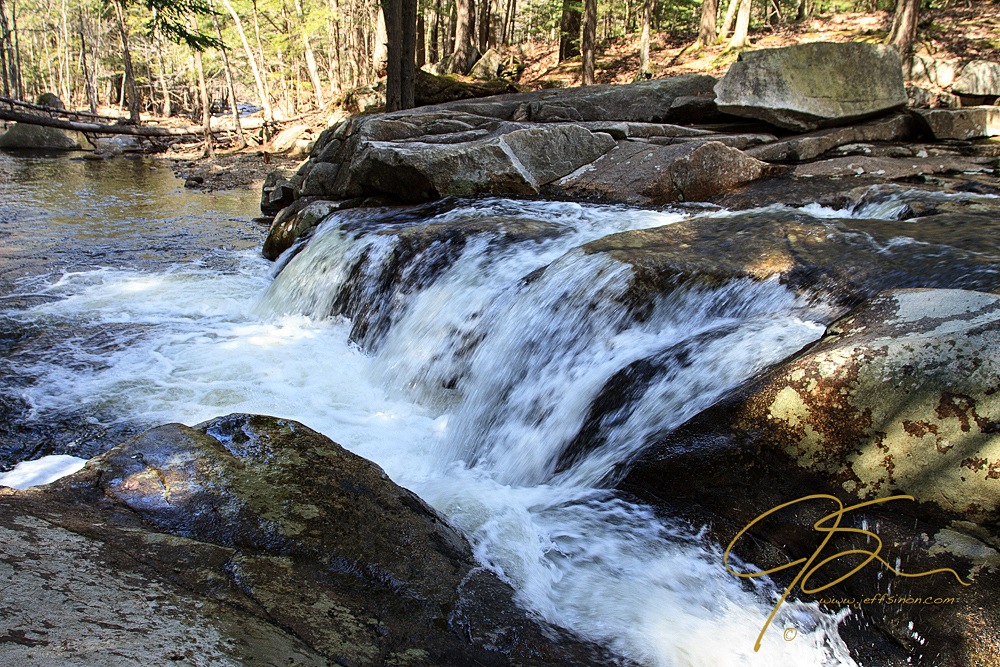
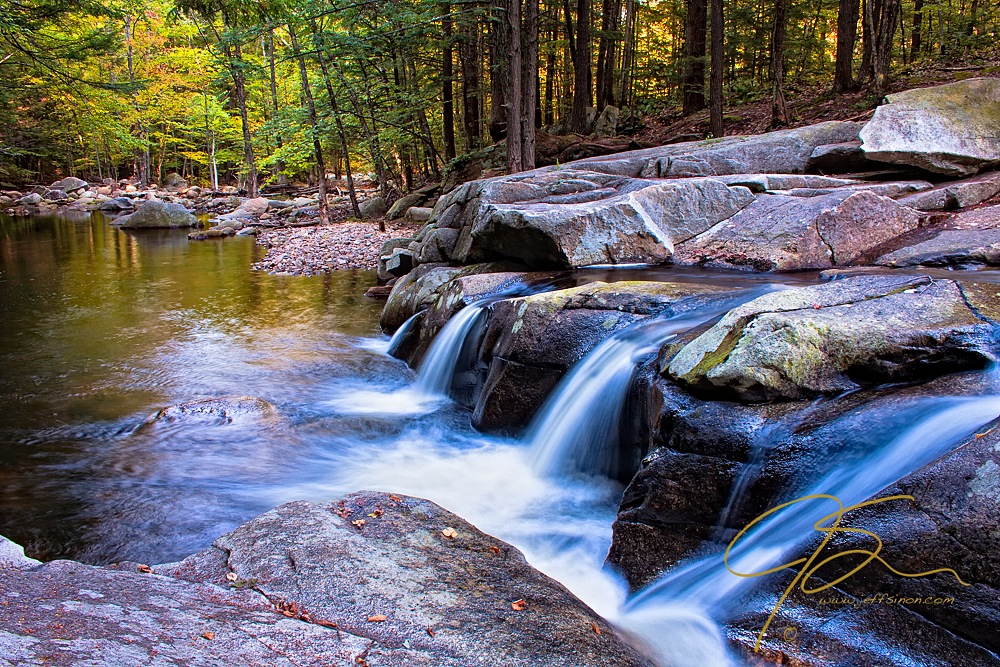
Here is the same waterfall as in the first picture, only this time my camera was set to Manual. I chose the aperture to give me the depth of field I wanted as well as the shutter speed to capture the water flowing over the falls with a pleasing silky smooth appearance. I’m not in the least embarrassed to show this one.
Advantages
You are the master of your photographic expression. How your chosen subject is presented to the world is entirely in your hands.
Disadvantages
The learning curve can be intimidating. But, in my opinion the results will be so rewarding you’ll soon forget how afraid you were to take control of your camera.
Bulb
Marked as “B”on the camera dial, Bulb is a somewhat specialized and limited use mode that is almost exactly the same as Manual with one exception. In Bulb mode, the shutter stays open as long as your finger is on the shutter button. Every camera I’ve ever used has had a maximum native exposure time of 30 seconds. Meaning the longest possible exposure with a single press of the shutter is 30 seconds. During low light situations, 30 seconds may not be long enough to get a proper exposure.
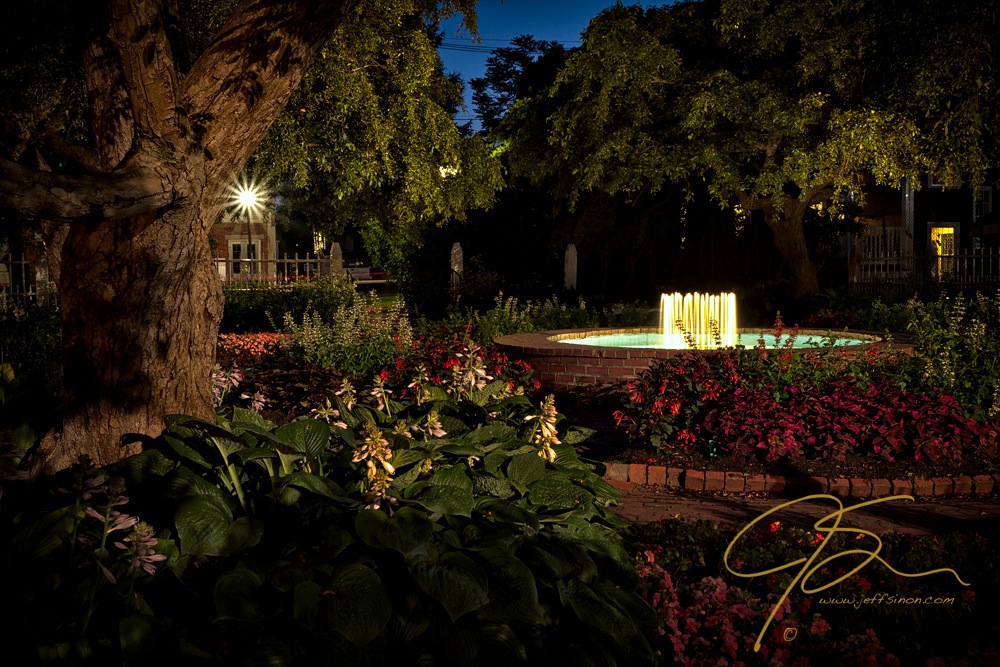
Capturing this scene in Prescott Park in Portsmouth, NH required a 40 second exposure to create the look I wanted, left to the camera’s 30 second max the photograph would have been much too dark, even for a night scene.
Advantages
This mode allows the use of exposure times longer than 30 seconds.
Disadvantages
To avoid any possibility of camera movement during exposure, you should invest in a remote shutter release. You will also have to experiment with exposure times before you get the shot you want.
Don’t stop here! This is only the beginning!
Sign up for Basics of Digital Photography today for expert, step-by-step instruction on how to make the most of your DSLR and how to capture better photos every time — from assessing light to correcting exposure to understanding depth of field and composition for professional-quality results.
I would very much like to learn about photogarphy