
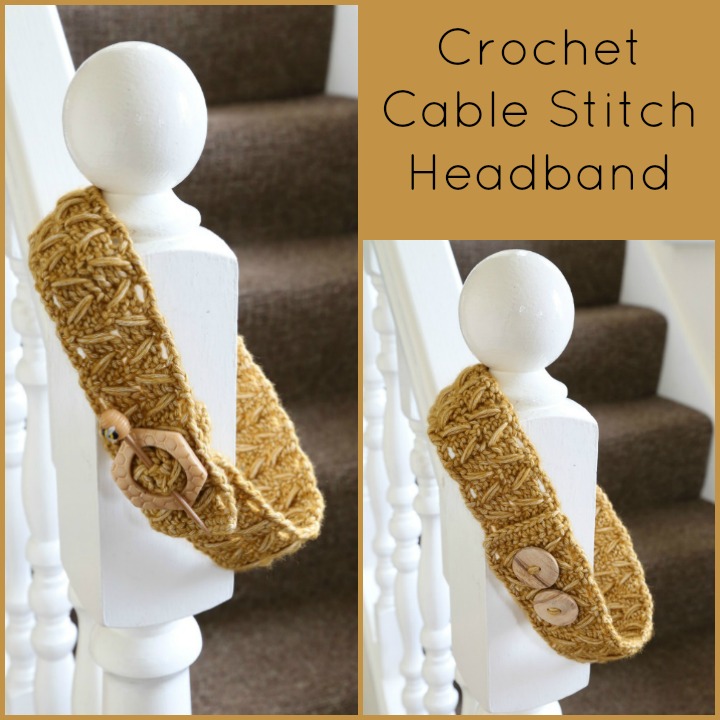
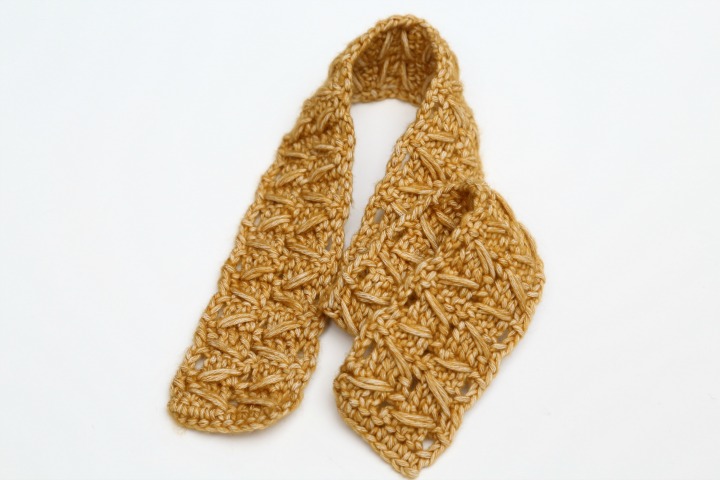
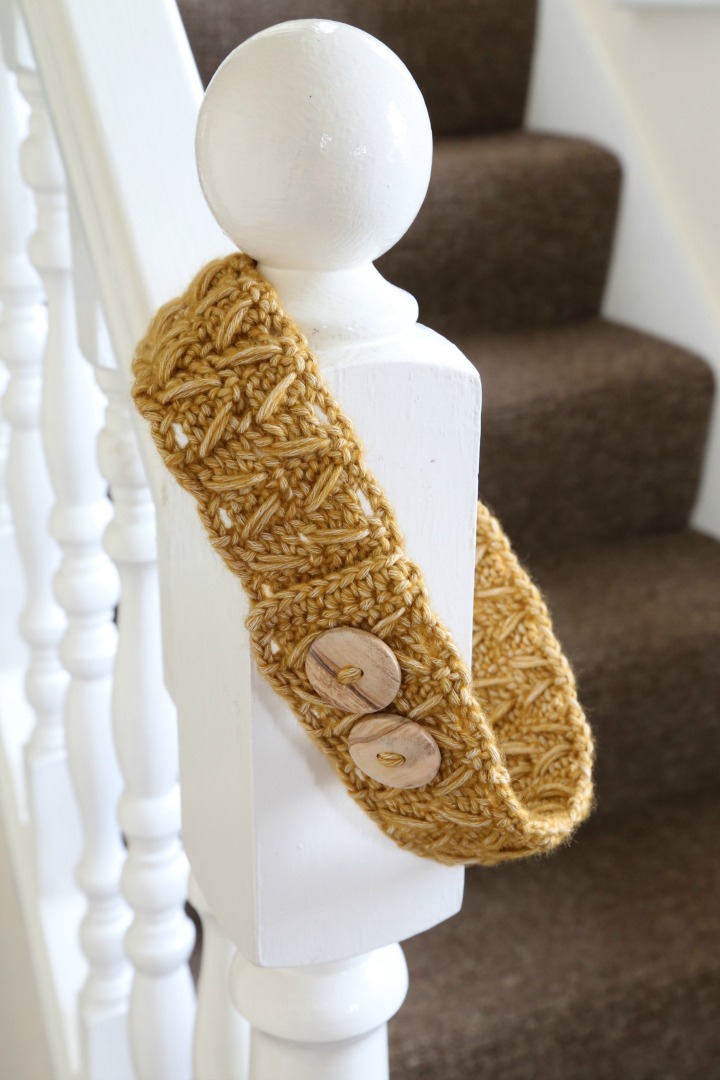
 There’s so much to love about this Cable Stitch Crochet Headband pattern. It’s perfect for a statement gift in a hurry — it takes less than an hour to make and just 50 meters of yarn. Plus, you can customize it by adding a fancy shawl pin or pretty buttons.
The cable stitch creates a lovely texture. It is one of my favorite crochet stitches, and once you have made it, you will see why!
There’s so much to love about this Cable Stitch Crochet Headband pattern. It’s perfect for a statement gift in a hurry — it takes less than an hour to make and just 50 meters of yarn. Plus, you can customize it by adding a fancy shawl pin or pretty buttons.
The cable stitch creates a lovely texture. It is one of my favorite crochet stitches, and once you have made it, you will see why!
Cable Stitch Crochet Headband Pattern
Abbreviations
- Ch – chain
- Dc – double crochet
- St/sts – stitch / stitches
- [ ] – Repeat the instructions between parentheses the amount of times specified
- { } – Stitch count at the end of the row.
Materials
- 5.5 (I-9) mm crochet hook
- 50 meters (about 55 yards) worsted weight yarn (Scheepjes Stonewashed XL was used for this tutorial)
Before you start
This pattern is easily adjustable. If you would like to make this headband wider, remember to start with a multiple of 4 + 3 chains (which is equal to 4 + 2 stitches).Pattern
Ch 11. Row 1: Sc in the second ch from the hook and each ch across, turn. {10} Row 2: Ch 3 (counts as first dc throughout). Skip the next st, dc in the next 3 st. Dc in the skipped st, working OVER the 3 dc just made. To do this, yarn over and insert your hook into the skipped st. Yarn over and pull up a loop to the height of your work. Complete your dc as normal. This is your first cable stitch. Skip the next st, dc in the next 3 st, dc in the skipped st, working OVER the 3 dc just made (as before). Dc in the last st, turn. {2 cable stitches and 2 dc} Row 3: Ch 3, [skip the next st, dc in the next 3 st, dc in the skipped st, working OVER the 3 dc just made] twice, dc in the last st, turn. {2 Cable Stitches and 2 dc}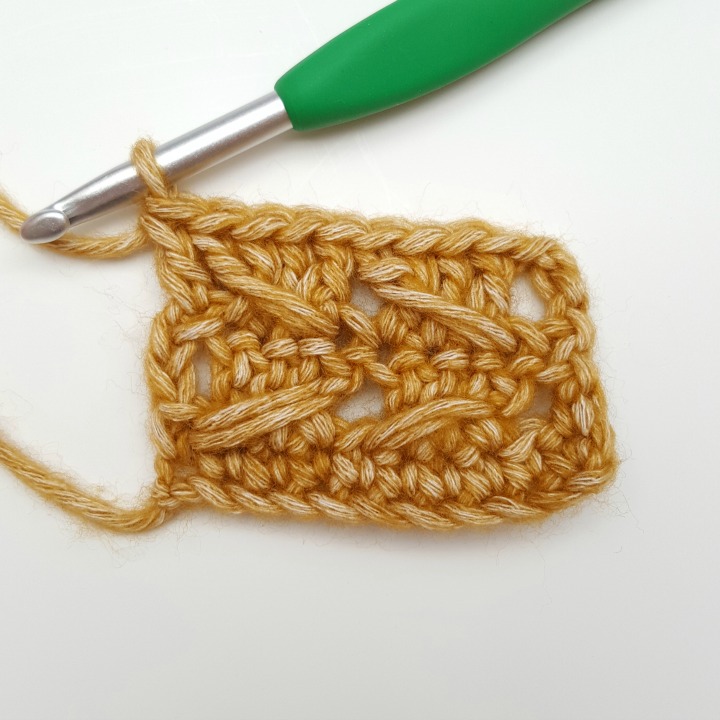 Rows 4 – 45*: Repeat Row 3.
*Feel free to make more or fewer rows to suit the size of your head. You want to be able to wrap the headband all the way around your head, overlapping it by 5 cable stitch rows so that you can fasten it (see the “Completing the Headband” section below).
Row 46: Ch 1 (doesn’t count as a st), sc in each st across, fasten off and weave in your yarn ends.
Rows 4 – 45*: Repeat Row 3.
*Feel free to make more or fewer rows to suit the size of your head. You want to be able to wrap the headband all the way around your head, overlapping it by 5 cable stitch rows so that you can fasten it (see the “Completing the Headband” section below).
Row 46: Ch 1 (doesn’t count as a st), sc in each st across, fasten off and weave in your yarn ends.
Completing the headband
To complete the headband, you can either pin the two edges together using a shawl pin…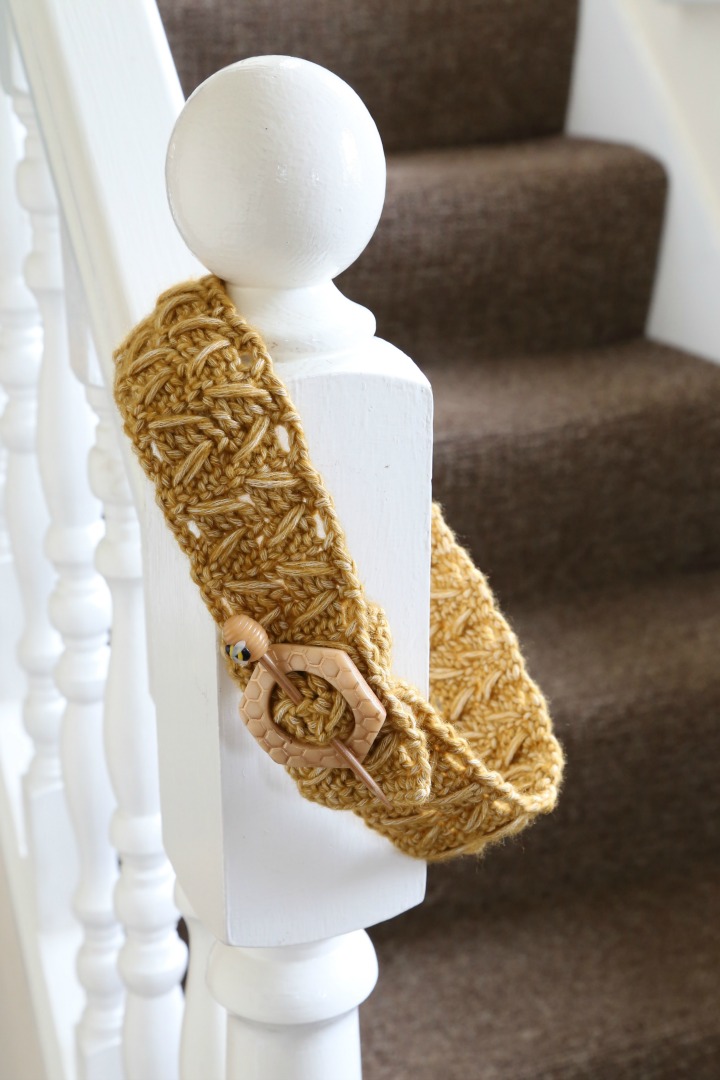 …or you can add two buttons as instructed below.
Adding buttons
The great thing about using cable stitches to create your crochet headband is that you have ready-made button holes between the two cable stitches in each row. If you want to add a button closure, choose buttons that will fit through the space between cable stitches. You want the buttons to be almost too big to fit through the holes so that they don’t accidentally unbutton themselves while you’re wearing the headband. Once you have selected your buttons, sew the first one onto the headband in the center of the second cable stitch row. Sew the second button onto the center of the fourth cable stitch row.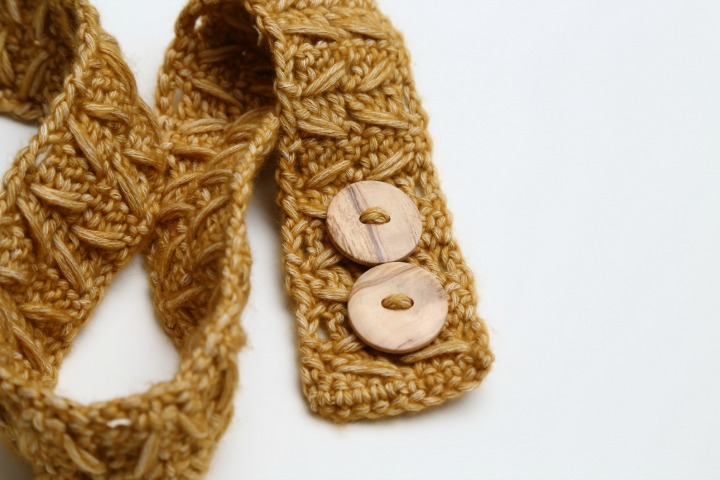 When the buttons have been sewn on, button your headband up by inserting the buttons into the space in the center of the second and fourth cable stitch rows on the opposite end of the headband. Make sure that you haven’t accidentally twisted your headband in the process.
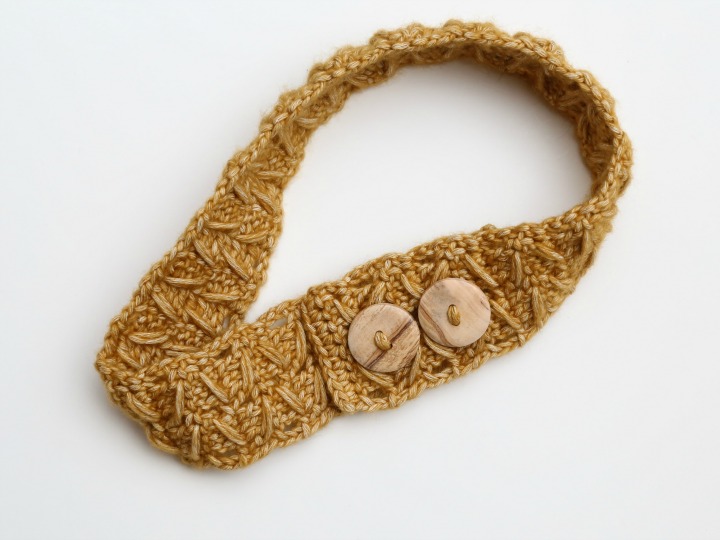 And there you have it. One super quick crochet headband!
Share tips, start a discussion or ask one of our experts or other students a question.
No Responses to “FREE Pattern: 1-Hour Cable Stitch Crochet Headband”