
When I need to cut a circle to make a wooden disc, my first thought is to reach for my circle cutting jig. It has all the hallmarks of a good woodworking jig. It’s is easy to use and can be fine-tuned to the specific size you need. Best of all, it’s a snap to set up.
Photos via Wooden-Box-Maker.com
What is the jig?
The jig consists of a plywood base with a runner and stop on the bottom. On top there is a sliding arm with a pin fixed onto the end. You can slide the arm, with the pin, to different distances from the blade. The distance from the pin to the saw blade becomes the radius of your circle.
For those who have forgotten: the radius is half the diameter of a circle. So if you want a 6” circle t,he diameter is 6” and the radius is 3”. In this case, you would set your pin 3” from the blade.
Using the jig
Slide the arm towards or away from the blade so the pin in the jig is at your chosen radius. Then clamp the arm in place or use double-sided tape if the clamp will interfere with your work.
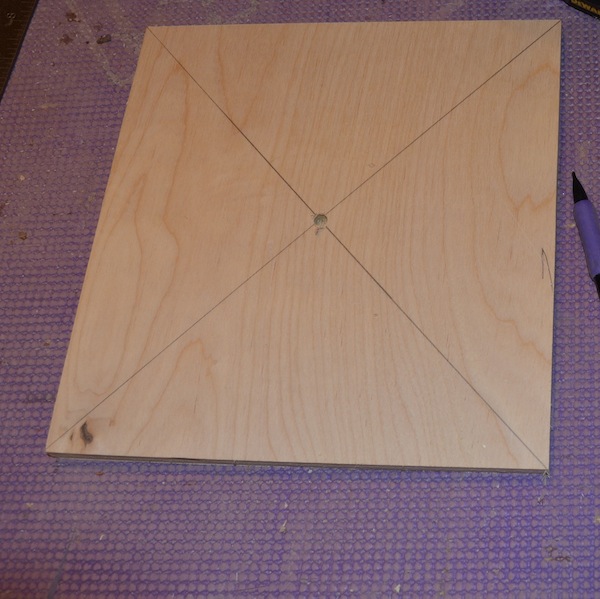
Use diagonals to find center point.
To use the jig, you need to drill a hole the size of your pin in the bottom of your workpiece (being careful not to drill all the way through). Make sure the hole is centered in your workpiece or you might run out on the edges of your circle. A good trick for finding the center of a square is to draw lines from the corners. The center is where the diagonals meet.
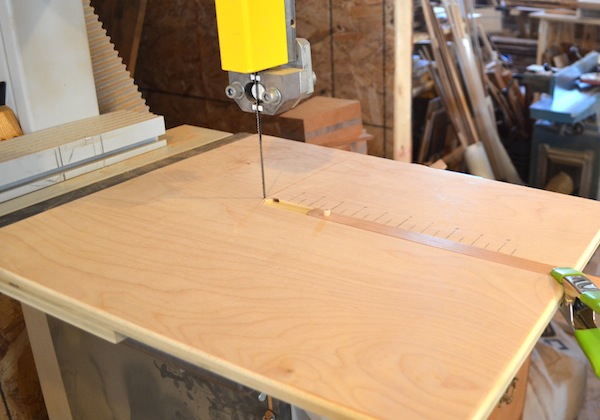
Place your workpiece so the center hole fits over the pin that you just clamped in place. You now have a pivot point. At this point, the jig is not in place on your saw.
Once your workpiece is in place, you can begin to feed your jig into the miter slot and into the blade. Hold the workpiece in place on top of the jig so it doesn’t move as you feed it into the blade. At this point you are making a straight cut into your workpiece. Continue until you hit the stop.

Feed the jig into the blade until it hits the stop.
Once you reach the stop, your jig is in place. You won’t move the jig again for the duration of the cut. Instead, you can begin to (slowly) make your cut by turning the work into the blade.
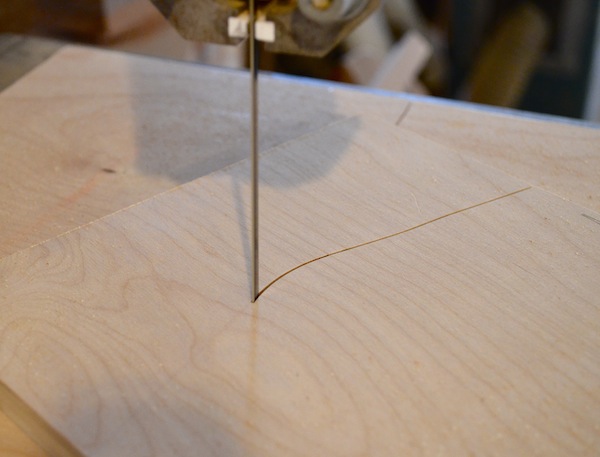
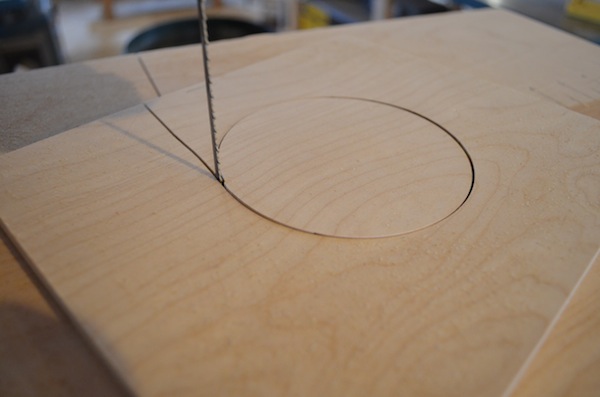
Beginning the circle.
The pin holds your workpiece a fixed distance from the blade, so you just pivot around your center point until your cut returns to the beginning.
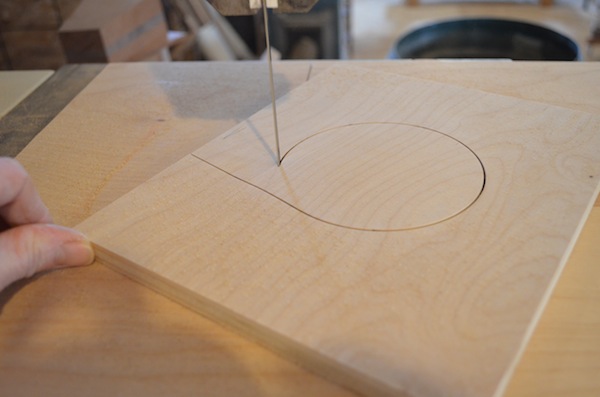
That’s it. All done.
Things to keep in mind:
- The diameter of the circle you can cut is dependent on the width of your blade. You will need a narrow blade for tight turns and wider blades if you are cutting through thicker material. I have generally found a 1/4″ or even 3/16″ blade to work well. (More on bandsaw blades here.)
- Another thing to keep in mind is that the steadier you keep the base the better. If you find the jig moves as you cut you should clamp it in place.
- Make sure your workpiece is firmly on your pivot point and that it doesn’t lift while you are cutting.
- Watch your fingers and use a push stick if you are cutting a small circle.
If you like this jig and would like to make your own check out this post.

Share tips, start a discussion or ask one of our experts or other students a question.
No Responses to “A Perfect Circle: Using Circle Cutting Jigs”