
Complicated stitch patterns like lace, cables and colorwork can be a bit difficult to digest when the instructions are written. That’s why knitting charts are so important for both designers and knitters. Making clear and accurate charts (super important) can be tough, but you can avoid beginner mistakes if you keep a few simple tips in mind.
If you’re designing your own knits, consider these tips for creating charts to go along with your patterns.
1. Use standard symbols.
It’s important that all designers use the same standards so that knitters can become familiar with the symbols. Some chart-making softwares include all the symbols along with the corresponding stitches so you can ensure you’re using the right one.
If your software doesn’t include the symbols, check out the Craft Yarn Council’s Knit Chart Symbols for a complete list.

2. Create a key.
Even though knitters might be familiar with the symbols you’re using, it’s still necessary to include a stitch key like the one pictured above. This key will include each symbol used in the chart, along with the stitch. The chart key can be abbreviated; just be sure you include a section of abbreviations for any uncommon ones that knitters might be unfamiliar with.
3. Double check and triple check.
A chart with errors can mess up your beautiful design, not to mention the stitch count! Double and triple check your chart to make sure it is accurate.
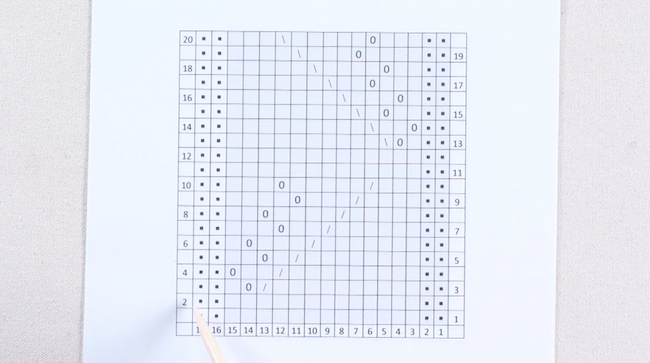
4. Put the stitches in the right order.
Knitting charts are read from right to left, so make sure your stitches go in the right direction for accuracy.
5. Number the rows and stitches.
Adding both row and stitch numbers can help knitters keep their place when following along the chart. Some charts only number even or odd rows and stitches, so consider that if your chart is complex and you want to condense it.
6. Avoid clutter.
You don’t always have to create a chart for your entire pattern. If you have a 4-row eyelet border, for instance, you only need to create the chart for those 4 rows. There’s no need to include the garter stitch rows that come after the eyelet.
Exclude rows if they’re not complex. For example, if you’re knitting a lace pattern with all wrong side rows purled, you don’t have to include the wrong side rows on the chart. Just be sure to be clear about that in the instructions. For example:
Rows 1-9: Work Rows 1-9 of the chart, purling all wrong side rows.
Another option is to label odd-numbered rows on one side and even-numbered rows on the other side, like the chart pictured above. This can just avoid a crowded labeling system, making it easier on knitters’ eyes.
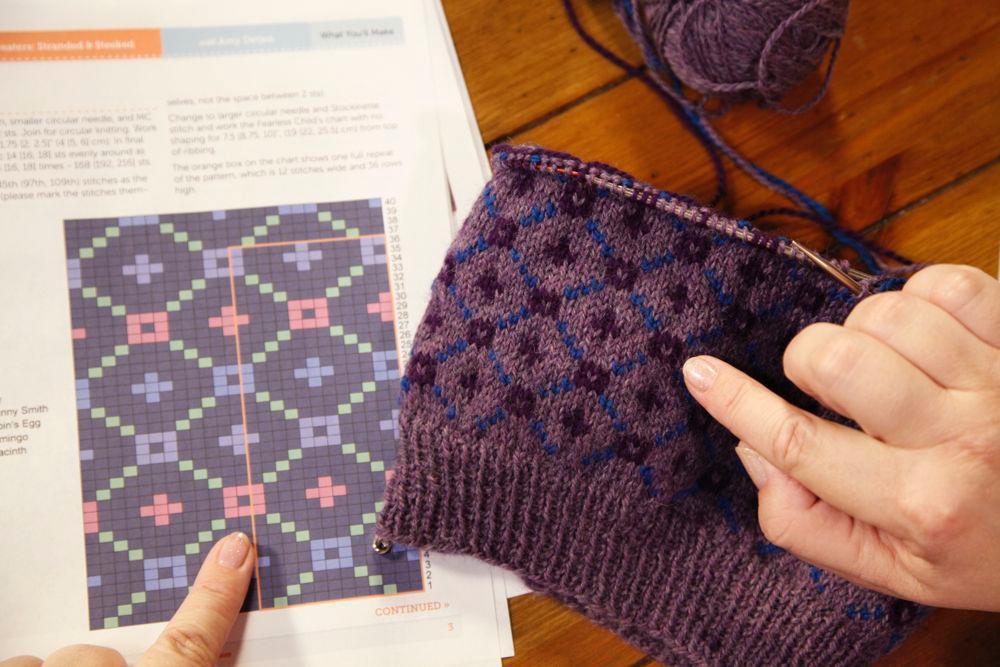
7. Clearly mark repeats.
In some instances, your chart may include stitches that are repeated across a row or round. If that’s the case, be sure to clearly mark where the repeat is. Rather than repeating the pattern over and over, you can include long, bold lines to mark the stitch repeat. This helps reduce clutter and simplifies things for the knitter.
In addition to marking where the repeat is, you should also include the number of stitches in the repeat and how many time to repeat it. A repeat of 7 stitches that should be repeated 4 times, for example, might say “7-stitch repeat x 4.”
What are your best tips for designing knitting charts?
Share tips, start a discussion or ask one of our experts or other students a question.
No Responses to “7 Tips for Making Clear, Accurate & Easy-to-Knit Charts”