
I’ve never considered buttons for making jewelry, but while preparing to create my tutorials, I realized the selection of really gorgeous buttons was impressive. I’ve seen wood, porcelain or just simple plastic buttons, but what makes some of those buttons stand out are their designs.
I picked quite a few designs while I was browsing through the craft stores, but had to cut it down to three button jewelry tutorials. I hope you enjoy them as much as I did.
To top it off, I will be giving away both earrings, and the necklace to one lucky reader at the end. Good luck!
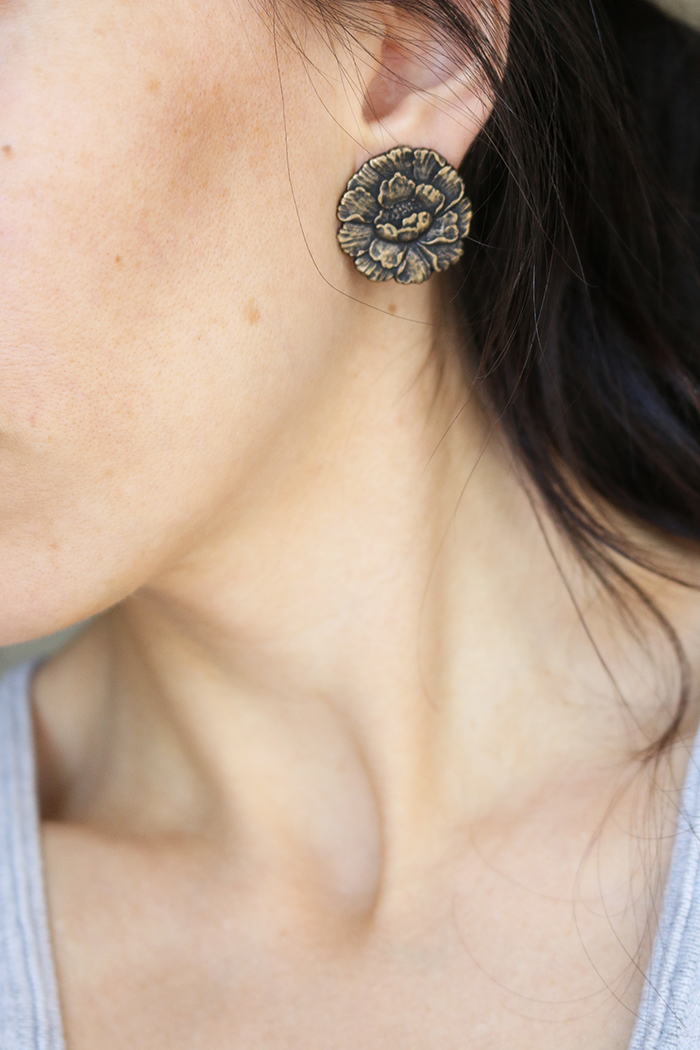
Ear Clip Button Earring
Supplies needed:
- 1 pair of gorgeous metal buttons (without holes) 1 – 1 1/2″ diameter
- Side cutters
- E6000 glue
- Ear clips
Note: You can find all today’s supplies at your local craft store.
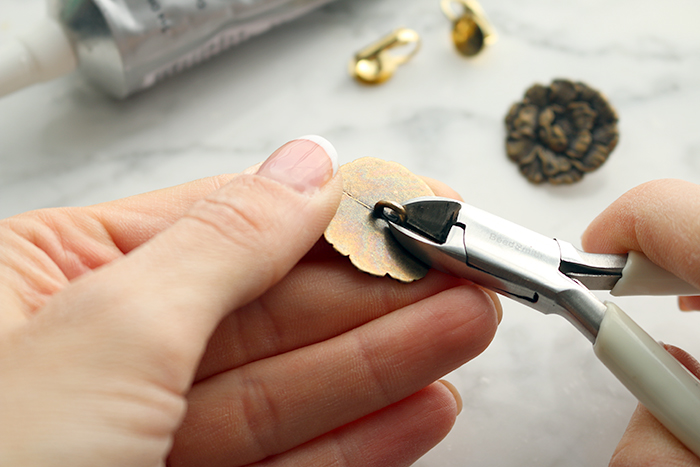
Step 1.
Cut off the back loop with your side cutters, try to achieve a nice flush cut! You can use sandpaper or a file to smooth out the sharp cuts.
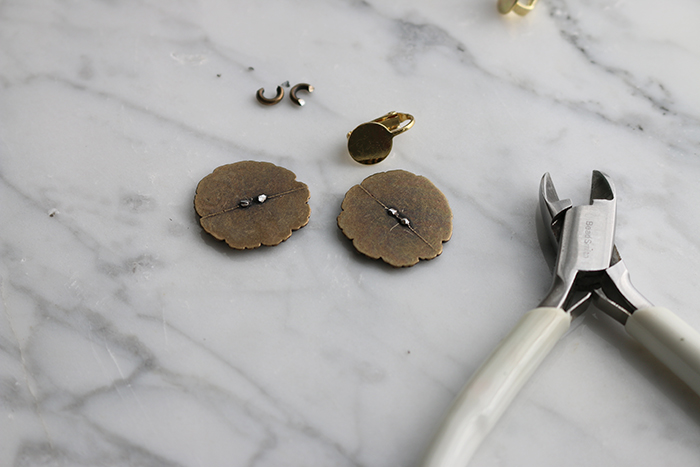
Step 2.
Add a dap of E6000 glue to your ear clip, and carefully press it onto the backside of your button.
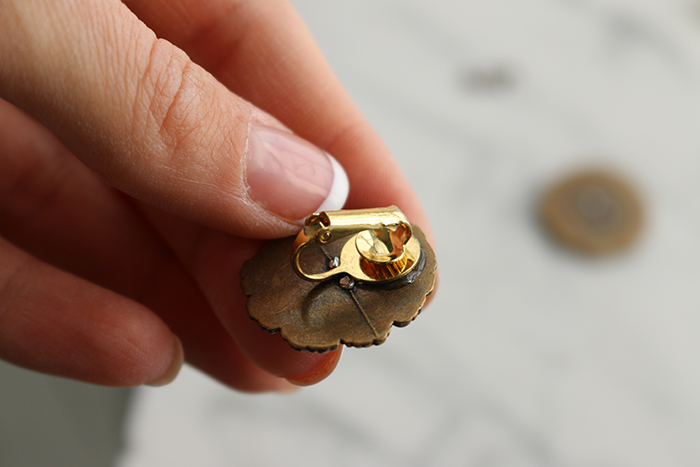
Step 3.
Let the glue dry for 30 minutes before using the earrings.
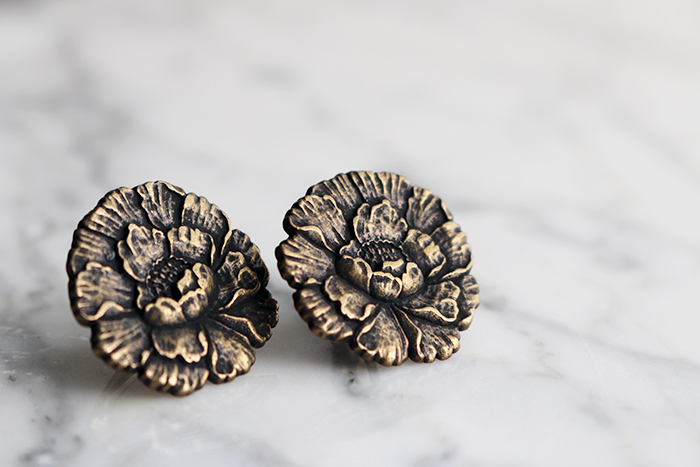
These are my personal favorites!
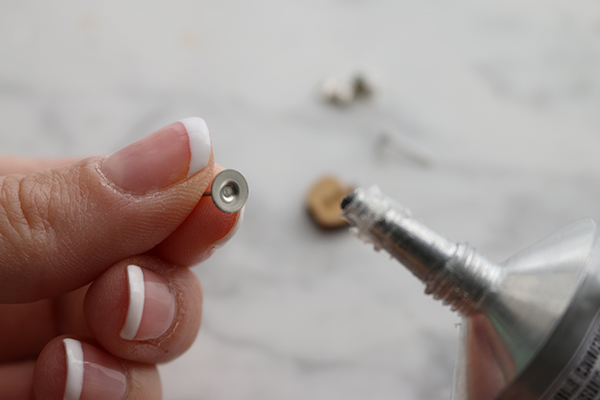
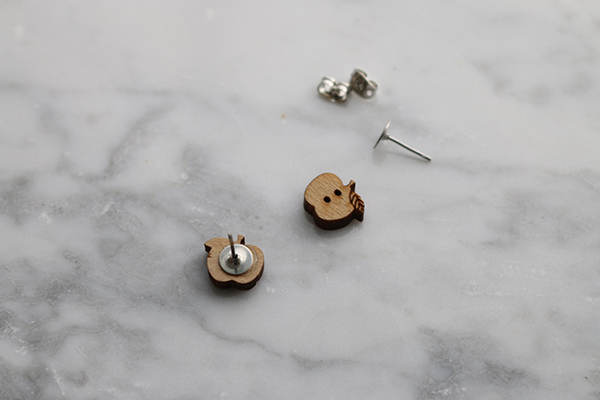
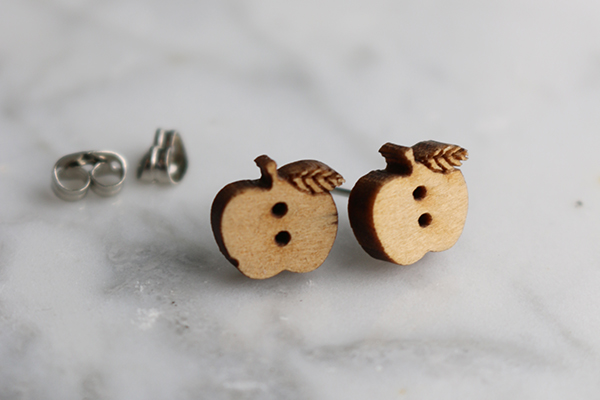
Wooden Apple Studs
My next earring is made out of wood and they are only 10 mm in size. This tutorial is very quick, and with only $3 spent for supplies, these are budget-friendly and cute!
Supplies needed:
- E6000 Glue
- Silver or gold studs
- Small wooden buttons
Step 1.
Add a small amount of glue to the stud, and press carefully onto the back of your wooden button.
Step 2.
Let the earring fully dry a minimum of 30 minutes before wearing.
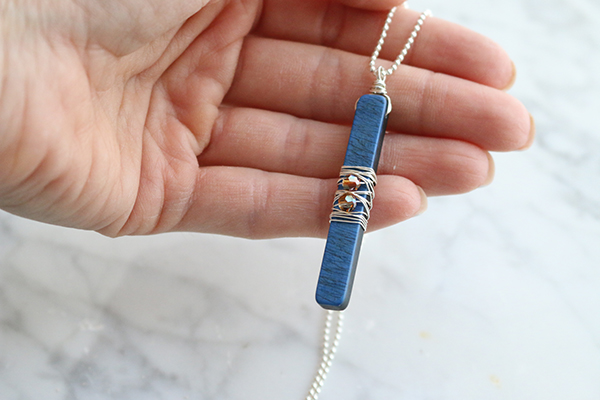
Long Button Pendant
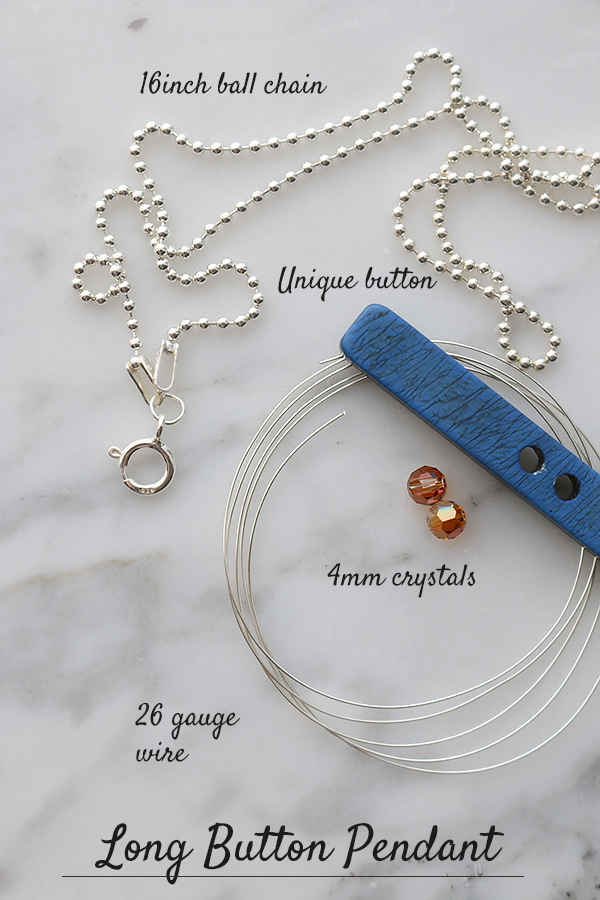
My last tutorial for today is a stunning, slim, but long button, that I thought was very unique in form. This was great for me, because I was able to picture a necklace right away.
Supplies needed:
- 20″ of 22-26 gauge HH (half hard) wire
- 2 x 4 mm round crystals
- 16 – 17″ ball chain
- A long button
- Jewelry pliers
- Hand-held drill with a 1.2-1.5 mm drill bit
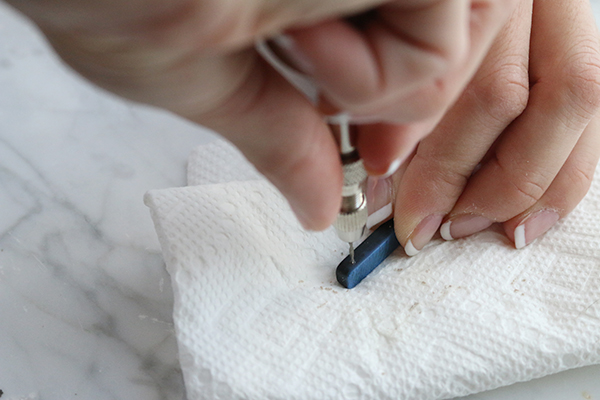
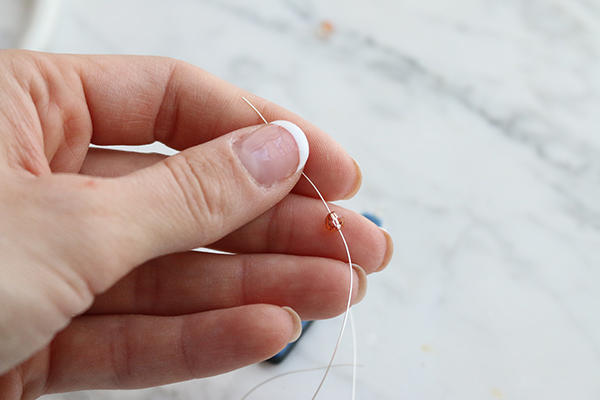
Step 1.
Drill a hole into the upper side of your button. This will be the hole for your bail. You can also use a stand drill, but take it slow when drilling into the button.
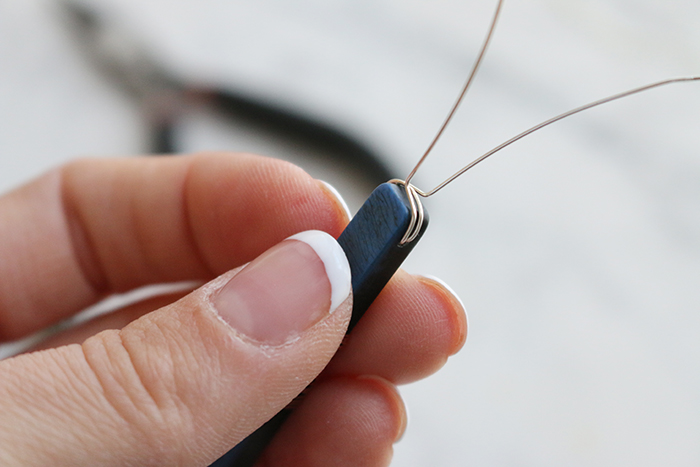
Step 2.
I used a 24-gauge wire on the bail, just to give it a stronger hold. But anything from 22 – 26 gauge will be fine. Slide half of your wire through the hole on the top and repeat one more time. You should have wire on each side as seen in the image below.
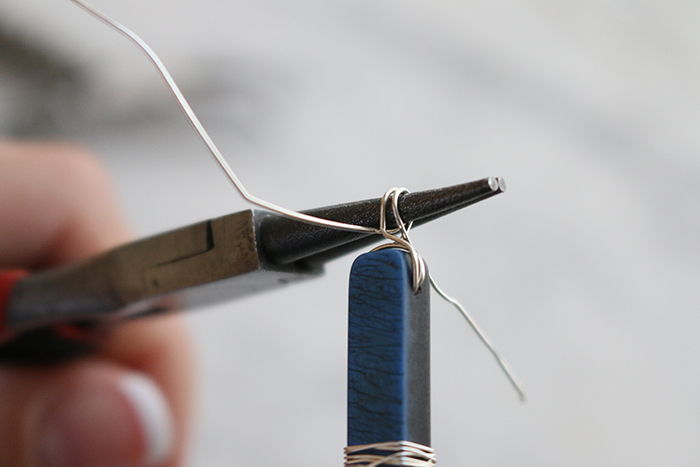
Step 3.
Use a round plier to create two loops (one with each wire). You want the loops to be sideways so the chain can go right through, and your pendant will sit nicely around your neck without to turn.
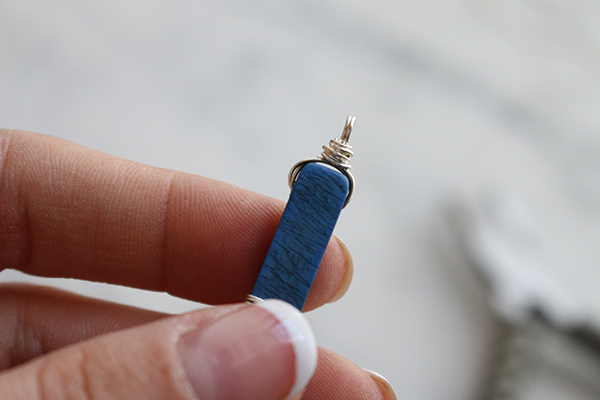
Step 4.
Add one small crystal to the wire, and wrap it around your button. Repeat with your second crystal.
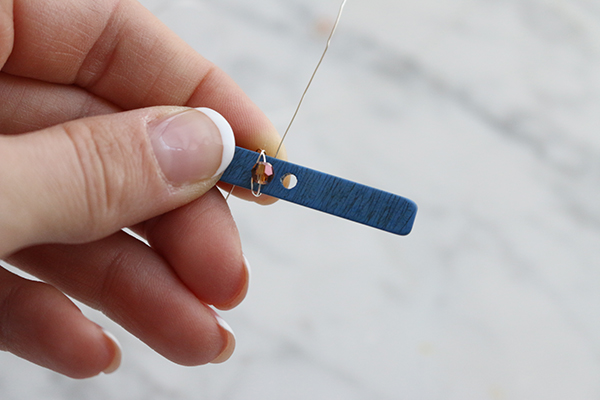

Note: Make sure your crystals are sitting inside the holes while you wrap the wire tightly.

Step 5.
Join both ends and twist them together. Hide the twisted end in one of the buttonholes.
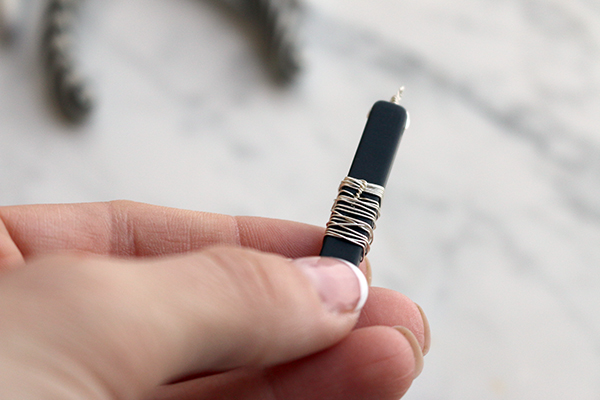
Step 6.
Add a chain to your pendant, and you are done!

I hope you enjoyed the tutorials! Now, it’s time to win these beauties. All you have to do is hop over to my blog, and enter one simple step. I wish you good luck!
Share tips, start a discussion or ask one of our experts or other students a question.
No Responses to “Cute as a Button: 3 Easy Button Jewelry Tutorials”