
You may think pencils, paper and erasers are all you need in your drawing toolbox, but there’s one more thing you need: a blending tool.
What’s a blending tool?
A blending tool is a piece of a tightly compressed paper folded in a tube with a point. Blending tools are widely used in drawing to connect values and to smooth out the surface. If used correctly, the blending tool produces realistic effect, creating gentle transitions between tones.
Types of blending tools
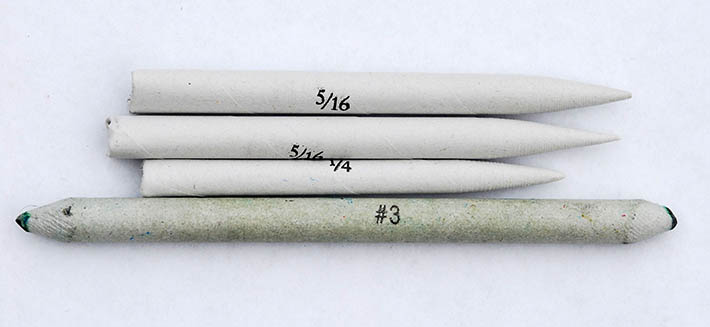
Blending tools can be divided into two categories: one tip or two tips.
The blending tools with two pointed sides are the softer blending stumps. On the other hand, tortillons have one pointed side. They both create a similar blending effect, so it doesn’t really matter which one you use to achieve the result. Try them both and pick the one that you like the best.
When to use a blending tool
Usually artists apply the blending tool once the basic values are established. Be aware that blenders lift off some of the pigment, creating weaker contrast. Therefore, once you’ve blended the surface, you must re-establish the darkest darks to keep the correct tones.
As you draw and blend, the blending tool will become dirty. You can clean them up somewhat with a sandpaper block. However, these tools are inexpensive, and they can be simply thrown out and replaced once dirty.
Using blenders in different mediums
I like to separate my blending tools by medium — I use one blender for graphite only, another for pastels only and so on. If you use one blender with many different mediums, you can contaminate your drawing with unnecessary pigment. You don’t want to get pastels into your graphite drawing and vice versa.
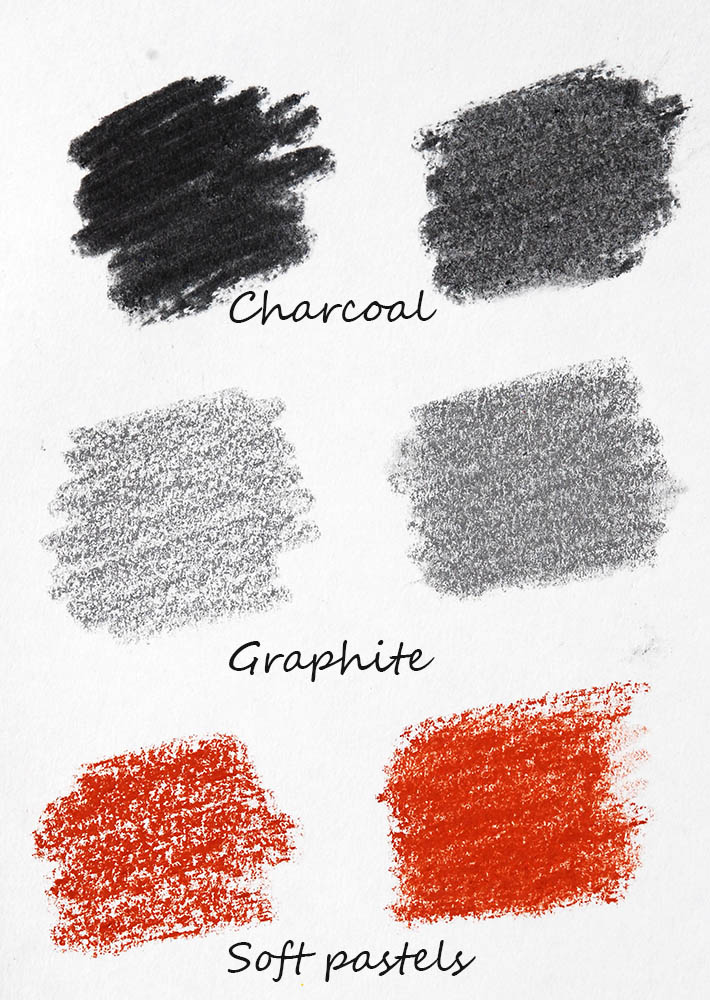
Blending tools can be used with the following mediums: graphite, charcoal and soft pastels. In the image above, you can see the non-blended medium on the left and the blending effect on the right.
Do not use these blenders in colored pencil drawing. You will smudge the surface without achieving the necessary blending result. For colored pencil drawing, use the tools listed in this blog post.
Blending in graphite or charcoal
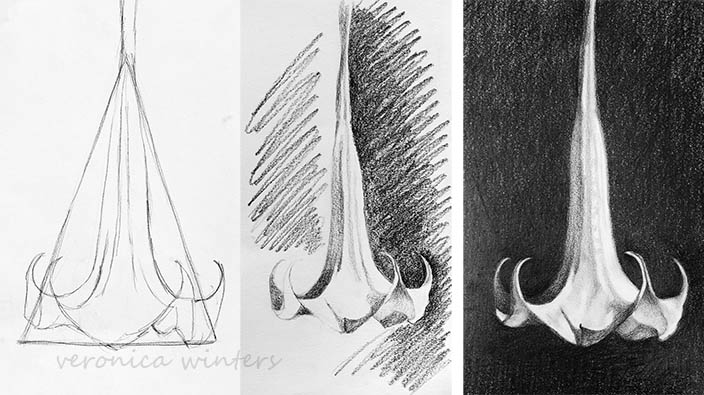
The step-by-step graphite demonstration above shows you how a basic outline can transform into a realistic rendition with the help of a blending tool.
In the first image, I created the outline. In the second image, I layered the basic tones, which I blended immediately. And in the third picture, I reestablished the darkest areas.
Sometimes I use a workable fixative after the initial blending to keep the graphite or charcoal in place and avoid future smudges. I also use a final fixative to hold the pigment on the page once I’m finished drawing.
Blending in soft pastels
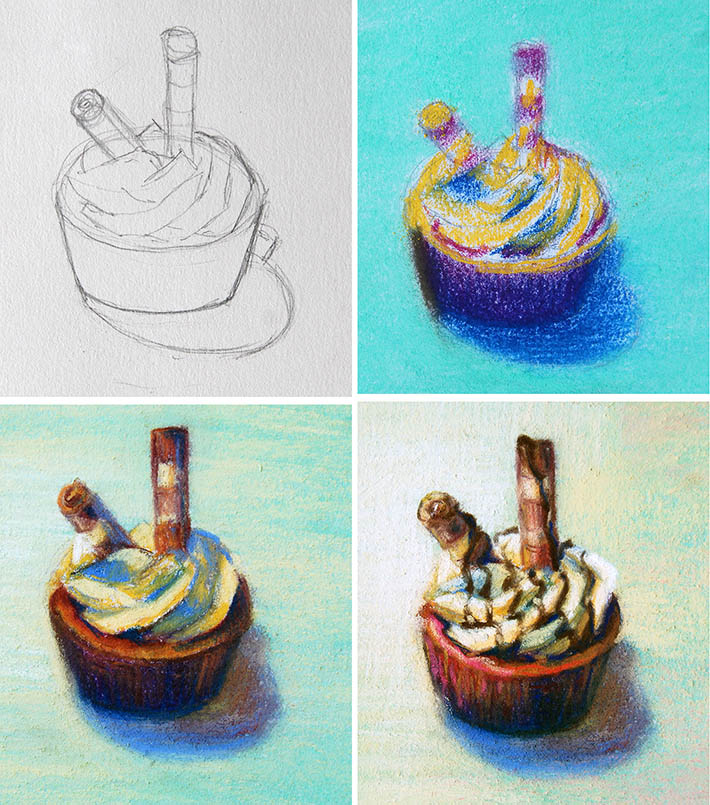
You can see the same concept in color here, done with soft pastels.
Once the general layout was complete, I began to throw the darkest complementary colors using rough strokes. I blended those colors with the blending tool or my fingers, fixed the drawing with a workable fixative. Then, I applied lighter pastels over that initial layer. Finally, I applied the lightest colors and details at the top layer and sparingly blended some of the edges.
The fine tip on a tortillon blending tool helps with precise blending only where I need it. Some artists apply a final fixative, but beware that it darkens the pastel colors. It’s best to frame your work immediately without the fixative.
Illustration Basics for Beginners

Learn illustration basics to take your art to publish-worthy levels.
Share tips, start a discussion or ask one of our experts or other students a question.
No Responses to “Make Your Drawings More Realistic With This One Tool”